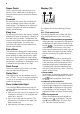
www. .ch WA 720 E User manual Washing machine 0848 559 111 www.fust.
CONTENTS Safety information Safety instructions Product description Control panel Programme chart Helpful hints and tips First use Personalisation 2 3 4 7 9 12 14 14 Daily use Care and cleaning What to do if… Technical data Installation Electrical connection Environment concerns 14 17 20 22 23 25 26 Subject to change without notice. SAFETY INFORMATION Before the installation and use of the appliance, carefully read the supplied instructions.
• If the supply cord is damaged, it must be replaced by the manufacturer, its service agent or similarly qualified persons in order to avoid a hazard. • The operating water pressure (minimum and maximum) must be between 0,5 bar (0,05 MPa) and 8 bar (0,8 MPa) • The ventilation openings in the base (if applicable) must not be obstructed by a carpet. • The appliance is to be connected to the water mains using the new supplied hose-sets. Old hose sets must not be reused.
Use Warning! Risk of injury, electrical shock, fire, burns or damage to the appliance. • Use this appliance in a household environment. • Obey the safety instructions on the detergent packaging. • Do not put flammable products or items that are wet with flammable products in, near or on the appliance. • Do not touch the glass of the door while a programme operates. The glass can be hot. • Make sure that you remove all metal objects from the laundry.
1 2 3 4 5 1 Detergent dispenser drawer 2 Control panel 3 Door opening handle 4 Drain pump 5 Adjustable feet
Detergent dispenser drawer Compartment for detergent used for prewash and soak phase or for stain remover used during the stain action phase (if available). The prewash and soak detergent is added at the beginning of the wash programme. The stain remover is added during the stain action phase. Compartment for powder or liquid detergent used for main wash. If using liquid detergent pour it just before starting the programme. Compartment for liquid additives (fabric softener, starch).
CONTROL PANEL Below is a picture of the control panel. It shows the programme selector dial as well as the buttons and the pilot lights. These are presented by relevant numbers on the following pages. 10 9 1 1 2 3 4 5 2 Programme selector dial SPIN reduction button (Schleudern — Essorage) and Rinse Hold option ( ) OPTION button (Optionen — Option): – Economy (Eco ) – Super Quick (Extra Kurz — Rapide) PREWASH button (Vorwäsche —Prélavage) EASY IRON button (Bügelquick — Repas.
Super Quick Short cycle for lightly soiled items or for laundry which needs only freshening up. We recommend you to reduce the fabrics loading. Display (10) 10.1 10.2 Prewash By selecting this option the machine performs a prewash cycle before the main wash phase. The washing time will be prolonged. This option is recommended for heavily soiled laundry. Easy Iron By selecting this option the laundry is gently washed and spun to avoid any creasing. In this way ironing is easier.
PROGRAMME CHART Programme Maximum and Minimum Temperature - Cycle Description - Maximum Spin Speed - Maximum Fabrics Load - Type of Laundry Koch-/Buntwäsche COTTONS 90° - 30° 1) - 40° 60° Main wash - Rinses Maximum spin speed at 1200 rpm Maximum load 7 kg - Reduced load 3.5 kg 2) White and coloured cotton (normally soiled items).
Programme Maximum and Minimum Temperature - Cycle Description - Maximum Spin Speed - Maximum Fabrics Load - Type of Laundry Options Jeans 40° Main wash - Rinses Maximum spin speed at 1200 rpm Maximum load 3.5 kg With this programme it is possible to wash items like pants, shirts or jackets in denim and also jersey realized with hi-tech materials. (The Extra Rinse option will be activated automatically).
Programme Maximum and Minimum Temperature - Cycle Description - Maximum Spin Speed - Maximum Fabrics Load - Type of Laundry RINSES Rinses Maximum spin speed at 1200 rpm Max. load 7 kg With this programme it is possible to rinse and spin cotton garments which have been washed by hand. The machine performs 3 rinses, followed by a final long spin. The spin speed can be reduced. Detergent Compartment Options SPIN REDUCTION RINSE HOLD EASY IRON EXTRA RINSE DRAIN Draining of water Max.
Programmes Wool/Hand wash 30 °C Load (kg) Energy consumption (kWh) Water consumption (litre) Approximate programme duration (minutes) Remaining moisture (%)1) 2 0.25 55 60 30 Standard cotton programmes Standard 60 °C cotton 7 1.05 49 183 53 Standard 60 °C cotton 3.5 0.70 40 155 53 Standard 40 °C cotton 3.5 0.57 40 155 53 1) At the end of spin phase. Off Mode (W) Left On Mode (W) 0.10 0.
The following weights are indicative: quilt cover 700 g man’s work shirt 600 g sheet, man’s pyjamas 500 g tablecloth 250 g pillow case, towelling towel, night dress, man’s shirt 200 g tea cloth, ladies’ briefs, napkin, blouse, men’s underpants 100 g Removing stains Stubborn stains may not be removed by just water and detergent. It is therefore advisable to treat them prior to washing. Blood: treat fresh stains with cold water.
Level Characteristic Degrees of water hardness German °dH French °T.H. Level Characteristic Degrees of water hardness German °dH French °T.H. 1 soft 0-7 0-15 3 hard 15-21 26-37 2 medium 8-14 16-25 4 very hard > 21 > 37 FIRST USE • Ensure that the electrical and water connections comply with the installation instructions. • Remove the polystyrene block and any material from the drum.
if the selected programme/option it requires (see more details in «Detergent dispenser drawer»). wrong selection. The machine will not perform the new selected programme. Select the spin speed by pressing button 2 When selecting a programme, the appliance proposes automatically the maximum spin speed provided for that programme. (See "Washing programmes" for the maximum allowed spin speed). Press this button repeatedly to change the spin speed, if you want your laundry to be spun at a different speed.
Select the Delay Start by pressing button 8 Before you start the programme, if you wish to delay the start, press this button to select the desired delay. The selected delay time value will appear on the display for a few seconds, then the duration of the programme will appear again. You must select this option after you have set the programme and before you start the programme. You can cancel or modify the delay time at any moment, before you press button 7. Selecting the delay start : 1.
1. Turn the programme selector dial to . 2. Select the draining or spinning programme. 3. Reduce the spin speed if needed, by pressing the relevant button. 4. Press button 7. At the end of the programme, the door is released and can be opened. Turn the proStand by : once the programme has finished after a few minutes the energy saving system will be enabled. The brightness of to switch the gramme selector dial to machine off. Remove the laundry from the drum and carefully check that the drum is empty.
Drain pump Regularly examine the drain pump and make sure that it is clean. Clean the pump regularly and/or if: • The appliance does not drain the water. • The drum cannot turn. • The appliance makes an unusual noise because of the blockage of the drain pump. • A problem with water draining is detected (see chapter “What to do if...” for more details). Clean the chamber of dispenser drawer with a brush. Washing drum Warning! 1. Disconnect the mains plug from the mains socket. 2.
again and again until no more water flows out from the drain pump. 1 2 11. Close the drain pump door. 5. Pull back the drainage duct. 6. Unscrew the filter and remove it. 1 2 Warning! 7. Remove fluff and objects from the pump. Never remove the pump cover during a wash cycle, always wait until the appliance has finished the cycle, and is empty. When refitting the pump cover, ensure it is securely re-tightened so as to stop leaks and young children being able to remove it.
When you drain the water with the emergency drain procedure, you must activate again the drain system: 1. Put 2 litres of water in the main wash compartment of the detergent dispenser. 2. Start the programme to drain the water. 7. Screw the hose back to the machine and make sure the connection is tight. 8. Turn on the water tap. Emergency emptying out If the appliance cannot drain the water, proceed as follows to empty out the machine: 1. pull out the plug from the power socket; 2.
Problem The washing machine does not start: The machine does not fill: Possible cause/Solution The door has not been closed. • Close the door firmly. The plug is not properly inserted in the power socket. • Insert the plug into the power socket. There is no power at the socket. • Please check your domestic electrical installation. The main fuse has blown. • Replace the fuse. The selector dial is not correctly positioned and/or the button 7 has not been pressed.
Problem Possible cause/Solution Unsatisfactory washing results: Too little detergent or unsuitable detergent has been used. • Increase the detergent quantity or use another one. Stubborn stains have not been treated prior to washing. • Use commercial products to treat the stubborn stains. The correct temperature was not selected. • Check if you have selected the correct temperature. Excessive laundry load. • Reduce the laundry load. The door will not open: The programme is still running.
Electrical connection Voltage Overall power Fuse Frequency 220-230 V 2200 W 10 A 50 Hz Water supply pressure Minimum Maximum 0,5 bar (0,05 MPa) 8 bar (0,8 MPa) Level of protection against ingress of solid particles and moisture Water supply 1) IPX4 Cold water Maximum Load Cotton 7 kg Spin Speed Maximum 1200 rpm 1) Connect the water inlet hose to a water tap with a 3/4'' thread. Accessories Rubber feet kit (4055126249) Available from your authorized dealer.
vibration, noise and displacement of the machine during operation. Caution! Never place cardboard, wood or similar materials under the machine to compensate for any unevenness in the floor. 5. Open the porthole. Remove the polystyrene block fitted on the door seal. Remove from the drum the objects supplied with the machine. Water inlet 6. Fill the smaller upper hole and the two large ones with the corresponding plastic plug caps supplied in the bag containing the instruction booklet.
The inlet hose must not be lengthened. If it is too short and you do not wish to move the tap, you will have to purchase a new, longer hose specially designed for this type of use. Water drainage The end of the drain hose can be positioned in three ways. • Hooked over the edge of a sink using the plastic hose guide supplied with the machine. In this case, make sure the end cannot come unhooked when the machine is emptying.
ENVIRONMENT CONCERNS The symbol on the product or on its packaging indicates that this product may not be treated as household waste. Instead it should be taken to the appropriate collection point for the recycling of electrical and electronic equipment. By ensuring this product is disposed of correctly, you will help prevent potential negative consequences for the environment and human health, which could otherwise be caused by inappropriate waste handling of this product.
Warranty / customer service For each product we provide a two-year guarantee from the date of purchase or delivery to the consumer (with a guarantee certificate, invoice or sales receipt serving as proof). The guarantee covers the costs of materials, labour and travel.
Unsere Kundendienst-Telefonnummer: Le numéro de téléphone de notre service après-vente: Il nostro numero di telefono del servizio clientela: Our customer service telephone number: 0848 559 111 oder unter ou sur Internet oppure su Internet or in the internet www.fust.ch Dipl. Ing FUST AG Buchental 4 9245 Oberbüren Tel. (071) 955 50 50 Dipl. Ing. FUST AG Riedmoosstrasse 3172 Niederwangen-Bern Tel. (031) 980 11 11 Dipl. Ing. FUST AG An der Rheinstrasse 4414 Füllinsdorf Tel. (061) 906 95 00 Ing. dipl.
132930991-A-412012 www. .