SMART-MR10 User Manual OM-20000130 Rev 0B
SMART-MR10 User Manual Publication Number: Revision Level: Revision Date: Firmware Version: OM-20000130 0B 2010/05/12 OEMV 3.710, SmartAgApp 1.200 Proprietary Notice Information in this document is subject to change without notice and does not represent a commitment on the part of NovAtel Inc. The software described in this document is furnished under a licence agreement or non-disclosure agreement. The software may be used or copied only in accordance with the terms of the agreement.
Table of Contents Software License Terms and Conditions Warranty Notice Foreword 1 Introduction 7 10 12 13 16 18 1.1 SMART-MR10 Features ....................................................................................... 18 1.2 SMART-MR10 Models .......................................................................................... 20 2 Installation and Setup 21 2.1 Additional Equipment Required ............................................................................ 21 2.1.
Table of Contents 4.3 Convert ................................................................................................................. 50 4.3.1 RINEX Format............................................................................................. 50 4.3.2 Convert4 Command Line Switches............................................................. 52 4.4 Firmware Upgrades .............................................................................................. 53 4.4.
Tables 1 2 3 4 5 6 7 8 9 10 11 12 13 14 15 16 17 18 19 20 21 SMART-MR10 Controller Models............................................................................... 20 SMART-MR10 Connector Pin-Out ............................................................................. 22 Use of MODE Pin....................................................................................................... 22 SMART-MR10 LED Status Indicators ........................................................................
Figures 1 2 3 4 5 6 7 8 9 10 11 12 13 14 15 16 17 18 19 20 21 22 23 24 25 26 27 28 6 SMART-MR10 Receiver ................................................................................................... 18 SMART-MR10 Connector ................................................................................................ 21 Simplified SMART-MR10 Setup ....................................................................................... 23 SMART-MR10 Universal Mounting Plate (70023085) ...............
Software License Software License BY INSTALLING, COPYING, OR OTHERWISE USING THE SOFTWARE PRODUCT, YOU AGREE TO BE BOUND BY THE TERMS OF THIS AGREEMENT. IF YOU DO NOT AGREE WITH THESE TERMS OF USE, DO NOT INSTALL, COPY OR USE THIS ELECTRONIC PRODUCT (SOFTWARE, FIRMWARE, SCRIPT FILES, OR OTHER ELECTRONIC PRODUCT WHETHER EMBEDDED IN THE HARDWARE, ON A CD OR AVAILABLE ON THE COMPANY WEB SITE) (hereinafter referred to as "Software"). 1. License: NovAtel Inc.
Software License visual output of the Software; transmit the Software over a network, by telephone or electronically using any means (except when downloading a purchased up[grade from the NovAtel Web site); or (e) reverse engineer, decompile or disassemble the Software. You agree to keep confidential and use your best efforts to prevent and protect the contents of the Software from unauthorized disclosure or use. 5.
Software License 9. Governing Law: This Agreement is governed by the laws of the Province of Alberta, Canada. Each of the parties hereto irrevocably attorns to the jurisdiction of the courts of the Province of Alberta. 10. Customer Support: For Software UPDATES and UPGRADES, and regular customer support, contact the NovAtel GPS Hotline at 1-800-NOVATEL (U.S. or Canada only), or +1-403-295-4900, Fax +1-403-295-4901, email to support@novatel.ca, Web site: http://www.novatel.com or write to: NovAtel Inc.
Terms and Conditions Terms and Conditions Standard Terms and Conditions of Sales 1. PRICES: All prices are Firm Fixed Price, FCA 1120 - 68th Avenue N.E., Calgary, Alberta. All prices include standard commercial packing for domestic shipment. All transportation, insurance, special packing costs and expenses, and all Federal, provincial and local excise, duties, sales, and other similar taxes are the responsibility of the Purchaser. 2. PAYMENT: Terms are prepayment unless otherwise agreed in writing.
Terms and Conditions 6. LIMITED WARRANTY AND LIABILITY: Warranty Period: Products - 1 year; Accessories 90 days (in each case from the date of invoice).
Warranty Warranty NovAtel Inc. warrants that its products are free from defects in materials and workmanship, subject to the conditions set forth below, for the following periods of time, from the date of sale: SMART-MR10 Antenna Cables and Accessories Computer Discs Software Warranty One (1) Year One (1) Year Ninety (90) Days Ninety (90) Days One (1) Year Date of sale shall mean the date of the invoice to the original customer for the product.
Notices Notice The following notices apply to the SMART-MR10. For more information on emissions testing, please refer to the regulatory body in your geographic area; for example, in the US, the Federal Communications Commission (FCC) and in Europe, the Conformité Européenne (CE). FCC This device complies with part 15 of the FCC Rules.
Notice Industry Canada SMART-MR10 Class B digital apparatus complies with Canadian ICES-003. SMART-MR10 appareils numérique de la classe B est conforme à la norme NMB-003 du Canada. SMART-MR10 has been certified for use in the 2400 MHz - 2483 MHz band by Industry Canada (RSS-210) [IC ID # TBD]. CE The SMART-MR10 enclosures carry the CE mark. "Hereby, NovAtel Inc.
Customer Service OEMV Firmware Updates Firmware updates are firmware releases, which include fixes and enhancements to the receiver functionality. Firmware updates are released occasionally on the Web site as they become available. Model upgrades enable features on the receiver and may be purchased. OEMV Model Upgrades Model upgrades are accomplished through NovAtel authorized dealers. Contact your local NovAtel dealer first for more information.
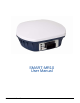
Foreword Foreword Congratulations! Congratulations on your purchase of the SMART-MR10, a smart antenna capable of receiving GPS L1+L2, GLONASS L1+L2, and L-band signals, with exceptional flexibility and performance. NovAtel is an industry leader in state-of-the-art Global Navigation Satellite Systems (GNSS) receiver design. We believe that our SMART-MR10 will meet your high expectations, and are working hard to ensure that future products and enhancements maintain that level of satisfaction.
Foreword • The letter H in the Offset columns of the commands and logs tables represents the header length for that command or log. Refer to the OEMV Family Firmware Reference Manual for ASCII and binary header details. • The number following 0x is a hexadecimal number. • Command descriptions’ brackets, [ ], represent the optionality of parameters. • In tables where values are missing, they are assumed to be reserved for future use.
Chapter 1 Introduction The SMART-MR10 is a rugged dual-constellation, dual-frequency smart antenna designed for onmachine applications in the agricultural, construction and industrial market segments.The SMARTMR10 consists of a high-performance GNSS receiver and antenna, capable of receiving and tracking different combinations of GPS+GLONASS L1+L2 code and carrier signals, and L-band signals, on a maximum of 72 channels.
Introduction • • • • Chapter 1 switched to RS422. Rugged, water and dust tight enclosure, consisting of a cast aluminum base and plastic radome. Bluetooth Three (3) daylight viewable status LED indicators. Range of installation options, including a quick-release mounting plate and a 5m power/data cable with tinned/tagged wires.
Chapter 1 1.2 Introduction SMART-MR10 Models The SMART-MR10 is available in several different firmware models whose configurations may include additional features. Available models are summarized in Table 1 below.
Chapter 2 Installation and Setup This chapter contains instructions and tips for setting up your SMART-MR10. 2.1 Additional Equipment Required For the receiver to perform optimally, the following additional equipment is required: • A PC/laptop (user-supplied) • A means of communicating with, and powering, the SMART-MR10 • SMART-MR10 cable (see Appendix D Replacement Parts on page 98 for part numbers).
Chapter 2 Installation and Setup Table 2: SMART-MR10 Connector Pin-Out Pin Use Pin Use 1 PWR+ 13 RESERVED 2 PWR- 14 CHASSIS GROUND 3 CAN1- 15 SIGGND1 4 CAN1+ 16 MKI 5 TXD2 17 PPS 6 RXD2 18 ER 7 TXD1 19 MODEa 8 RTS1/AUXTX 20 RESERVED 9 SIGGND2 21 RESERVED 10 RESERVED 22 CTS1/AUXRX 11 RESERVED 23 RXD1 12 RESERVED a. The SMART-MR10 is RS-232/RS-422-selectable through pin 19 MODE, as shown in Table 3. Table 3: Use of MODE Pin MODE Pin 3.
Installation and Setup Chapter 2 Fuse/holder recommendations can be found in Table 10, Recommended Fuses on page 72 Tyco 23-pin connector COM1 User Supplied 5A Fuse COM2 + - ER Figure 3: Simplified SMART-MR10 Setup Minimum conductor size for all wiring is 0.5 mm / 20 AWG. 2.1.2 Installing the PC Utilities Once the SMART-MR10 is connected to the PC/laptop and a power supply, install NovAtel’s PC Utilities. These include CDU, a graphical user interface program. 1. Start up the PC/laptop. 2.
Chapter 2 3. Installation and Setup Select Install the OEMV GPS PC Utilities from the window that is automatically displayed. If the window does not automatically open when the CD is inserted, select Run from the Start menu and select the Browse button to locate Setup.exe on the CD drive. 4. 2.1.3 Install the PC Utilities by advancing through the steps provided in the NovAtel PC Utilities setup program.
Installation and Setup 2.1.4 Chapter 2 Mounting Plates Several mounting plate options are available for mounting the SMART-MR10 receiver: • • • Universal mounting plate (NovAtel part number 70023085), shown in Figure 4 on page 25. Mounting plate with AG GPS 262 layout (NovAtel part number 70023086), shown in Figure 5 on page 26. Pole-mount (NovAtel part number 70023087), shown in Figure 6 on page 27.
Chapter 2 Installation and Setup Figure 5: SMART-MR10 AG GPS 262 Layout Mounting Plate (70023086) 26 SMART-MR10 User Manual Rev 0B
Installation and Setup Chapter 2 INSERT Figure 6: SMART-MR10 Pole Mount (70023087) All measurements are in millimetres unless specified otherwise.
Chapter 2 2.1.5 Installation and Setup Mounting the SMART-MR10 When installing the SMART-MR10: 2.1.6 • Choose a location that has a clear view of the sky so that each satellite above the horizon can be tracked without obstruction. • Mount on a secure, stable structure capable of safe operation in the specific environment. Typical installation is the vehicle roof.
Installation and Setup Chapter 2 Table 4 shows the meaning of the LED states in the expected sequence after power is applied. Table 4: SMART-MR10 LED Status Indicators Red Yellow Green Condition Off Off Off Power is not available. (Red indicator may also not be lit if a boot failure has occurred.
Chapter 2 • • 2.2.3 Installation and Setup distributed in the sky. If it is stuck on blinking yellow, there may be excessive blockage or the unit may be defective. Make sure the unit has an unobstructed view of the sky. Try power cycling the unit. If the yellow LED is on, but the green does not turn on within five minutes than no SBAS or DGPS positions are available.
Installation and Setup Chapter 2 The CAN module is generally not user-interactive. It is activated when a SETCANNAME command is entered, and after a SAVECONFIG, the CAN module is activated immediately on all subsequent start-ups.
Chapter 3 Operation Before operating the SMART-MR10 for the first time, please ensure that you have followed the installation instructions in Chapter 2 Installation and Setup starting on page 21. The following instructions are based on a COM port configuration such as that shown in Figure 8 on page 36. It is assumed that a personal computer (PC), or laptop, is used during initial operation and testing for greater ease and versatility. 3.
Operation Chapter 3 CAUTION!: 3.1.2 Although the receiver can operate at data transfer rates as low as 300 bps, this is not desirable. For example, if several data logs are active (that is, a significant amount of information needs to be transmitted every second) but the bit rate is set too low, data will overflow the serial port buffers, cause an error condition in the receiver status and result in lost data.
Chapter 3 3.2.2 Operation Communicating with the Receiver Using CDU Launch the CDU program and select Device | Open from its main menu. The Open Configuration window appears. Figure 7, below, shows an Open Configuration window with three possible configurations already set up. Your configurations may be different or you may have none at all, in which case, the Open Configuration window is empty. Figure 7: Open Configuration Window Refer to CDU’s help file by selecting the Help | Contents menu.
Operation Chapter 3 Commands are typed at the interfacing computing device’s keypad or keyboard, and executed after issuing a carriage return command which is usually the same as pressing the key. An example of a response to an input command is the FIX POSITION command, as shown in the following example: [COM2] fix position 51.11635 -114.0383 1048.
Chapter 3 Operation 1 2 + - Rover 3 Base 1 2 + 3 COM1 4 - COM1 COM2 5 6 COM2 5 Figure 8: Basic Differential Setup Reference Description 1 SMART-MR10 receiver 2 User-supplied 5A fuse 3 User-supplied power supply, for example a battery 4 User-supplied device to COM1 5 User-supplied radio device to COM2 6 User-supplied PC/laptop, for setting up and monitoring, to COM1 System biases can introduce errors. Refer to the NovAtel web site at http://www.novatel.
Operation 3.3.1 Chapter 3 Base Station Configuration At the base station, enter the following commands: interfacemode port rx_type tx_type [responses] fix position latitude longitude height log port message [trigger [period]] Examples of these commands include the following: RTCA interfacemode com2 none rtca off fix position 51.11358042 -114.04358013 1059.
Chapter 3 Operation (for L1/L2 models or cards OEMV1DF, OEMV2G, and OEMV3G) log com2 rtcm1006 ontime 10 log com2 rtcm1033 ontime 10 log com2 rtcm1019 ontime 120 log com2 rtcm1020 ontime 120 CMRPLUS (CMR+) interfacemode com2 none cmr off fix position 51.11358042 -114.04358013 1059.4105 (enter your own lat, lon, hgt) log com2 cmrobs ontime 1 log com2 cmrgloobs ontime 1 log com2 cmrplus ontime 1 (important to use ontime 1 with cmrplus) CMR interfacemode com2 none cmr off fix position 51.11358042 -114.
Operation 3.3.
Chapter 3 Operation At the rover station you can leave the INTERFACEMODE default settings (interfacemode com2 novatel novatel). The rover receiver recognizes the default and uses the corrections it receives with a NovAtel header. The PSRDIFFSOURCE and RTKSOURCE commands set the station ID values which identify the base stations from which to accept pseudorange or RTK corrections respectively. They are useful commands when the rover station is receiving corrections from multiple base stations.
Operation Chapter 3 free of charge. Future developments to this system will encompass the L5 signal. EGNOS EGNOS (European Geostationary Navigation Overlay Service) has been developed to work with existing satellite navigation systems to improve the accuracy of navigation signals. The EGNOS signal is transmitted by two geostationary satellites and covers all of Europe. EGNOS transmits a signal containing information on the reliability and accuracy of the positioning signals sent out by GPS.
Chapter 3 Operation GL1DE® 3.4 SMART-MR10 contains NovAtel’s GL1DE,a positioning algorithm for single frequency GPS and GPS/ GLONASS applications. GL1DE produces a smooth position output tuned for applications where optimal time relative (pass to pass) accuracy is more important than absolute accuracy, making it well suited for agricultural applications. Multipath signals tend to induce time-varying biases and increase the measurement noise on the L1 pseudorange measurements.
Operation Chapter 3 separate ground-sensing radar equipment by converting the GPS-derived velocity to proportional frequency output. The following emulated radar signal parameters can be configured by the customer: • • • Frequency Step: Specifies how the frequency output relates to the vehicle speed. Signal Update Rate: Specifies how often the frequency output is updated to match the vehicle speed. Response Mode: Specifies how quickly changes in velocity are reflected in the frequency output.
Chapter 4 PC Utilities Visit NovAtel’s Web site at http://www.novatel.com/support/fwswupdates.htm for the most recent versions of the PC software and receiver firmware. 4.1 CDU/Convert Installation The CD accompanying this manual contains the Windows applications CDU (Control and Display Unit) and Convert. They are installed via a standard Install Shield set-up application.
PC Utilities 4.2 Chapter 4 CDU CDU is a 32-bit Windows application. The application provides a graphical user interface (GUI) to allow you to set-up and monitor the operation of the NovAtel receiver by providing a series of windows whose functionality is explained in this section. A help file is included with CDU. To access the file, select Contents from the Help menu. The rest of this section shows the CDU windows from the View menu and their descriptions.
Chapter 4 PC Utilities horizon to directly overhead, respectively. The azimuth is mapped on a compass relative to true North. The colored rings indicate the lowest elevation cut-off angles at which satellites are tracked and can be changed or viewed via the button.
PC Utilities Chapter 4 valid). Normally this represents the latency in the correction data. • The number of satellites used in the solution • The Solution Status • The receiver's date and time (GMT and local) Open this window by selecting Position Window from the View menu or its button in the Window Toolbar. Right-click in the Position window to enable you to set the PC clock to the receiver's time, change the font used to display the position data or set the units through the Options dialog box.
Chapter 4 PC Utilities subsequent positions, shown with a yellow + marker, are given relative to this initial starting point. The current position is shown with a red + marker.
PC Utilities Chapter 4 This window automatically opens when CDU is first connected to a receiver. To bring the window to the front, select Console Window from the View menu or click its button in the Window Toolbar.
Chapter 4 4.3 PC Utilities Convert Convert is a 32-bit Windows application. It is shown in Figure 9. Convert will accept GPS file formats and convert them to ASCII, Binary or RINEX format. The application also allows the user to screen out particular logs by selecting the desired logs from the list of available logs. This feature is useful for screening particular logs out of large data files in either ASCII or Binary formats. Figure 9: Convert4 Screen Examples 4.3.
PC Utilities Chapter 4 The Convert4 utility can be used to produce RINEX files from NovAtel receiver data files. Although RINEX is intended to be a receiver-independent format, there are many optional records and fields. Please keep this in mind when combining NovAtel and non-NovAtel RINEX data. When converting to RINEX, two files are produced - a RINEX observation file and a RINEX navigation file. A third GLONASS file is produced if the data contains GLONASS observations.
Chapter 4 PC Utilities a. Information from this log overrides data entered into the Receiver Number, Type and Version fields using the OBS file button of the RINEX Headers section, see Figure 9 on page 50. 4.3.2 Convert4 Command Line Switches Convert4 supports several command-line switches to facilitate batch processing. To access its Command Line Arguments window, open a command prompt window (select Accessories | Command Prompt from the Start menu).
PC Utilities 4.4 Chapter 4 Firmware Upgrades The receiver stores its program firmware in non-volatile memory, which allows you to perform firmware upgrades without having to return the receiver to the distributor. New firmware can be transferred to the receiver through COM1, and the unit will immediately be ready for operation at a higher level of performance. The first step in upgrading your receiver is to contact your local NovAtel dealer.
Chapter 4 PC Utilities auth-code is the upgrade authorization code, expressed as hhhh,hhhh,hhhh,hhhh,hhhh,model# where the h characters are an ASCII hexadecimal code, and the model# would be ASCII text Example: auth 17cb,29af,3d74,01ec,fd34,l1smrter Once the AUTH command has been executed, the OEMV family receiver will reboot itself. Issuing the LOG VERSION command will confirm the new upgrade model type and version number.
PC Utilities Chapter 4 WhatsNew.txt Information on the changes made in the firmware since the last revision XXXX.hex Firmware version upgrade file, where XXXX = program version level (for example, 1001.hex) Using the WinLoad Utility WinLoad is a Windows-based program used to download firmware to OEMV family cards. The main screen is shown in Figure 11 on page 55.
Chapter 4 PC Utilities Open a File to Download From the file menu choose Open. Use the Open dialog to browse for your file, see Figure 12, WinLoad’s Open Dialog on page 56. Figure 12: WinLoad’s Open Dialog Once you have selected your file, the name should appear in the main display area and in the title bar, see Figure 13 below. Figure 13: Open File in WinLoad Communications Settings To set the communications port and baud rate, select COM Settings from the Settings menu.
PC Utilities Chapter 4 Figure 14: COM Port Setup Downloading firmware To download firmware follow these steps: 1. Set up the communications port as described in Communications Settings above. 2. Select the file to download, see Open a File to Download on page 56. 3. Make sure the file path and file name are displayed in main display area, see Figure 13, Open File in WinLoad on page 56. 4. Click on the Write Flash button to download the firmware. 5.
Chapter 4 PC Utilities Figure 17: Upgrade Process Complete 7. Close WinLoad. This completes the procedure required to upgrade an OEMV family receiver.
Chapter 5 Bluetooth® Configuration Bluetooth is a wireless radio communication standard designed for use over short ranges (within 10 m). This chapter describes how to: 5.
Chapter 5 5.2 Bluetooth® Configuration Set Up a PC/Laptop with a Bluetooth Adaptor If your PC/laptop is already Bluetooth-equipped and ready, proceed to Section 5.3 on Page 60 1. With the PC/laptop powered on, install the driver(s) from the disc that came with your Bluetooth adapter. 2. Connect the Bluetooth adapter.
Bluetooth® Configuration Chapter 5 Figure 22: My Bluetooth Places Window 5.4 Communicate with the SMART-MR10 Using Bluetooth 1. Double-click the SMART-MR10 device icon in the Entire Bluetooth Neighborhood window, as shown in Figure 22. The PC/laptop searches for available services. If Bluetooth is working properly, a COM port service appears. 2. Double-click the COM3 icon. To use the serial COM port, the SMART-MR10 must be “paired” with the PC/laptop to use the COM3 port.
Chapter 5 Bluetooth® Configuration If the code is correct, a new COM dialog opens, showing the PC/laptop COM port that has been assigned to the Bluetooth link. For example, in Figure 24, the PC/laptop port is COM21. Figure 24: PC/Laptop COM3 Port Assignment 4. Open a terminal program (HyperTerminal, for example) and configure it to the serial port specified in the Bluetooth configuration utility. In the above example, the terminal program must be configured to connect through COM21. 5.
Bluetooth® Configuration 5.5 Chapter 5 Stop Communicating with SMART-MR10 Using Bluetooth 1. Double-click the Bluetooth icon in the task bar, as shown in Figure 20 on page 60, or select Programs | My Bluetooth Places from the Start menu in Windows. The My Bluetooth Places window opens. 2. Click the Search for devices in range option from the Bluetooth Tasks side bar on the left of the My Bluetooth Places window.
Appendix A Technical Specifications A.1 SMART-MR10 Receiver Performance PERFORMANCE Channel Configuration 14 GPS L1, 14 GPS L2, 6 GPS L5 12 GLONASS L1, 12 GLONASS L2 (optional) 2 SBASa 1 L-band Horizontal Position Accuracy (RMS)b Autonomous (L1) Autonomous (L1/L2) SBASa CDGPS DGPS OmniSTAR VBS XP HP RT-20™c(optional ) RT-2™c(optional) 1.5 m 1.2 m 0.6 m 0.6 m 0.4 m 0.6 m 0.15 m 0.1 m 0.2 m 1 cm+1 ppm L1 C/A Code L1 Carrier Phase L2 P(Y) Code L2 Carrier Phase GPS 4 cm RMS 0.5 mm RMS 8 cm RMS 1.
Technical Specifications f. A.2 Appendix A Typical value. Almanac and recent ephemerides saved and approximate time entered. For more information, Please refer to the “SETAPPROXTIME” command in the OEMV Family Firmware Reference Manual found on our Web site at http://www.novatel.com/support/docupdates.htm. SMART-MR10 Specifications INPUT/OUTPUT CONNECTORS SMART-MR10 COM/ PWR +8 to +36 V DC at 2.
Appendix A Technical Specifications a. When tracking GPS satellites. b. See also the Notice section of this manual starting on Page 13. DIMENSIONS Antenna Phase Centre Notes: 1. All dimensions are in millimetres 2. Mounting holes are labelled according to their size and thread.
Technical Specifications Appendix A Antenna Phase Centre Note: All dimensions are in millimetres SMART-MR10 User Manual Rev 0B 67
Appendix A A.2.
Technical Specifications Appendix A Table 7: SMART-MR10 Evaluation Cable Pinouts TYCO 23-PIN COM1 D-SUB COM2 D-SUB COM3 D-SUB TINNED LEAD SIGNAL NAME 1 PWR+ PWR+ 2 PWR- PWR- 3 CAN- CAN- 4 CAN+ CAN+ 5 2 TXD2 6 3 RXD2 7 2 TXD1 8 2 9 RTS1/AUXTX/TXD3 SIGGND2 10 RESERVED 11 RESERVED 12 RESERVED 13 RESERVED 14 CHASSIS GROUNDa 15 5 5 5 SIGGND2 SIGGND1 SIGGND1 16 MKI MKI 17 PPS PPS 18 ER ER 19 MODE MODE 20 RESERVED 21 RESERVED 22 3 23 3 CTS1/AUXR
Appendix A A.2.2 Technical Specifications SMART-MR10 Streamlined Cable (Part Number 01018526) The SMART-MR10 streamlined cable, designed for reduced size and weight, and increased flexibility, provides: • • • Connection to a battery while operating in the field.
Technical Specifications Appendix A Table 8: SMART-MR10 Streamlined Cable Pinouts TYCO 23-PIN COM1 D-SUB COM2 D-SUB TINNED LEAD SIGNAL NAME 1 PWR+ PWR+ 2 PWR- PWR- 3 RESERVED 4 RESERVED 5 2 TXD2 6 3 RXD2 7 2 TXD1 8 RESERVED 9 SIGGND2 10 RESERVED 11 RESERVED 12 RESERVED 13 RESERVED 14 CHASSIS GROUNDa 15 5 5 SIGGND1 16 RESERVED 17 RESERVED 18 ER 19 RESERVED 20 RESERVED 21 RESERVED 22 RESERVED 23 3 SIGGND2 SIGGND1 ER RXD1 a.
Appendix A A.2.3 Technical Specifications SMART-MR10 Connector and Cable Requirements Custom cables for installing your SMART-MR10 can be created using the following guidelines: • • • • • Wire size must be 0.5 mm-1.25 mm (20-16 AWG) Batt + connection must be protected by (value TBD) fast blow fuse Serial data signals (TxD, RxD, signal ground) must be run in shielded cable.
Appendix B Commands The SMART-MR10 firmware implements the OEMV family command set, documented in OEMV Family Firmware Reference Manual. For convenience, commonly used SMART-MR10 commands are summarized in Table 11 and documented in this appendix. Table 11: Commonly Used SMART-MR10 Commands in Alphabetical Order ASCII Command Message ID Description btcontrol 8205 Enable/disable Bluetooth. com 4 Configure the receiver’s asynchronous serial ports communications drivers.
Appendix B B.2 Commands 7. Optional parameters are indicated by square brackets ([ ]). For commands that contain optional parameters, the value used if the optional parameter is not specified is given in the syntax table for the command. 8. Data format definitions, as specified in the “Format” field, are detailed in the OEMV Family Firmware Reference Manual. Note that all binary data is little-endian byte-ordered.
Commands B.3 Appendix B COM Configure COM Port This command permits you to configure the receiver’s asynchronous serial port communications drivers. The current COM port configuration can be reset to its default state at any time by sending it two hardware break signals of 250 milliseconds each, spaced by fifteen hundred milliseconds (1.5 seconds) with a pause of at least 250 milliseconds following the second break.
Appendix B WARNING!: Commands Use the COM command before using the INTERFACEMODE command on each port. Turn break detection off using the COM command to stop the port from resetting because it is interpreting incoming bits as a break command. Table 12: COM Serial Port Identifiers Binarya ASCII 1 COM1 COM port 1 2 COM2 COM port 2 3 COM3 COM port 3 (available over Bluetooth) 6 THISPORT 16 AUX Description Current COM port AUX port a. This table lists the commonly used SMART-MR10 COM ports.
Commands Field Field Type Appendix B ASCII Value 1 COM header - 2 port 3 Binary Value Binary Binary Format Bytes Binary Offset This field contains the command name or the message header depending on whether the command is abbreviated ASCII, ASCII or binary, respectively. - H 0 See Table 12, COM Serial Port Identifiers on Page 76 Port to configure.
Appendix B B.4 Commands FRESET Clear Selected Data from NVM and Reset This command is extended to include SMART-MR10 features. An additional target field, userdata (value = 10), resets only the SMART-MR10 user data NVM, thereby resetting all parameters indicated in this document as “Stored in NVM” to factory defaults. Issuing the FRESET command with the “target” field set to standard, resets the userdata NVM as well as OEMV parameters as indicated in the OEMV Family Firmware Reference Manual.
Commands B.5 Appendix B LOG Request Logs from the Receiver Many different types of data can be logged using several different methods of triggering the log events. Every log element can be directed to any combination of the three COM ports and three USB ports. The ONTIME trigger option requires the addition of the period parameter. See the OEMV Family Firmware Reference Manual for further information and a complete list of data log structures.
Appendix B Commands Abbreviated ASCII Syntax: Message ID: 1 LOG [port] message [trigger [period [offset [hold]]]] Factory Default: log com1 rxstatuseventa onnew 0 0 hold log com2 rxstatuseventa onnew 0 0 hold log com3 rxstatuseventa onnew 0 0 hold log aux rxstatuseventa onnew 0 0 hold log usb1 rxstatuseventa onnew 0 0 hold log usb2 rxstatuseventa onnew 0 0 hold log usb3 rxstatuseventa onnew 0 0 hold Abbreviated ASCII Example 1: log com1 bestpos ontime 7 0.
Commands Field Appendix B Field Name ASCII Value Description Field Type 1 LOG (ASCII) header - This field contains the command name or the message header depending on whether the command is abbreviated ASCII or ASCII respectively. - 2 port See Table 16, Detailed Serial Port Identifiers on Page 82 Output port (default = THISPORT) Enum 3 message Any valid message name, with an optional A or B suffix.
Appendix B Commands Table 16: Detailed Serial Port Identifiers ASCII Port Name Hex Port Value Decimal Port Value a Description NO_PORTS 0 0 No ports specified COM1_ALL 1 1 All virtual ports for COM port 1 COM2_ALL 2 2 All virtual ports for COM port 2 COM3_ALL 3 3 All virtual ports for COM port 3 THISPORT_ALL 6 6 All virtual ports for the current port ALL_PORTS 8 8 All virtual ports for all ports XCOM1_ALL 9 9 All virtual COM1 ports XCOM2_ALL 10 10 All virtual COM2 ports
Commands Appendix B ASCII Port Name Hex Port Value Decimal Port Value a Description THISPORT_31 df 223 Current COM port, virtual port 31 FILE c e0c 224c User-specified file destination, 0 c FILE_1c e1c 225c User-specified file destination, 1 c FILE_31c ff c 255c User-specified file destination, 31 c XCOM1 1a0 416 Virtual COM1 port, virtual port 0 XCOM1_1 ...
Appendix B B.6 Commands PDPFILTER Enable, disable or reset the PDP filter This command enables, disables or resets the Pseudorange/Delta-Phase (PDP) filter. The main advantages of the Pseudorange/Delta-Phase (PDP) implementation are: • Smooths a jumpy position • Bridges outages in satellite coverage (the solution is degraded from normal but there is at least a reasonable solution without gaps) Enable the PDP filter to output the PDP solution in BESTPOS, BESTVEL and NMEA logs.
Commands B.7 Appendix B PDPMODE Select the PDP mode and dynamics This command allows you to select the mode and dynamics of the PDP filter. 1. You must issue a PDPFILTER enable command before the PDPMODE command. See PDPFILTER Enable, disable or reset the PDP filter starting on page 84. 2. If you choose RELATIVE mode (GL1DE) while in WAAS or CDGPS mode: • With an L1-only receiver model, you must force the iono type to GRID in the SETIONOTYPE command.
Appendix B B.8 Commands RADARCFG Configure the ER output Use this command to configure the Emulated Radar (ER) output. ER is available through the SMARTMR10 multi-cable, see page 69 for pin-out details. Syntax radarcfg switch freq_step update_rate resp_mode threshold Message ID = 8192 Field Data Description Bytes Format Units Offset - - 0 1 Header This field contains the command name or the message header depending on whether the command is abbreviated ASCII, ASCII or binary, respectively.
Commands Appendix B Table 17: Response Modes Mode Description 2000 2000 ms 1000 1000 ms 500 500 ms (default) 2 Automatically switches between 1000 and 500 ms 1 Performs no smoothing The time period over which to smooth velocity samples Example 1 to disable radar emulation: radarcfg disable 26.11 1 1 2 Example 2 to set the frequency step to 36.11 Hz/kph, update rate to 1 Hz and no smoothing: radarcfg enable 36.
Appendix B B.9 Commands RESET Performs a hardware reset This command performs a hardware reset. Following a RESET command, the receiver initiates a coldstart boot up. Therefore, the receiver configuration reverts either to the factory default, if no user configuration was saved, or the last SAVECONFIG settings. The optional delay field is used to set the number of seconds the receiver is to wait before resetting.
Commands Appendix B B.10 SBASCONTROL Set SBAS test mode and PRN This command allows you to dictate how the receiver handles Satellite Based Augmentation System (SBAS) corrections. The receiver automatically switches to Pseudorange Differential (RTCM or RTCA) or RTK if the appropriate corrections are received, regardless of the current setting. To enable the position solution corrections, you must issue the SBASCONTROL ENABLE command.
Appendix B Commands Factory Default: sbascontrol disable auto 0 none Abbreviated ASCII Example 1: sbascontrol enable waas 0 zerototwo NovAtel's OEMV receivers work with SBAS systems including EGNOS (Europe), MSAS (Japan) and WAAS (North America) System Types 90 ASCII Binary Description NONE 0 Don’t use any SBAS satellites AUTO 1 Automatically determine satellite system to use (default) ANY 2 Use any and all SBAS satellites found WAAS 3 Use only WAAS satellites EGNOS 4 Use only EGNOS sat
Appendix C Logs C.1 Position Logs C.1.1 NMEA Logs The NMEA logs (receiver outputs) supported by the SMART-MR10 are summarized in Chapter 3 of the OEMV Family Firmware Reference Manual in section "NMEA Standard Logs". The available logs include: • GPGGA, which outputs a log of position system fix data and undulation.
Appendix C Logs You can configure the log to output at various frequencies, as described in Appendix B.5, LOG Request Logs from the Receiver on Page 79. The above command line operations can also be carried out through the CDU. Information about configuring the communication port can be found in the CDU online help in Contents > Getting Started > Connecting to the receiver. Information about logging data can be found in Getting Started > Logging Data.
Logs Appendix C C.2 Other Logs The SMART-MR10 firmware generates the logs in Table 18, in addition to those of the OEMV Family log set. Refer to the OEMV Family Firmware Reference Manual, which also contains procedures and explanations related to data logging and is available from our Web site at: http://www.novatel.com/support/docupdates.htm Table 18: SMART-MR10 Logs in Alphabetical Order Message ID C.2.
Appendix C Field # Logs Field type Data Description Format 1 RADARSIGNAL header Log header 2 sol status Solution status, see Table 20, Solution Status on Page 96 3 vel type 4 Binary Binary Bytes Offset H 0 Enum 4 H Velocity type, see Table 19, Position or Velocity Type on Page 95 Enum 4 H+4 speed Speed over ground (m/s) Double 8 H+8 4 varf freq External VARF output frequency (Hz) Double 8 H+16 5 radar freq Radar signal frequency (Hz) as output by the Emulated Radar Out s
Logs Appendix C Table 19: Position or Velocity Type Type (binary) Type (ASCII) Description 0 NONE No solution 1 FIXEDPOS Position has been fixed by the FIX POSITION command 2 FIXEDHEIGHT Position has been fixed by the FIX HEIGHT/AUTO command 8 DOPPLER_VELOCITY Velocity computed using instantaneous Doppler 16 SINGLE Single point position 17 PSRDIFF Pseudorange differential solution 18 WAAS Solution calculated using corrections from an SBAS 19 PROPAGATED Propagated by a Kalman filt
Appendix C Logs Table 20: Solution Status Solution Status (Binary) Description (ASCII) 0 SOL_COMPUTED Solution computed 1 INSUFFICIENT_OBS Insufficient observations 2 NO_CONVERGENCE No convergence 3 SINGULARITY Singularity at parameters matrix 4 COV_TRACE Covariance trace exceeds maximum (trace > 1000 m) 5 TEST_DIST Test distance exceeded (maximum of 3 rejections if distance > 10 km) 6 COLD_START Not yet converged from cold start 7 V_H_LIMIT Height or velocity limits exceeded (in
Logs Appendix C C.2.2 VERSION HW & SW Versions and Serial Numbers The Component Type of the VERSION log, refer to the OEMV Family Firmware Reference Manual, is extended to include SMART-MR10 information as in Table .
Appendix D Replacement Parts The following are a list of the replacement parts available for your NovAtel SMART-MR10 receiver. Should you require assistance, or need to order additional components, please contact your local NovAtel dealer or Customer Service representative. D.
Index A accuracy position, 35, 64 velocity, 64 ALIGN, 42 almanac, 78 antenna internal, 18 specifications, 65 ascii, 50 AUTH command, 53 authorization, 54 AUX port, 83 identifier, 76 B base station, 40 baseline, 35 baud rate, 32 baud rate, see bps BESTPOS log, 92 BESTXYZ log, 92 bidirectional communication, 33 bit rate, see bps Bluetooth, 23 configuration, 59–63 power-down, 59 bps, 77 break, 75, 77 bridge, 84 BTCONTROL, 74 buffer, 33, 79 C cable customer interface, 68 serial, 32 streamlined, 70 warranty, 1
Index specifications, 65 Controller Area Network, 30 Convert software, 50 copyright, 2 CPU requirements, 79 customer interface cable, 68 Customer Service, 15, 53 EGNOS, 41 EGNOS (European SBAS), 90 e-mail, 15 Emulated Radar (ER), 30, 86, 93 operation, 42 enable Bluetooth, 59 ESTB, 41 F D data Bluetooth, 59 collect, 29 erase, 78 format, 74 L-band, 78 link, 36 log, 79–80 NVM, 78 port, 28, 32 start, 33–34 storage device, 36 terminal, 33 Warning, 35 DC power, 65 dealer, 53 default Bluetooth, 59, 61 factory, 7
Index input command, 34–35 connector, 65 differential, 37–38 mark, 81 power, 24 syntax, 73 install, 16 installation, 44 integration, 16 interface base or rover, 37–38 Bluetooth, 59 communication, 33 graphical, 23 serial, 32 introduction, 18 L laptop power settings, 80 LED power, 22, 28 log, 39, 79–80, 93 LOG command, 79 logs in CDU, 49 M message trigger, 81 models SMART-MR10, 20 mounting plates, 25 MSAS (Japanese SBAS), 90 N NMEA logs, 91 note, logging, 79 Notices, 13 NovAtel Inc.
Index rover station, 40 configuration, 38 RTCA, 39 RTCM, 39 RTCM1819, 37 RTCMV3, 37, 39 S satellite, 28, 32 coverage, 84 SBAS control, 89 system type, 90 self-test, 33, 79 serial cable, 32 number, 53 port, 39, 82 sleep Bluetooth, 59 SMART-MR10 models, 20 smooth, 84 standby mode, PC, 80 static mode, 85 status, receiver, 79 streamlined cable, 70 support, 12, 15 syntax, 73 WAAS (Wide Area Augmentation System), 40 Warning CE, 14 FCC, 13 voltage, 24 warranty, 12 antenna, 12 Web site, 15 windows in CDU, 45–49 W
Index SMART-MR10 User Manual Rev 0B 103
OM-20000130 Rev 0B 2010/05/12