
User Guide

Controlling Access to Your Server Using Local Database or LDAP Modes 271
Getting Results with Novell Web Services
103-000133-001
August 29, 2001
Novell Confidential
Manual 99a38 July 17, 2001
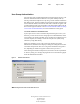
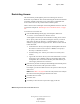
The bottom frame displays a form where you can select whether you want
to allow or deny access to the users, groups, or hosts you’ll specify in the
following steps. Select the option you want > click Update.
6 Click Anyone to specify User-Group authentication listed under the
Users/Groups column.
7 Select the options you want > click Update.
See “Specifying Users and Groups” on page 273 for more detailed
information about each option.
8 Click Anyplace to specify the computers you want to include in the rule.
9 Select the options you want > click Update.
See “Specifying Hostnames and IP Addresses” on page 275 for more
information about each option.
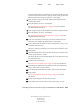
10 Click All to specify the access rights you want to include in the rule.
Check the access rights in the bottom frame > click Update.
11 Click X under the Extra column to enter a customized ACL entry if you
are familiar with ACL files.
This area is useful if you use the access control API to customize ACLs.
12 Click Update.
13 Check the appropriate box in the Continue column if you want the access
control rule to continue in a chain.
This means the next line is evaluated before the server determines if the
user is allowed access.
14 Check Access Control Is On.
See “When Access Control Is On” on page 277 for more information.
15 Check Response When Denied if you want the user to be redirected to
another URL if their request is denied.
16 Select Respond with the Following URL > type the URL in the field.
17 Click Update.
See “Responding When Access Is Denied” on page 277 for more
information.
18 Repeat steps 8 through 17 for each rule you need.
19 Click Submit to store the new access control rules in the ACL file.