INSTRUCTION MANUAL 3-Drawer Dresser MODEL NO: DL8876-1 (WHITE) DL8876-1WN (WALNUT) UPC CODE: 0-65857-20990-7 (WHITE) 0-65857-20991-4 (WALNUT) NOTE: THIS INSTRUCTION BOOKLET CONTAINS IMPORTANT SAFETY INFORMATION. PLEASE READ AND KEEP FOR FUTURE REFERENCE. LOT NUMBER: (LOCATED ON CARTON) DATE OF PURCHASE: ______ / ______ / ______ DO NOT RETURN PRODUCT TO THE RETAILER If a part is missing or damaged, Contact our customer service department. We will replace the part FREE of charge.
CUSTOMER SERVICE You can also contact us by writing to the address listed below. Please include the product model number, color and a detailed description of your enquiry. DHP Consumer Service 12345 Albert-Hudon Boulevard, Suite 100 Montreal, Quebec Canada, H1G 3L1 * * * * * * * * * NOTES Ensure all parts and components are present before beginning assembly. Assemble on a soft, smooth surface to prevent damage to the product finish. Use the wall safety strap provided to secure the unit to the wall.
-Drawer Dresser DL8876-1, DL8876-1WN HARDWARE LIST 1 2 3 Ø8 * 30mm LARGE CAM BOLT PERNO DE LEVA GRANDE GRAND BOULON DE CAME LARGE CAM LOCK GRAN CERRADURA DE LEVA GRANDE SERRURE LARGE WOOD DOWEL TAPÓN DE MADERA GRANDE GRAND GOUPILLE EN BOIS 14 PCS 14 PCS 16 PCS 4 5 6 Ø6 * 20mm SMALL CAM BOLT TORNILLO PEQUEÑO BOULON DE PETIT CAM SMALL CAM LOCK BLOQUEO DE LEVAS PEQUEÑAS Petite serrure à came SMALL WOOD DOWEL TAPON MADERA PEQUEÑA PETIT BOIS GOUJON 18 PCS 18 PCS 24 PCS 7 8 9 M3 X 15mm M4
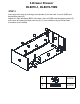
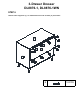
3-Drawer Dresser DL8876-1, DL8876-1WN PARTS LIST A B C D TOP PANEL PANNEAU DU HAUT TAPA DE LA CÓMODA LEFT SIDE PANEL CÔTÉ GAUCHE LADO IZQUIERDOL RIGHT SIDE PANEL CÔTÉ DROIT LADO DERECHO BACK RAIL BORDURE ARRIÈRE BORDE POSTERIOR 1 PC 1 PC 1 PC 1 PC E F G H FRONT RAIL BORDURE AVANT BORDE ANTERIOR BACK TOP PANEL PANEL SUP.
3-Drawer Dresser DL8876-1, DL8876-1WN STEP 1 Insert large cam bolts (1) into the top panel (A), left / right side panel (B&C) and bottom panel (H) as shown.
3-Drawer Dresser DL8876-1, DL8876-1WN STEP 2 Insert large cam locks (2) and large wood dowels (3) into the back / front rail (D&E) and back bottom panel (G). Attach left / right side panel (B&C) to the back / front rail (D&E) and back bottom panel (G) and secure by rotating the large cam lock (2) 1/2 turn clockwise using a Phillips head screwdriver (not included).
3-Drawer Dresser DL8876-1, DL8876-1WN STEP 3 Attach legs (I) to bottom panel (H) with bolts (11), Use the Allen key (12) to tighten the bolts.
3-Drawer Dresser DL8876-1, DL8876-1WN STEP 5 Insert large cam lock (2) and large wood dowel (3) to left / right side panel (B&C) as shown. Attach top panel (A) to assembled unit with screws (9) and secure by rotating the large cam locks (2) 1/2 turn clockwise using a Phillips head screwdriver (not included).
3-Drawer Dresser DL8876-1, DL8876-1WN STEP 4 Insert large cam locks (2) into back bottom panel (G) as shown below. Insert large wood dowel (3) and barrel nut (7) into the left / right side panel as shown. Attach bottom panel (H) to the back bottom panel (G) and secure by rotating the large cam locks (2) 1/2 turn clockwise using a Phillips head screwdriver (not included). Attach bottom panel (H) to left / right side panel (B&C) with bolts (10), Use the Allen key (12) to tighten the bolts.
3-Drawer Dresser DL8876-1, DL8876-1WN STEP 6 Attach back top panel (F) to assembled unit with screws (8) as shown.
3-Drawer Dresser DL8876-1, DL8876-1WN STEP 7 Insert small cam bolts (4) into drawer front (J) and drawer back (M). Insert small wood dowels (6) into drawer front (J) as shown. Insert small cam lock to drawer left / right side panel (L&K). Attach drawer left / right side panel (L&K) to the drawer front (J) and secure by rotating the small cam locks (5) 1/2 turn clockwise using a Phillips head screwdriver (not included).
3-Drawer Dresser DL8876-1, DL8876-1WN STEP 8 Insert small wood dowels (6) into the drawer front (J), and small cam lock (5) into the drawer support bar (O) as shown. Slide the drawer bottom panel (N) into the grooves of bottom drawer left / right side panel (K&L). Attach the drawer support bar (O) to drawer front (J) by rotating the small cam locks (5) 1/2 turn clockwise using a Phillips head screwdriver (not included). Insert small wood dowel (6) into the drawer support bar (O).
3-Drawer Dresser DL8876-1, DL8876-1WN STEP 9 Insert all drawers into the assembled unit.
3-Drawer Dresser DL8876-1, DL8876-1WN CAUTION: This unit is intended for use only with the products and/or maximum weights indicated. Use with other products and/or products heavier than the maximum weights indicated may result in instability or cause possible injury. Top panel maximum weight 30 lbs. Maximum weight per drawer 15 lbs. That's it! You've finished assembling your 3-Drawer Dresser! DO NOT RETURN PRODUCT TO THE STORE. If a part is missing or damaged, contact our customer service department.
Furniture Wall Safety Strap A B C MOUNTING BRACKET 4 PCS SAFETY WALL STRAP 2 PCS LONG SCREW 2 PCS D SHORT SCREW 2 PCS TOOLS NECESSARY: RUBBER MALLET AND PHILLIPS SCREW DRIVER ARE NOT INCLUDED. NOTE: 3/8" DRILL BIT AND ELECTRIC DRILL ARE NOT PROVIDED. WARNING: WHEN UPRIGHT, IT IS POSSIBLE THAT THE FURNITURE MAY TIP OVER. PLEASE INSTALL THE SAFETY WALL STRAP BEHIND THE FURNITURE TO ENSURE SAFETY.
MANUAL DE INSTRUCCIONES Cómoda de 3 Cajones Modelo No: DL8876-1 (BLANCO) DL8876-1WN (NUEZ) CODIGO UPC: 0-65857-20990-7 (BLANCO) 0-65857-20991-4 (NUEZ) NOTA: ESTE MANUEL DE INSTRUCCIONES CONTIENE INFORMACIÓN DE SEGURIDAD IMPORTANTE. POR FAVOR LÉALO Y CONSÉRVELO PARA REFERENCIA FUTURA. Numero de lote: (TOMADO DEL CARTON) Fecha de compra: ______ / ______ / ______ NO DEVUELVA EL PRODUCTO A LA TIENDA. Si falta una pieza o está dañada, contacte nuestro departamento de servicio a la clientela.
SERVICIO A LA CLIENTELA También puede pedir piezas escribiendo a la dirección indicada abajo. Por favor incluya el número de modelo, color y una descripción detallada de la pieza. DHP Consumer Service 12345 Albert-Hudon Boulevard, Suite 100 Montreal, Quebec Canadá H1G 3L1 NOTA * Para evitar que se raye, por favor retire todo el embalaje y ármelo sobre una superficie limpia y suave. * Ensamble sobre una superficie suave, lisa para evitar daños en el acabado del producto.
Cómoda de 3 Cajones DL8876-1, DL8876-1WN ETAPA 1 Inserte los pernos de leva grandes (1) en el panel superior (A), el panel lateral izquierdo / derecho (B y C) y el panel inferior (H) como se muestra.
Cómoda de 3 Cajones DL8876-1, DL8876-1WN ETAPA 2 Inserte los bloqueos de leva grandes (2) y los pasadores de madera grandes (3) en el riel trasero / delantero (D&E) y el panel inferior trasero (G). Fije el panel lateral izquierdo / derecho (B y C) al riel posterior / delantero (D&E) y al panel inferior posterior (G) y asegúrelo girando el bloqueo de leva grande (2) 1/2 vuelta en sentido horario con un destornillador Phillips (no incluido) .
Cómoda de 3 Cajones DL8876-1, DL8876-1WN ETAPA 3 Fije las patas (I) al panel inferior (H) con los pernos (11). Use la llave Allen (12) para apretar los pernos.
Cómoda de 3 Cajones DL8876-1, DL8876-1WN ETAPA 4 Inserte los bloqueos de leva grandes (2) en el panel inferior trasero (G) como se muestra a continuación. Inserte la espiga de madera grande (3) y la tuerca cilíndrica (7) en el panel lateral izquierdo / derecho como se muestra. Fije el panel inferior (H) al panel posterior inferior (G) y fíjelo girando los bloqueos de leva grandes (2) 1/2 vuelta en sentido horario con un destornillador Phillips (no incluido).
Cómoda de 3 Cajones DL8876-1, DL8876-1WN ETAPA 5 Inserte el bloqueo de leva grande (2) y la espiga de madera grande (3) en el panel lateral izquierdo / derecho (B y C) como se muestra. Fije el panel superior (A) a la unidad ensamblada con los tornillos (9) y fíjelos girando los bloqueos de leva grandes (2) 1/2 vuelta en sentido horario con un destornillador Phillips (no incluido).
Cómoda de 3 Cajones DL8876-1, DL8876-1WN ETAPA 6 Fije el panel superior posterior (F) a la unidad ensamblada con los tornillos (8) como se muestra.
Cómoda de 3 Cajones DL8876-1, DL8876-1WN ETAPA 7 Inserte los pernos de leva pequeños (4) en la parte delantera del cajón (J) y la parte posterior del cajón (M). Inserte tacos pequeños de madera (6) en el frente del cajón (J) como se muestra. Inserte un pequeño candado de leva en el panel lateral izquierdo / derecho del cajón (L&K).
Cómoda de 3 Cajones DL8876-1, DL8876-1WN ETAPA 8 Inserte tacos pequeños de madera (6) en el frente del cajón (J), y un pequeño bloqueo de leva (5) en la barra de soporte del cajón (O) como se muestra. Deslice el panel inferior del cajón (N) en las ranuras del panel lateral izquierdo / derecho del cajón inferior (K&L). Fije la barra de soporte del cajón (O) al frente del cajón (J) girando los pequeños bloqueos de leva (5) 1/2 vuelta en sentido horario con un destornillador Phillips (no incluido).
Cómoda de 3 Cajones DL8876-1, DL8876-1WN ETAPA 9 Inserte todos los cajones en la unidad ensamblada.
Cómoda de 3 Cajónes DL8876-1, DL8876-1WN PRECAUCIÓN: Esta unidad está prevista únicamente para ser usada con los productos y el peso máximo indicados. El usarla con otros productos más pesados que el peso máximo indicado puede provocar inestabilidad y causar heridas. Top panel maximum weight 30 lbs. Maximum weight per drawer 15 lbs. ¡Listo! ¡Ya ha terminado de ensamblar la cómoda de 6 cajónes. NO DEVUELVA EL PRODUCTO A LA TIENDA.
Correa de seguridad para fijar el mueble a la pared Lista de tornillos y accesorios A B X27AO C X27AO D X27AO X27AO GANCHO DE METAL 4 PZAS CORREA DE SEGURIDAD PARA LA PARED 2 PZAS TORNILLO LARGO 2 PZAS TORNILLO CORTO 2 PZAS HERRAMIENTAS NECESARIAS: LA MASA DE CAUCHO Y EL DESTORNILLADOR PHILLIPS NO ESTÁN INCLUIDOS. NOTA: LA MECHA DE 3/8" Y EL TALADRO ELÉCTRICO NO ESTÁN INCLUIDOS. X27AO ADVERTENCIA: ES POSIBLE QUE EL MUEBLE PUEDA VOLCARSE AL ESTAR DE PIE.
MANUEL D'INSTRUCTIONS Commode 3 Tiroirs Modèle No: DL8876-1 (BLANC) DL8876-1WN (NOYER) CODE CUP : 0-65857-20990-7 (BLANC) 0-65857-20991-4 (NOYER) NOTE: CE MANUEL D'INSTRUCTIONS CONTIENT INFORMATION DE SÉCURITÉ IMPORTANTE. VEUILLEZ LE LIRE ET LE CONSERVER POUR RÉFÉRENCE ULTÉRIEURE. Numéro de lot: (SUR LA BOÎTE) Date d'achat: ______ / ______ / ______ NE RETOURNEZ PAS LE PRODUIT AU MAGASIN. Si une pièce est manquante ou endommagée, veuillez communiquer avec notre service à la clientèle.
SERVICE À LA CLIENTÈLE Vous pouvez aussi commander des pièces en écrivant à l'adresse indiquée ci-dessous. Veuillez inclure le numéro de modèle du produit, la couleur et une description détaillée de la pièce. Service à la clientèle No. 413 12345 Boulevard Albert-Hudon, bureau 100 Montréal, Québec Canada H1G 3L1 NOTES : * Veuillez vous assurer d'avoir toutes les pièces et composantes avant de commencer l'assemblage. * Monter sur une surface douce, lisse pour éviter d'endommager la finition du produit.
DRESSER À 3 TIROIRS DL8876-1, DL8876-1WN ÉTAPE 1 Insérez les gros boulons à came (1) dans le panneau supérieur (A), le panneau latéral gauche / droit (B & C) et le panneau inférieur (H), comme indiqué.
DRESSER À 3 TIROIRS DL8876-1, DL8876-1WN ÉTAPE 2 Insérez les grandes serrures à came (2) et les grosses chevilles en bois (3) dans le rail arrière / avant (D & E) et le panneau inférieur arrière (G). Fixez le panneau latéral gauche / droit (B & C) au rail arrière / avant (D & E) et au panneau inférieur arrière (G) et fixez-le en tournant le grand verrou à came (2) d'un demi-tour dans le sens des aiguilles d'une montre à l'aide d'un tournevis cruciforme (non fourni) .
DRESSER À 3 TIROIRS DL8876-1, DL8876-1WN ÉTAPE 3 Fixez les pieds (I) au panneau inférieur (H) avec les boulons (11). Utilisez la clé Allen (12) pour serrer les boulons.
DRESSER À 3 TIROIRS DL8876-1, DL8876-1WN ÉTAPE 4 Insérez les gros verrous à came (2) dans le panneau inférieur arrière (G), comme indiqué cidessous. Insérez le grand goujon en bois (3) et l’écrou à tonneau (7) dans le panneau latéral gauche / droit, comme indiqué. Fixez le panneau inférieur (H) au panneau inférieur arrière (G) et fixez-le en faisant pivoter les grands verrous à came (2) d'un demi-tour dans le sens des aiguilles d'une montre à l'aide d'un tournevis cruciforme (non fourni).
DRESSER À 3 TIROIRS DL8876-1, DL8876-1WN ÉTAPE 5 Insérez le grand verrou à came (2) et la grande cheville en bois (3) dans le panneau latéral gauche / droit (B & C), comme indiqué.
DRESSER À 3 TIROIRS DL8876-1, DL8876-1WN ÉTAPE 6 Fixez le panneau supérieur arrière (F) à l'unité assemblée à l'aide des vis (8) comme indiqué.
DRESSER À 3 TIROIRS DL8876-1, DL8876-1WN ÉTAPE 7 Insérez les petits boulons à came (4) dans le tiroir (J) et le tiroir (M). Insérez de petites chevilles en bois (6) dans le devant du tiroir (J) comme indiqué. Insérez le petit verrou à came dans le panneau latéral gauche / droit du tiroir (L & K).
DRESSER À 3 TIROIRS DL8876-1, DL8876-1WN ÉTAPE 8 Insérez de petites chevilles en bois (6) dans le devant du tiroir (J) et un petit verrou à came (5) dans la barre de support du tiroir (O), comme indiqué. Faites glisser le panneau inférieur du tiroir (N) dans les rainures du panneau latéral gauche / droit du tiroir inférieur (K & L).
DRESSER À 3 TIROIRS DL8876-1, DL8876-1WN ÉTAPE 9 Insérez tous les tiroirs dans l'unité assemblée.
DRESSER À 3 TIROIRS DL8876-1, DL8876-1WN ATTENTION: Cette unité est conçue pour être utilisée seulement avec les produits et/ou les poids maximum indiqués. L'utilisation avec d'autres produits et/ou des produits plus lourds que les poids maximum indiqués peut entraîner de l'instabilité et causer des blessures. Top panel maximum weight 30 lbs. Maximum weight per drawer 15 lbs. Voilà! Vous avez terminé d'assembler votre commode 6 tiroirs. NE PAS RETOURNER LE PRODUIT AU MAGASIN.
Sangle de sécurité pour ancrer le meuble au mur Liste de quincaillerie A B CROCHET DE MÉTAL 2 PCES C X40AO SANGLE DE SÉCURITÉ POUR LE MUR 2 PCES X40AO D VIS LONGUE 2 PCES X40AO VIS COURTE 2 PCES OUTILS NÉCESSAIRES: LE MAILLET EN CAOUTCHOUC ET LE TOURNEVIS PHILLIPS NE SONT PAS COMPRIS. NOTE: LA MÈCHE DE 3/8" ET LA PERCEUSE ÉLECTRIQUE NE SONT PAS FOURNIES. X40AO AVERTISSEMENT: LORSQUE DEBOUT , IL EST POSSIBLE QUE LE MEUBLE PUISSE BASCULER.