
How to Guide

page 4 | Retractable Awning Installation & Operation Manual
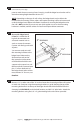
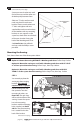
2. Basic Tools Required
3. Wall Mount Installation
A. Drill with Impact, if possible
B. 1/4” Drill Bit
C. 9/16” Socket
D. Level
E. Caulking and a Caulking Gun
F. Tape Measure
G. Sturdy Ladders
H. Adjustable Wrench
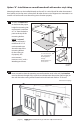
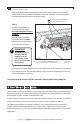
House Preparation:
Inspect the surface on which the awning will be mounted. Be sure you have a clear span with no
light xtures, downspouts or other obstructions.
Sight the wall surface to be sure there are no bows or sweeps in the wall. If there are, shimming
the mounting brackets or ledger board will be required at time of installation.
Since the awning weighs 8-12 pounds per linear foot, it is important to install the mounting
brackets securely to support the weight of the awning when extended. It is critical that the
mounting lag bolts be installed into a stud or ledger board. Plywood sheathing or equivalent will
NOT support the awning.
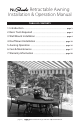
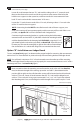
Awning Installation:
For wall mount installation, there are two options available. Choose the one that best ts your
desired application:
Option “A”: If mounting on a wood framed wall with wood or vinyl siding.
Option “B”: If mounting over stucco, veneers or uneven surfaces.
NOTE: Installations directly over smooth structural concrete use Option “A”, changing the
mounting fasteners to those listed in Option “M” (at top of page 8).
Additional tools needed for:
Weatherguard Cover:
I. 13mm Socket
J. #2 Phillips Screwdriver
K. 3/16” Allen Wrench
Roof Mount Kit:
L. 3/8” Drill Bit
M. 9/16” Wrench
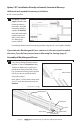
!
IMPORTANT!
If you have chosen the Roof Mount option, please refer to the installation
instructions in Section 4 on page 10 of this manual now.