
Installation Guide


INSTALLATION INSTRUCTIONS
READ & SAVE THESE INSTRUCTIONS!
®
MAKING THE CUTOUT
1. Locate wall inlet 18" on-center from the floor.
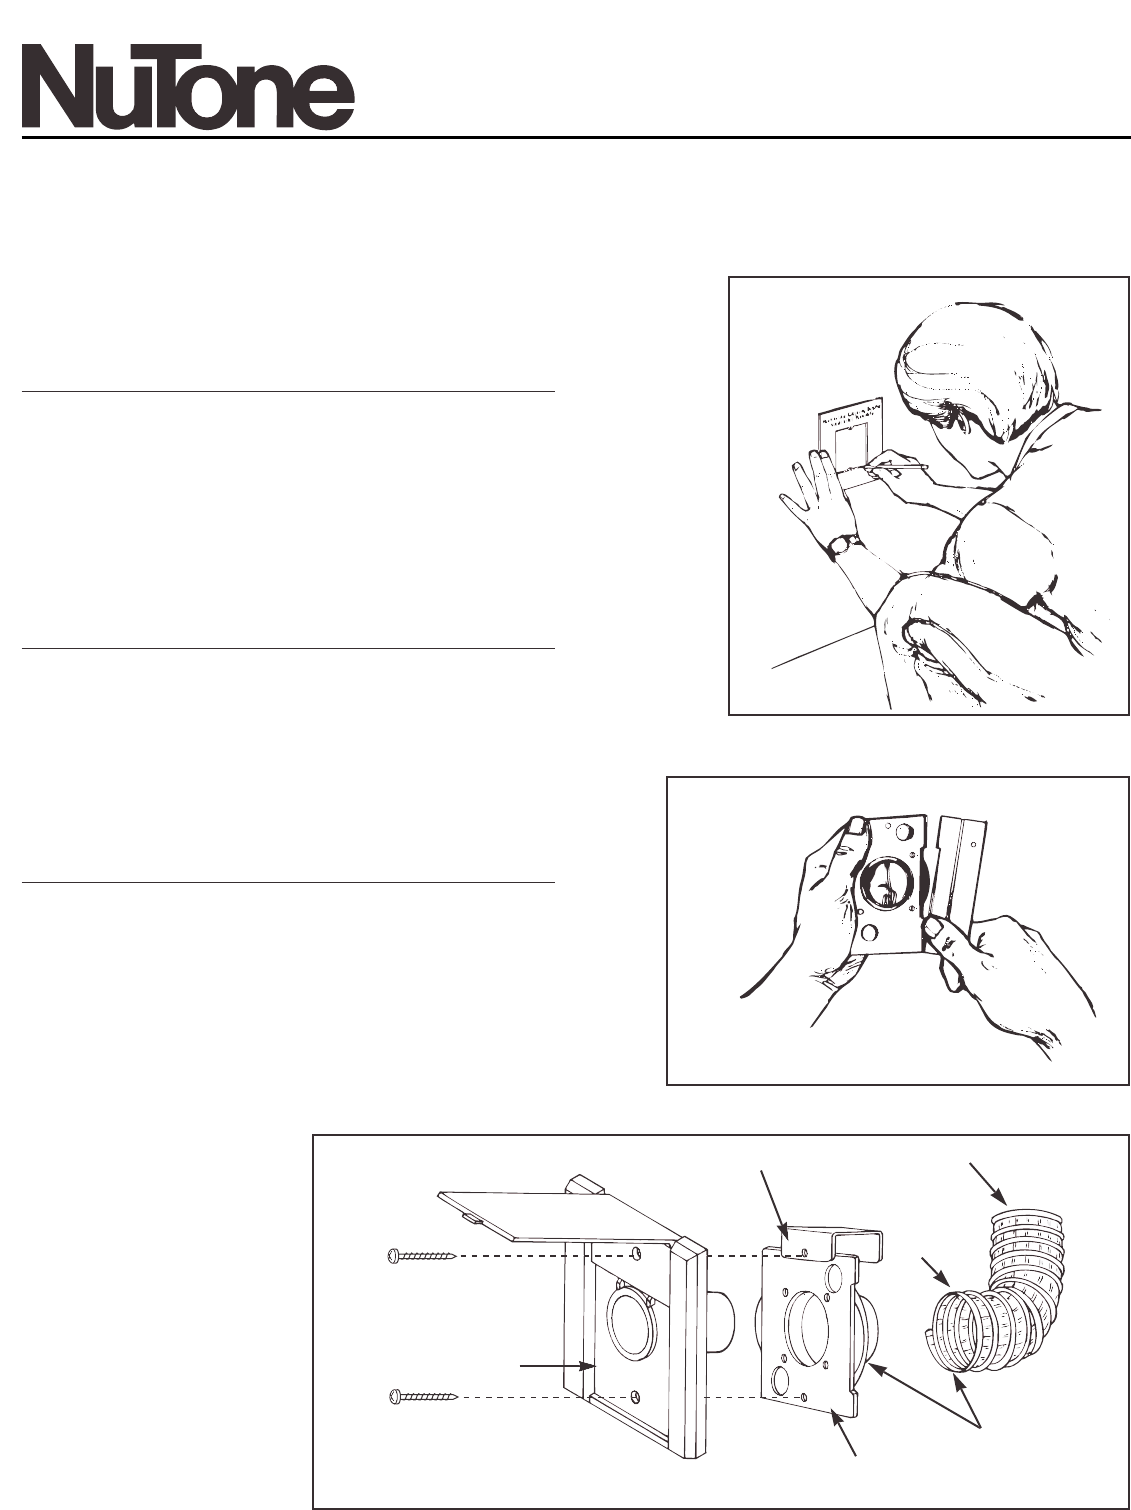
2. Refer to Figure 1. Use the enclosed template to mark the
wall for the cutout. Mark screw hole locations through
punched holes in top and bottom of the template.
3. Drill two 3/8" diameter holes at top and bottom as marked
with template.
4. Make cutout in wall. make sure to cut along inside of
marked line.
ATTACHING THE MOUNTING PLATE
1. Refer to Figure 2. Remove nail flange from inlet mounting
plate.
2. Pull flexible tubing through cutout.
3. Apply cement to both the inside of the flexible tubing and
the outside of the mounting plate's tube ring.
4. Attach mounting plate to flexible tubing and allow
5 minutes for cement to completely dry.
COMPLETING INLET ASSEMBLY
1. Pull low voltage wiring through top hole in mounting plate.
2. Connect low voltage wires to terminal screws on inlet
cover.
3. Refer to Figure 3. Assemble inlet cover to tube guard and
mounting plate.
4. Insert the top screw through the entire inlet assembly until
screw engages mounting plate.
Wall Inlet Kit
MODEL: 326N
For use in installing a Central Cleaning Wall Inlet
in existing construction.
FIGURE 1
FIGURE 2
FIGURE 3
FLEX TUBE ATTACHED
TO INLET TUBING
THREADED THROUGH
WALL
CEMENT OUTSIDE OF
MOUNTING PLATE
RING AND INSIDE OF
FLEX TUBE
FLEXIBLE
TUBING
TUBE GUARD
MOUNTING PLATE
INLET COVER