
Home Theater Server User Manual
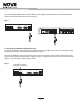
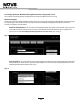
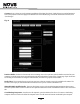
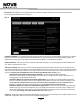
Table Of Contents
- 1: Cover
- 2: Blank
- 3: FCC Warning
- 4: English warning page
- 5: French warning page
- 6: Table of contents
- 7: Wiring Diagram
- 8: Front Panel callouts
- 9: back panel callouts
- 10: NuVoNet installation
- 11: Accessing remote config
- 12: LAN LED
- 13: Accessing remote config
- 14: Setting up the NV-MPS4
- 15: Sources
- 16: Online credentials
- 17: Firmware
- 18: Sync Tool
- 19: Summary
- 20: Other content
- 21: Advanced tab
- 22: Specs
- 23: Blank
- 24: Back Page
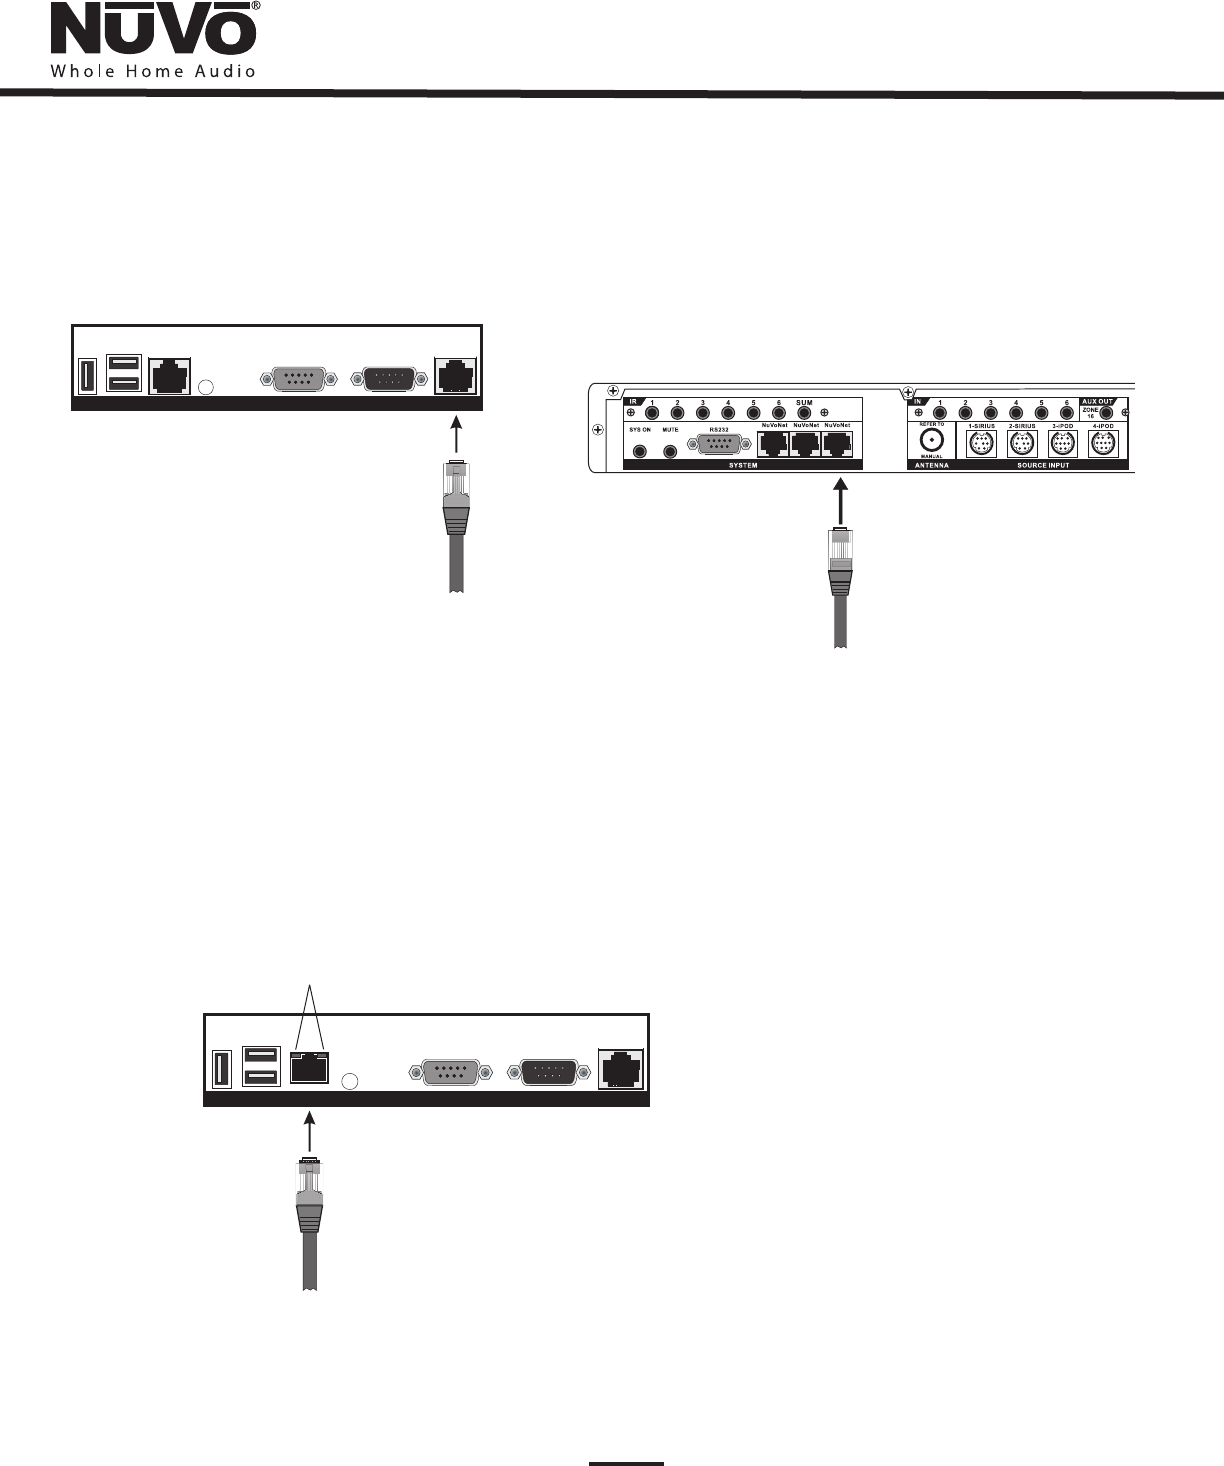
If you are installing the Music Port Server with a Renovia System, plug the CAT5 directly into one of the three “NuVoNet”
inputs on the back panel of the Renovia Source Hub, Fig. 3.
USB
USB
RS232
RS232
ETHERNET
Passthrough
To NuVo
NuVoNet
SYSTEM
Fig. 3
Fig. 4
II. Accessing the Remote Configuration Tool
The Remote Configuration Tool is a quick, easy setup for the operation of the Music Port Server. Once configured, it will be
fully operational with any of the NuVoNet Audio Distribution Systems.
Make sure the NV-MPS4 is plugged in, powered on, and connected to the home’s router through its “Ethernet” port. A live
Internet connection will cause the port LED’s to light green, Fig. 4. It is suggested that you use the white CAT5 cable for this
purpose to avoid confusing it with the NuVoNet cables.
USB
USB
RS232
RS232
ETHERNET
Passthrough
To NuVo
NuVoNet
SYSTEM
Green LED’s indicate a
live Ethernet connection
7