
User Manual


2. Go to Start › Control Panel › Programs and Features.
If you have an NVIDIA graphics card, double click NVIDIA
Drivers.*
a) Select the option Remove only the following.
b) Select NVIDIA Display Driver
c) Click Remove
d) Restart your computer
* If you are replacing a non NVIDIA graphics card, be sure to remove the
graphics driver and power down your system to replace the card before
continuing. Replace the card with a supported NVIDIA GeForce card.
Installing the Drivers and Software
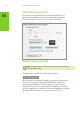
3. Insert the 3D Vision Software and Manual CD.
The Software Installation screen is displayed.
4. Select Install GeForce Graphics driver.
The InstallShield Wizard begins to guide you through the
installation.
5. Select Yes, I want to restart my computer now when prompted.
When your system reboots, the 3D Vision Software Installation
automatically restarts to continue the install. (If for any reason the
software does not restart, go to My Computer and double click on
the CD icon to relaunch the installer.)
6. Select Next to install the 3D Vision driver.
If you would like to have a shortcut to the NVIDIA Stereoscopic 3D
Viewer installed on your desktop, check the box.
7. Select Next to continue.
If you receive the warning box below, select Install to continue.
8. Select Finish to complete the installation.
After completing the driver installation, the 3D Vision Setup
Wizard begins when the InstallShield completes. 3D Vision
Notebook users should click on the desktop shortcut Setup
NVIDIA 3D Vision to begin the Setup Wizard. The Setup Wizard
takes you through installing the IR emitter, setting up your display,
and configuring the wireless glasses.
9. Complete the 3D Vision Setup Wizard.
Note the Status Bar across the top of each screen. This tells you
where you are in the Setup.