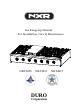
Gas Rangetop Manual For Installation, Care & Maintenance NKT3055 NKT3611 DURO Corporation NKT4811
Thank you for purchasing your NXR professional Rangetop. We appreciate your business and we recommend that you read this entire user’s manual before operating your new appliance for the first time. This manual contains instructions on how to properly install and set up your new rangetop, as well as insights into many of the unique features that our product offers. Please keep this manual for future reference, as it contains the answers to questions that you might have as you begin to cook.
Contents Safety Instructions ……………………………………………………………. 4~7 Installation Instructions ………………………………………………………. 8~15 Rangetop Operation …………………………………………………………… 16~18 Griddle Operation …………………………………………………………….. 19 Care & Cleaning ……………………………………………………………… 20 Troubleshooting ………………………………………………………………. 21 Warranty & Product Registration ……………………………………………..
SAFETY INSTRUCTIONS Definitions This is a safety alert symbol. It will alert you to potential personal or property safety hazards. Obey all safety messages to avoid any property damage, personal injury or death. WARNING indicates a potentially hazardous situation which, if not avoided, could result in serious injury or death. CAUTION CAUTION indicates a moderate hazardous situation which, if not avoided, could result in minor or moderate injury.
SAFETY INSTRUCTIONS What to do if you smell gas? Do not try to light any appliance. Do not touch any electrical switch. Do not use any phone in your residence. Immediately call your gas supplier from a neighbor' s phone. Follow the gas supplier' s instructions. If you cannot reach your gas supplier, call the fire department. IMPORTANT The installation and service of your rangetop product must be performed by a licensed installer, an approved service agency or your gas supplier.
SAFETY INSTRUCTIONS ! WARNING! Explosion Hazard If you smell gas, do not use the appliance. Open a window or door to let the gas escape, then follow the instructions on the inside front cover of this manual. Do not use water on grease fires. A violent steam explosion may result. Turn all burners off, then smother fire or flame or use dry chemical or foam-type extinguisher. Do not heat unopened food containters such as cans ¨C Build-up of pressure may cause container to burst and result in injury.
SAFETY INSTRUCTIONS Do not store or use gasoline, liquid propane cylinder or other flammable vapors and liquids in the vicinity of this appliance. The installation and service of your rangetop must be performed by a qualified installer, an approved service agency or the gas supplier. Gas appliances can cause minor exposure to four of these substances, namely benzene, carbon monoxide, formaldehyde and soot, caused primarily by the incomplete combustion of natural gas fuel.
INSTALLATION AND OPERATION INSTRUCTIONS To ensure proper and safe operation, read all instructions before using the product. Install or locate the product only in accordance with the provided Installation Instructions. All servicing should be performed to a qualified technician. Do not attempt to adjust, repair, service or replace any part of your appliance unless it is specifically recommended in this guide. Do not use the appliance for warming or heating the room.
INSTALLATION INSTRUCTIONS IMPORTANT K eep appliance area clear and free from combustible materials, gasoline, and other flammable vapors. Gas Supply Requirements Installation of this rangetop must conform with local codes, or in the absence of local codes, the National Fuel Gas Code, ANSI Z223.1 / NFPA 54. In Canada, installation must conform to the current natural Gas Installation /code, CAN 1-1.1-M81 and with local codes where applicable. This range has been design-certified according to ANSI Z21.
INSTALLATION INSTRUCTIONS Dimensions and Clearances The rangetop may be installed flush to the rear wall. You may install a non- combustible material on the rear wall above the cooktop and up to the vent hood. It is not necessary to install non-combustible materials behind the rangetop below the counter top height. The minimum distance from the side of the rangetop above the counter top to combustible sidewalls must be at least 10 inches. INSTALLATION INSTRUCTIONS 26.
36" .7" 26 7.5" " .7 26 48" 7.
Installation Dimensions and Clearances Cabinet tolerances ± 1/16" (± 1.6 mm) unless otherwise noted. 1 1/2”" (3.8 cm) typical countertop thickness 10”" (25.4 cm) to combustible side wall min. both sides B 7 1/2" (19 cm) Recommended gas and electrical service location, consult local code Mounting platform 1" (2.5 cm) min. thickness 36" (91.4 cm) typical Cabinet/Countertop Dimensions - Front View 13" (33.0 cm) max. 3 Rangetop Model C B NK T3055 30" (76.2 cm) NK T3611 36" (91.
Cabinet/Countertop Dimensions (cont.) Cabinet tolerances ±1/16" (±1.6 mm) unless otherwise noted. 23.7" (60.2 cm) Cabinet face Installed control panel overhang 1/7/10" (4.35 cm) Gas and electrical connections at right rear section of chassis Countertop Mounting platform Installed Rangetop - Side View Gas connection and power cord may be routed through bottom or back of chassis Increase countertop and overhang additional 2 1/2" (6.4 cm) min.
INSTALLATION INSTRUCTIONS Installation Electric Power Supply Requirements Your cooktop must be electrically grounded in accordance with local codes or, in the absence of local codes, in accordance with the National Electrical Code (ANSI/NFPA 70, latest edition). In Canada, electrical grounding must be in accordance with the current CSA C22.1 Canadian Electrical Code Part 1 and/or local codes.
Connect Rangetop to Gas Supply • Install a manual gas line shut-off valve in the gas line in an easily accessed location outside the cooktop in the gas piping external to the appliance for the purpose of turning on or shutting off gas to the appliance. • Install male 1/2" flare union adapter to 1/2" NPT internal thread elbow at inlet of regulator.
RANGETOP OPERATION Surface Burner Ignition Push to release gas. Turn to Ignite and ‘Hi’ position. Adjust to appropriate flame height. To light the surface burners, push and turn the appropriate control knob counter clockwise to a “Hi” position. You will hear a clicking noise – the sound of the electric spark igniting the burner. Once burner ignition has been achieved, turn the burner control knob to adjust the flame size. If the knob stays at “Hi”, it will continue to click.
Rangetop Operation Simmer and Boil • A smaller flame will give the best simmer results. Small flames offer precise cooking performance for delicate foods, keeping food warm, melting chocolate or butter, and for cooking that need to cook over low heat for a long time. • The highest (larger) flame settings provide the maximum heat that is available on your range. This setting should be used for heavy cooking loads such as water boiling and pasta cooking.
Rangetop Operation ! WARNING FOOD SAFETY According to the United States Department of Agriculture: DO NOT hold foods at temperatures between 40oF to 140oF more than 2 hours. Cooking raw foods below 275oF is not recommended. Burner Grates 1. The grates must be properly positioned before cooking. Improper installation of the grates may result in scratching of the cooktop and / or poor combustion. 2.
Griddle Operation Before Using the Griddle 1. Clean the griddle thoroughly with warm, soapy water to remove dust or any protective coating. 2. Rinse with clean water and wipe off to dry with soft, clean, lint-free towel/cloth. 3. A stainless steel cover that is sized to fit on top of the surface when the griddle is not being used is provided. Please note – the cover must be removed before turning the griddle on. 4. Make sure the grease tray is under the front edge of the griddle.
Care and Cleaning Rangetop • To avoid electrical shock or burns, turn off all controls and ensure the rangetop is cool before cleaning. • Before cleaning the rangetop, ensure that all burners are turned off and that all components are cool enough to safely touch. • Do not use harsh or abrasive cleaning agents, waxes, polishes, or commercial rangetop cleaners to clean the rangetop. • Use only a sponge, soft cloth, fibrous or plastic brush, and nylon pad for cleaning.
Troubleshooting Before you call for service, please review the potential problem / possible causes and remedies shown in the table below. Have rangetop connected to a properly electrical power supply by a Rangetop is not connected to the electrical sized qualified electrician. power. Nothing works Power supply is not energized. Have an electrician check the power supply, including the house circuit breaker, wiring and fuses Plug on range is not completely inserted in the electrical outlet.
Manufacture’s Limited Warranty This Product has been manufactured by Duro Corporation,17018 Evergreen Place, City of Industry, CA 91745. Duro Corporation disclaims all express warranties except for the following: This warranty applies to products purchased and located in the United States. Products purchased or located outside these areas are excluded.
6. Service to instruct you on how to use your rangetop to correct house wiring, replace or repair house fuses. Service to correct the installation of your rangetop. 7. Repairs when your rangetop is used for other than normal, single - family household use or when it is used in a manner that is contrary to published user or operator instructions and/or installation instructions. 8.
Warranty and Product Registration Duro is not responsible for incidental or consequential damages. Under no circumstances will Duro’s liability exceed the cost that you paid for the product. Some provinces/states do not allow the exclusion or limitation of incidental or consequential damages, so the above limitation or exclusion may not apply to you. This warranty gives you specific legal rights, and you may also have other rights that vary from state to state.