User Guide Version: 1.4.
User Guide Version 1.4.2 Last Revision: 2016-06-30 Objectif Lune, Inc. 2030 Pie-IX, Suite 500 Montréal, QC, Canada, H1V 2C8 +1 (514) 875-5863 www.objectiflune.com All trademarks displayed are the property of their respective owners. © Objectif Lune, Inc. 1994-2016. All rights reserved. No part of this documentation may be reproduced, transmitted or distributed outside of Objectif Lune Inc. by any means whatsoever without the express written permission of Objectif Lune Inc. Inc. Objectif Lune Inc. Inc.
Table of Contents Table of Contents 4 Welcome to PlanetPress Connect 1.4.
Building Float Values 169 Defining Currency Values 169 Building Currency Values 170 Defining Date Values 170 Defining Object Values 171 The Designer 174 API 174 Basic Steps 218 Features 220 Designer User Interface 452 Mark Position Options 538 Additional Text 543 Additional Images 543 Additional Barcodes 544 Additional OMR Marks 544 Additional Text Settings 546 Additional Image Settings 547 Barcode Options 548 Standard Barcode Settings 548 Page 5
Codabar Settings 550 Code 128 Settings 552 Code 39 Settings 554 Additional Datamatrix Settings 556 Additional EAN 128 Settings 558 Additional EAN 13 Settings 559 Additional EAN 8 Settings 561 Additional Interleave 2 of 5 Settings 563 Additional PDF417 Settings 565 Additional QR Code Settings 567 Additional UPC A Settings 569 Additional UPC E Settings 571 Additional OMR Mark Settings 573 Keystore 578 PDF Signature 580 Copyright Information 601 Legal Notices and Acknowledgement
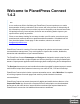
Welcome to PlanetPress Connect 1.4.2 Note In our continuous effort to facilitate your PlanetPress Connect experience, our entire documentation is being overhauled. Since we are still in the process of restructuring all this information, expect to see our online help evolve frequently over the next few weeks. We apologize for any inconvenience, but know we are working hard to improve your experience as quickly as possible.
This online documentation covers PlanetPress Connect version 1.4.2. Icons used in this guide Icons are used throughout this guide to point your attention to certain information. Note Complementary information that is not critical, but may help you better use PlanetPress Connect. Tip Information that is useful or suggests an easier method. Technical Information that may require specific knowledge to understand. Warning Information that is potentially critical to using PlanetPress Connect.
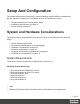
Setup And Configuration This chapter describes the PlanetPress Connect installation and the different considerations that are important in regards to the installation and use of PlanetPress Connect. l l l "System and Hardware Considerations" below "Installation and Activation" on page 16 "Server Settings" on page 37 System and Hardware Considerations There are a variety of considerations to be aware of.
PlanetPress Connect. Minimum Hardware Requirements l l l l NTFS Filesystem (FAT32 is not supported) CPU Intel Core i7-4770 Haswell (4 Core) 8GB RAM (16GB Recommended) Disk Space: At least 10GB (20GB recommended) Note For tips and tricks on performance, see "Performance Considerations" on page 13.
Terminal Server/Service PlanetPress Connect does not support Terminal Server (or Terminal Service) environment as possible under Windows 2000, 2003 and 2008. This is to say, if Terminal Service is installed on the server where PlanetPress Connect is located, unexpected behaviours may occur and will not be supported by Objectif Lune Inc.. Furthermore, using PlanetPress Connect in a Terminal Service environment is an infringement of our End-User License Agreement.
Database Considerations This page describes the different considerations and pre-requisites for the database back-end used by PlanetPress Connect, whether using the MySQL instance provided by the installer, or pre-existing instance. Using the MySQL Instance from the Installer The MySQL Instance provided in the Installation Wizard is already pre-configured with options to provide the most stable back-end setup. These are the specific options that have been changed in our version of "my.
l If a local proxy is configured (in the Internet Explorer Optionsdialog, the option Bypass proxy server for local addresses must be checked, or some features depending on local communication will not work. Language and Encoding considerations Please note the following considerations: l Language: l PlanetPress Connect is currently offered in several languages. These languages can be switch between via the Preferences dialog.
performance from PlanetPress Connect before looking into hardware upgrades or extra PlanetPress Connect performance packs. l Job Sizes and Speed: In terms of pure output speed, it's important to first determine what job size is expected, and adjust Scheduling Preferences accordingly. The basic rules are: l l l l RAM Configuration: By default, each instance of the Merge Engine and Weaver Engine is set to use 640MB of RAM.
l l l l l Preprocessor and Postprocessor scripts: manipulating data using a script may cause delays before and after the data mapping action has actually taken place, especially file conversion and data enrichment from other sources. Loading external and network resources: In Designer, using images, javascript or css resources located on a slow network or on a slow internet connection will obviously lead to a loss of speed.
l 4 or 8 physical cores. We're not talking Hyper-Threading here, but physical cores. Hyper-Threading is great with small applications, but the overhead of "switching" between the virtual cores, and the fact that, well, they're virtual, means the performance is much lesser on high-power applications such as OL Connect. In short, a dual-core processor with Hyper-Threading enabled is not equivalent to a quad-core processor.
l l l PlanetPress requires Microsoft .NET Framework 3.5 already be installed on the target system. In order to use the automation feature in Version 1.4.2, you need to install PlanetPress Workflow 8. This can be installed on the same machine as an existing PlanetPress® Suite 7.6 installation or on a new computer. For more information, please see Information about PlanetPress Workflow 8. As with any JAVA application, the more RAM available, the faster the product will execute. Users of Connect 1.
Also see "Users of Connect 1.1" on the previous page for extra information about updating from that version. Installing PlanetPress Connect on Machines without Internet Access In order to install PlanetPress Connect it is necessary for the GoDaddy Root Certificate Authority to be installed (G2 Certificate) on the host machine and for this to be verified online.
Note PlanetPress Connect requires prior installation of Microsoft .NET Framework 3.5 (please refer to https://www.microsoft.com/en-us/download/details.aspx?id=21 for more details). Selecting the required components After clicking the Next button, the component selection page appears, where the different components of PlanetPress Connect can be selected for installation. Currently, the following are available: l l l l PlanetPress Connect Designer: The Designer module.
End User License Agreement The next page displays the End User License Agreement, which needs to be read and accepted before clicking Next. MySQL Configuration The Default Database Configuration page only appears if the MySQL Product module was selected in the Product Selection screen. It defines the administrative password for the MySQL server as well as which port it uses for communication. Note that the installer will automatically configure the Server to use the supplied password and port.
from any other machine. It is also required if MySQL is on a separate machine than PlanetPress Connect. Note The last option may represent a security risk if the machine is open to the internet. It is recommended to ensure your firewall blocks access to port 3306 from external requests! The Database Connection page appears if the MySQL Product module was not selected. It defines the necessary information required to connect to an existing database.
l l l l Username: The username the service uses to login. If the machine is on a domain, use the format domain\username. Password: The password associated with the username. Validate user button: Click to verify that the entered username and password combination is correct and that the service is able to login. This button must be clicked and the user validated before the Next button becomes available. Click Next to start the actual installation process. This process can take several minutes.
l It can be uninstalled via Control Panel | Programs | Programs and Features. Product Activation After installation, it is necessary to activate the software. See Activating your license for more information. Technical Before activating the software, please wait 5 minutes for the database to initialize. If the software is activated and the services rebooted too quickly, the database can become corrupted and require a re-installation.
server.runas.password = admin # Database configuration database.type = mysql database.host = 192.168.116.10 database.port = 3308 database.username = root database.password = admin database.schema = my_ol Verbose Logging (Optional) By default, the Silent Installer will log in the same way as the GUI installer. That means logging of error and warnings, and certain information during database configuration. A more verbose logging can be switched on by using logging.verbose = true.
l l l l l server.master.host server.master.port server.master.authenticate = true_or_false server.master.username server.master.password Database configuration If the MySQL Product is part of the installation, the following properties should be defined: l l l database.type = mysql (required) database.password (required, needs to match the security rules) database.port (optional, the default is 3306. The defined port needs to be available.
l l l l When uninstalling PlanetPress Workflow 8, you may be prompted to repair your legacy PlanetPress® Suite 7.x installation. If PlanetPress Workflow 8 has been installed alongside PlanetPress® Suite 7, Capture can no longer be used with Workflow 7. The plugins are now registered uniquely to Workflow 8 and the messenger for Workflow 7 is taken offline. It is only then possible to use Capture from PlanetPress Workflow 8.
l When the application opens, if it has never been activated or the activation has expired, the Software Activation dialog appears: l License Information section: l l l Licensed Products section: l l l l l l l l l Name: Displays the name of the application or module relevant to this activation. Serial Number: Displays the activation serial number if the product has been activated in the past.
l l Customersmust submit their Magic Number and serial number to Objectif Lune via the Web Activations page: http://www.objectiflune.com/activations. The OL Customer Care team will then send the PlanetPress Connect license file via email. Resellerscan create an evaluation license via the the Objectif Lune Partner Portal by following the instructions there: http://extranet.objectiflune.com/ Note that if you do not have a serial number, one will be issued to you by the OL Activations team.
l Click Install License to activate the license. The license will then be registered on the computer and you will be able to start using the software. After installation message will appear warning that the Server services will need to be restarted. Just click OK to proceed. Migrating to a new computer Currently there are no special migration tools to move data from one PlanetPress Connect installation to another.
The Importance of User Credentials on Installation and Running OL Connect and required credentials depends heavily on the Connect component and respective tasks and what sort of user credentials are needed. First of all, it is important to distinguish between installation and run-time Installation The Connect installer puts all required files, folders, registry entries and much more to their correct places and locations.
computers and, where appropriate, internet resources, URLs, mail servers, FTP servers, database servers and everything else planned to be used for the intended operation of Connect. The Server user is the run-time user. Connect Components Usually, a standard end user will only be facing Connect Designer and maybe the License Activation Tool. Designer this does not require administrator rights.
This migration benefits existing users in many ways and has limited impact on their current processes and how they use PlanetPress Suite version 7 and 6. This document provides information on the migration process and the requirements and considerations for existing PlanetPress Suite users to upgrade to the latest generation of our products. PlanetPress Connect Print-Only is available for existing users of PlanetPress version 7 or 6 with a valid OL Care agreement.
You can keep everything you have The first thing to know is that you can keep your current PlanetPress Workflow 7 configuration and your PlanetPress Design documents. When upgrading to PlanetPress Connect, they will remain functional. Please note that PlanetPress Workflow 7 and PlanetPress Workflow 8 cannot run at the same time. See Information about PlanetPress Workflow 8 for information about these limitations.
What do I gain by upgrading to PlanetPress Connect? PlanetPress Watch users When upgrading to PlanetPress Connect, you receive key features of PlanetPress Office such as the following: l l l l Ability to input data from PDF Ability to print your PlanetPress Suite documents on any Windows printer (no need for printer licenses) Ability to create standard PDF output from your PlanetPress Suite documents Even if you don’t recreate your existing PlanetPress Suite documents, you can easily change your workflow
Create new documents and integrate them into your workflow at your own pace You can start benefiting from the innovative technology of the new PlanetPress Connect Designer right away by designing new documents, or re-doing existing ones at your own pace.
help importing all those settings, if you wish to import them. 4. To launch the Upgrade wizard, open the PlanetPress Workflow 8 configuration tool and, from the Tools menu, launch the Upgrade Wizard. IMPORTANT: Before you start this process, make sure you have a backup of your current installation/computer. 5. Then select your upgrade type: 6. Then select the product from which you wish to upgrade: 7. If you selected to do a Custom upgrade, select the required options: 8.
PlanetPress Workflow 8 to which you want to send the PlanetPress Design document. Server Settings This chapter describes the different considerations that are important in regards to the use of PlanetPress Connect Server. l l "Server Security Settings" below "Server Extension Settings" below Server Security Settings This dialog controls the security settings for external applications connecting to the PlanetPress Connect Server, such as PlanetPress Workflow or scripts communicating through the REST API.
The Preferences dialog is separated into individual pages, where each page controls certain aspects of the software.
MySQL modules, the MySQL instance configured (steps 2-4 above) then the master and other slaves can be installed. The remainder of the instructions remain the same. It is also possible to setup clustering with MySQL being installed completely separately from PlanetPress Connect, such as using an existing MySQL instance. In this case, the instructions for the bind address must be followed, but the user does not have to be root.
l l In the Scheduling Preferences of the Slave, both "Maximum Records" are ignored. Scheduling is handled by the Master. The "Expected Remote Merge Engine" and "Expected Remote Weaver Engine" in Merge Engine Scheduling and Weaver Engine Scheduling respectively, on the Master, should each equal the total number of engines in all the slaves combined. l l l l For example, the Expected Remote Merge Engine on the Master should equal the total of "Local Engines Launched" for each slave.
DataMapper Module The DataMapper Module is a tool that helps in the preparation of data for a unified data model. You can then use that Data Model in the Designer module. The tool does this through the use of a data mapping workflow consisting of multiple steps which extract data from each Source Record of a Data Source and places this data in a Data Model. This Data Model contains all the necessary information for the creation of a template in the Designer module.
Data Mapping Configuration A Data Mapping Configuration file can refer to either the current active configuration in the DataMapper, or a file on disk containing the information necessary for data mapping. It contains the extraction workflow (steps), Delimiter and Boundary Settings, and any imported Data Samples.
From a File You can create a new data mapping configuration manually under the From a file section. As opposed to using a wizard, you must configure all settings in the Settings pane of the DataMapper interface. Please refer to Configuring Settings For The Data Source for more information. A CSV File To create a Data Mapping from a CSV file, use the following steps: From the Welcome screen 1.
From the File menu 1. Click the File menu and select New. 2. Click the Data mapping Configuration drop-down and select Files and then Microsoft Access. 3. Click Next. 4. Click the Browse button and open the database file you want to work with. 5. Enter the password if needed and click Next. A PDF File To create a PDF/VT file data mapping configuration, use the following steps: From the Welcome screen 1.
From the Welcome screen 1. Open the PlanetPress Connect Welcome page by clicking the icon at the top right or select the Help menu and then Welcome. 2. Click Create a New Configuration. 3. From the From a file section, select Text. 4. Click the Browse button and open the text file you want to work with. 5. Click Finish to close the dialog and open the actual Data Mapping configuration). From the File menu 1. 2. 3. 4. 5.
Using a Wizard The Data Mapping Wizard simplifies extracting records. When using a Data Mapping Wizard, all the fields are automatically extracted inside the record. The Data Mapping Wizard also preconfigure the settings and boundaries of the data source using common values. For A CSV File To create a Data Mapping from a CSV file using the wizard, use the following steps: From the Welcome screen 1.
From the File menu 1. Click the File menu and select New.Click the Data mapping Data mapping Wizards drop-down and select From CSV File. 2. Click Next. 3. Click the Browse button and open the CSV file you want to work with. l l Take a look at the Preview box content to ensure that the file is the right one and the encoding correctly reads the data. Click Next. 4. From the Select a CSV Configuration dialog, choose the proper settings: Note These settings are generally detected automatically.
4. Use the drop-down to select the Database type. 5. Click Next. From the File menu 1. Click the File menu and select New.Click the Data mapping Data mapping Wizards drop-down and select From databases. 2. Click Next. 3. Use the drop-down to select the Database type. 4. Click Next. Now set the following properties according to the selected database: MySQL l l l l l l l l Server: Enter the server address for the MySQL database. Port: Enter the port to communicate with the MySQL server.
l l l l l l l l Server: Enter the server address for the SQL Server database. Port: Enter the port to communicate with the SQL Server server. The default port is 3306. Database name: Enter the exact name of the database from where the data should be extracted. User name: Enter a user name that has access to the SQL Server server and specified database. The user only requires Readaccess to the database. Password: Enter the password that matches the user name above.
Since JDBC can connect to multiple types of databases, a specific database driver and path to this driver's JAR file must be specified. l l l l l l l l l l JDBC Driver: Use the drop-down to select which JDBC Driver to use for the database connection. JAR file path: Enter a path to the JAR file that contains the appropriate driver for the database below. Server: Enter the server address for the database server.
From the Welcome screen 1. Open the PlanetPress Connect Welcome page by clicking the icon at the top right or select the Help menu and then Welcome. 2. Click Create a New Configuration. 3. From the Using a wizard section, select PDF/VT. 4. Click the Browse button and open the PDF/VT file you want to work with. Click Next. 5. In the Metadata page, select the following options: l l Metadata record levels: Use the drop-down to select what level in the metadata defines a Source Record.
From the Welcome screen 1. Open the PlanetPress Connect Welcome page by clicking the icon at the top right or select the Help menu and then Welcome. 2. Click Create a New Configuration. 3. From the Using a wizard section, select XML. 4. Click the Browse button and open the XML file you want to work with. Click Next. 5. In the Select split level and trigger type page, select the following options: l l XML Elements: A list of node elements that have children nodes.
incremented by a set value also. It is useful for numbered tickets or any other template requiring sequential numbers. l l l l l l l Starting Value: The starting number for the counter. Defaults to 1. Increment Value: The value by which to increment the counter for each record. For example, an increment value of 3 and starting value of 1 would give the counter values of 1, 4, 7, 10, [...] Number of records: The total number of counter records to generate.
1. In the Menus, click on File, then Save As. 2. Browse to the location where the data mapping configuration should be saved and type a name, then click Save. Data Mapping Workflow A data mapping workflow is a series of steps used to process and extract the appropriate data from the Source Record and store it into the Record (see Data Model). With the data model, it is what makes a data mapping configuration (See Data Mapping Configuration).
The Preprocessor and the Postprocessor Data processors allow the application to perform actions on the data file itself before it is handed over to the Data Mapping workflow (preprocessors) and after the Data Mapping workflow has completed (postprocessors). To configure settings for the Preprocessor step, see Preprocessor Step Properties. To configure settings for the Postprocessor step, see Postprocessor Step Properties. The Extraction The Extract step is the heart of the DataMapper software.
Note Alternatively, you can simply right click on the selected fields and select Add Extraction. Extracting Transactional Data The Transactional Data (line items information) appears on multiple lines. You must create a loop on these lines to extract the items information. The line items are extracted in a detail table. 1. Select the fields that contain the first line item information. 2. Right click on this data selection and select Add Repeat . 3.
Note You can also use the toolbar buttons instead of contextual menus, See Toolbars for more details. From a XML file Extracting Promotional Data The Promotional Data (customer and the invoice information) is repeated for each item normally located at the top of the Source Record, before the ITEM information. It generally includes the name, the address, reference numbers, invoice information...etc.
1. Select the children leaf nodes of the CUSTOMER() node. 2. Right click on the selected nodes and select Add Extraction. Note Alternatively, you can simply drag & drop the selected fields into the Data Model pane.
3. Select the children leaf nodes of the INVOICE() node. 4. Right click on the selected nodes and select Add Extraction. Extracting Transactional Data The Transactional Data (line items information) appears on multiple lines. In the example below, this information appears under the parent node ITEM(). Each ITEM() node give information about one item. Create a loop on the ITEM() nodes to extract the items information. 1. Select the ITEM() node. 2. Right click on the selected node and select Add Repeat.
Note By default, the For Each option is selected in the Repeat type option as shown in theStep Properties pane. It means that the loop will include each ITEM() node. In the Collection field, you will find the corresponding ITEM() node path. 3. Select the children leaf nodes of the ITEM() node.
4. Right click on the selected nodes and select Add Extraction. Note You can also use the toolbar buttons instead of contextual menus, See Toolbars for more details. From a Text or a PDF file Extracting Promotional Data The Promotional Data (customer and the invoice information) is repeated for each item and normally located at the top of the Source Record. It generally includes the name, the address, reference numbers, invoice information...etc. 1.
Extracting Transactional Data The Transactional Data (line items information) appears on multiple lines and pages. A loop has to be created on these lines to extract the items information. The line items are extracted in a detail table as below: 1. Select a simple data in the first line item. For example the product number. 2. Right click on the selection and select Add Goto. That moves the cursor at the beginning of the first line item. 3. Add a loop to extract each item until the end of the line items.
1. Select the text (SUBTOTALS for example) in the Viewer. 2. Right click on the selection and select Add Repeat. The Repeat step loops on all lines until the selected text is found. Since a record can extend on more than one page, lines that are not item lines must be excluded form the extraction. You can use any exclusive information like a "." or "," in prices or totals for example. 4. Select the "." or the "," in the total or in the price of the first line item. 5.
7. Right click on the selection and select Add Extraction. 8. Select the second field. 9. Right click on the selection and select Add Extract Field. 10. Do the same for the rest of the fields along that same line item.
Extract Step creates a new step in the Steps pane. For optimization purposes, it is better to use Add Extract Field than to have a succession of Add Extract steps. Note You can also use the toolbar buttons instead of contextual menus, See Toolbars for more details. Totals Information After the loop step, the cursor position is at the end of line items. If the record contains sums or totals at the end of the line items list: 1. Select the amounts. 2. Click the Repeat step in the Steps panel. 3.
Also Note That... Note l l l l l l If no Extract step is currently selected in the Steps pane, a new Extraction step is created. If an Extract step is selected, new Extract Fields will be added to this existing step. Dragging a data selection or fields into a specific level of the Data Model (record or detail tables) will add the fields to that level.
To select data, click on a starting character within the grid, keeping the mouse button down, dragging to the end character and releasing the button. This creates a data selection that can contain multiple lines. From a PDF File The PDF data viewer displays the PDF file contents of the Data Sample that is currently active within the data mapping configuration as pages. To select data, click on a starting point, keeping the mouse button down, dragging to the end location and releasing the button.
From a CSV or a Database File The CSV/Database data viewer displays the field-based contents of the Data Sample that is currently active within the data mapping configuration in a grid-like fashion, with each field being in a separate grid position. To select data, click on a starting point, keeping the mouse button down, dragging to the end location and releasing the button. This creates a data selection that can contain multiple lines.
From a XML File The XML data viewer displays the XML-based contents of the Data Sample that is currently active within the data mapping configuration in a tree view, with XML fields displayed at each level of the Sample Record. To select data, click on a starting point, keeping the mouse button down, dragging to the end location and releasing the button. This creates a data selection that can contain multiple lines.
Adding an Extraction Step from a Data Selection To add a new step from the Data Viewer: 1. Create your data selection (refer to Creating a Data Selection for more information). 2. Right-clicking on the data selection and select the appropriate step. See Type of Steps for more information on available steps.
Once created, data selections can be modified and moved in order to change or extend the data included in the selection. You can also modify a data selection that is attached to a field extraction in an Extract step by double-clicking on the data selection in the Data Viewer and then modifying the data selection. Moving a Data Selection To move a data selection, click and hold anywhere on the data selection, move it to its new desired location and release the mouses.
From a PDF File The PDF data viewer displays the PDF file contents of the Data Sample that is currently active within the data mapping configuration as pages. Once created, data selections can be modified and moved in order to change or extend the data included in the extraction. Moving a new data selection can be done directly if the data selection is new.
Resizing a Data Selection To resize a data selection, click and hold on one of the resize handles on the borders or corners, move them to the new size and release the mouse.
From a CSV or a Database File The CSV/Database data viewer displays the field-based contents of the Data Sample that is currently active within the data mapping configuration in a grid-like fashion, with each field being in a separate grid position. Once created, data selections can be modified. Modifying a new data selection can be done directly if the data selection is new.
Modifying a Data Selection To modify a data selection, press and hold the CTRL key click, and click on a field to add it or remove it from the selection (the blue color indicates that the field is part of the current selection). Steps Steps are executed sequentially, from top to bottom. Inside conditions, some steps may be skipped altogether when they are on a particular branch, whereas in loops several steps may be repeated a number of times.
Preprocessor and Postprocessor Preprocessors Data preprocessors allow the application to perform actions on the data file itself before it is handed over to the Data Mapping workflow Some preprocessors might for instance, using a JavaScript expression, convert all characters of a text file from lowercase to uppercase prior to running Data Mapping workflow : Any number of preprocessing tasks can be added to a workflow and run in sequence before the data is sent to the Data Mapping workflow.
Postprocessors Data postprocessors allow the application to extract data that was stored in the data model once the workflow is complete. For example, the post processor can export all data or only addresses, to a CSV file which can then be given directly to a postal addresses verification application.
Any number of postprocessing tasks can be added to a workflow and be executed after the Data Mapping workflow is complete. Click the button to add a Postprocessor to the list.
Extract The Extract step is the heart of the DataMapper software. It takes information from the Data Sample and places it in the Extracted Record within the Record Set. Please refer to Data Extraction for an animated example. For more information on how to add a step, please refer to Toolbar, Menus or Shortcut Keys under the Interface section. Note To add an Extract step, you can also use JavaScript (select JavaScript from the Mode drop-down in the Step Properties pane).
Goto The cursor position determines how data is extracted from the Source Record. The cursor in a Source Record is always at a specific position. In a Source Record, the cursor position starts off at the top-left corner of the Sample Data. When the Goto step is used, that cursor position is moved to the location (either relative or absolute) set by the Goto step.
A Condition step is used when the data extraction must be made based on specific criteria. In the example shown in the following figure, the transactional data must be extracted according to two main criteria. First, the line item must include an amount of money and secondly, the lines that include a Description field on two lines have to be extracted as a single record.
1. Since the extraction is for transactional data, a Repeat step is first added. 2. A first condition is added to determine whether the line should be considered for the extraction.
3. The extraction is performed if the condition is true. 4. Under the true branch of the first condition, a second condition is added for Description fields on two lines.
5. The extraction performed under the true branch of the second condition. 6. The extraction performed under the false branch of the second condition. For more information on how to add a step, please refer to Toolbar, Menus or Shortcut Keys under the Interface section.
Properties You can also further customize the step properties. Please refer to The Step Properties Interface for more information. Repeat The Repeat step is a loop that may run 0 or more times, depending on the condition specified. It is generally used for the extraction of transactional data. A Repeat steps do not automatically move the pointer in the file. In order to avoid infinite loops, a Goto step must be present within the loop itself. The following picture shows a usage example of a Repeat step.
Note By default, if an Extract step is added within a Repeat step, its extraction is made in a detail table. Note If an XML node that has children is selected, and the pointer is currently at this node, creating a repeat step will loop on that node. Extract Field The Add Extract Field function adds the selected data to a selected Extract step in the Steps pane.
For more information on how to add a step, please refer to Toolbar, Menus or Shortcut Keys under the Interface section. Properties You can also further customize the step properties. Please refer to The Step Properties Interface for more information. Data Model A Data Model is the format into which Records are saved. It is also a file format that can be exchanged between different parts of the PlanetPress Connect solution.
They can be imported to, and exported from, the Data Model Pane in the Designer and DataMapper Modules. For more information about the operations you can perform on the Data Model, please refer to The Data Model Interface. About Records and Fields A Record is a collection of fields and contains all the data about one particular person, company, or item in a database that is required for creating a single document for a single recipient (see Record for more information).
Example with transactional details, a simple invoice format PAGE 90Example of Nested Tables (one table into another) PAGE 91Boundaries Boundaries are the division between source records. They can be set using different types of rules such as text, pages or even custom JavaScript rules. Boundaries differ from Delimiters. When defining boundaries , multiple delimiters can be included between boundaries - many pages per invoice, many CSV row per transaction, etc. To set a boundary, a specific trigger must be found.
DataMapper User Interface Interface Sections and Panels A. B. C. D.
E. F. G. H. Data Model Pane Data Viewer Messages Pane Settings Pane Menus The following menu items are shown in the DataMapper Module's menu: File Menu l l l l l l l l l l New... : Opens the Creating a New Data Mapping Configuration dialog. Open: Opens a standard File Open dialog. This dialog can be used to open Templates and data mapping configurations. Open Recent: List the most recently opened Templates and configurations.
l l Send to Workflow: Opens theSend to Workflow dialog to send files to a local PlanetPress Workflow software installation. Exit:Closes the software. If any of the files need to be saved, the Save Resources dialog opens. Edit Menu l l l l l l l l l Undo: Undoes the previous action. Redo: Redoes the last action that was undone. Cut Step: Removes the currently selected step and places it in the clipboard. If the step is a Repeat or a Condition, all steps under it are also placed in the clipboard.
l l l l l Add Goto Step: Adds a Goto step that moves the selection pointer to the beginning of the data selection. For instance if an XML node is selected, the pointer moves to where that node is located. Add Condition Step: Adds a condition based on the current data selection. The "True" branch gets run when the text is found on the page. Other conditions are available in the step properties once it has been added.
Help Menu l l l l l Software Activation: Displays the Software Activation dialog. See Activating your license. Help Topics: Click to open this documentation. Contact Support: Click to open the Objectif Lune Contact Page in the default system Web browser. About PlanetPress Connect Designer: Displays the software's About dialog. Welcome Screen: Click to re-open the Welcome Screen. Panes The following topics explain in detail the different panes of the DataMapper Interface.
There are some specific tricks and limitations, however: l l l l l If no Extract step is currently selected in the Steps Pane, a new Extract step is created. If an Extract step is selected, new Extract Fields are added to this existing step. Dragging a data selection or fields into a specific level of the Data Model (Record or detail tables) will add the fields to that level.
l l l l Rename: Click to rename the selected table or field. Enter the new name and click OK to rename. Only available for empty Data Model Fields (see below) tables that only contain them. Delete: Click to delete the selected table or field. Only available for empty Data Model Fields or tables that only contain them. Set Type: Use the list to select which the field type (see Data Types). Only available for empty Data Model Fields or tables that only contain them.
l l l l l l Boundary settings, Preprocessor and the Record Limit setting). In other levels it represents the number of entries in a table. Number of Records: The number of available records in the Data Sample. Affected by the Boundary settings, Preprocessor and the Record Limit setting. First Record: Jumps to the first record in the Data Sample. Disabled if the first record is already shown. Previous Record: Moves to the previous record in the Data Sample.
In the most basic of transactional systems, a single detail table is used. However, it is possible to create multiple detail tables, as well as nested tables. When detail and nested tables are present in the record, they are displayed as separate levels in the Data Model (see The Data Model Interface for more information).
Example 1. Data Overview.
Page 102
2. Extracting Customer and Invoice information.
3. Extracting Transactional Data.
4. Renaming Tables. Nested Tables Nested detail tables are used to create transactional data that is relative to other data. An example of this would be an invoice for a multi-service provider. In this example, a first table contains services (Internet, Cable, Home Phone, Mobile), while one or more nested tables giving details for charges and rebates on each of those services.
Example 1. Data Overview.
Page 107
2. Extracting Customer and Invoice information.
3. Extracting Transactional Data for the First Table.
4. Extracting Transactional Data for Nested Tables.
5. Renaming Tables. Note Creating nested tables is currently an advanced feature, and using these nested tables in the Designer module requires some amount of coding. Note For more information about operations that can be performed on tables, please refer to The Data Model Interface The Data Viewer Interface The Data Viewer displays the contents of the Data Sample that is currently active within the data mapping configuration.
way to be displayed on the screen. For example, XML is displayed in a tree view rather than the XML code. Similarly, PDFs are displayed as pages. When the Delimiter and Boundary options are set in the Settings Pane, the Data Viewer reflects those changes and can display more than one unit of the data sample (page, XML node, csv line, etc) depending on these options. The Data Viewer's display is also affected by the Preprocessor Step and displays the data after it has gone through all enabled preprocessors.
Note The Add Extract Field item is available only after an Extract step has been added to the workflow. For more information about the different steps that can be added to a Data Mapping workflow, please refer to Steps. Operations Drag & drops from the Viewer window to the Data Model pane can be performed to extract data.
Messages Pane The Messages pane is shared between the DataMapper and Designer modules and displays any warnings and errors from the data mapping configuration or template. At the top of the Message pane are control buttons: l l l l l l l l Export Log: Click to open a Save As dialog where the log file (.log) can be saved on disk. Clear Log Viewer: Click to remove all entries in the log viewer. Filters: Displays the Log Filter .
The Input Data Section For a CSV File l l l l l l l l Field separator: Defines what character separates each fields in the file. Text delimiter: Defines what character surrounds text fields in the file, preventing the Field separator from being interpreted within those text delimiters. Comment delimiter: Defines what character starts a comment line. Encoding: Defines what encoding is used to read the Data Source ( US-ASCII, ISO8859-1, UTF-8, UTF-16, UTF-16BE or UTF-16LE ).
l l l Paragraph spacing: Determines the spacing between paragraphs. The default value is 1.5, meaning the space between paragraphs must be equal to at least 1.5 times the height of the average character height to start a new paragraph. Magic number: Determines the tolerance factor for all the above values. The tolerance is meant to avoid rounding errors. If two values are more than 70% away from each other they are considered distinct, otherwise they are the same.
l line in your input data. Setting a maximum data line length that greatly exceeds the length of the longest line in your input data may increase execution time. Page delimiter type: Defines the delimiter between each page of data. Multiple such pages can be part of a Source Record, as defined by the Boundaries. l l On lines: Triggers a new page in the Data Sample after a static number of lines (called Lines per Page), or using a Form Feed character.
record. So the boundaries for each record can be completely dependent on how you want to use the data. With no actual boundary markers inside the data, we have to figure out a way to identify specific locations in the input stream and mark those locations as record boundaries. Fortunately for us, it turns out that every single file format possesses intrinsic, natural delimiters that are used to identify chunks of related data.
l l l Field name: Displays the fields in the top line. The selected value determines new boundaries. On script: Defines the boundaries using a custom user-defined JavaScript. For more information see Boundaries Using javaScript. On field value: Defines the boundary when the contents of a specific field value. l l l Field name: Displays the fields in the top line. The selected value is compared with the Expression below to create a new boundary.
l l l l l Times condition found: When the boundaries are based on the presence of specific text, you can specify after how many instances of this text the boundary can be effectively defined. For example, if a string is always found on the first and on the last page of a document, you could specify a number of occurrences of 2. In this way, no need to inspect other items for whether it is on the first page or the last page.
l l l l l l l l l l l Left/Right: Defines the location, in the row, where to find the text value. Top/Bottom: Defines the start and end row of the data selection to compare with the text value. Entire width: Ignores the column values and compares using the whole line. Entire height: Ignores the row values and compares using the whole column. Entire page: Compares the text value on the whole page. Only available with contains, not contains, is empty and is not empty operators.
l l Occurrences: The number of times that the delimiter is encountered before fixing the boundary. For example, if you know that your documents always have four pages delimited by the FF character, you can set the boundaries whenever you counted four delimiters. On Change: Defines a new Source Record when a specific field under the XML level has a new value. l Field: Displays the fields that are under the XML level. The selected one's value determines new boundaries.
Default Data Format Default Format Settings can also be defined at the Datamapper configuration level (see Datamapper Default Data Format for more information). SQL Query Designer The SQL Query Designer is used to design a custom SQL query to pull information from a database. l l l l Tables: Lists all tables and stored queries in the database. Custom Query: Displays the query that retries information from a database. Each database type has their own version of the SQL query language.
l Add a Step: Adds a step to the process. Right click anywhere in the Steps pane and select Add a Step from the contextual menu. For more information about the steps and how to use them, please refer to Steps. More options are available when a Repeat or a Condition step is selected: l Add Step in Repeat: To add a step into the Repeat loop, right-click on the step and select Add a Step in Repeat.
l Add Step in True: To add a step under the true branch of a condition step, rightclick on the condition and select Add a Step in True.
l l l Add Step in False: To add a step under the false branch of a condition step, rightclick on the condition and select Add a Step in False. Ignore Step: Click to set the step to be ignored (aka disabled). Disabled steps are grayed and do not run when in DataMapper and do not execute when the data mapping configuration is executed in Workflow. However, they can still be modified normally. Moving: To move a step, right-click on it and select Cut Step or use the button in the Toolbar.
Note You can also use a drag & drop to move steps. l Delete Step: To remove a step, right-click on it and select Delete step from the contextual menu or use the button in the Toolbar. If the step to be deleted is Repeat or Condition, all steps under it will also be deleted. Warning Currently there is no Undo and Redo feature in the DataMapper module.
l l Copy Step: To copy a step, right-click on it and select Copy Step or use the button in the Toolbar. If the step is Repeat or Condition, all steps under it will also be placed in the clipboard. If there is already a step in the clipboard, it will be overwritten. To place a copy of the step at its destination, right-click the step in the position before the desired location and select Paste Step, or use the button in the Toolbar.
l l l l Name: A read-only field displaying the name of the property. Scope: A read-only field indicating that the scope of the property is Automation. Type: A read-only field indicating the data type for each property. Default Value: Enter a default value for the property. This value is overwritten by the actual value coming from PlanetPress Workflow when the data mapping configuration is run using the Execute Data Mapping task.
l l Name: The name of the property used to refer to its value. Scope: What this property applies to: l l l l l Entire Data: These properties are static properties that cannot be changed once they have been set, in other words they are Global constants. Each Record: These properties are evaluated and set at the beginning of each Source Record. These properties can be modified once they have been set, but are always reset at the beginning of each Source Record.
Preprocessor definition l Expression: The JavaScript expression that will run on the Data Sample. See JavaScript API. Description This section is collapsed by default in the interface in order to give more screen space to important parts. Name: The name of the step. This name will be displayed on top of the step's icon in the Steps pane. Comments: The text entered here gives more details on the step and will be displayed in the tooltip appearing when hovering over the step in the Steps pane.
Field Definition This section explains how the currently selected Extract Field in the Field List is defined. Text File l l l Field List: The Field List displays each of the single fields that are being extracted in a drop-down. Fields can be re-ordered and re-named within the Ordering and Renaming Fields dialog. Add Unique ID to extraction field: Check to add a unique numerical set of characters to the end of the extracted value. This ensures no two values are identical in the Record Set.
l l JavaScript : The result of the JavaScript Expression written below the drop-down will be the value of the extracted field. If the expression contains multiple lines, the last value attribution (variable = "value";) will be the value. See JavaScript API. Type: The data type of the selected data. Please refer to ...(link to come) for more information. PDF File l Field List: The Field List displays each of the single fields that are being extracted in a drop-down.
l l l l l l l Post Function: Enter a JavaScript expression to be run after the extraction. For example replace("-","") would replace a single dash character inside the extracted string. Trim: Select to trim empty characters at the beginning or the end of the field. Type: The data type of the selected data. Please refer to ...(link to come) for more information. Concatenation string: Split: Separate the selection into individual fields based on the Concatenation string defined above.
l l Add Unique ID to extraction field: Check to add a unique numerical set of characters to the end of the extracted value. This ensures no two values are identical in the Record Set. Mode: Determines the origin of the data. l Location: The contents of the data selection set below will be the value of the extracted field. The data selection settings are different depending on the data sample type. l l Column: Drop-down listing all fields in the Data Sample, of which the value will be used.
l Use selection: Click to use the value of the current data selection for the extraction. Note If the selection contains multiple lines, only the first line is selected. l Type: The data type of the selected data. Please refer to ...(link to come) for more information. XML File l Field List: The Field List displays each of the single fields that are being extracted in a drop-down. Fields can be re-ordered and re-named within the Ordering and Renaming Fields dialog.
l Post Function: Enter a JavaScript expression to be run after the extraction. For example replace("-","") would replace a single dash character inside the extracted string. l l l l Use JavaScript Editor: Click to display the Script Editor dialog. Trim: Select to trim empty characters at the beginning or the end of the field. Type: The data type of the selected data. Please refer to ...(link to come) for more information.
l Integer l l l l Float l l l l l Negative Sign Before: Adds a negative (-) sign before negative values in the Extracted Record. Decimal Separator: Determines the character to use for decimal values, generally a dot (.). Thousand Separator: Adds the selected character between each thousand position (for example, "1,000,000") Treat empty as 0: Considers empty spaces as 0. Currency l l l l l l Negative Sign Before: Adds a negative (-) sign before negative values in the Extracted Record.
Ordering and Renaming Fields The Order and rename fields dialog appears from the Extract step by clicking on the Rename Fields button next to the field list. This dialog displays the extracted fields in the currently selected Extract step. Field extractions are executed from top to bottom. Using JavaScript fields, it is possible to refer to previously extracted fields if they are extracted higher in this list or in previous Extract steps in the extraction workflow. l l l l l Name: The name of the field.
l Run JavaScript : Runs a JavaScript expression, giving much more flexibility over the extraction process. Set Property Text and PDF Files l l l Property: Displays a list of Source Record properties set in the Preprocessor Step. Type: Displays the type of the Source Record property. Read only field. Based on: Determines the origin of the data. l Location: The contents of the data selection set below will be the value of the extracted field.
l l l l l Setting Properties and Record Field values using advanced expressions Do complex mathematical operations and calculations More features to come in future versions. For more information, see the JavaScript in DataMapper section. Use selected text: Inserts the text in the current data selection in the JavaScript Expression. If multiple lines or elements are selected, only the first one is used. Use selection: Click to use the value of the current data selection for the extraction.
l l l Currency l l l l l l Thousand Separator: Adds the selected character between each thousand position (for example, "1,000,000") Treat empty as 0: Considers empty spaces as 0. Negative Sign Before: Adds a negative (-) sign before negative values in the Extracted Record. Decimal Separator: Determines the character to use for decimal values, generally a dot (.).
l l Top offset: The vertical offset from the current pointer location in the Data Sample (Viewer). Use selection: Click to use the value of the current data selection for the extraction. Note If the selection contains multiple lines, only the first line is selected. l l Trim: Select to trim empty characters at the beginning or the end of the field JavaScript : The result of the JavaScript Expression written below the drop-down will be the value of the extracted field.
Note If the selection contains multiple lines, only the first line is selected. l Data Format The data format defines the precise format for some of the variable types, such as dates and currencies. l l l l Boolean String HTML String Integer l l l l Float l l l l l Negative Sign Before: Adds a negative (-) sign before negative values in the Extracted Record.
l l Extracted Record. Treat empty as 0: Considers empty spaces as 0. Date l l Date/Time Format: Determines how the date is read. The format written here needs to correspond with the format in the data selection. Language: The language in which the date is written, when relevant. Useful when months or days are written alphabetically. Note Default Format Settings can be defined at the user level, at the Datamapper configuration level and/or at the field level.
l JavaScript : The result of the JavaScript Expression written below the drop-down will be the value of the extracted field. If the expression contains multiple lines, the last value attribution (variable = "value";) will be the value. See JavaScript API. l l Expression: The JavaScript expression to run. Use JavaScript Editor: Click to display the Edit Script dialog.
l Integer l l l l Float l l l l l Negative Sign Before: Adds a negative (-) sign before negative values in the Extracted Record. Decimal Separator: Determines the character to use for decimal values, generally a dot (.). Thousand Separator: Adds the selected character between each thousand position (for example, "1,000,000") Treat empty as 0: Considers empty spaces as 0. Currency l l l l l l Negative Sign Before: Adds a negative (-) sign before negative values in the Extracted Record.
information). Run JavaScript l l Expression: The JavaScript expression to run. Use JavaScript Editor: Click to display the Edit Script dialog. Note Running a JavaScript expression offers many possibilities, for example: l l l l l Setting Properties and Record Field values using advanced expressions Do complex mathematical operations and calculations More features to come in future versions. For more information, see the JavaScript in DataMapper section.
Description This section is collapsed by default in the interface in order to give more screen space to important parts. Name: The name of the step. This name will be displayed on top of the step's icon in the Steps pane. Comments: The text entered here gives more details on the step and will be displayed in the tooltip appearing when hovering over the step in the Steps pane. Repeat Definition l Repeat type: l l l l While statement is true: The loop executes while the statement below is true.
l Use JavaScript Editor: Click to display the Edit Script dialog. Note Running a JavaScript expression offers many possibilities, for example: l l l Setting Properties and Record Field values using advanced expressions Do complex mathematical operations and calculations More features to come in future versions. For more information, see the JavaScript in DataMapper section.
l Based On: l Position: The data in the specified position for the comparison. l l l l l l l Value: A specified static text value. l l l l l l l Field: The Extracted Record field to use in the comparison. JavaScript : The result of a JavaScript Expression. l l Value: The text value to use in the comparison. Use selected text: Uses the text in the current data selection as the Value. If multiple lines or elements are selected, only the first one is used.
l Extractor Property: The value of an internal extractor variable: l l l Counter: The value of the current counter iteration in a Repeat step. Vertical Position: The current vertical position on the page, either in Measure (PDF) or Line (Text and CSV). Operators: l l l l l l is equal to: The two specified value are identical for the condition to be True. contains: The first specified value contains the second one for the condition to be True.
l JavaScript : The result of a JavaScript Expression. l l l l l l l Data Property: The value of a data-level property set in the Preprocessor step. Record Property: One of the local variables that you can create and that are reset for each document as opposed to data variables that are global because they are initialized only once at the beginning of each job. Automation Property: The current value of a Document-level property set in the Preprocessor step.
l Position: The data in the specified position for the comparison. l l l l Value: A specified static text value. l l l l l l l l Expression: The JavaScript line that is evaluated. Note that the last value attribution to a variable is the one used as a result of the expression. Use JavaScript Editor: Click to display the Edit Script dialog. Use selected text: Inserts the text in the current data selection in the JavaScript Expression.
l l l l is less than: The first specified value is smaller, numerically, than the second value for the condition to be True. is greater than: The first specified value is larger, numerically, than the second value for the condition to be True. is empty: The first specified value is empty. With this operator, there is no second value. Invert condition: Inverts the result of the condition. For instance, is empty becomes is not empty.
Technical Both the Left and Right operands have the same properties. Text and PDF Files l Based On: l Position: The data in the specified position for the comparison. l l l l l l l Value: A specified static text value. l l l Field: The Extracted Record field to use in the comparison. JavaScript : The result of a JavaScript Expression. l l l l Value: The text value to use in the comparison. Use selected text: Uses the text in the current data selection as the Value.
l l l Record Property: One of the local variables that you can create and that are reset for each document as opposed to data variables that are global because they are initialized only once at the beginning of each job. Automation Property: The current value of a Document-level property set in the Preprocessor Step. Extractor Property: The value of an internal extractor variable: l l l Counter: The value of the current counter iteration in a Repeat step.
l Value: A specified static text value. l l l Field: The contents of a specific field in the Extracted Record. l l l l l l l Expression: The JavaScript line that is evaluated. Note that the last value attribution to a variable is the one used as a result of the expression. Use JavaScript Editor: Click to display the Edit Script dialog. Use selected text: Inserts the text in the current data selection in the JavaScript Expression.
l Invert condition: Inverts the result of the condition. For instance, is empty becomes is not empty. XML File l Based On: l Position: The data in the specified position for the comparison. l l l l Value: A specified static text value. l l l l l l l l Field: The Extracted Record field to use in the comparison. JavaScript : The result of a JavaScript Expression. l l Value: The text value to use in the comparison. Use selected text: Uses the text in the current data selection as the Value.
l Operators: l l l l l l is equal to: The two specified value are identical for the condition to be True. contains: The first specified value contains the second one for the condition to be True. is less than: The first specified value is smaller, numerically, than the second value for the condition to be True. is greater than: The first specified value is larger, numerically, than the second value for the condition to be True. is empty: The first specified value is empty.
l l Move by: Enter the number of lines or pages to jump. Page: Jumps between pages or to a specific page. l From: Defines where the jump begins: l l l l Move by: Enter the number of lines or pages to jump. Next line with content: Jumps to the next line that has contents, either anywhere on the line or in specific columns. l Inspect entire page width: When checked, the Next line with content and Next occurrence of options will look anywhere on the line.
l Use regular expression: Check so that the Expression box is treated as a regular expression instead of static text. For more information on using Regular Expressions (regex), see the Regular-Expressions.info Tutorial. PDF File l Target Type: Defines the type of jump . l Physical distance: l From: Defines where the jump begins: l l l l Move by: Enter distance to jump. Page: Jumps between pages or to a specific page.
checks in: l l l l l l Left: The starting column, inclusively. Right: The end column, inclusively. Use selection: Click while a selection is made in the Data Viewer to automatically set the left and right values to the left and right edges of the selection. Expression: Enter the text or Regex expression to look for on the page. Use selection: Click while a selection is made in the Data Viewer to copy the contents of the first line of the selection into the Expression box.
l Level Up/Down: Jumps up or down one node level (up to the parent, down to a child). The number of levels to change is defined in the Move byoption. Postprocessor Properties The Postprocessor step does not run for every Source Record in the Data Sample. It runs once, at the end of the Steps, after all records have been processed. Postprocessor The Postprocessor section defines what postprocessors run on the Data Sample at the end of the data mapping workflow.
Name: The name of the step. This name will be displayed on top of the step's icon in the Steps pane. Comments: The text entered here gives more details on the step and will be displayed in the tooltip appearing when hovering over the step in the Steps pane. Data Types Each piece of data in PlanetPress Connect, once it has been extracted from the Source Record, will always be handled using Data Types.
Defining Boolean Values l l l Pre-Processor: Specify the "Type" as "Boolean" and set a default value of either true; or false; Extraction: Specify the "Type" as "Boolean". The field value must betrueorfalse. JavaScript Expression: Set the desired value to either true; or false; Example: record.fields["isCanadian"] = true; Note The value must be true , all in lowercase. Any variation in case (True, TRUE) will not work.
Building String Values Strings values can be made up of more than just a series of characters between quotes. Here are a few tips and tricks to build strings: l l l Both single and double quotes can be used to surround strings and they will act in precisely the same manner. So, "this is a string" and 'this is a string' mean the same thing. However, it's useful to have both in order to remove the need for escaping characters.
Defining Integer Values l l l Pre-Processor: Specify the "Type" as "Integer" and set a default value as a number, such as 42; Extraction: Specify the "Type" as "Integer". The field value will be extracted and treated as an integer. JavaScript Expression: Set the desired value to any integer value. Example: record.fields["AnswerToEverything"] = 42; Building Integer Values Integers can be set through a few methods, all of which result into an actual integer result.
Defining Float Values l l l Pre-Processor: Specify the "Type" as "Float" and set a default value as a number with decimal points, such as 546513.8798463; Extraction: Specify the "Type" as "Float". The field value will be extracted and treated as a float. JavaScript Expression: Set the desired value to any float value. Example: record.fields["PreciseTaxSubtotal"] = 27.13465; Building Float Values Float values can be the result of direct attribution or mathematical operations just like Integer values.
Building Currency Values Currency values can be the result of direct attribution or mathematical operations just like Integer and Float values. Date Data Type Dates are values that represent a specific point in time, precise up to the second. They can also be referred to as datetime values. While dates are shown visually under the system's regional settings, in reality they are stored unformatted.
Defining Object Values l Pre-Processor: Specify the "Type" as "Object" and set a default value as a semi-colon. Toolbar In the DataMapper module, the following buttons are available in the top toolbar: File Manipulation Buttons l l l New : Displays the New wizard where a new data mapping configuration or a new template can be created. Open : Displays the Open dialog to open an existing data mapping configuration. Save : Saves the current data mapping configuration.
l l l l l l l l l data selection is on a lower line, the loop will be for each line until the text in the data selection is found at the specified position on the line (e.g. until "TOTAL" is found). Add Extract Field : Adds the data selection to the selected Extract step, if an extract step is currently selected. If multiple lines, nodes or fields are selected, multiple extract fields are added simultaneously. Add Action Step : Adds a step to create a custom JavaScript snippet.
Welcome Screen The Welcome Screen appears when first starting up PlanetPress Connect. It offers some useful shortcuts to resources and to recent documents and data mapping configurations. The Welcome Screen can be brought back in two ways: l l The Welcome Screen button in the Toolbars. From the Menus in Help, Welcome Screen. Contents l l l l l Activation: Click to open the Objectif Lune Web Activation Manager. Release Notes: Opens the current Release Notes for PlanetPress Connect.
The Designer The Designer is a WYSIWIG (what you is what you get) editor that lets you create templates for various output channels: Print, Email and Web. A template may contain designs for multiple output channels: a letter intended for print and an e-mail variant of the same message, for example. Content, like the body of the message or letter, can be shared across these contexts. Templates are personalized using scripts and variable data extracted via the DataMapper.
Objects results The HTML element or set of HTML elements that match the selector specified in the script editor. record The current record in the main data set. logger Global object that allows you to log messages. locale Defines which locale to use. "formatter" on page 200 Global object that allows you to format values.
before inserting the content into the page. The second find command also adds formatting to the replacing text.var mysnippet = loadhtml ('snippets/snippet.html'); mysnippet.find('@var1@').text('OL Connect 1'); mysnippet.find('@var2@').html('OL Connect 2').css('textdecoration','underline'); results.replaceWith(mysnippet); This last script loads a snippet into a variable and retrieves an element from the snippet using query().var mysnippet = loadhtml('snippets/text-root-wrapped.
template's contents and creates a new result set containing the HTML elements that match the given CSS selector. Functions All these functions can be used with an HTML element or a set of HTML, such as the results (the HTML element or set of HTML elements that match the selector specified in the script editor) or the result set returned by a query (see "query()" on page 209). "add()" on page 179 Adds elements to a set of HTML elements.
"css()" on page 191 Gets the value of a style property for the first element in set of HTML elements or sets one or more CSS properties for every element in a set of HTML elements. "children()" on page 189 Returns the immediate children of an HTML element. "clone()" on page 189 Returns a new result set containing a copy of each element in a set of HTML elements. filter() Returns a subset of the current result set.
()" on page 210 set of HTML elements. Has no effect if the class is not present. "replaceWith ()" on page 211 Replaces an HTML element or a set of HTML elements (with a snippet, for example). Returns the result set. show() Shows the HTML element or a set of HTML elements. text() Replaces the text content of an HTML element or of each element in a set of HTML elements with the supplied value, or returns the text content of the first element if no value is supplied.
Note: the way the functions add() and css() are used in this script is called 'chaining'. Chaining is optional; the same could be achieved by storing the results of the queries in a variable: var myResult = query("#test1"); myResult.add(query("#test2"); myResult.css("background", "yellow"); Creating an empty result set and adding elements to it The following script loads snippets in an iteration and adds their elements to an empty result set (using query()).
String, space separated list of class names. Examples This script adds a class name to a paragraph. results.addClass("foo"); Selector Matched element Matched element after script execution p
Hello world
Hello world
The following script adds two class names to a paragraph. results.Matched element Matched element after script execution
Peter Parker
Peter Parker
Lorem ipsum
This script looks up an element with the ID #salesrep, sets its text color to red and inserts a paragraph after it. query("#salesrep").after("Lorem ipsum
").Lorem dolor sit amet, consectetur adipiscing elit.
Lorem ipsum dolor sit amet, consectetur adipiscing elit.
This script looks up an element with the ID #salesrep and inserts a string after it. The string is automatically enclosed in a span. query("#salesrep").Selector Matched element Matched element after script execution #box
Personal information
Personal information
Peter Parker
The following script appends a snippet to a Div element with the ID box. var a = loadhtml('snippets/snippet_name.html'); results.append(a); Selector Matched element Matched element after script execution #box
Personal information
Personal information
Peter Parker
This script looks for an element with the ID box and appends a paragraph to it. query("#box").var box = query("#box"); box.append("
Peter Parker
"); box.css("color","red"); attr() Returns the value of the specified attribute of the first element in a result set, or sets the value of the specified attribute of each element in a result set. l l attr(attributeName) attr(attributeName, value) attr(attributeName) Returns the value of the specified attribute of the first element in a result set. attributeName String; the name of the attribute.Examples This script looks up a table cell in an element with the ID #calloutbox and sets its text color to red. query("#callout td").attr('bgcolor' , 'red'); The following script sets the background color of a specific table cell to red if the value of the field TOTAL has a negative value in the current record. if(record.fields.TOTAL<0) { query("#total").
query("#salesrep").before("
Lorem ipsum
"); Matched element Matched element after script execution Peter Parker
Lorem ipsum
Peter Parker
The following script looks for an element with the ID salesrep, inserts a paragraph before that element and colors that element red. query("#salesrep").before("Lorem ipsum
").execution
ipsum dolor sit amet, consectetur adipiscing elit.
Lorem Ipsum Peter Parker
children() Returns the immediate children (inner HTML) of the elements in a result set. Examples This script retrieves the inner HTML of an element selected from a snippet. var snippet = loadhtml('snippets/snippet.html','#foobar').children (); results.append(snippet); The following script retrieves the inner HTML of the elements and then performs a find/replace.} // Iterate over the rows and populate them with the data from the accompanying data row query("#table_2 > tbody > tr").each(function(i) { this.find('@ItemNumber@').text( record.tables['detail'][i].fields ["ItemNumber"]); this.find('@ItemOrdered@').text( record.tables['detail'][i].fields ["ItemOrdered"]); this.find('@ItemTotal@').text( record.tables['detail'][i].fields ["ItemTotal"]); this.find('@ItemDesc@').text( record.tables['detail'][i].fields ["ItemDesc"]); this.find('@nr@').
css() Get the value of a style property for the first element in the set of HTML elements that match the selector of the script or of another query in the template (see "query()" on page 209), or set one or more CSS properties for every element in the set. l l l css(propertyName) css(propertyName, value) css(properties css(propertyName) Returns the value of the specified CSS property. propertyName String; the name of the CSS property.
query("#callout p").css('color' , 'red'); The following script does the same, but it only sets the text color to red if in the current record the value of the field 'accounttype' is 'PRO'. if(record.fields.accounttype == "PRO") { query("#callout p").css("color","red"); } This script sets the text color of the results to a hexadecimal color code. results.css('color' , '#669900'); This script loads a snippet into a variable.
l l l l l dateTimeShort() time() timeLong() timeMedium() timeShort() Note The locale also influences the output of the different Date functions; see "Locale" on page 421. Tip To format a date from a date field in the record set, you can enter a formatting pattern directly in the Text Script Wizard; see "Using the Text Script Wizard" on page 338, "Formatting variable data" on page 341 and Date and time patterns). date(value, pattern) Formats a date object using a custom pattern. value A Date object.
value A Date object. A Date can contain a date and time. dateShort(value) Formats a date as short string representation, for example 1-Apr-2016. value A Date object. A Date can contain a date and time. dateTime(value, pattern) Formats a date and time object using a custom pattern. value A Date object. A Date can contain a date and time. pattern String. The custom pattern may consist of pattern letters, separating symbols and quoted text, for example: "yyyy.MM.
value A Date object. A Date can contain a date and time. time(value, pattern) Formats a time using a custom pattern. value A Date object. A Date can contain a date and time. pattern String. The custom pattern may consist of pattern letters, separating symbols and quoted text, for example: "'at' HH:mm:ss z"; see Date and time patterns. Note that the repetition of pattern letters determines the exact presentation. timeLong(value) Formats a time as long string representation, for example 12:00:00 EDT AM.
var myDate = formatter.date(records.fields.DATE, "MM/dd/yyyy"); The custom pattern that the script provides, outputs the month and day in two digits each and the year in four digits: 05/21/2016. For more examples of formatting patterns, see Date and time patterns.
Each A generic iterator function, to iterate over the elements in the result set. each(callback) Iterates over the elements in a set, such as the enumerable properties of an object, in arbitrary order. For each distinct property, statements can be executed. callback A function. The callback function is passed the iteration index and the current element. In the scope of the callback function, this refers to the current element.
results.each(function(index){ this.text(index); } Selector Matched element Matched element after script execution p
0
1
2
Using each() in a translation script The following script first loads a snippet containing translation strings, depending on the value of a field.For...in Can be used to iterate over fields in a data set or rows in detail table. Also see https://developer.mozilla.org/en-US/docs/Web/JavaScript/Reference/Statements/for...in. for(variable in object) { ... } Iterates over the enumerable properties of an object, in arbitrary order. For each distinct property, statements can be executed. Examples This script iterates over field names in the current record and adds them to a paragraph. for(var i in record.fields){ results.
for(var i in record.tables['countries']) { results.after("
" + record.tables['countries'][i].fields ['country'] + "
"); } Selector Matched element Matched element after script execution #countries Countries
Countries
The Netherlands
Canada
Australia
This script iterates over rows in a detail table and adds the contents of the 'ItemID2' field to an option. The l l l l l l l l l l l l l l l l l l integer() integerUngrouped () number() numberUngrouped () "Number functions" on page 205. date() dateLong() dateMedium() dateShort() dateTime() dateTimeLong() dateTimeMedium() dateTimeShort() timeLong() timeMedium() timeShort() The date, dateTime and time functions allow you to format a date and/or time. See "Date, date/time and time functions" on page 192.
location String containing a path that can be absolute or relative to the section/context. Use: snippets/ to retrieve the content from a HTML file residing in the Snippets folder on the Resources panel. Examples This script loads a local HTML snippet (from the Resources panel) directly into the matched elements results.loadhtml("snippets/snippet.
location String; the location can be absolute or relative to the section/context. Use: snippets/ to retrieve the content from a HTML file residing in snippets folder of the Resources panel. selector String. The supplied selector should conform to CSS selector syntax and allows you to retrieve only the content of matching elements. Examples This script loads a specific element from the snippet. var mysnippet = loadhtml('snippets/snippetselectors.html','#item3'); results.
loadjson(location) Loads json data from a remote location. location String; the supplied location should be either a URL or a relative file path. Examples This sample script retrieves JSON data from a snippet. var localJSON = loadjson('snippets/jsonsnippet.html'); if(localJSON.post){ results.html("
" + localJSON.post.title + "
" + localJSON.post.modified + "
"); } This script retrieves a post from a WordPress site. var wpPost = loadjson('http://192.168.101.Number functions l l l l l l l currency() currencyNoSymbol() grouped() integer() integerUngrouped() number() numberUngrouped() Note The locale also influences the output of some Number functions; see "Locale" on page 421. Tip For fields that contain a number, you can also enter a formatting pattern directly in the Text Script Wizard; see "Using the Text Script Wizard" on page 338, "Formatting variable data" on page 341 and Number patterns). currency(value) Formats a number as an amount of money.
pattern A custom pattern that may consist of symbols; see Number patterns. Note that the repetition of pattern letters plays a part in determining the exact presentation. currencyNoSymbol(value) Formats a number as a currency whilst omitting the currency symbol. value A number. This can be a value from a field that contains a SmallInteger, BigInteger, Float, SmallCurrency or LargeCurrency. grouped(value) Formats a number using a thousands separator.
Selector Matched element Matched element after script execution #box
Personal information
Peter Parker
Selector Matched element Matched element after script execution div
Personal information
Peter Parker
var box = query("#box"); box.prepend("
Peter Parker
"); box.css("color","red"); query() Creates a new result set containing the HTML elements that match the supplied CSS selector. The context (optional) allows you to restrict the search to descendants of one or more context elements. l l query(selector) query(selector, context) query(selector) Creates a new result set containing the HTML elements in the template that match the supplied CSS selector. selector A String containing a CSS selector.query("#test1").css("color", "yellow"); Matched element Matched element after script execution
foo
foo
Look for an element in a snippet The following script loads a snippet. Then it looks up an element in a snippet and sets its text. Finally, it replaces the elements matched by the script's selector by the snippet. var snippet = loadhtml('snippets/mysnippet.html'); query("#foo", snippet).text("bar"); results.replaceWith() Replaces each element in a set of HTML elements. replaceWith(content) Replaces each element in a set of HTML elements. Returns the result set. content A query result. This can be an HTML string or a result set. Examples Replace elements with a snippet The following script loads a snippet and then replaces the elements matched by the script's selector with the snippet. var snippet = loadhtml('snippets/mysnippet.html'); results.
Value Description EMAIL The merge request is for output to Email PRINT The merge request is for output to Print WEB The merge request is for output to Web THUMBNAIL The merge request is for generating a template preview ContextType This is an enumeration for the context types.
which contexts are available in the template. Context Context is an object representing the respective context in the template. Which contexts are available in the template can be queried using merge.template.contexts. The context being merged can be queried using merge.context. Field Type Description sections Array Array of sections inside this context defined in the template. type ContextType The context type. Template Template is an object representing the template.
behavior of previous versions): For Web channel requests the requested web section is enabled by default. It is possible to redirect to another section by disabling the requested section and enabling another section. For Email channel requests on the Web context only the default section is enabled by default. It is possible to enable different or multiple sections, to control which sections will be attached to the email.
section will start with page 1 (to emulate behavior of previous versions). BackgroundResource This is an enumeration for the types of background resources for a Print section. Field Description DATAMAPPER_ PDF A PDF file retrieved via the active Data Mapping Configuration. This can be the PDF file that was used as input file, or another type of input file, converted to PDF. NONE No PDF background. RESOURCE_ PDF A PDF file stored in the template or on the network.
l l merge.section is only defined when when the output channel is Web. To make sure that it is defined, use the following if statement: if (merge.channel == Channel.WEB && merge.context.type == ContextType.WEB) { ... }. When using merge.context.sections keep in mind that for example 'Section X' might only exist in your Print context, so using merge.context.sections ['Section X'] without enclosing it in the if statement if (merge.context.type == ContextType.
Controlling multiple Email attachments The following script attaches the following sections to an email: l l l Print section 3 + 4 as attachment with continued page numbers Print section 6 as separate attachment Web sections A and B as separate attachment if (channel == Channel.EMAIL) { // only when generating Email output if (merge.context.type == ContextType.PRINT) { merge.context.sections['Section 1'].enabled = false; merge.context.sections['Section 2'].enabled = false; merge.context.
// from a resource file rather than using a PDF DataMapper background merge.template.contexts.PRINT.sections['Policy'].background.source = BackgroundResource.RESOURCE_PDF; // Specify the path var resourceUrl = 'images/policy-' + record.fields.policy + '.pdf'; merge.template.contexts.PRINT.sections['Policy'].background.url = resourceUrl; Positioning the background of a Print section Using abolute positioning var activeSection = merge.template.contexts.PRINT.sections['Section 1']; activeSection.background.
3. Personalize the content Personalize the content using variable data. See "Personalizing Content" on page 325. 4. Generate output Adjust the settings, test the template and generate output: letters, emails, and/or web pages. See Skin/Formats/CrossReferencePrintFormat("Generating outputWhen merged with a record set, the templates made in the Designer can generate three types of output: Print, Email and Web.Print outputPrint templates, also called Print sections, are part of the Print context.
Note Steps 2 and 3 are not necessarily to be followed in this order. For example, as you add elements to a template, you may start personalizing them right away, before adding other elements to the template. Features The Designer is Connect's module to create templates for personalized customer communications. These are some of the key features in the Designer: "Contexts" on the next page. A context contains one or more designs for one output channel. "Content elements" on page 223.
generated from an Email template, can have the following attachments:The contents of the Print context, in the form of a single PDF attachment. The output of the Web context, as an integral HTML file.Other files, an image or a PDF leaflet for example.Attaching the Print context and/or the Web context is one of the options in the Send (Test) Email dialog; see Generating Email output. To learn how to attach other files, see Email attachments.
l l l The Print context outputs documents to either a physical printer a PDF file; see "Print context" on page 352. The Email context outputs HTML email, composed of HTML code with embedded CSS. See "Email context" on page 298. The Web context outputs an HTML web page. See "Web Context" on page 444. When a new template is made, the Context appropriate to that new template is automatically created, including one section.
Deleting a context To delete a context, right-click the context on the Resources pane and click Delete. Warning No backup files are maintained in the template. The only way to recover a deleted section, is to click Undo on the Edit menu, until the deleted section is restored. After closing and reopening the template it is no longer possible to restore the deleted context this way.
Tip Wrapping elements in a box (see "Boxes" on page 265) or in a semantic HTML element makes it easier to target them in a script or a style sheet. Place the cursor in the element or select multiple elements. Then, on the menu, click Insert > Wrap in Box. You can now use the wrapper element as a script's or style's selector; see "Using the Text Script Wizard" on page 338 and "Styling and formatting" on page 398.
the clicked element, as well as the HTML tags of other elements to which the clicked element belongs. The clicked element is at the end of the line. To edit the HTML text directly: l In the workspace, toggle to the Source tab. On this tab you can view and edit the content of the template in the form of plain text with HTML tags (note the angle brackets: <>). You may add and edit the text and the HTML tags, classes, ID’s and other attributes. To learn more about HTML, see for example https://developer.
For each type of element, a small selection of attributes is visible on the Attributes pane at the top right. Changing attributes via script Many attributes can be changed via the user interface. Another way to change attributes is by using a script. Any of the Script Wizards can produce a script that changes an attribute of an HTML element. Set the Options in the Script Wizard to Attribute, to output the script's results to the value of a specific attribute. See "Using the Text Script Wizard" on page 338.
Selecting an element When an element is selected, the Attributes pane shows the attributes of that element, and the Styles pane, next to the Attributes pane, shows which styles are applied to it. To select an element in the content, you can of course click on it, but this isn't always as easy as it seems, especially when the element has elements inside it. Tip Click the Edges button on the toolbar to make borders of elements visible on the Design tab. The borders will not be visible on the Preview tab.
left-align, right-align, or rotate graphical elements. The toolbar buttons only represent a selection of the formatting options for each element. There are no toolbar buttons to change an element's margins, or to add a border to it, for example. To access all formatting properties of an element, you have to open the Formatting dialog. There are two ways to do this: l l Right-click the element and select the type of element on the shortcut menu.
Preset: select File > Print presets > Output Creation Settings (see "Output Creation Settings" on page 587) and send the preset to Workflow. Before adding a Barcode, load data or at least a Data Model; see "Loading data" on page 327. You will need the field names when adding the Barcode. Then, to add a Barcode to a section, Master Page or snippet: 1. 2. 3. 4. Select Insert > Barcode on the menu or click the Barcode toolbar button Choose the desired barcode type.
Note For a detailed description or for background information on a specific barcode, please refer to the documentation provided by the individual barcode supplier. Note that some barcode readers may require specific parameters as well. 6. Click OK to close the dialog. In the template the barcode shows up as a gray box. The barcode script is added to the Scripts pane. To see the barcode script working, toggle to the Preview tab in the Workspace.
l l l "PDF417" on page 255 "Aztec Code" on the facing page "MaxiCode" on page 252 Tip As of version 1.5 it will be possible to change the type of a barcode in the template as well, when changing the properties of a barcode. OneCode, KIX Code, Royal Mail, Australia Post OneCode, KIX Code, Royal Mail and Australia Post are some of the types of barcodes that can be added to a template; see "Barcode" on page 228.
l l l None: The barcode is rendered based on the module width. Fit to box: The barcode is stretched to fit the parent box in both width and height. Proportionally: The barcode is stretched up to where it fits either the width or height of the parent box, whichever requires the less stretching. Color The Color property allows you to choose a different Barcode color (instead of black) and Background color (instead of white), by typing a hexadecimal color value (see for example w3school's color picker).
Configuration type Use the drop-down to select the format type used when creating the barcode: only full range format, only compact formats, or any format. Preferred configuration Use the drop-down to select the preferred format for the barcode. Note that the barcode generator may choose a different format if the data cannot be represented by the preferred format.
Output format Defines how the barcode is output on the page. There are two possible formats: l l SVG: Vector format. This is smaller in size, but not compatible with Email output. PNG: Binary rasterized format. This is slightly larger than SVG but will display properly in Email output. Codabar Codabar is one of the barcode types that can be added to a template.
Add Checksum When checked, PlanetPress Connect will calculate a Checksum character and add that to the result of the Barcode script. If the value to be encoded is longer than 10 digits, a second check character will be calculated. Human Readable Message When this option is checked, PlanetPress Connect shows a human readable text below or above the barcode, as defined using the Text Position, using the specified font and font size. The font size is given in points (pt).
l l l l l l Code 11 Code 93 Code 93 extended Industrial 2 of 5 Interleaved 2 of 5 Matrix 2 of 5 For the properties of other barcode types, see "Barcode properties" on page 230. Module width Specifies the width of the narrow bars in centimeters. Changing this value to a higher value will make the barcode bigger when Scale is set to None. Scale Defines if and how the rendered barcode is scaled in relation to the parent element: l l l None: The barcode is rendered based on the module width.
l l SVG: Vector format. This is smaller in size, but not compatible with Email output. PNG: Binary rasterized format. This is slightly larger than SVG but will display properly in Email output. Code 39, Code 39 extended Code 39 and Code 39 extended are two of the barcode types that can be added to a template. The barcode can be added either using the Barcode toolbar button or through selecting Insert > Barcode on the menu; see " Adding a Barcode" on page 228.
character will be calculated. Human Readable Message When this option is checked, PlanetPress Connect shows a human readable text below or above the barcode, as defined using the Text Position, using the specified font and font size. The font size is given in points (pt). Color The Color property allows you to choose a different Barcode color (instead of black) and Background color (instead of white), by typing a hexadecimal color value (see for example w3school's color picker).
l l Interleaved 2 of 5 Matrix 2 of 5 For the properties of other barcode types, see "Barcode properties" on page 230. Module width Specifies the width of the narrow bars in centimeters. Changing this value to a higher value will make the barcode bigger when Scale is set to None. Scale Defines if and how the rendered barcode is scaled in relation to the parent element: l l l None: The barcode is rendered based on the module width.
l l SVG: Vector format. This is smaller in size, but not compatible with Email output. PNG: Binary rasterized format. This is slightly larger than SVG but will display properly in Email output. Code 128 Code 128 is one of the types of barcodes that can be added to a template; see "Barcode" on page 228. The barcode can be added either using the Barcode toolbar button or through selecting Insert > Barcode on the menu; see " Adding a Barcode" on page 228.
l l l None: The barcode is rendered based on the module width. Fit to box: The barcode is stretched to fit the parent box in both width and height. Proportionally: The barcode is stretched up to where it fits either the width or height of the parent box, whichever requires the less stretching. Add Checksum When checked, PlanetPress Connect will calculate a Checksum character and add that to the result of the Barcode script.
Barcode properties This topic lists the properties of the QR barcode. For the properties of other barcode types, see "Barcode properties" on page 230. Dots per pixel Type the number of dots per pixel. To optimize barcode quality a Data Matrix symbol should not be printed with dots smaller than 4 pixels. Encoding The data represented in the symbol can be compressed using of the following algorithms.
l l SVG: Vector format. This is smaller in size, but not compatible with Email output. PNG: Binary rasterized format. This is slightly larger than SVG but will display properly in Email output. UPC-A, UPC-E, EAN-8, EAN-13 UPC-A, UPC-E, EAN-8 and EAN-13 are a few of the barcode types that can be added to a template. The barcode can be added either using the Barcode toolbar button or through selecting Insert > Barcode on the menu; see " Adding a Barcode" on page 228.
Supplement UPC-A, UPC-E, EAN-13, and EAN-8 may all include an additional barcode to the right of the main barcode. l Type: The supplement type can be 2-digit (originally used to indicate the edition of a magazine or periodical) or 5-digit (used to indicate the suggested retail price for books). In case this option is set to None, and the data includes digits for the 2 or 5 supplement, the supplement data will be skipped and the additional barcode will not be rendered.
GS1-128 GS1-128 is one of the types of barcodes that can be added to a template; see "Barcode" on page 228. The barcode can be added either using the Barcode toolbar button or through selecting Insert > Barcode on the menu; see " Adding a Barcode" on page 228. Initially the barcode will have the barcode type's default properties.
Color The Color property allows you to choose a different Barcode color (instead of black) and Background color (instead of white), by typing a hexadecimal color value (see for example w3school's color picker). Output format Defines how the barcode is output on the page. There are two possible formats: l l SVG: Vector format. This is smaller in size, but not compatible with Email output. PNG: Binary rasterized format. This is slightly larger than SVG but will display properly in Email output.
l l l None: The barcode is rendered based on the module width. Fit to box: The barcode is stretched to fit the parent box in both width and height. Proportionally: The barcode is stretched up to where it fits either the width or height of the parent box, whichever requires the less stretching. Color The Color property allows you to choose a different Barcode color (instead of black) and Background color (instead of white), by typing a hexadecimal color value (see for example w3school's color picker).
l l SVG: Vector format. This is smaller in size, but not compatible with Email output. PNG: Binary rasterized format. This is slightly larger than SVG but will display properly in Email output. Code 11, Code 93, Code 93 extended, Industrial 2 of 5, Interleaved 2 of 5, Matrix 2 of 5 Code 11, Code 93, Code 93 extended, Industrial 2 of 5, Interleaved 2 of 5, and Matrix 2 of 5 are a few of the barcode types that can be added to a template.
Add Checksum When checked, PlanetPress Connect will calculate a Checksum character and add that to the result of the Barcode script. If the value to be encoded is longer than 10 digits, a second check character will be calculated. Human Readable Message When this option is checked, PlanetPress Connect shows a human readable text below or above the barcode, as defined using the Text Position, using the specified font and font size. The font size is given in points (pt).
l l l l l l Code 11 Code 93 Code 93 extended Industrial 2 of 5 Interleaved 2 of 5 Matrix 2 of 5 For the properties of other barcode types, see "Barcode properties" on page 230. Module width Specifies the width of the narrow bars in centimeters. Changing this value to a higher value will make the barcode bigger when Scale is set to None. Scale Defines if and how the rendered barcode is scaled in relation to the parent element: l l l None: The barcode is rendered based on the module width.
l l SVG: Vector format. This is smaller in size, but not compatible with Email output. PNG: Binary rasterized format. This is slightly larger than SVG but will display properly in Email output. Code 11, Code 93, Code 93 extended, Industrial 2 of 5, Interleaved 2 of 5, Matrix 2 of 5 Code 11, Code 93, Code 93 extended, Industrial 2 of 5, Interleaved 2 of 5, and Matrix 2 of 5 are a few of the barcode types that can be added to a template.
Add Checksum When checked, PlanetPress Connect will calculate a Checksum character and add that to the result of the Barcode script. If the value to be encoded is longer than 10 digits, a second check character will be calculated. Human Readable Message When this option is checked, PlanetPress Connect shows a human readable text below or above the barcode, as defined using the Text Position, using the specified font and font size. The font size is given in points (pt).
Resolution Select the printer output definition for the barcode (200, 300, 400, 500 or 600 dpi). Color The Color property allows you to choose a different Barcode color (instead of black) and Background color (instead of white), by typing a hexadecimal color value (see for example w3school's color picker). MSI MSI is one of the types of barcodes that can be added to a template; see "Barcode" on page 228.
Add Checksum When checked, PlanetPress Connect will calculate a Checksum character and add that to the result of the Barcode script. If the value to be encoded is longer than 10 digits, a second check character will be calculated. Checksum Type The Checksum type can be MSI10, MSI11, MSI1010 or MSI1110; see https://en.wikipedia.org/wiki/MSI_Barcode.
Barcode properties This topic lists the properties of the barcode types OneCode, KIX Code, Royal Mail and Australia Post. For the properties of other barcode types, see "Barcode properties" on page 230. Height, width and spacing The height, width and spacing of the barcode are all measured in pixels (38 dpi).
The barcode can be added either using the Barcode toolbar button or through selecting Insert > Barcode on the menu; see " Adding a Barcode" on page 228. Initially the barcode will have the barcode type's default properties. To change those properties, such as the scale and color, open the Barcode properties dialog: right-click the barcode (on the Design tab in the Workspace) and select the barcode type on the shortcut menu. Barcode properties This topic lists the properties of the barcode type PDF417.
Compact Check this option to use Compact PDF417 instead of the PDF417 barcode. This shortened form of the PDF417 barcode is useful where the space for the symbol is restricted. Scale Defines if and how the rendered barcode is scaled in relation to the parent element: l l l None: The barcode is rendered based on the module width. Fit to box: The barcode is stretched to fit the parent box in both width and height.
Barcode properties This topic lists the properties of the barcode type Postnet. For the properties of other barcode types, see "Barcode properties" on page 230. Module width Specifies the width of the narrow bars in centimeters. Changing this value to a higher value will make the barcode bigger when Scale is set to None. Bar height You can set the height (in cm) of the short bars and the tall bars in the Postnet barcode.
QR Code A QR Code is one of the types of barcodes that can be added to a template; see "Barcode" on page 228. The barcode can be added either using the Barcode toolbar button or through selecting Insert > Barcode on the menu; see " Adding a Barcode" on page 228. Initially the barcode will have the barcode type's default properties.
Extended Channel Interpretation (ECI) This setting enables data using character sets other than the default set. Select Latin-1, Shift JIS or UTF-8, or select None to disable extended channel interpretation. Correction level Part of the robustness of QR codes in the physical environment is their ability to sustain 'damage' and continue to function even when a part of the QR code image is obscured, defaced or removed.
l l SVG: Vector format. This is smaller in size, but not compatible with Email output. PNG: Binary rasterized format. This is slightly larger than SVG but will display properly in Email output. Barcode Data QR Codes can have many different types of data, which determines how the code will be generated. On top of just straightforward data, special data structures are used to trigger actions on the device that reads them. This can include contact cards, phone numbers, URLs, emails, etc.
l l l None: The barcode is rendered based on the module width. Fit to box: The barcode is stretched to fit the parent box in both width and height. Proportionally: The barcode is stretched up to where it fits either the width or height of the parent box, whichever requires the less stretching. Color The Color property allows you to choose a different Barcode color (instead of black) and Background color (instead of white), by typing a hexadecimal color value (see for example w3school's color picker).
Preferred version Use the drop-down to select the size of the barcode, in a number of modules. The actual size of the barcode can be 12 mm x 12 mm up to 22.4 mm x 22.4 mm, depending on the preferred version and the module width. Scale Defines if and how the rendered barcode is scaled in relation to the parent element: l l l None: The barcode is rendered based on the module width. Fit to box: The barcode is stretched to fit the parent box in both width and height.
Barcode properties This topic lists the properties of the barcode types UPC-A, UPC-E, EAN-8 and EAN-13. For the properties of other barcode types, see "Barcode properties" on page 230. Module width Specifies the width of the narrow bars in centimeters. Changing this value to a higher value will make the barcode bigger when Scale is set to None. Show guardbars Checking this option adds guardbars to the barcode.
l normal bars. Space Before : Defines the space between the main symbol and the supplement, in cm. Human Readable Message When this option is checked, PlanetPress Connect shows a human readable text below or above the barcode, as defined using the Text Position, using the specified font and font size. The font size is given in points (pt).
Positioned Boxes are suitable for use in Print templates only. Adding a Positioned Box To insert a Positioned Box, use the icon on the toolbar. Positioned Boxes can be moved by dragging the borders, and resized using the handles on the sides and the corners. They can be styled using the Format > Box menu item, through the CTRL+M keyboard shortcut or through the CSS files; see "Styling and formatting" on page 398 and "Styling templates with CSS files" on page 399.
Span The Span element ( in HTML code) is used to group inline elements, such as text in a paragraph. A Span doesn't provide any visual change by itself, but it provides a way to target its content in a script or in a style sheet. To wrap content in a span, select the text and other inline elements and click Insert > Wrap in Span on the menu.
Adding a date To add a date, use the Insert > Date option in the "Menus" on page 482. A dialog appears with the following controls: l l l Language: Use the drop-down to select which language the date should be displayed in. Update Automatically: Check to update the date automatically when the template is viewed or produces output. When this option is checked, a placeholder is inserted in the template and a script is created to update it automatically, otherwise a static text with the date is inserted.
Locale can be the system's locale, a specific locale, or it can depend on the value of a data field; see "Locale" on page 421. Forms Web templates can contain Form elements. Capture OnTheGo templates always contain a Form element. Tip To create a Capture OnTheGo template, preferably use a Template Wizard; see "Capture OnTheGo (COTG) templates" on page 436. The Wizard not only adds the form, but also the necessary Capture OnTheGo form elements, styles and JavaScript files. Adding a Form 1.
5. Using the the Method drop-down, select whether the form should be sent using the GET or POST method. 6. Using the next drop-down, select the form's Encryption Type (enctype): l l l application/x-www-form-urlencoded: Default. All characters are encoded before they are sent. Spaces are converted to "+" symbols, and special characters are converted to ASCII HEX values. multipart/form-data: No characters are encoded. This value is required when you are using forms that have a file upload control.
11. Use the Location drop-down to select where to insert the element. l l l l l At cursor position: The element is inserted where the cursor is located in the template. Before element: The element is inserted before the current HTML element where the cursor is located. For example if the cursor is within a paragraph, insertion occurs before the
tag.* After start tag: The element is inserted within the current HTML element, at the beginning, just after the start tag.
l l characters are converted to ASCII HEX values. multipart/form-data: No characters are encoded. This value is required when you are using forms that have a file upload control. text/plain: Spaces are converted to "+" symbols, but no special characters are encoded. Changing a Form's validation method In Connect PlanetPress Connect, there are two ways in which a Form's input can be validated: l l The Browser validation method leaves it up to the browser to validate the user input.
validation. For more information about Forms, see "Forms" on page 269. For more information about elements in Forms, see http://www.w3schools.com/html/html_forms.asp. Types of Form Elements Fieldset A fieldset is a group of related elements in a form. The elements don't have to be of the same type. After inserting and selecting the Fieldset (see "Selecting an element" on page 227) you can add elements to it in the same way you add elements to a Form; see "Adding elements to a Form" on page 275.
Label A Label element is a text displaying informative text within the form. Labels are non-interactive. Note that this type of label is not tied to an input element. At the same time you add an input element, you can add a label to that element; see "Adding elements to a Form" on the next page below. To change a label after inserting the Form, simply click it and start typing. Checkbox A Checkbox element sends information to the server whether it is checked (true) or not (false).
Button The Button element is an element that can be clicked. When adding a Button to a Form you can set the button's type: A submit button will validate the form data and if validation is successful, send the data to the provided URL (by the Action specified for the Form; see "Changing a Form's properties" on page 271). l A reset button will reset the form to its original configuration, erasing any information entered and options provided.
l l l l Wrap input with label places the input element inside the Label element. Attach label to input ties the label to the input element using the for attribute of the Label element. Use label as placeholder inserts the given label text in the placeholder attribute of the field. No style omits the label altogether. Note The first two label styles ensure that when the user clicks the label, the input element gets the focus. 4.
l l l Required: Check if the field is required to submit the form. If a field is required but contains no data, a message will be shown to the user. Minimum and maximum length: Enter a numerical value for the minimum and maximum character length required for this field. Equal to: Use the drop-down to select another field that is already added to the same Form. The contents of both fields must match for the data to be validated.
the Designer; see "Editing HTML" on page 224. The HTML tag of a hyperlink or mailto-link is . This is sometimes called an anchor tag. For a list of attributes, see http://www.w3schools.com/tags/tag_a.asp. Adding a hyperlink or mailto link 1. Select text or an image. Note Although it is possible, it is not advisable to add a Hyperlink to other elements, such as a Paragraph or Div. HTML 4 specifies that hyperlinks and mailto-links may only contain inline elements.
Dynamically inserting or modifying a hyperlink You may wish to adjust a hyperlink depending on a value in a record that is merged to the template when generating output, for example, to provide a different mailto link for different customers. How to add or modify a hyperlink is described in a how-to; see How to dynamically insert a hyperlink. This implies writing a script. For information about scripts, see "Write your own scripts" on page 376.
Tip To create a Print section from an existing PDF file, use a PDF file as a Print section's background. Editing PDF files in the Designer is not possible, but when they're used as a section's background, you can add text and other elements, such as a barcode, to them. See "Using a PDF file as background image" on page 359. Optional filler for whitespace Conditional content and dynamic tables, when used in a Print section, may or may not leave an empty space at the bottom of the last page.
1. Look up the image file on your computer and drag the image file from the Explorer to the Images folder on the Resources pane at the top left. 2. To place the image in the content, drag it from the Images folder on the Resources pane to the content and drop it. To import a remotely stored image, see "Using external images" below. Using external images An external image is an image that is not saved within the template file.
Resizing an image There are three ways to resize an image after inserting it in the content of a template. l l l Click the image and drag the handles to resize it. Press the Shift key while dragging, to scale the image proportionally. Select the image (see "Selecting an element" on page 227) and type the desired width and height in the respective fields on the Attributes pane. Select the image and select Format > Image, on the menu. On the Image tab, change the width and height of the image.
To set an alternative text, click the image and enter the alternate text in the Alternate text field on the Attributes pane at the top right. Table Tables serve two different purposes: they are a way to display data in a tabular format, and they are also a way to position elements on a page. In HTML email, Tables are the most reliable way to position text and images; see "Designing an Email template" on page 439. In web pages, on the other hand, Inline Boxes are the preferred way to position elements.
2. Enter the table's desired attributes: l l l l l ID: a unique identifier for the table. IDs are used to access the Table from scripts and as CSS selectors for style rules. Class: A class identifier for the table. Classes can be shared between elements and are used to access the table from scripts and as CSS selectors for style rules. The number of rows for the header, body and footer of the table. The number of columns The width of the table. 3.
Header and footer Adding a header or footer To add a header or footer to an existing table, right-click the table and then select Table > Insert thead or Insert tfoot, on the shortcut menu. Alternatively, click in one of the cells and select Insert > Table > Insert thead or Insert tfoot, on the menu. Deleting a header or footer To delete a header or footer, simply right-click the header or footer and select Row > Delete on the shortcut menu.
Headings (
through ) are also considered text elements. Text elements can be present within other types of elements such as table cells (), boxes (), etc. Adding text To add text, simply type in the workspace in the middle. l l Press Enter to insert a new paragraph. Press Shift+Enter to insert a line break. Alternatively, copy-paste text into a template, or use the Insert Lorem Ipsum toolbar button to insert dummy text. A line break looks like this in HTML:
. Formatting text Text can be styled, colored, centered, indented etc. It can even be displayed so that it reads from right to left. See "Styling text and paragraphs" on page 407. In all templates you can use the fonts that are provided with the Designer, as well as imported fonts; see "Fonts" on page 419. Capture OnTheGo With the Designer you can create Capture OnTheGo templates. COTG templates are used to generate forms for the Capture OnTheGo mobile application. 1. Add an ID (required) and, optionally, a class. Note The ID will be copied to the name attribute of the element. The name attribute is what identifies the field to the receiving server-side script. To change the name, select the element after inserting it and type the new name on the Attributes pane. ID's and classes are also useful with regard to variable data (see "Personalizing Content" on page 325) and styling (see "Styling templates with CSS files" on page 399). 2. Note When you add a COTG element to a template that you didn't start with a COTG template wizard, the Designer will automatically add the jQuery library and the JavaScript file cotg.js, so that the element works well. The Foundation style sheets will not be added. You only get those when you start creating a COTG template with a template wizard. A Capture OnTheGo form is actually just a Web form, that you could add without a wizard, but the COTG Template Wizards include the appropriate JavaScript and styles to create userfriendly, responsive forms. They are built upon the Foundation framework. Foundation All Web Template Wizards make use of the Zurb Foundation front-end framework. A front-end framework is a collection of HTML, CSS, and JavaScript files to build upon. l l l Patient Intake. The Patient Intake Template is a generic medical questionnaire that could potentially be used as a base for insurance or clinic form. Kitchen Sink. The Kitchen Sink Template includes a wide range of basic form and COTG form elements demonstrating various possibilities of the software. Time Sheet. The Time Sheet Template is a single page application used to add time entries to a list. submitted data. The action will look like this: http://127.0.0.1:8080/action (8080 is Workflow's default port number; 'action' should be replaced by the HTTP action of that particular HTTP Server Input task). The method of a Capture OnTheGo form should be POST to ensure that it doesn't hit a data limit when submitting the form. The GET method adds the data to the URL, and the length of a URL is limited to 2048 characters. Tip Click the Edges button on the toolbar to make borders of elements visible on the Design tab. The borders will not be visible on the Preview tab. COTG Elements With the Designer you can create Capture OnTheGo templates. COTG templates are used to generate forms for the Capture OnTheGo mobile application. This topic is about Capture OnTheGo form elements. For more information about the application see this website: Capture OnTheGo. l l features available (quality, orientation, filters) are dependent on the device itself. You can, however, set the format, quality and scaling for images that are submitted by the Camera element, as explained below. Library: Opens the device's default library or gallery application to select a single image that is then saved in the form data. The accessible images and navigation depend on the device itself. Clear: Removes any existing image data from the Camera element. l Scale Image: Check this option to enable image scaling. Then set the maximum width and height of images before they are sent to the server. Note that only the smallest of these is applied and the size ratio is always maintained. How to use the captured or selected image in a template When the user has submitted the form, you may want to use the captured or selected image in a Designer template, for example in a letter or on a web page. new row will contain the same elements as the first row. The names of all elements in the first row will be extended with __0, while the names of the elements in the second row will be extended with __1, etc. Geolocation The Geolocation Element adds a button to read the device's current GPS coordinates and save them in a form field. When the button is pressed, the GPS coordinates are requested and saved. When the form is submitted, the Geolocation data is sent in plain text. Time and Formatted Time The Time element and the Formatted Time element display the current time on the device when the form is first opened. When the element is touched, a time selector appears so the user can modify this time. The Formatted Time element displays times in a format that depends on the locale of the device on which the user is viewing the form. A Time Element displays dates in the ISO 8601 format: HH:MM. When the form is submitted, the time data is sent as plain text. Only one Email section is created at the start, but you can add as many Email sections as you need; see "Email templates" on page 300. However, when the Designer merges a data set to generate output from the Email context, it can merge only one of the templates with each record; see "Generating Email output" on page 320. Email templates are personalized just like any other template; see "Variable Data" on page 336. pane. These style sheets are meant to be used for styles that are only applied to elements in the Email context. The Wizard opens the Email section, so that you can fill it with text and other elements; see "Content elements" on page 223 and "Email templates" on the facing page. Sending email When the template is ready, you can generate Email output; See "Generating Email output" on page 320. To test a template, you can send a test email first. Lossless is the maximum quality. Note that this will produce a larger PDF file. Uncheck this option to be able to set a lower quality. The quality is set in a percentage of the maximum quality. Tile Size is the size of the files in which the image that is being compressed is divided. (If the image height or width is not an even multiple of the tile size, partial tiles are used on the edges.) Image data for each tile is individually compressed and can be individually decompressed. Adding an Email template When an Email template is created (see "Creating an Email template with a Wizard" on page 428), only one Email section is added to it. An Email context may contain various templates, but per record only one of those can be sent when you generate Email output. It is not possible to add an Email section to an existing Email context with the help of a Template Wizard. Email clients do not read CSS files and some even remove a |