
1.7
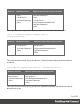


Table Of Contents
- Table of Contents
- Welcome to PrintShop Mail Connect 1.7.1
- Setup And Configuration
- System and Hardware Considerations
- Installation and Activation
- Where to Obtain the Installers
- Installation - important information
- Installation - How to guides
- Activation
- Installation Prerequisites
- User accounts and security
- The Importance of User Credentials on Installing and Running PrintShop Mail C...
- Installing PrintShop Mail Connect on Machines without Internet Access
- Installation Wizard
- Running connect installer in Silent Mode
- Activating a License
- Migrating to a new workstation
- Uninstalling
- The Designer
- Basic Steps
- Content elements
- Snippets
- Styling and formatting
- Personalizing Content
- Writing your own scripts
- Designer User Interface
- Script API
- Designer Scripts API
- Examples
- Examples
- Examples
- Examples
- Examples
- Examples
- Examples
- Examples
- Examples
- Examples
- Examples
- Examples
- Examples
- Example
- Example
- Example
- Example
- Example
- Examples
- Creating a table of contents
- Example
- Examples
- Examples
- Examples
- Examples
- Replace elements with a snippet
- Replace elements with a set of snippets
- Example
- Example
- Control Script API
- Generating output
- Print output
- Email output
- Optimizing a template
- Generating Print output
- Saving Printing options in Printing Presets.
- Connect Printing options that cannot be changed from within the Printer Wizard.
- Print Using Standard Print Output Settings
- Print Using Advanced Printer Wizard
- Adding print output models to the Print Wizard
- Splitting printing into more than one file
- Variables available in the Output
- Generating Tags for Image Output
- Generating Email output
- Print Manager
- General Information
- Release Notes
- Overview
- Connect 1.7.1 General Enhancements and Fixes
- Connect 1.7.1 Designer Enhancements and Fixes
- Connect 1.7.1 Output Enhancements and Fixes
- Known Issues
- Previous Releases
- Overview
- Connect 1.6.1 General Enhancements and Fixes
- Connect 1.6.1 Designer Enhancements and Fixes
- Connect 1.6.1 Output Enhancements and Fixes
- Known Issues
- Overview
- Connect 1.4.2 Enhancements and Fixes
- Connect 1.4.1 New Features and Enhancements
- Connect 1.4.1 Designer Enhancements and Fixes
- Connect 1.4.1 Output Enhancements and Fixes
- Known Issues
- Legal Notices and Acknowledgments

Example
This script checks if the output channel is EMAIL and if the context to be merged is the Print
context (which happens if the Print context is attached to an email). If this is the case, it includes
and excludes certain Print sections from the output.
if (channel == Channel.EMAIL) {
if (merge.context.type == ContextType.PRINT) {
merge.context.sections['Section 1'].enabled = false;
merge.context.sections['Section 2'].enabled = false;
merge.context.sections['Section 3'].enabled = true;
}
}
merge
In Control Scripts, the root level instance of the object merge is the entry point from where you
can query and change the way contexts are merged. It gives access to the template with all its
contexts and sections.
For sample scripts, follow the links to the respective objects.
For more information about Control Scripts, see "Control Scripts" on page258 and "Control
Script API" on page516.
Field Type Description
channel "Channel"
on
page529
The final output channel: EMAIL, PRINT or WEB. The channel
doesn't change when the output consists of different contexts.
When generating an email, for example, the channel is EMAIL,
even when merging the Print context to attach it to the email.
"context"
on the
previous
page
Context The context rendered by this merge run. If for one record,
different contexts need to be output (for example, when the
Print context is attached to an email) a record is merged
multiple times: once per context. Per merge run,
merge.context shows with which context the record is
merged.
"section"
on the
Section In template scripts, this object defines the section that is being
merged.
Page 519