
Operation Manual


2-9
2. Windows KX Driver
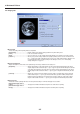
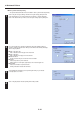
■ Staple
Stapling is possible if the optional finisher is installed.
* Stapling is only available with 20 ppm copiers.
* The following settings are required before stapling is possible:
(1) “Device Options” setting in the “Device Settings” Tab
• Select [RAM Disk] or [Hard Disk].
• Select [Internal Finisher], [Finisher] or [Booklet Stitcher].
(2) “Output” Tab
• When the Internal Finisher is installed, select [Finishing Tray] as the “Output to” setting.
• When the Finisher is installed, select [Main Tray] as the “Output to” setting.
• When the Booklet Stitcher is installed, select [Finisher Tray (Face-Down)] as the “Output to” setting.
• Put a check mark in the checkbox for [Collate].
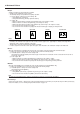
• Put a check mark in the checkbox for [Staple] and select the desired type of stapling you want performed.
Upper Left Upper Right Booklet Booklet Stitch
Notes
•“Booklet” and “Booklet Stitch” cannot be selected when the Internal Finisher is installed. “Upper Left” or “Upper Right” should be selected
according to the orientation of the paper set in the cassette. If either “Upper Left” or “Upper Right” is selected, a message will be
displayed in order to verify the orientation of the paper.
•“Booklet Sticher” cannot be selected when the Finisher is installed.
• In order to staple in the lower left or lower right of the paper, select “Rotated” as the “Orientation” setting in the “Media” Tab.
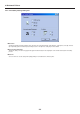
■ Punch
When the optional Finisher is equipped with a Punch Unit, it is possible to have holes punched into the finished copies.
* In order to use the Hole Punch function, it is first necessary to perform the following settings.
(1) “Installable Options” setting in the “Device Settings” Tab
Select [Finisher] or [Booklet Stitcher] and select the type of Punch Unit. For more details on how to select the Punch Unit, refer to
“Punch Unit” on page 2-15.
(2) In the “Output” Ta b
• When the Finisher is installed, select [Main Tray] or [Sub Tray] as the “Output to” setting.
• When the Booklet Stitcher is installed, select [Finisher Tray (Face-Down)] as the “Output to” setting.
• Put a check mark in the checkbox for [Punch] and select the type of hole punching you want performed.
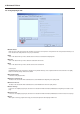
■ Mailbox
When the optional Mailbox Unit is installed, the copies can be ejected into the specified Mailbox Tray.
* In order to use the Mailbox Unit, it is first necessary to perform the following settings.
(1) “Installable Options” setting in the “Device Settings” Tab
Select [Finisher] and then [Mailbox].
(2) In the “Output” Ta b
• Select [Mailbox (Face-Down)] or [Finisher Tray (Face-Up)] as the “Output to” setting.
• Put a check mark in the checkbox for [Mailbox] and select the desired tray.
Note
The Hole Punch and Staple functions cannot be used when the copies are to be ejected into the Mailbox.
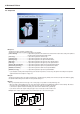
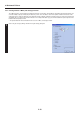
■ Job Settings...
Clicking on the [Job Settings...] button opens up the [Job Settings] dialog box from which you can print out using the e-MPS (Job Storage)
function. For details, see “2-6-1 Printing using the e-MPS function” on page 2-10.