
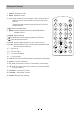
User's Manual


6
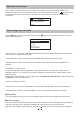
Ethernet connection
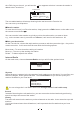
If you want to connect the internet via Ethernet, simply plug in the Ethernet cable to the
Ethernet socket at the rear side of the radio, you will see the Ethernet icon starts blinking,
it’s now connecting to the network. Once the icon goes steady, it means the network is
connected.
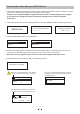
Start using internet radio
Press <Menu> to return to the main menu or the key on the remote controller. You will
see the item list below:
<My Favorite>- To show the list of favorite stations which have been assigned to the presets.
There are up to 99 presets available.
<Internet Radio>- Start exploring the worldwide radio stations and music here
<Media Centre>- Music streams from the UPnP servers/ devices under the same Wi-Fi
network
<FM Radio> - Listen to FM
To seek the FM radio station, press the Left or Right button, the radio will seek the next
available station. If you want to fine tune the frequency, please the up / down button on the
remote control.
When listening to FM radio, you can press the <Tune/Select rotary knob> to mute the sound
or <Enter> on the remote control
<Alarm>- Setting of Alarms
<Sleep Timer>- You can set the timer to turn the radio standby after certain time elapsed
<Configuration>- More settings available for you to configure the radio as you desire
My Favorite
This is to show the list of your Favorite stations which have been assigned to the presets.
Preset a station
There are 4 individual preset buttons on the radio allows to access the top 4 favorite stations.
The radio can store up to 99 preset stations for each Internet radio and FM radio.
While you are playing a radio station, press the utton on the remote control or long press
My Favorite
Internet Radio
Media Centre
Alarm
Sleep Timer
Configuration
12:00AM
Connecting to Network...
!!!