ODYS BASE Content 3 4 5 6 Important Safety Instructions............................................................................ 2 Front and Rear Panel Illustration ...................................................................... 6 2.1 Front panel and Keyborad .......................................................................... 6 2.2 Remote Key Function: ................................................................................ 7 Teletext Function Keys ..............................
ODYS BASE 1 Important Safety Instructions EN Warning: To reduce the risk of electric shock, do not remove the cover or back. There are no userserviceable parts inside. Refer servicing to qualified personnel. Warning: To prevent fire or electric shock hazard, do not expose the unit to rain or moisture. Do not expose the Adaptor and Digital Photo Frame to water (dripping or splashing) and no objects filled with liquids, such as vases, should be placed on the unit.
ODYS BASE Warning EN High voltages are used in the operation of this television receiver. Do not remove the cabinet back from your set. Refer servicing to qualified service personnel. To prevent fire or electrical shock hazard, do not expose the television receiver to rain or moisture Do not drop or push objects into the television cabinet slots or openings. Never spill any kind of liquid on the television receiver. Do not block the ventilation holes in the back cover.
ODYS BASE Tips regarding environmental protection EN At the end of its operating life, this product may not be disposed of by way of your normal household waste. Instead it must be delivered to a collection point for recycling electrical and electronic equipment. The icon on the product, in the operating instructions or on the packaging, indicates this. The materials used in manufacturing this product are recyclable, depending on their identifying markings.
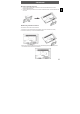
ODYS BASE Insert the stand support pillar into the stand as the arrow indicated direction, and then fastened with three screws. 2. Insert the stand Ass'y into back cover as the arrow indicated direction, and then fastened with one screw. Wall Mounting Installation Guidelines This television can be wall mounted as follows: 1. Remove the screw which fixes the stand and back cover (screw as shown in the circle). 2. Remove the stand Ass'y as the arrow indicated direction. 3.
ODYS BASE 2 Front and Rear Panel Illustration EN 2.1 Front panel and Keyborad 1: 2: 1.SOURCE: Display the input source menu.In MENU mode,press“SOURCE”to confirm the selected item. 2.MENU: Display main MENU. 3.CH+/CHIn TV mode,press“CH+”or“CH-” to change the channel up and down. In MENU mode, press “CH+”or “CH-”to select items . 4.VOL+/VOLAdjust sound level. In MENU mode, press“VOL+”or“ VOL-”to adjust the item that you selected. 5. STANDBY Press this button to turn the unit ON from STANDBY mode.
ODYS BASE 1. AV and YPbPr share one audio channel. 2. When HDMI2 port get DVI signal ,the audio signal receives from the YPbPr/AV Audio channel 3. When HDMI1 port get DVI signal ,the audio signal receives from the PC Audio channel Remote Key Function: EN 2.2 1:POWER:To set the TV to standby or power on. 2:NUMERIC KEY:For direct access to channels. 3:TV MENU:To display TV menu. 4:CURSOR:To move within the menu. 5: CH. LIST: To display channels list. 6:VOL+/- :To adjust sound level.
ODYS BASE EN 8
ODYS BASE 3 Teletext Function Keys consulte d like a ne wspaper. I t also o ffers access t o sub titles for v iewers with hearing proble ms or wh o are no t fa miliar wit h the trans missi on lan guage (cable n etworks, satellite cha nnels, etc. ) Press: TTX SELECTING A DIRECT ACCESS TO THE ITEMS INDEX SUB PAGE HOLD You will obtain: Thi s i s u sed to call or exi t telete x t mode s . T he su m mar y appear s wi th a lis t o f ite m s tha t ca n b e ac ce s sed .
ODYS BASE 4 System Connections EN Do not connect the power cord until all other connections have been made. Ensure that you observe the color cord when connecting audio and video cables. 4.1 Connecting to External AV Signal Source Use the audio and video cable to connect the input jacks on the right panel of the unit to the external AV signal source. Ensure that you observe the color cord when connecting audio and video cables.
ODYS BASE 4.2 Connecting to External AV Signal Source (Y/PB/PR) EN Use the audio and video cables to connect the Y/PB/PR input jacks on the rear panel of the unit to the external AV signal source. AV L R Y Pb Pr HDMI2 AC-INPUT 100-240V~ 50/60Hz After connection, turn on the power of the unit and the external AV signal source. Press SOURCE then direction buttons to select Component mode, and then press the OK button to confirm. 4.
ODYS BASE 4.4 Connecting to External AV Signal Source (HDMI) Follow the figure below to connect an HDMI signal source to the HDMI jack on the rear panel of the unit. EN AV L R Y Pb Pr HDMI2 AC-INPUT 100-240V~ 50/60Hz USB HDMI1 …...HDMI2 PC AUDIO SCART VGA RF …HDMI1 After connection, turn on the power of the unit and the external AV signal source and use the SOURCE and the direction buttons to select HDMI mode, and then press the OK button to confirm.
ODYS BASE EN Press SOURCE then direction buttons to select MediaPlayer mode, then press the OK button to confirm. Please make sure that the USB device have plugged in the slot. There are three type media item can be selected, such as photo, music and Movie. Select the type media item by pressing ◄►, press OK button to enter the disk selection menu. Press the◄► to select the right disk and press OK to display media files and folder list or choose Return to back to the media type selection menu.
ODYS BASE EN 4.6 Connecting to PC The unit can be connected to PC (personal computer) via the VGA cable. Follow the figure below to connect: 1. Connect one end of the VGA cable to the VGA input jack on the rear panel of the unit and connect the other end to the PC. 2. Connect one end of the audio cable to the PC audio input jack on the rear panel of the unit and connect the other end to the PC audio output jack. 3. Connect the power cord. 4.
ODYS BASE 4.7 Connecting to TV-Signal Input EN Connect the TV signal cable (the antenna cable, for example) to the Antenna Input Jack on the back of the unit so that you can receive television programmes. After connection, turn on the power of the unit. Then press the SOURCE button to select TV or DTV mode and conduct program selection.
ODYS BASE 5 Input Source Selection EN The unit incorporates multiple video modes which can be selected vi a the Input button on the television or remote. Press the SOURCE button to enter Input menu. The sc reen will display as s hown below: Input Source OK Use the ▲▼ direction buttons and OK button On the input menu, press the ▲▼ direction button to s elect the desired video mode, and press the OK button to enter the s elected mode.
ODYS BASE 6 TV operation and System Setup Installation Guide (DVB-T, ATV) EN 6.1 This screen only appear when the TV first time turn on or reset to factory et. energy-saving mode and country, auto tuning programs. And after tuning ,the screen will skip to the first DTV program. Select Mode Select the country for DTV and ATV reception. 1.Switch Home/Shop Mode freely by yourself. -Home Mode is an energy-saving Mode, it's recommended as a family's normal watching mode in default by manufacturer.
ODYS BASE EN You can search channels and edit programs here. 1).Auto tuning: Search all the channels automatically(you can select ATV and DTV) Pls press ◄► ▲▼ to select country at first , then press OK button to start auto tuning . Press “TV MENU” to cancel ATV channel search and Press ◄ to c onfirm. Press ►to continue with ATV channel search. The engine will proceed with the DTV channel s earch.
EN ODYS BASE 3). ATV Manual tuning : You can change the sound system to search the analog TV channels and fine tune the channels , then store the channels you selected to a desired Number. Press teletext red button to storage to channels after manual tuning. 4). Program edit: You can Delete ,Rename ,Move, Skip , FAV any programs. Red Key Delete Green Key Rename: Yellow Key Move Blue Key Skip FAV Key Favourite Press teletext red button , the program in cursor will delete.
ODYS BASE 6.2.2 Picture Menu EN The second item of the MENU is PICTURE MENU. You can adjust picture effect here, such as contrast, brightness, etc. Press ▲▼ to select the setting, press OK to adjust, press ◄► to change the setting. Press TV MENU to step back to the previous menu. 1).Tint is available in NTSC system only. 2).There are four colors temperature modes can be selected medium, warm, cool, user 3).
ODYS BASE NOTE: Restore factory default will clear all the programs and password. 6.2.6 Lock Menu The sixth item of the menu is the LOCK MENU You can lock system, set password, block program and set parental guidance Once you set the lock system on you can not search the channels or change any programs. Press ▲▼ to select the setting, press OK to adjust, press ▲▼ to select the value to change, press ◄► to change the setting. Press TV MENU to step back to the previous menu.
ODYS BASE 6.2.7 EPG Menu (Electronic Program Guide). The EPG menu is used to look at what is being broadcasted on DTV or Radio channel in the day. To access the EPG menu, press the EPG button, the following menu will be displayed: EN Green Key / INFO Key Use to choose the programs , Press INFO key, you can display the highlight program's information.
ODYS BASE EN 7 Trouble Shooting Trouble phenomenon Symptom Inspection Check Picture Audio antenna position, direction Snow Noise Ghost Normal audio Interfere nce Noise or connection antenna position, direction or connection electronic equipment,car/ motorcycle,fluorescent light Volume(check if mute is Normal Picture Mute activated or if the audio system connections are not correct) Power cord is not inserted Mute Contrast and brightness/volume No picture No colour Power switch is not opene
ODYS BASE 8 Specifications Item EN ATV/DTV Tune DVB-T Demodulation Specification Frequency Range Demodulator VHF: 174MHz to 230 MHz UHF: 470MHz to 862 MHz COFDM OFDM Modulation Packet Carries Guard Interval RF IN 2K, 8K FFT, SFN and MFN 2K/8K 1/4, 1/8, 1/16, 1/32 IEC 169-2 female connector RF Loopthough IEC 165-2 male connector TV SCART Composite Video, Audio L/R Power Consumption 100-240V ~ 50/60Hz Display Decoder Module PAL, NTSC Aspect Rate 4:3 (Letterbox, Pan & Scan),16:9 Connections
ODYS BASE The following conditions comprise the requirements and scope of our warranty conditions and do not affect our legal and contractual warranty obligations. We offer a warranty on our products in accordance with the following conditions: 1. ODYS products are covered by a 24 month warranty. We will resolve damages or defects on ODYS products free of charge within 12 months of the purchase date under the following warranty conditions.
ODYS BASE Please observe the following when sending the product: EN 1. Send the product suitably packaged with carriage and insurance paid. Do not enclose any accessories with the products (no cables, CD's, memory cards, manuals, etc.), unless the AXDIA Service Centre specifies otherwise. 2. Mark the RMA number on the outside of the package in such a way that it is visible and clearly legible. 3. You must enclose a copy of the sales slip as proof of purchase. 4.