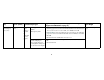
Contents Ordering Replacement Supplies . . . . . . . . . . . . . . . . . . . . . . . . . . . . . . . . . . . . . . . 1 Network Configuration . . . . . . . . . . . . . . . . . . . . . . . . . . . . . . . . . . . . . . . . . . . . . . 2 Operation Panel . . . . . . . . . . . . . . . . . . . . . . . . . . . . . . . . . . . . . . . . . . . . . . . . . . . . 3 Menu Overview . . . . . . . . . . . . . . . . . . . . . . . . . . . . . . . . . . . . . . . . . . . . . . . . . . . . 5 Plain Paper Usage Table . . . . . .
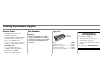
Ordering Replacement Supplies How to Order Part Numbers • Consult the dealer where you purchased your printer • Consult an Oki Data Authorized Sales or Service Dealer. For the nearest dealer, call 1-800-654-3282. • U.S., Puerto Rico, Guam, U.S. Virgin Islands only: Order on the Internet www.okidata.com. • U.S. only: Order toll-free at 1-800-654-3282, using VISA®, MasterCard® or AMEX®. • Check office supply catalogs.
Network Configuration Remote Web Access You can adjust printer settings via your web browser. 1. Point your web browser to the printer’s IP address. 2. The Web page shows information of the printer. 3. Click Help for details. Web Page Items Access restriction to the Web pages is described below. Network Card Setup To allow configuring the print server card (network interface card), a link to the network card web page is provided.
Operation Panel Operation Panel Explanation Keys The display and indicators show the current status of the printer. All printer settings are made by using the keys and display panel. Menu key Press to select a menu group. Also, press to return to the job status screen from the setting screen of each job status group. Arrow keys Press to select menu or function items or to set numerical values.
Operation Panel (cont.) OK key Press to register the selected menu or function. total number of printed pages and quantity of toner remaining (as a percentage) displays. Information key When “i” is displayed with a message indicating a paper misfeed, the relevant operation procedure can be displayed by pressing the INFORMATION key. If the INFORMATION key or the BACK/C key is pressed while the operation procedure is displayed, the information mode is cancelled.
Menu Overview The menu groups are classified into five groups and are selected consecutively by pressing the MENU key. If the OK key is pressed when the desired menu screen is displayed, a message will appear to indicate the next required operation. Ready WARMING UP: The printer is warming up. READY: The printer is ready. FROM TRAY #: The printer is currently printing. CHANGE THE TONER CARTRIDGE: Out of toner. Replace the toner cartridge. PAPER JAM: A misfeed has occurred.
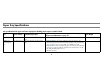
Paper Tray Specifications The specifications for types and sizes of paper for loading paper trays are shown below. Tray Tray No. (Name) Applicable Paper Types Applicable Paper Sizes (R - refer to page “The meaning of “R” in paper size indications” on page 11) Paper Weight Paper tray 1 Tray 1 8½ x 11, A4, B5 16 to 28 lb or 60 to 105 g/m2 Multipurpose drawer/ bypass tray Tray 2/bypass tray Plain paper. (Refer to the plain paper table.) Plain paper. (Refer to the plain paper table.
Tray Tray No. (Name) Applicable Paper Types Multipurpose drawer/ bypass tray (cont.) Tray 2/bypass tray (cont.) Special • Thick paper paper. • Labels (Refer to • Transparency film the table for applicable special papers.) Envelopes can only be fed from the multipurpose drawer.
Tray (optional) Tray No. (Name) Stand/3 x 500 sheet paper drawer Upper Middle Lower Stand/MPD and Upper 2000 sheet paper Lower drawer Applicable Paper Types Tray 2 Tray 3 Tray 4 Tray 2 Tray 3 Applicable Paper Sizes (R - refer to page “The meaning of “R” in paper size indications” on page 11) Paper Weight Same as multipurpose drawer. • 16 to 28 lb or 60 to 105 g/ • If AUTO-INCH is selected in setting the paper size and type, the Plain paper.
Plain Paper Usage Table Plain Paper Paper in AB system Paper in Inch system A5 to A3 5½ x 8½ to 11 x 17 2 60 to 105 g/m or 16 to 28 lb Recycled, colored, pre-punched, pre-printed and letterhead papers must conform to the same conditions as above.
Special Paper Usage Table Special Paper Type Remarks Thick Paper • • • • • • • • • • • Transparency film, labels Envelopes For A5 to A4, 5½ x 8½ and 8½ x11 sizes, thick paper ranging from 16 to 34 lb or 60 to 128 g/m2 can be used For sizes larger than 8½ x 11 or A4, thick paper ranging from 16 to 28 lb or 60 to 105g/m2 can be used Other thick papers Index stock (65 lb or 176 g/m2) or can be used Cover stock (110 lb or 200 to 205 g/m2) can be used but only for 8½ x 11and A4 paper in portrait orientati
Original and Paper Sizes The Oki B8300 uses media of standard sizes in both English and metric systems.The standard sizes available are shown below.
Setting Paper Size and Type from the Operation Panel To back up at any point, press the BACK/C key. 1. Press MENU repeatedly until CUSTOM SETTINGS appears in the message display. 2. Press OK. TRAY SETTING appears. TRAY SETTING ▼ 3. Press OK again. TRAY 1 appears in the message display. TRAY SETTING TRAY 1 • For example, if TRAY 1 is selected, the message shown below appears. LETTER PLAIN ▼ 4. Press ▼ or ▲ repeatedly until the desired paper tray is indicated in the display. TRAY SETTING TRAY 2 ▼ 6.
Setting Paper Size and Type from the Operation Panel (cont.) • Special paper such as thick paper, transparency film, labels, and postcards can be set for tray 2 and the bypass tray. • Envelopes can be set only for tray 2. 8. Press OK. 9. Press ▼ or ▲ repeatedly until the desired paper size appears. LETTER OK? ▼ • Depending on the selected tray, a selection for AUTO-AB and AUTOINCH may appear. • AUTO-AB: Select when you have set AB system paper. • AUTO-INCH: Select when you have set inch system paper.
Loading Paper: Tray 1 Loading paper in Tray 1 1. Gently pull out Tray 1 until it stops. 2. Load paper into the tray. Do not load paper above the maximum height line (approximately 500 sheets of 20 lb (80 g/m2) paper). Changing the Paper Size in Tray 1 3. Gently push Tray 1 firmly all the way into the machine. 4. Set the paper type. If you change the paper type, be sure to set the correct type by referring to “Setting Paper Size and Type from the Operation Panel” on page 12.
Loading Print Media: Multipurpose Drawer Loading paper in the multipurpose drawer The method of loading paper into the multi-purpose drawer is the same as described for Tray 1. When loading envelopes, postcards or transparency film, follow the descriptions below. Loading Postcards Load postcards print side up to the rear left of the tray as shown. • Two maximum height lines are indicated: one for plain paper and one for special paper.
Fusing Unit Pressure Adjusment Levers When feeding envelopes from the multipurpose drawer, damage to the envelopes or smudged printing may occur even if envelopes are within specification. The problem may be reduced by shifting the fusing unit pressure adjusting levers from the normal position to the lower pressure position. toner adherence, paper misfeeds or other problems may occur. 2. Lower the two levers marked A and B in the illustration. 1. Unlatch the duplex module and slide it to the left.
Loading Print Media: Transparency Film Loading transparency film Name Multi-purpose drawer Be sure to load the transparency film with the white label side up. Make sure no image will be printed on the label. Printing on the label may cause smudges on prints. Transparency film must be placed in short edge first orientation.
Loading Print Media: In the stand/3 x 500 sheet paper drawer Upper paper tray The upper tray is the same as the multi-purpose drawer. Use the upper tray according to the instructions for the multi-purpose drawer. Specifications Middle and lower paper trays Up to 500 sheets of recommended plain paper can be loaded into these trays. The method of loading paper is the same as for paper tray 1 in the main unit.
Loading Print Media: In the stand/MPD and 2000 sheet paper drawer Upper paper tray The upper paper tray is equivalent to the multipurpose drawer. The method of loading paper and the paper that can be used are the same as for the multipurpose drawer. Refer to the description of the multi-purpose drawer. If the paper size or paper type is changed in either paper tray, the tray settings must be changed in custom settings. Refer to Setting the Paper Size and Type. 2.
Adding Toner When toner runs out, the message CHANGE THE TONER CARTRIDGE appears on the display indicating that the print cartridge must be replaced. If you press and hold down the INFORMATION key while printing or in standby, the quantity of toner remaining (as a percentage) displays. When the percentage appears within the range of 025 per cent prepare a new cartridge. Part • The print cartridge contains toner and a photoconductive drum.
Adding Toner (cont.) 3. On the side, either unlatch the duplex module and gently it pull away or open the side cover. 4. While holding the lock release button down, pull out the printer cartridge and remove it. 5. Remove the new printer cartridge from its bag and remove the protective material A. 6. Shake the new cartridge horizontally five or six times. 21 7. Insert the new printer cartridge. Push the cartridge in until it locks securely into place.
Adding Toner (cont.) 8. Gently remove the sealing tape from the cartridge. 9. Remove the drum protective sheet from the printer cartridge. Do not 10.Close the duplex module. If the machine is not equipped with the duplex module, close the side cover. 11.Return the cartridge lock lever and close the front cover. Do not shake the developer cartridge after the sealing tape has been removed. If the cartridge is shaken after the tape is removed, some developer will come out of the cartridge.
Developer Cartridge Replacement When the cartridge needs replacing, a message will appear in the display. Follow the procedure below to replace the developer cartridge. 1. Turn off the power and open the front cover. 2. Lower the cartridge lock lever. • Do not shake the developer cartridge after the sealing tape has been removed. If the cartridge is shaken after the tape is removed, some developer will come out of the cartridge. Part OKI # 100k Developer cartridge ..................57100101 23 3.
Developer Cartridge Replacement (cont.) 4. Push the lock button at the rear and remove the developer cartridge. 5. Remove the new developer cartridge from its bag and remove the tape and protective material A and B. 6. Shake the new developer cartridge horizontally five or six times. 7. Insert the new developer cartridge. A B 8. Push the cartridge in until it locks securely into place. Close the front cover. The machine will become available in about two minutes.
Cancel a Print Job Cancel a Print Job 1. Press BACK/C during printing. Printing stops and a message asking for confirmation to delete the job appears. 2. Press OK to delete the data. To cancel deletion, press BACK/C. Printing will resume. To delete print data of a reserved job (jobs stored in the printer) Print data transmitted from computers will be stored in this printer (up to 99 jobs) and will be printed sequentially. 25 To delete print data of a reserved job before starting printing: 1.
Job Control The job hold function can be used only if your printer is equipped with the hard disk drive option. If Print after hold, Print before hold or Proof print operation is performed on the computer, print data will be held as a hold job. 1. Press MENU. PRINTJOBS ON HOLD will appear. 2. Press OK. When pressed, a user name BACK/C 3. Select the desired data by pressing the OK MENU and a file name of the print data stored as a held job will appear.
Job Control (cont.) 6. Use the same procedure as step 5 to enter the password from the second digit to the fifth digit and then press OK. 7. Select execution or cancellation of printing, or data retention after printing, and then press OK. • Deletion or retention of data after printing can be selected. Alternatively deletion of data without printing can be selected. Press ▼ or ▲ until the desired choice appears. PRINT AND DELETE DATA - OK? ▼ PRINT AND SAVE ▼ DATA -OK? DELETE THE DATA OK? ▼ 8.
Condition Settings There are three options that can be set from the Operator Panel for this setting: • Default settings: Basic settings used in printing. • PCL Symbol Set: Establishes a PCL symbol set. • Print PS Errors: Defines whether a PostScript error page is printed or not when a PostScript error has occurred. How to Access Condition Settings • Items that can be set from the operator panel: 1. Press MENU until SET OPERATIONS CONDITIONS appears. Any print jobs held in the 2. Press OK.
Default Settings The default settings allow detailed print conditions to be set for printing without any printer driver (for example, printing from MS-DOS and printing from a computer without any printer driver installed). While some items can be set either in the printer driver or on the operator panel, values set in the printer driver override those set on the panel. Use the printer driver to set options where possible. Smoothing: SMOOTHING reduces jagged edges (jaggies).
Default Settings (cont.) How to Access Default Settings 1. Press MENU until SET OPERATIONS CONDITIONS appears. Any print jobs held in the 4. Press ▼ or ▲ until the desired setting appears. 2. Press OK. DEFAULT SETTINGS appears. BACK/C MENU OK BACK/C MENU 5. Press OK. 6. Press ▼ or ▲ until the desired setting appears. 7. Press OK. 3. Press OK. printer and any job currently transmitted to the printer will be printed with the former printer settings. 30 8.
Custom Settings The items that can be set: Tray settings: The paper type and paper size for each tray are set here. Auto tray switching: Used to automatically switch the paper tray to another tray of the same paper size when paper runs out during continuous printing. Print list: Used to print a list of settings that have been made, or a font list. Total count: The number of printed pages and similar items are displayed. Clock: The date and time of the built-in clock of the printer can be set.
Misfeed Removal General Information All messages appear on the display panel of the main unit. When a misfeed has occurred, printing will stop and the message shown below will appear. Follow the procedure below to remove misfed paper. ! CAUTION • Do not damage or touch the photoconductive drum. • Be careful not to tear the misfed paper during removal. • If paper is accidentally torn during removal, be sure to remove all pieces. CAUTION The fusing unit is hot. Take care in removing paper.
Misfeed in the Paper Area Be sure to follow the misfeed removal sequence. Do not pull the paper tray out first as paper may be located between the paper tray and the paper feed section. If the tray is pulled first, the misfed paper may be torn and difficult to remove. The following procedure shows the removal sequence when the machine is equipped with a duplex module. If the machine is not equipped with a duplex module or any output device, the procedure is basically the same. The left the side cover.
Misfeed in the Paper Area (cont.) 3. If misfed paper is not found in step 2, pull out paper tray 1 and remove the misfed paper carefully. 5. Gently close the duplex module. If the machine is not equipped with a duplex module, close the side cover. After closing, confirm that the misfeed message has been cleared and the normal display appears. 6. If paper drops beyond the rear side of the paper tray that has been pulled out, remove the paper tray and then remove the paper. 4. Gently close the paper tray.
Misfeed in multi-purpose drawer 1. If available, unlatch the duplex module, slide it to the left and gently move the module away from the machine. If the machine is not equipped with a duplex module, open the side cover. 2. Open the left cover of the stand/paper drawer. Hold the knob and gently open the cover. If the machine is not equipped with a stand/ paper drawer, open the left cover of the multipurpose drawer. 3. Remove the misfed paper. Be careful not to tear the misfed paper during removal.
Misfeed in the stand/MPD and 2000 sheet paper drawer For misfeed removal in the upper tray, refer to the procedure Misfeed in the multi-purpose drawer. For misfeed removal in the lower large capacity tray, follow the procedure below. Follow steps 1 to 4 of Misfeed in the multi-purpose drawer before starting here. 2. Raise the paper guide and remove the misfed paper. After removing the misfed paper, be sure to return the paper guide. 1.
Misfeed in the transport area, fusing area and exit area CAUTION: The fusing unit is hot. Take care when removing paper. Do not touch the metal parts. module, open the side cover. 2. Remove the misfed paper as shown. If paper is misfed in the fusing area, turn knob A in the direction of the arrow to remove the misfed paper. 1. Unlatch the duplex module and slide it to the left. Gently move the module away from the machine.
Misfeed in the transport area, fusing area and exit area (cont.) 3. If paper is misfed in the transport area, turn knob B in the direction of the arrow to remove the misfed paper. 4. If the misfed paper is inside the fusing area, turn down the fusing unit open tab to open the fusing unit and remove the misfed paper. 5. If paper is misfed in the exit area, remove it, taking care not to tear the paper. 6.
Troubleshooting Whenever the printer stops or operation is not possible, check the operation panel display for messages. In most cases these messages will give sufficient information to return the machine to an operating condition. In cases where this information is not enough, check the list below for more information. This section describes problems relating to the printer only. For peripheral issues, see the appropriate sections. Problem Check Solution or Cause Printer does not operate.
Troubleshooting (cont.) Problem Check Solution or Cause Printer is on but data is not received.
Troubleshooting (cont.) Problem Check Solution or Cause The orientation of the image is incorrect on the print. Image loss has occurred. The image is larger than paper. Black pages. Black and white areas are reversed. Printer prints in reverse order. Printer stops in the middle of a print job. Printer driver orientation setting correct? Correct the orientation in the printer driver. Zoom printing? Check the zoom setting in the driver.
Troubleshooting (cont.) Problem Check Solution or Cause Printing is not on desired paper size. Printer resident font cannot be selected from the application. Printer write error occurs when using parallel port. Only one set has been output when more than one set has been specified. Two-sided printing is specified but only a notice page is printed.
Troubleshooting (cont.) Problem Check Solution or Cause Printed image is too light or too dark. Smudges on printed sheets. Exposure control set properly? The printer exposure level can be adjusted by using a key operator program. Contact your key operator. See the Operation Manual. (Read this document before installing the product.
Troubleshooting (cont.) Problem Check Solution or Cause Paper misfeeds frequently. Paper curled or damp? Do not use curled or crimped paper. If you do not use paper for a long time, store paper in its wrapper in a dry location. Paper may be curled when output depending on the paper type and quality.
Troubleshooting (cont.) Problem Check Solution or Cause Printed paper is wrinkled or the image rubs off easily. Paper size or weight out of the allowable range? Paper damp? Use paper in the allowable range. Be sure to store paper in the wrapper in a dry location and do not store paper in a location that is: humid A notice page prints when a job is Number of jobs reached the maximum of 100 jobs in retention? sent to the printer for retention. Password entry is requested.
Notice Page Printing Af Notice Page will be printed when the current print job cannot be done due to a system limitation and an explanation of the limitation is too lengthy to be shown in the message display. A Notice Page will describe the limitation and other possibilities to run the job. A Notice Page will be printed in the following cases: • When sufficient memory is not available to store the print data.
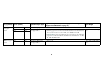
Selecting/Using OKI Print Media OKI SynFlex™* OKI Bright White Proofing Paper* Order # 52205901 To purchase OKI Media, contact your local OKI dealer or visit us at www.okidata.com. and tearproof White, 8½'' x 11'' (216 x 279 mm) 100 sheets/box 47 Weight OKI Order # Size OKI Order # 60 lb. (Cover) 52205601 8½ x 11'' 52206101 90 lb. (Index) 52205602 11 x 17'' 52206102 110 lb. (Index) 52205603 Order # 52206101 Acid-free White, White, 32-lb.
Selecting/Using OKI Print Media (cont.
Service and Support First … Consult the store where you purchased your printer. Additional OKI Resources Available 24/7 (24 Hours a Day, 7Days a Week) • Visit our multilingual web site www.okidata.com • Visit http://my.okidata.com • Call 1-800-654-3282. OKI is a registered trademark of Oki Electric Industry Company, Ltd. HammerMill is a registered trademark of HammerMill. MasterCard is a registered trademark of MasterCard International, Inc. Springhill is a registered trademark of International Paper.