
Printer User Manual
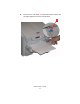
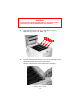
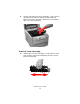
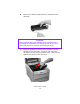

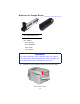
Table Of Contents
- Copyright Information
- Contents
- Notes, Cautions, etc.
- Introduction
- Parts of the Printer
- Paper (Print Media)
- Paper Trays
- Paper Exit Paths
- Loading Paper
- Consumables and Replacement Supplies
- Printer Settings (Menu Settings)
- Options
- Specifications
- Troubleshooting
- General Information
- Display Panel Messages
- Paper Jams
- Print Quality Problems
- USB Problems
- Application error
- General Protection Fault
- Paper Size Change Request
- Printer does not go online
- Printer makes a strange noise
- Printer takes a long time to start printing
- Printing cancels
- Printing does not start
- Printing is slow
- Cleaning Page
- Printer Drivers
- Printer Features
- Overview
- Banners
- Black Finish
- Black Overprint
- Black Printing
- Booklets (Binding Print)
- Collating
- Color Matching
- Overview
- Basics
- What this guide describes
- Background Information
- Factors that Affect Color Printing
- Choosing a Color Matching Method
- Color Settings
- Hue, Brightness, and Saturation
- How To
- Color Match Precision
- List of Color Matching Methods
- Descriptions of Color Matching Methods
- Automatic
- Office Color
- No Color Matching
- Grayscale
- Color Synch
- Custom Page Sizes
- Duplex Printing
- (Printing on Both Sides of the Paper)
- General Information
- Paper Types
- Paper Weights
- Paper Sizes
- Long Edge vs. Short Edge
- Duplexing Restrictions
- Windows PostScript: All Print Jobs (Default)
- Windows PostScript: Single Job
- Windows PCL: All Print Jobs (Default)
- Windows PCL: Single Print Job
- Macintosh OS 9.x
- Macintosh OS 10.1 & 10.2
- Macintosh OS 10.3
- Grayscale
- N-Up Printing
- Photographs
- Posters
- Print Resolution
- Save as File
- Toner Saving
- Watermarks
- Utilities
- Overview
- Accessing
- Descriptions of Utilities
- Installing the Utilities
- Color Correction Utility
- Color Swatch Utility
- Direct Network Printing Utility (LPR)
- Display Language Utility
- Network Printer Status Utility
- Network Setup Utility
- PS Gamma Adjuster Utility
C6000n User’s Guide
76
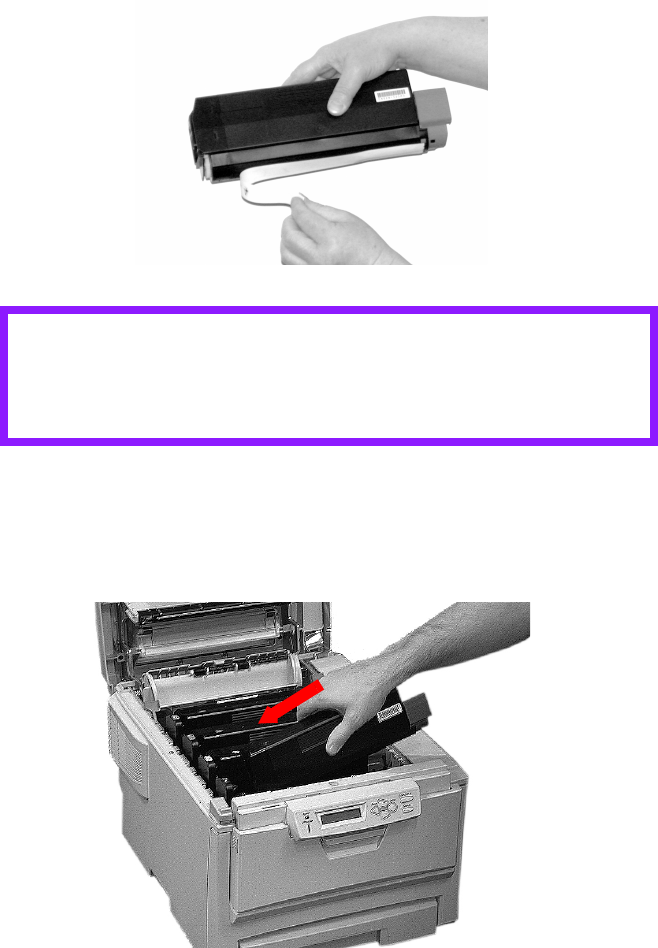
6. Remove the adhesive tape from the underside of the
cartridge.
7. Hold the cartridge by its top center with the colored
release lever to the right. Insert the left end of the
cartridge into the top of the image drum. Push it firmly
against the spring on the drum unit.
c53_80_tonrout.jpg
CAUTION!
Do not touch the toner release lever until the toner
cartridge is installed in the image drum. If you do, it
will open the toner release slot and spill toner.