
Operation Manual


- 42 -
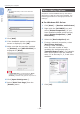
Connecting to a Computer
1
1. Setup
Manual connections
If the wireless terminal (computer, tablet,
smartphone, etc.) does not support WPS-PBC
(push button), then you can input the machine’s
SSID and password into the wireless terminal
(computer, tablet, smartphone, etc.) to connect.
Follow the procedure below to connect.
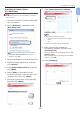
1 Turn on the printer.
2 Press the scroll button several times to
select [Wireless(AP Mode) Setting],
and then press the <ENTER> button.
3 Enter the Admin password, and press
the <ENTER> button.
(The default password is 999999.)
4 Select [Enable], and then press the
<ENTER> button.
5 Press the scroll button several times
to select [Manual Setup], and then
press the <ENTER> button.
6 Conrm the [SSID] and [Password]
that are displayed on the printer.
7 Input the printer’s [SSID] and
[Password] that were conrmed in step
7 for the wireless terminal (computer,
tablet, smartphone, etc.).
USB Connection
Perform the following procedure to connect your
printer to a computer via USB.
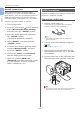
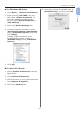
Connecting a USB Cable
1
Prepare a USB cable (1).
A USB cable is not supplied with your printer.
Prepare a USB 2.0 cable separately.
1
Memo
● Use a USB 2.0 Hi-Speed cable for a USB 2.0 Hi-
Speed connection.
2 Turn off your printer and the computer.
Reference
● “Turning Off the Power” P.21
3 Plug one end of the USB cable into the
USB interface connector (2) on the back
of the printer.
4 Plug the other end of the USB cable into
the computer’s USB interface connector.
2
Note
● Do not plug the USB cable into the network interface
connection. Doing so may cause a malfunction.