
Operation Manual


Scanning – general > 102
6. Place the document to be scanned on the scanner unit glass or ADF.
7. Press the START button.
S
CAN
TO
HOLD
QUEUE
The main steps in summary are:
(a) Press the SCAN button.
(b) Press the Hold Queue tab.
(c) On the Attachments tab, define your attachment properties, using the
Advanced Settings features as required.
(d) Set your document on the scanner unit.
(e) Press the START button on the scanner unit control panel.
These steps are expanded below.
1. Press the SCAN button to display the Network Send Mode screen.
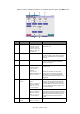
2. Press the Hold Queue tab (1).
3. On the Hold Queue tab (2), check the displayed settings for your scanned file.
NOTE
If you specify Auto for Original Size, the MFP automatically selects the paper
size to match the original document. However, depending on the document
conditions (for example, if the background density is high), document sizes
may not be detected automatically. In this case, specify the document size
manually.
NOTE
At any time, you can press the Active Jobs, Job Log buttons to check the
status of your work.
1
2