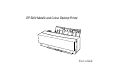
DP-5000 Metallic and Colour Desktop Printer User’s Guide
Preface Every effort has been made to ensure that the information in this document is complete, accurate, and up-todate. Oki assumes no responsibility for the results of errors beyond its control. Oki also cannot guarantee that changes in software and equipment made by other manufacturers and referred to in this guide will not affect the applicability of the information in it. Mention of software products manufactured by other companies does not necessarily constitute endorsement by Oki.
English Safety instructions This printer has been carefully designed to give years of safe, reliable performance. As with all electrical equipment, however, there are a few basic precautions that should be taken to avoid personal injury or damaging the printer: • Read this setup guide carefully and save it for future reference. • Read and follow all warning and instruction labels on the printer itself. • Disconnect the printer before cleaning. Use only a damp cloth.
plugged into the outlet should not exceed 13 amperes. • The power outlet into which the printer is connected must remain accessible at all times. • Opening any cover may expose hot surfaces. These are clearly labelled. Do NOT touch them. • iv Do not insert anything into the ventilation slots on the printer; you could get a shock or cause a fire. • Aside from the routine maintenance described in the user’s guide, do not try to service the printer yourself.
English Table of contents Preface . . . . . . . . . . . . . . . . . . . . . . . . . . . . . . . . . . . . . ii EEC compatibility . . . . . . . . . . . . . . . . . . . . . . . . . . . . ii Energy Star . . . . . . . . . . . . . . . . . . . . . . . . . . . . . . . . . . ii Safety instructions . . . . . . . . . . . . . . . . . . . . . . . . . . . . iii Table of contents . . . . . . . . . . . . . . . . . . . . . . . . . . . . . .v Chapter 1 - Introduction Introduction . . . . . . . . . . . . . . . . . . . . . .
Port monitor setup . . . . . . . . . . . . . . . . . . . . . . . . . 24 Select the I/O port speed . . . . . . . . . . . . . . . . . 25 Port speed error . . . . . . . . . . . . . . . . . . . . . . . . 25 Configure LPT port . . . . . . . . . . . . . . . . . . . . . 25 Printing operations. . . . . . . . . . . . . . . . . . . . . . . . . . . . 26 Printing in monochrome . . . . . . . . . . . . . . . . . . . . 26 Requirements . . . . . . . . . . . . . . . . . . . . . . . . . .
Colour printing on plain paper . . . . . . . . . . . . . . . .42 Requirement . . . . . . . . . . . . . . . . . . . . . . . . . . .42 Prepare the image to be printed. . . . . . . . . . . . .43 Install ink cartridges . . . . . . . . . . . . . . . . . . . . .43 Load the paper in your printer. . . . . . . . . . . . . .43 Set up the printer driver for printing . . . . . . . . .43 Printing in foil colour . . . . . . . . . . . . . . . . . . . . . . . . . .45 Single foil colour printing. . . . . . . . . . . . . . .
Forced printing and clearing data. . . . . . . . . . . 66 Clearing paper jams . . . . . . . . . . . . . . . . . . . . . . . . 66 Troubleshooting - Windows . . . . . . . . . . . . . . . . . . . . 68 Troubleshooting - Macintosh . . . . . . . . . . . . . . . . . . . 80 Chapter 8 - Specifications & Settings Options. . . . . . . . . . . . . . . . . . . . . . . . . . . . . . . . . . 94 DIP switches . . . . . . . . . . . . . . . . . . . . . . . . . . . . . 94 Printable area . . . . . . . . . . . . . . . . . . . .
English Chapter 1 - Introduction Introduction Thank you for your purchase of the OKI DP-5000 Photo Quality Colour Printer. This printer represents the most recent advances in printing quality and technology. Whether you need a printer for your Windows PC, your Macintosh or the new iMac computer, this printer is the solution you have been looking for.
Features The following is a summarised list of the many standard features offered by your new printer: 2 • Variable-dot 2400 dots-per-inch printing resolution. • Seven-colour ink capacity, the most challenging printing tasks are easily accomplished. • Fully compatible with all of the standard inks and foil colours. • Fade-proof, smear-proof, and waterproof printing. • Ability to print on any paper using our VPhoto Primer cartridge.
English Preparing your printer Removing package contents 1. Lift the printer out of its container box. Remove the packing materials from inside and outside the printer. 2. Remove the three pieces of tape (1) from the outside of the printer before using. Opening front cover 1. Caution The printer is shipped with tape, spacers, and other packing materials to prevent delicate parts from being damaged while in transit. Remove these packing materials before using the printer.
5. 6. Remove the tape (3) from the metal frame, and move the smaller packing piece (1) to the left. 4 Remove the other tape (3) from the carriage Caution: Operating the printer without first removing the packing materials may damage the printer. 1 3 2 Closing front cover Close the front cover after removing the carriage packing material. Caution: When closing the front cover, never slam it shut. The ink cartridges can become dislodged and damage to the printer may result.
English which you can run the power cables safely to suitable nearby connection points. Installing output paper tray Place the printer on the output paper tray (1) as shown below. During printing, extend the paper tray. The output paper tray will hold up to 100 sheets of paper.
Printer functions changing ink cartridges. Open the front cover gently, using both hands. The following paragraphs explain the name and function of each part of the printer. Front view of printer 1. Sheet feeder - Paper can fed into the printer either automatically or manually. Place a stack of not more than 100 sheets (plain laser paper) for automatic feed. In manual feed, insert a single sheet at a time. 1 3. Front cover - The front cover protects the internal mechanisms of the printer.
English Accessory connector - This connector is used to connect an optional dye sublimation key or Macintosh interface module to the printer. Make sure you remove the rectangular plastic connector cover before connecting either of these options. 5. Paper stopper - This stopper prevents the paper from rising when the small size media is set vertically for printing. 6. Paper support - The paper support holds the loaded paper upright. To extend the paper support, pull up on the top edge. 3.
2. SCSI connector - The SCSI connectors are used for connecting to the Macintosh computer and/or other SCSI devices. 3. Paper feed switch - This switch sets the paper feeding method to automatic feed mode or manual feed mode. 4. Power socket - The power cable connects to the power socket. needed for a particular printing job. A maximum of seven ink cartridges is allowed. 3.
Caution: Mishandling the print head or carriage can cause damage to the printer. Also, never load an ink cartridge directly into the carriage. Malfunction or damage to the printer may result. Paper feed switch English Paper feed switch set to position “A”Paper feed switch set to position “M” Control panel The top area of the printer has two buttons and three LED indicator lights. This area of the printer is called the control panel. 1. Power button - Use the power button to turn the printer on and off.
4. 5. Ready light - This light illuminates when the printer is ready to print. The light blinks slowly while printing and goes out when printing has paused or stopped. Power light - Indicates whether the printer is on or off. The light illuminates when the printer is on. When the light is off, the internal functions of the printer still retain power. To completely shut off power to the printer, unplug the power cable from the socket.
English Chapter 2 - Initial Setup Connecting cables for Windows When your printer has been positioned in a suitable location, you can connect it to your Windows PC with a printer cable and to a suitable AC power source with the power cable. 2 Connecting the printer to your computer Caution Power to the printer and computer must be turned off and the power cables unplugged before connecting or disconnecting the printer cable. Otherwise damage or malfunction may result.
2. Plug the free end of the power cable into a suitable AC power source (such as a wall socket). Caution: Power to the printer is completely cut off only when the cable is unplugged. Place the printer where you can easily unplug it from the wall socket. Also, pull the plug and not the cable when unplugging the printer.
English Ink cartridges The following describes how to identify the different types of ink cartridge and how to install and remove the cartridges from the printer. Printing type Ink cartridge type Black Part number Matching paper type 41067604 Yellow Identifying ink cartridge and paper types The ink cartridge type is indicated on the surface of each cartridge.
*1 Use VPhoto primer for any plain papers. Caution 1 The manufacturer only recommends printing with the cartridge-paper combinations listed in Table 1. 1. The cartridge has a stopper (1) to prevent slack in the ribbon (see below). Remove this stopper from the ink cartridge. 2. Insert a pencil from the side marked “B” and turn the pencil slowly to take up any slack in the ribbon (1). Caution 3 Printing outside the printable paper area can damage the cartridge ribbon.
English Note The printer carriage located inside the printer can select and pick up the necessary ink cartridge from any holder. You can place up to 7 cartridges of the same colour in the holders to reduce the need to change ink cartridges. 7. Place the second ink cartridge on top of the ink cartridge already installed. Gently push down the centre of the ink cartridges. Caution The ink cartridges may be put in any holder but DO NOT put ink cartridges directly into the carriage.
Caution 2: You must leave at least one cartridge holder empty for the printer to operate properly. Do not install more than 7 ink cartridges. 2. Removing an ink cartridge is similar to installing it. Hold the centre of the cartridge with your thumb and index finger. Push the left latch on the ink cartridge holder slightly to the left with the cartridge. 3. Lift up the right side of the cartridge, and then remove the entire ink cartridge.
English Loading paper The following paragraphs explain how to load paper into the printer. Paper types and available feeding modes The table below shows information on switching between automatic and manual feeds, and on setting the paper feed switch (“A” or “M”). Automatic feed mode Media type Plain paper (for plain paper A copiers) Manual feed mode M Laser paper / High Grade Paper A M VPhoto Print Film (A4) A*1 M Overhead Projector A Transparency Film M Other media (thick paper, etc.
Thick paper and other kinds of special printing media should be used in manual feed mode. The approximate thicknesses of paper that can be used in manual feed mode or automatic feed mode are as follows: Feed Mode Min. 0.07mm (0.003") 0.10mm (0.004") Manual 0.07mm (0.003") 0.23mm (0.01") Caution: Never use paper in the sheet feeder with thickness outside the range 0.07 mm - 0.10 mm (0.003" - 0.004") in automatic feed mode. In manual feed mode, never use paper whose thickness is outside the range 0.
English Loading high grade/plain/laser paper and transparencies 1. Pull the paper support upwards. 4. Adjust the paper feed guide to the paper size. 2. Select the paper feed mode by switching the paper feed switch to position “A”. Note 1: Do not use creased or curled paper, this can cause the paper to misfeed. 3. Place the paper in the sheet feeder. Chapter 2 - Initial Setup Note 2: Fan the paper once before placing it in the sheet feeder.
Note 3: Use only one type of paper at a time. Note 4: Pushing the paper feed guide too hard against the paper can bend the paper. Adjust the position of the paper feed guide so that it just touches the paper. Loading paper in manual feed mode Use manual feed mode when printing on thick paper, cards and other kinds of special printing media. In manual feed mode you should load only one sheet at a time. 1. 3. Make sure that the paper stopper is not lifted. Switch the paper feed switch to position “M”. 4.
English Note 1: Paper that is creased or curled may print incorrectly. Note 2: Make sure that you insert the paper straight. Inserting it at a slant can cause a paper jam. 5. Adjust the paper feed guide to the paper size. 6. Press the ready/ insert button. The paper is automatically pulled into the printer.
22 User’s Guide
English Chapter 3 - Installation and Operation, Windows Installing the printer driver Before you can use your printer, you need to install the correct printer driver software into your computer so that it can operate with the printer. The following paragraphs describe how to install the printer driver. Purpose of the printer driver The printer driver software helps to control the printing process, so the driver you select must match the printer you are using.
Note 1: The figures in Table 2 are approximations of the total disc space required when printing at VPhoto Colour mode. Note 2: The working disk space needed during printing is automatically erased after printing is completed. Installing printer software from CD The printer driver is included on the supplied installation disc. To install the printer driver software for Windows 95/98® follow these steps. 1. 24 Insert the OKI DP-5000 installation disk into your CD-ROM drive.
English Select the I/O port speed Port speed error 1. Choose Settings from the Start menu, and then select Printers . In the Printers window that appears, right-click the DP-5000 printer icon. Then select Properties. If the ‘I/O Port Speed Error’ message appears, you must set the parallel port configuration to ECP mode in the BIOS settings for the parallel port to use the DMA. Refer to your computer's reference manual for details. 2. Click the Details tab, and then click the Port Settings…button. 3.
Printing operations When you have connected the cables to your printer and have installed the printer driver, you are ready to use your printer. This section describes step by step operations for monochrome and colour printing. Printing in monochrome The following paragraphs explain how to perform monochrome printing on plain paper. Requirements You need the following items for monochrome printing; 1. Ink cartridge a 2. 26 Black ink cartridge or Econo Black ink cartridge.
Note 2: Refer to Installing Ink Cartridges’ in Chapter 2 for directions on installing ink cartridges. 4. 5. Note 3: Installing multiple ink cartridges of the same colour allows you to print more pages without stopping to replace spent ink cartridges. Note 4: Econo Black cartridges can be reversed up to 20 times. 6. Load the paper into your printer. Setting up the printer driver for monochrome printing 1.
8. Set the Paper Size, Orientation, and number of Copies as required. 9. When you have completed all the setup, click OK to close the printer driver Properties dialogue box. 10. Click OK in the Print dialogue box to start printing. Printing in colour The following paragraphs describe how to print standard colour images on plain paper. Requirements You need the following items for standard colour printing; 1. 2.
Setting up the printer driver for colour printing 1. In the application you want to print from, select Print from the File menu to open the Print dialogue box. Note: Please note that the procedure for opening the dialogue box of the DP-5000 driver may differ slightly from one application to another. 2. In the Print dialogue box click Properties. 3. Select Automatic, Photographs or Graphics/ Text from the Document type menu on the Document/Quality tab.
5. In the Document/Quality tab click Print On Reverse Side option. Note: Note that when you select certain media types the Print on Reverse Side option will not be available. 6. Select Automatic, Photographs, or Graphics/ Text from the Document Type menu. When you select Automatic here, the black & white printing data will be printed in black & white, and the colour printing data will be printed in full colour. 7. Select a paper type from the Media Type menu. 8.
English Chapter 4 - Installation and Operation, Macintosh Installing the printer driver Before you can use your printer, you need to install the correct printer driver software so that your computer can work with the printer. This chapter describes how to install the supplied printer driver for an Apple Macintosh. These directions assume that you are familiar with normal Macintosh operations, such as using the mouse and menus.
Installing the printer driver software Computer: Apple Macintosh computer or compatible Operating system: System 7.1 or later Total RAM: 16 MB or more (32 MB or more is recommended) VPhoto Printing Monochrome image Colour image 20MB 80MB Note 1: The figures in Table 2 are approximations of the total disk space required when printing at VPhoto Colour mode. Note 2: The working disk space needed during printing is automatically erased after printing is completed.
Selecting the correct driver Before creating any documents in your application you should select the DP-5000 printer driver which you installed from the CD-ROM. If you want to print documents created when this printer driver was not selected, first select the DP-5000 printer in the Chooser menu, then choose Page Setup from your application’s File menu. Finally change the application’s page format and other settings if needed. Follow the steps below to select the correct printer driver. 1.
1. The printer is connected to the computer and is turned on. 2. The system folder window is open (if not, doubleclick the folder on the startup disk). 3. There is paper in the printer. Page setup dialogue box Print preview You can preview your printed job by clicking the Preview button in the Print dialogue box, the desktop will appear on screen. To print the desktop, click Print Page. Printing begins. When you finished printing, turn off your printing devices in the following order; 1.
English Printing operations When you have connected the cables to your printer and have installed the printer driver, you are ready to use your printer. The following describes step by step operations for monochrome and colour printing. Printing in monochrome The following paragraphs explain how to perform monochrome printing on plain paper. Requirements You need the following items for monochrome printing: 1. Ink cartridge a 2. Black ink cartridge or Econo Black ink cartridge.
Note 2: Refer to ‘Installing Ink Cartridges in Chapter 2 for directions on installing ink cartridges. 5. Select Print from the File menu. 6. Make any necessary changes to the settings in the Print dialogue box. Note 3: Installing multiple ink cartridges of the same colour allows you to print more pages without stopping to replace spent ink cartridges. a Select either Greyscale or Black & White from the Type menu. b When you install a black ink cartridge, select Standard Colour from the Mode menu.
2. 3. b Cyan ink cartridge c Magenta ink cartridge d Yellow ink cartridge Media a High grade paper b Laser paper or plain paper c VPhoto Print Film English Load the paper into your printer, for reference see Chapter 2, ‘Loading Paper. Setting up the printer driver for colour printing 1. Follow steps 1 to 4 in ‘Setting up the printer driver for monochrome printing’. 2. In the Print dialogue box select either Automatic, Photographs, or Graphics & Text from the Type menu.
6. When you have completed your settings, click Print in the Print dialogue box. The printer prints cyan, magenta, yellow, and black in that order as the print head moves back and forth over the paper. 3. No Colour Matching - The colour information for print data is output directly to the printer. Note 1: If the four ink cartridges (cyan, magenta, yellow, and black) are not installed, the error light will flash, and the printer will not print. To use ColorSync, follow these steps. 1.
English ColorSync from the Colour Matching options. After the settings have been completed, click OK. perature see your computer’s reference manual for details. Note 1: Some monitors do not allow the colour temperature to be changed. In this case, open Monitor & Sound in Control Panels and set the Gamma option to PageWhite Gamma, which provides a colour temperature similar to D50. Note 2: Once you have completed steps 1 through 3, you should not need to repeat them unless you wish to change the settings.
3. Set the Media to Plain Paper or Laser Paper, and the Size to A4. When using a different type or size of paper, change the setup accordingly. 4. After making any changes required, click OK to close the Page Setup dialogue box. 5. Select Print from the File menu to display the Print dialogue box. 6. Select either Automatic, Photographs or Graphics & Text from the Type: menu.
English Chapter 5 - Specialised Printing Operations VPhoto colour printing Colour printing on VPhoto print film The following describes how to print colour images on VPhoto print film. Photographic-like quality can be achieved by printing images on VPhoto print film with standard inks. This is very effective when printing multicolored images such as computer graphics. Requirements You need the following items for colour printing on VPhoto print film. 1. Media a 2.
Note: VPhoto Print Film is very adhesive. When loading the multiple sheets, fan them thoroughly before loading to make sure that they do not adhere to one another. Store unused sheets in the package. For best results, use single sheet and manual feed. Set up the printer driver for printing 1. Select Print from the File menu to open the Print dialog box, then click Properties. 2. Click the Document/Quality tab to bring to the front. 3.
English f VPhoto Primer ink cartridge Note: To print the photo quality images on plain paper, use VPhoto Primer ink. VPhoto Primer ink fills any unevenness on the paper surface, so that a similar print quality as on VPhoto Print Film can be achieved. Set up the printer driver for printing 1. Select Print from the File menu to open the Print dialog box, then click Properties. 2. Click the Document/Quality tab to bring to the front. 3.
matic, Photographs, or Graphics/Text is selected from Document Type. 44 6. Make any other necessary changes to the settings. 7. When you complete the setup, click OK to close the dialog box. 8. Click OK in the Print dialog box to start printing.
English Printing in foil colour Foil colour printing is one of the unique features of the OKI DP-5000 printer. The printer driver allows you to select specific colours or colour components that will be replaced by foil colours and black ink when printing. You can print with up to two foil colours, (or two foil colours plus black) from most applications that allow colour specification. Moreover, because foil inks are opaque, foil colour printing is unaffected by the colour of the underlying paper.
Requirements For single foil colour printing you will need the following. 1. Media a 2. Plain paper, laser paper, postcards, etc. can be used as with normal colour printing. Ink cartridges Use either one of the following ink cartridges. a Gold Foil ink cartridge b Silver Foil ink cartridge The following ink cartridges are also necessary for undercoating.
4. Set Media Type depending on the paper to be used. 5. In Print Settings click the Use Spot Colours check box so that the Spot Colours dialog box is displayed. 6. In the Spot Colour Settings click the Use Foil Colour(s) radio button. 7. Set Print Using to Single Ink. 8. Enabled ink cartridges among those installed in the printer are displayed in Select Ink Cartridge(s). Click the radio button(s) of the ink cartridge(s) to be used.
Note 2: White portions of data (R=G=B=100%) are not printed. In multi foil colour printing, indicate foil colours by selecting colours in the application that most closely resemble the foil colours. Try to select colours that resemble the colours listed in the tables below. In applications that do not have many colour choices, such as word processors, closely related colours can be used.
3. Set Document Type to an option appropriate to the document to be printed. 4. Set Media Type depending on the paper used. 5. In Print Settings click Use Spot Colours check box so that the Spot Colours dialog box is displayed. 6. In the Spot Colour Settings click the Use Foil Colour(s) radio button. 7. Set Print Using to Multiple Inks. 8. Enabled ink cartridges among those installed in the printer are displayed in Select Ink Cartridge(s).
b Silver Foil ink cartridge c Cyan ink cartridge d Magenta ink cartridge e Yellow ink cartridge f Black ink cartridge g Finish II ink cartridge h VPhoto Primer ink cartridge Note: Only a maximum of seven ink cartridges can be installed in the printer at any one time. Cyan, Magenta, Yellow and Black cartridges must always be installed. The Foil, Finish II and VPhoto Primer cartridges are optional. colours.
English Note 1: Some applications make internal adjustment to produce the displayed colour components. In such cases, the colour components cannot be restricted and therefore foil colours cannot be used. When using such an application, use the Overlay mode. Note 2: There are a small range of colour component values which are close to a foil colour. These colours will be interpreted by the printer as indicating foil colours and will be printed in the respective foil colour.
printed if the corresponding ink cartridge has not been selected. Note 2: If a selected foil colour ink cartridge is not installed, a warning message will be displayed. In this case, exchange ink cartridges as indicated in the message. 10. When you complete the setup, click OK to close the dialog box. 11. Click OK in the Print dialog box to start printing.
English Printing on overhead transparencies The following paragraphs describe how to print full colour graphic images and text on overhead transparencies for presentations. Requirements For printing on overhead transparencies, you will need the following. 1. Media a 2. DP-5000 Overhead Projector Transparency Film (A4). Ink cartridges The following ink cartridges can be used.
located into the left side of the printer (when viewed from the front). 3. 4. To prevent jams remove the sheets immediately after printing. 5. Place the box with the installed separators into the printer paper tray and align the edge of the box with the centre cover (5) on the printer. 6. When the transparencies are printing they will ride on top of the separators, preventing them from picking up any completed transparencies lying below.
English 2 2 3 1 4 5 Chapter 5 - Specialised Printing Operations 55
Undercoating with VPhoto primer ink cartridge The VPhoto Primer ink cartridge is used to print an undercoat on paper prior to the main printing process. Undercoat fills any uneveness on the paper surface making plain paper suitable for high quality colour printing. Requirements For undercoating, you will need the following. 1. Media Any plain photocopier paper can be used. 2.
English 6. In Spot Colour Settings click the Use Spot Colour(s) radio button. 7. Set Print Using to VPhoto Primer (Undercoat). 8. Click OK to close the dialog box. 9. Click the Paper tab to bring to the front, make all necessary adjustments then click the Overlay check box. 10. When you complete the setup, click OK to close the dialog box. 11. Click OK in the Print dialog box to start printing. Your document will be printed using VPhoto Primer ink.
58 User’s Guide
English Chapter 6 - Maintenance Cleaning the printer We recommend that this printer be cleaned periodically to ensure satisfactory long term operation. 2. Push the front cover release button and gently lower the front cover. 3. Clean the inside of the printer using a soft brush to brush away dirt and dust. WARNING Make sure you unplug the printer before cleaning it. Cleaning the main unit Follow the cleaning steps described below. 1.
Caution: Brush very gently around electrical components, and be careful not to leave any brush hairs on or near these components. 1. Push the front cover release button and gently lower the front cover. 2. Wipe the print head (1) with a cotton swab dipped in isopropyl alcohol. The print head may not come clean in one wipe so repeat several times. Cleaning the print head 1 Follow the steps below, using isopropyl alcohol and a cotton swab.
English 1. Press the front cover release button and gently lower the front cover. 3. Slowly peel off the tape. 4. Repeat as necessary to remove dirt from the platen. Cleaning the feed roller Use isopropyl alcohol and a cotton swab to clean the feed roller as described below. 2. Gently apply the tape (1) to dirty spots on the platen (2), and rub your finger over the tape. 3 2 1 Caution: Do not touch or remove the white pad (3) on the left side of the platen. Doing so may damage the printer.
4. Wipe the feed roller (metal shaft roller) with a cotton swab dipped in isopropyl alcohol. The feed roller may not come clean in one wipe, so repeat several times. Changing dye sub cleaning pads In order to maintain good print quality, replace the orange-coloured cleaning pad after printing 20 sheets of paper. A cleaning pad is enclosed in each new package of Dye Sub paper. 1.
English 2. To fit a new cleaning pad, mount the pad on the platen by locating the two lugs on the underside of the pad into the holes on the platen. Push the pad onto the platen to make sure it sits flat. Caution: Always fit a cleaning pad in the printer. Failure to do so can cause the printer to malfunction.
64 User’s Guide
English Chapter 7 - Troubleshooting Troubleshooting - general Power failure while printing With the front cover closed, turn the printer on. The printer will initialise and eject the partially printed page. When the front cover has been opened before the printer is turned back on, perform the following. 2. Close the front cover. The printer will now be able to resume operation.
2. Fix the error to continue printing, or terminate printing. For more information on fixing printer errors see the rest of this Chapter. Ready/insert button functions The ready/insert button is used for a number of functions, depending on the printer status. The functions during normal printing are described below. Paper feed To feed a single sheet, set the paper feed switch to position “M” while no data is being received from the computer (i.e.
English 1 Paper jams can be caused by a dirty platen. For information on cleaning see ‘Cleaning the Platen’ in Chapter 6 - Maintaining the Printer. 4. Close the front cover. 5. Press the power button to turn on the power.
Troubleshooting - Windows When problems occur during operation of the printer, please check the following troubleshooting tips before returning the printer for repair. With AT compatible computers, most typical cables will work. It is possible to use a one-way interface with the printer if the spooler is set for one-way interfacing. Power does not come on 1 Is the power cable disconnected? Make sure the power cable is plugged into an outlet as well as connected to the printer.
English b c The printer driver cannot tell which ink cartridge is in which holder. To store all the print output, an enormous amount of spool data (held in a temporary file for printing) is generated during colour multipage printing. As a result, the number of sheets of paper that can be continuously printed will be limited if there is insufficient free space on the hard disk.
9 Are you using a printer selection switch or a printer buffer? With bi-directional interfaces, operation is sometimes unreliable when using printer switching boxes or printer buffers. If you are using a printer selection switching box or printer buffer, use oneway communication. 10 14 The DP-5000 requires work space on the hard disk when it prints. Keep enough space open on the disk for the printer to operate (after printing, the work space is released.
English 2 Is the ink cartridge head dirty? 6 Clean the cartridge head by refering to Chapter 5, Maintaining the Printer. The platen often gets dirty at the same time as the head, so it is recommended to also clean the platen. 3 4 7 Are you printing on a rough or special surface (such as overhead transparency film)? Rough or specially treated surfaces may not allow the ink to adhere well, resulting in gaps or distortions. In such a case, use a halftone setting appropriate for the image.
Colour printing is not working or is extremely slow 1 Are the ink cartridges for colour printing installed? manual for information and check the colour settings. 5 When little memory is available for print processing, printing may take a long time or fail. Close as many applications as possible and try again.
English corner cut end is placed at the top of the paper guide. utility like DEFRAG that comes with MS-DOS 6.0 (or later) or Windows 95/98. Paper is not feeding correctly or not ejecting correctly from the sheet feeder 1 3 Are you using paper with folded or cut corners? This can cause problems since the paper position sensor and paper length sensor do not work properly.
9 Is the cut corner in the correct position (for transparencies and back print film)? 13 When these sheets are inserted with the cut corner incorrectly positioned, they may not feed correctly. Follow the instructions and insert the sheets correctly. 10 Are you printing on envelopes, thermal paper, or picture cards? Correct printing and feeding of envelopes and thermal paper cannot be guaranteed. The paper side of picture cards can be used if the card is less than 0.23 mm (0.
English 4 Is there paper caught between the platen and the print head? 2 The printer will not operate correctly on a slanted surface. Place it on a level, stable surface. Remove the paper (for reference see ‘Cleaning the Printer’, Chapter 5) . 3 5 “Missing ink cartridges” message appears.
2 Is the ink cartridge installed in the holder with the (A) side up? 2 Make sure the ink cartridges are placed in the holder with the identification markings (B side) facing up. 3 In colour printing, greyscale intermediate colours (such as grey) are printed using four colours. If you want to print only in black ink, set the Document Type setting in the Document/Quality tab in the Print dialogue box to Greyscale.
5 English tones close to those obtained by printing on white paper. When plain or other coarse-surfaced paper is printed in colour, ink is missing from a number of points on the image. When paper with a coarse surface is used for full colour printing, ink will be missing from certain points where it was difficult to deposit. To correct this, you can attempt the following. a Set the Halftone setting in the More Settings dialogue box to Standard Dither for printing.
2 How should I use VPhoto Primer ink? The VPhoto Primer ink prints an undercoat and improves the print quality on most plain papers by allowing you to print photo quality images at 2400 dpi using variable dots. 3 Is it OK to print using white ink on top of a full colour image? 7 No. Always use the Finish II cartridge. Connection method 1 For full colour printing and glossy finish, may I use any type of paper? We suggest using High Grade Paper for full colour printing and glossy finish.
English 2 When my display is set for 64,000 or 16,700,000 colours, I run out of memory when printing. 6 Windows runs out of memory when there are too many display colours. Change to 256 colours when printing. Changing the display mode does not change the print results. 3 When I print from Notepad in Windows, the left edge does not print. This happens whenever you print from Notepad at 600 dpi or more. Switch to 300 dpi or use a different application.
Troubleshooting - Macintosh When problems occur during printer operation, please check the following troubleshooting tips before returning the printer for repair. During installation a “File not found” error occurs or the installer is not found Is At Ease installed? If you are using At Ease when you place the Installation Disc in the CD-ROM drive, (some of the Performa series start up in At Ease), the following things may happen. 80 The installer is not displayed.
2 c Deselect QuickDraw GX in the list of items. d Close the Extensions Manager, and restart your Macintosh. Is the printer driver installed? English device must have a unique device number. (If the computer has more than one SCSI bus, then the device number must only be unique for the bus that the printer is attached to.) 4 Install the DP-5000 printer driver from the Installation Disc (CD-ROM).
9 Is the ready light off? 14 Press the ready/insert button and make sure that the ready light comes on. 10 Are you using the wrong cartridges? Use only OKI recommended cartridges in the DP-5000 printer. Do not use cartridges from other manufacturers. 11 Are the cartridges installed correctly? 15 Insert the cartridges in the holders with the identification markings (B side) face up. 12 13 82 16 Is there a paper jam? Remove the paper.
18 Is the printer driver correctly installed? Install the DP-5000 printer driver from the Installation Disc (CD-ROM). 19 English Colour printing is not working or is extremely slow 1 Has the printer been selected using the Chooser? The following ink cartridges are required for colour printing: From the Apple menu, select the Chooser and make sure the printer and device number appear correctly. Click on the printer name and SCSI#.
4 Is enough memory allocated? Colour printing may not be possible if the memory allocated to the application is insufficient. Allocate more memory to the application. 5 port colour printing. Read the manual for the application and check the colour settings. 8 When very little memory is available for print processing, printing may take a long time or fail. Close as many applications as possible and try again.
English 3 Is the platen dirty or is there an obstruction on the platen? 6 Clean the platen by following the directions in Chapter 5. If anything is stuck to the platen, remove it, being careful not to damage the platen. Printing is unreliable on envelopes and other surfaces which have a non-uniform thickness. Printing and feeding of thermal paper is unreliable. The back side of picture postcards may be printed on if the surface is smooth and the card thickness is 0.23 mm (0.
Paper is not feeding or ejecting correctly from the sheet feeder 1 Are you using poor quality paper? 6 Are you using curled paper? 7 8 86 Is the paper feed switch positioned correctly for the paper feed method? To print on plain paper using automatic feed mode, set the paper feed switch to position “A”; to print in manual feed mode, set it to position “M”.
mode is used. Printing on the photo side is unreliable. 10 Are you using home-made cards or thick cards? English The printer emits unusual noises when the power is turned on, and the error lights blink 1 Cards with thickness within the range of 0.07 mm - 0.23 mm (0.003" - 0.01") can be used in manual feed mode. 11 Are there pages piled up near the output slot or in the output paper tray? Refer to Chapter 1, Introduction for details on removing packing material.
A mechanism or cartridge change error occurred 1 6 Are the cartridges installed correctly? If the paper output slot is obstructed, paper ejected from the printer can fold or bend and cause the printer to malfunction. When printing, make sure that the paper output slot is unobstructed and that there is room for paper to be ejected. If a cartridge has become dislodged from its holder, a cartridge change error will occur. Open the front cover and reinstall the cartridge.
English Printing quality, hue, and resolution queries 1 4 Can all four colours of the colour inks be combined for black and white printing? In colour printing mode, greyscale portions are printed using a four-colour greyscale. Black characters are also printed using a mixture of the four colours, if brightness is adjusted. To print monochrome portions in black only, adjust the brightness to 0%. To subject the overall image to monochrome printing, set the Type Settings to Black & White.
6 When coloured paper is used for full colour printing, the colours are not reproduced correctly. Colour printing is based upon the ink being printed on a white background, so correct colours cannot be reproduced on coloured paper. DP printers, however, can provide the following forms of printing even on coloured paper. a b On light-coloured paper, DP printers provide a white undercoat prior to colour printing.
English dialogue box. This value may be specified between 25 and 400. Connection method 1 Can I connect multiple DP printers to a single computer? 4 If different SCSI device numbers are used, multiple printers can be connected to a single Macintosh. Of course, simultaneous printing is not possible. 2 Can I connect a single DP printer to multiple computers? The preview will not change size with different reduction or enlargement settings.
7 Why can I not print correctly with page layout settings? There are application programs that allow you to format a document composed of both orientations of portrait and landscape. When printing such document with layout (more than 2 pages per sheet), it may not print properly.
English Chapter 8 - Specifications & Settings Table 1 details the general specifications for the OKI DP-5000 printer. Name Dimensions Name OKI DP-5000 Photo Quality Colour Printer OKI DP-5000 Photo Quality Colour Printer 46.2cm (width) x 30cm (depth) x 19.1cm (height) 18.2" x 11.8" x 7.5" (approximate dimensions) 240 dot Weight 5.2 kg (11lbs. 8 oz.) Printing speed Plain paper: Equivalent to 240 cps (100 cps x 2.
Options • 1 SCSI Interface for Macintosh (Part No. 41065001) ® 2 3 4 SCSI No. ON OFF ON OFF No. 5 OFF ON ON OFF No. 6 (note 1) ON ON ON OFF No. 7 (note 2) • USB Interface Kit for iMac & Window 95/98 (Part No. 41065101 ) Note 1: Factory default setting is No.6. • Dye Sublimation Upgrade Kit (enables dye sublimation printing capability) (Part No. 41064901) Note 2: SCSI device number 7 is reserved for the Macintosh itself.
English Printable area A A A4 F B C D 2 1 0m m 297mm 3 .5m m (8.5") (11") (0.134") 3.5mm (0.134") E F 12mm 15.2mm (0.47”min (0.6”min) ) Using cardboard or thick paper Print within the recommended range shown in Table 4 below. Depending on the printing media, printing outside the recommended area may cause malfunctions such as the ink cartridge ribbon getting caught and breaking. B C 12mm (0.47") D 12mm (0.47") E F 15.2mm (0.6”min) 12mm (0.
Available supplies Print media Ink cartridges High Grade Paper (100 sheets, A4+) 41067706 VPhoto Print Film (20 sheets, A4) 41067701 41067703 41067705 Print media Ink Cartridges Black ink cartridge Part Number 41067604 Yellow ink cartridge 41067603 Overhead Projector Transparency Film (30 sheets, A4) Magenta ink cartridge 41067602 Dye Sublimation Paper (20 sheets, A4) * Cyan ink cartridge 41067601 Econo Black ink cartridge 41067605 Gold Foil ink cartridge 41067608 Silver Foil ink cartr
English Appendix A - Optional Devices USB interface kit The OKI USB Interface Kit enables you to use your OKI DP-5000 Series printer with an Apple® iMac™ or with a Windows 95/98® computer that has a USB port. Important Note 1: DO NOT unplug the USB interface cable while printing. If you do so you must restart your computer before re-commencing printing. Important Note 2: The OKI USB interface cable works only with the designated OKI DP-5000 printer.
2 3 1 Connect directly to your iMac Connect to your iMac via USB hub 4 6 1 5 1 98 User’s Guide
English 2. Connect the other end of the USB cable (3) to an available USB port (4) on the side of the iMac, or on a USB hub (5). a b To connect the USB cable directly to the iMac, open the port door (6) on the side of the iMac, and with the three-pronged USB icon facing up, plug the cable into the USB port. To connect the USB cable to a USB hub, plug the cable into the hub as shown below. The USB hub itself can be connected to a free USB port on the side of the iMac or on the iMac keyboard.
Installing for Windows 98 To install the OKI USB Interface Kit to enable you to operate your DP-5000 printer with a Windows 98 computer, follow these steps: Note: You must delete any previously installed OKI DP Series printer driver prior to installing the USB printer driver. The new OKI printer driver enables you to print using the USB interface cable, as well as the parallel printer cable. WARNING Make sure the computer and printer are turned off before you connect the USB interface cable. 2.
6. Place the OKI USB Setup Disc in your CD-ROM drive, and click Next. In the next window that appears, click Next to continue. 7. Select CD-ROM drive and Specify a location from the Add New Hardware Wizard, and then click Browse... button to select the folder D:\Drivers\USB\English on the OKI Setup disc (Where D: is the letter of your CDROM drive). Click Next to continue. 8. 9. In the next window that appears, click Next to continue.
Windows 98 Q1 The Add New Hardware Wizard (USB Printer) does not appear when the USB interface cable is connected. Please check the following: 1. 2. 3. If for some reason your first installation attempt is unsuccessful, try the following procedure. Unplug the USB interface cable from your computer. b Place the OKI DP-5000 Setup Disc in your CD-ROM drive. From the Windows Start menu, choose Run. In the dialog box that appears, type the following: D:\drivers\usb\English\MDULPTUN.
Q2 The Add New Hardware Wizard (OKI printer) does not appear, after the MD USB to LPT Cable software installation is complete You can continue to install the OKI USB printer driver. Follow these steps: 1. Make sure that the USB interface cable is properly connected to the printer’s parallel connection, and the printer is turned on. 2. If you are installing the standard printer driver, please refer to the installation instructions in Chapter 3, page 3-2 "Installing printer software from CD".
Dye sublimation upgrade kit The Dye Sublimation Upgrade Kit enables your OKI DP-5000 to print true continuous-tone images, without dots, through the magic of dye sublimation technology. The upgrade itself is as simple as plugging in the special electronic key and pressing a button. At the same time, you lose none of the other features of the DP5000, and you can still print with other DP-5000 supply inks anytime you want. 3.
8. 9. Press and hold the ready/insert button until the printer lights begin to flash (about three seconds), and then release the button. The printer now prints a test page that gives the product name as DP-5000P and includes “Dye-Sublimation Printing” on the printed list of features. 3. Double-click on the Add Printer icon. This starts the Add Printer Wizard window. 4. When requested to choose the manufacturer and make of your printer, click Have Disk…and navigate to the CD-ROM drive.
2. In the window that appears type; D:\Drivers\Mon- 1. Insert the OKI DP-5000 installation disk into your CD-ROM drive. 2. Open the ‘English’ folder, and then double-click on the Install OKI DP-5000 icon. 3. Follow the instructions on-screen to complete the installation. itor\English\Monitor.exe 3. Click OK. 4. The Port Monitor Installer window appears. Click Install. 5. In Windows 95/98, choose Settings from the Start menu. Then select Printers. 6.
English Connecting SCSI interface for Macintosh black tab on the bottom of the cover, pull it up, and twist it until it breaks free. When your printer has been positioned in a suitable location, you can connect it to your Macintosh computer with a SCSI interface and to a suitable AC power source with the power cable. Connecting the Macintosh SCSI interface module When using your printer with a Macintosh computer, the printer must be connected to the computer via a SCSI interface module.
Removing the SCSI interface module 1. Turn off the power to your printer, computer, and all SCSI devices connected. Remove the power cable from the wall socket and the printer. 2. To disconnect the SCSI interface module (1) gently pull the plastic handle (2) at the bottom of the module to release the catch and lift the module away from the printer. Caution 2: For best results use a high-impedance SCSI cable and an active terminator.
English Checking the SCSI device number Make sure the device number for the printer is set correctly, the printer device number is set to 6 at the factory. Each SCSI device connected to the computer must have a unique SCSI device number. If two devices have the same device number, they will not work properly. To change the device number, move the DIP switches (4) next to the connector. For information on DIP switch settings, refer to ‘Specifications and Settings’ in Chapter 8.
110 User’s Guide
English Index A Agency approvals . . . . . . . . . . . . . . . . . . . . . . . . . . . . .93 C Cancelling an alarm . . . . . . . . . . . . . . . . . . . . . . . . . . .66 Carriage . . . . . . . . . . . . . . . . . . . . . . . . . . . . . . . . . . . . .8 Cleaning Feed roller . . . . . . . . . . . . . . . . . . . . . . . . . . . . . . . .61 Main unit. . . . . . . . . . . . . . . . . . . . . . . . . . . . . . . . .59 Platen . . . . . . . . . . . . . . . . . . . . . . . . . . . . . . . . . . .60 Print head .
Setting up the printer driver . . . . . . . . . . . . . . . . . . 46 Single foil. . . . . . . . . . . . . . . . . . . . . . . . . . . . . . . . 45 Forced printing . . . . . . . . . . . . . . . . . . . . . . . . . . . . . . 66 Front cover closing . . . . . . . . . . . . . . . . . . . . . . . . . . . . 4 Front cover opening. . . . . . . . . . . . . . . . . . . . . . . . . . . . 3 DIP switches . . . . . . . . . . . . . . . . . . . . . . . . . . . . . . .7 Removing . . . . . . . . . . . . . . . . . . . . . . .
Paper thickness . . . . . . . . . . . . . . . . . . . . . . . . . . . . . . .93 Paper width . . . . . . . . . . . . . . . . . . . . . . . . . . . . . . . . . .93 Port monitor setup . . . . . . . . . . . . . . . . . . . . . . . . . . . .24 Port speed error. . . . . . . . . . . . . . . . . . . . . . . . . . . . . . .25 Power supply . . . . . . . . . . . . . . . . . . . . . . . . . . . . . . . .93 Preparing your printer. . . . . . . . . . . . . . . . . . . . . . . . . . .3 Print dialogue box. . . . . . . . . .
S SCSI device number . . . . . . . . . . . . . . . . . . . . . . . . . 109 Storage environment . . . . . . . . . . . . . . . . . . . . . . . . . . 93 Supplies available . . . . . . . . . . . . . . . . . . . . . . . . . . . . 96 T Testing the printer . . . . . . . . . . . . . . . . . . . . . . . . . . . . 33 Troubleshooting, general Power failure while printing . . . . . . . . . . . . . . . . . 65 Printer errors . . . . . . . . . . . . . . . . . . . . . . . . . . . . .
English U Undercoating Overlay function . . . . . . . . . . . . . . . . . . . . . . . . . . .57 Setting up the printer driver . . . . . . . . . . . . . . . . . .56 Undercoating with Vphoto primer . . . . . . . . . . . . . . . .56 USB interface kit . . . . . . . . . . . . . . . . . . . . . . . . . . . . .97 iMac installation . . . . . . . . . . . . . . . . . . . . . . . . . . .99 Installation for iMac . . . . . . . . . . . . . . . . . . . . . . . .97 Installing for Windows 98 . . . . . . . . . . . . . . . .