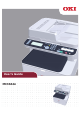
User’s Guide MC363dn
PREFACE Every effort has been made to ensure that the information in this document is complete, accurate, and up-to-date. The manufacturer assumes no responsibility for the results of errors beyond its control. The manufacturer also cannot guarantee that changes in software and equipment made by other manufacturers and referred to in this guide will not affect the applicability of the information in it.
EMERGENCY FIRST AID Take care with toner powder: If swallowed, give small amounts of cold water and seek medical attention. DO NOT attempt to induce vomiting. If inhaled, move the person to an open area for fresh air. Seek medical attention. If it gets into the eyes, flush with large amounts of water for at least 15 minutes keeping eyelids open. Seek medical attention. Spillages should be treated with cold water and soap to help reduce risk of staining skin or clothing.
This product contains software developed by the Heimdal Project. Copyright (c) 1995 - 2008 Kungliga Tekniska Högskolan (Royal Institute of Technology, Stockholm, Sweden). All rights reserved. Redistribution and use in source and binary forms, with or without modification, are permitted provided that the following conditions are met: 1. Redistributions of source code must retain the above copyright notice, this list of conditions and the following disclaimer. 2.
CONTENTS Preface . . . . . . . . . . . . . . . . . . . . . . . . . . . . . . . . . . . . . . . . . . . . . . . . . . .2 Emergency first aid . . . . . . . . . . . . . . . . . . . . . . . . . . . . . . . . . . . . . . . . . .3 Manufacturer . . . . . . . . . . . . . . . . . . . . . . . . . . . . . . . . . . . . . . . . . . . . . . .3 Importer to the EU/authorised representative. . . . . . . . . . . . . . . . . . . . .3 Environmental information . . . . . . . . . . . . . . . . . . . . . . . . . . . . . . . . .
Operation . . . . . . . . . . . . . . . . . . . . . . . . . . . . . . . . Multi-tasking. . . . . . . . . . . . . . . . . . . . . . . . . . . . . Loading document(s) . . . . . . . . . . . . . . . . . . . . . . . Document requirements . . . . . . . . . . . . . . . . . . . Scannable area . . . . . . . . . . . . . . . . . . . . . . . . . Placing document(s) in the ADF . . . . . . . . . . . . . Placing document(s) on the glass . . . . . . . . . . . . . . . . . . . . . . . . . . . . . . . . . . . . . . . .
Advanced operation . . . . . . . . . . . . . . . . . . . . . . . . . . . . . Fax receiving . . . . . . . . . . . . . . . . . . . . . . . . . . . . . . . . . Managing the phone book . . . . . . . . . . . . . . . . . . . . . . . . . . Adding a speed dial entry to the phone book . . . . . . . . . . . Adding a group entry to the phone book . . . . . . . . . . . . . . Deleting a speed dial entry from the phone book. . . . . . . . . Deleting a group dial entry from the phone book. . . . . . . . .
NOTES, CAUTIONS AND WARNINGS NOTE A note provides additional information to supplement the main text. CAUTION! A caution provides additional information which, if ignored, may result in equipment malfunction or damage. WARNING! A warning provides additional information which, if ignored, may result in a risk of personal injury.
ABOUT THIS GUIDE NOTE Images used in this manual may include optional features that your product does not have installed. DOCUMENTATION SUITE This guide is part of a suite of online and printed documentation provided to help you become familiar with your product and to make the best use of its many powerful features.
ON-LINE USAGE This guide is intended to be read on screen using Adobe Reader. Use the navigation and viewing tools provided in Adobe Reader. There are many cross-references within this book, each highlighted as blue text. When you click on a cross-reference the display will instantly jump to the part of the manual containing the referenced material. By using the before.
INTRODUCTION Congratulations on choosing this Multi Function Product (MFP). It is designed with advanced features, to give you clear, vibrant color prints and crisp black and white pages at high speed on a range of office print media. With this MFP, you can instantly scan paper-based documents and deliver the electronic image to various destinations including E-mail addresses, printers, ftp servers or someone else's computer on the network.
Additionally, the following optional features are also available: > Additional paper tray for loading a further 530 sheets to minimise operator intervention, or different paper stocks for letterhead stationery, alternative paper sizes or other print media. > Additional memory allows printing of more complex pages. For example, high resolution banner printing. > Four modes of toner save function (Default: Off, Low, Middle, High) are available when using Copy/DirectPrint/Fax function.
OVERVIEW FRONT VIEW 12 2 11 1 13 3 14 10 9 4 8 6 7 15 5 5 17 16 1. ADF unit. 7. Multi-purpose tray release recess. 2. ADF paper tray. 8. Output tray release button. 9. Document glass. 3. Operator panel. Menu driven operator controls and LCD panela. 10. ADF document glass. 11. Document cover. 4. Output tray (face down). Standard printed copy delivery point. Holds up to 12. LED heads. 150 sheets at 80g/m². 13. Fuser release levers. 5. Paper tray. 14. Toner cartridges (C,M,Y,K).
REAR VIEW 6 7 5 8 3 4 1 2 1. Access panel. 5. Rear output tray (face up stacker). 2. AC power socket. 6. LINE connection. 3. USB interface. 7. TEL connection. a 4. Network interface. 8. Wireless LAN I/F Cover. a. The Network Interface may have a protective “plug” which must be removed before connection can be made. When the rear output tray is folded down paper exits the printer through the rear of the printer and is stacked here face up. This is mainly used for heavy print media.
CONTROL PANEL 3 1 2 11 12 5 4 6 17 14 REF. 1. 9 16 15 13 7 8 10 DESCRIPTION Liquid crystal display (LCD) Displays operating instructions and status of your machine. 2. Panel adjust recess The LCD panel can be swivelled upwards from its base position for ease of use. 3. Main function buttons COPY: Pressing this button selects copy mode.
REF. DESCRIPTION 11. STATUS: Pressing this button gives access to the status menu screen. Use to check detailed status information about the machine. Flashes/illuminates if there is a status item to be displayed. 12. SETTING: Pressing this button gives access to several setup options on the LCD screen, including the administrator menu, profile options and address books settings. 13. CLEAR: Executes the following actions according to the entered items when pressed or held: 14.
CHANGING THE DISPLAY LANGUAGE The default language used by your MFP for display messages and for report printing is English1. If required, this can be changed using the Panel Language Setup utility. 1. To ensure your product contains the latest firmware updates, it is recommended that you download the language files from this utility during setup.
GETTING STARTED TURNING ON YOUR MACHINE 1. Plug the AC cable into the AC power socket of your machine. 2. Plug the AC cable into the electric socket. 3. Check that no documents are on the document glass or ADF, and the ADF cover is closed. 4. Hold down the power switch for about a second to turn on the power. The copy standby screen is displayed after your machine became ready status.
TURNING OFF YOUR MACHINE Be sure to follow the procedure below every time you turn off the machine. 1. Hold down the power switch for about a second. NOTE Press the power switch for less than 5 seconds. The message Shutdown in progress. Please wait. The machine turns off automatically. appears in the operator panel, and power switch indicator blinks every 1 second. Then the machine turns off automatically and power switch indicator goes out.
POWER SAVING MODE If you do not use the machine for a while, it will enter power saving mode to control the power consumption of the device. To cancel or initiate power saving mode, press the Power Save button on the control panel. NOTE If your machine is connected locally (via USB), when it transitions to Sleep mode its status is viewed as off-line. To use the printer in this state, you must press the Power Save button to exit sleep mode.
SLEEP MODE Your machine transitions from power saving mode to sleep mode after a set period of time. In sleep mode the power consumption of the device in minimal. To cancel sleep mode, press the Power Save button on the control panel. NOTE The machine will not enter sleep mode if an error occurs and the machine requires attention. By default, the time interval to enter sleep mode is set to 30 minutes. You can enable or disable sleep mode.
AUTO POWER OFF When your machine is not used for a certain period of time, it turns off the power automatically. Once the machine turns off the power, you need to turn on to use it. The machine has three settings to select the machine's behavior on Auto Power Off. > Enable > Auto Config > Disable Enable: When your machine is not used for a certain period of time, it turns off the power automatically. Auto Config: The machine will not turn off the power automatically under the conditions listed below.
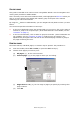
INSTALLING DRIVERS AND UTILITIES NOTE Example screenshots have been used throughout and may not represent your machine, however the procedure is the same. NOTE You must be logged on as an administrator or a member of the Administrators group in order to complete this procedure. If your computer is connected to a network, network policy settings may also prevent you from completing this procedure. The installation instructions below refer to USB connection.
WINDOWS - SCANNER AND PRINTER DRIVERS The scanner driver is used for “Pull Scan”, i.e. Initiating a scan from your PC via software. Compare this to “Push Scan” where you start the scan by pressing a button on the MFP's front panel. NOTE The Oki driver installer program is the recommended installation method. NOTE Do not connect the USB cable at this time. You will be instructed when to connect the USB cable when you run the Oki driver installer program. 1.
MAC - PRINTER DRIVER The information in this section is based on Mac OS X 10.9. Other versions may appear slightly different, but the principles are the same. 1. Insert the DVD-ROM and run the Oki driver installer program. 2. Follow the on-screen instructions to install the printer driver. 3. Attach the printer to a USB port of your computer. 4. Switch on the printer. 5. Choose Apple Menu > System Preferences > Print & Scan. 6.
FAX DRIVER The fax driver allows you to send faxes directly from your computer without printing the document first. With Oki's fax driver you are sending the fax data from your computer to the MFP, and then the MFP automatically sends the document. NOTE Before using the internet fax function, you need to configure the server settings. Refer to the Configuration Guide for details. Installing the fax driver This is installed as part of the Oki driver installer wizard.
CONFIGURATION TOOL Installation of the Configuration Tool is optional and can be found on the DVD in the Utilities folder. Follow the on-screen instructions to complete the Configuration Tool installation. The Configuration Tool can discover devices over USB or network connections. 1. To search and install, select Tools > Register Device. 2. Highlight the required search result and when prompted click Yes. The Configuration Tool allows you to set up and manage your MFP.
ACTKEY UTILITY NOTE The ActKey utility only supports Windows. You must have the scanner driver installed. The ActKey utility enables the MFP to receive one key touch commands from a connected computer. Installation of the ActKey utility is optional and can be found on the DVD in the Utilities folder. Information on using the ActKey utility can be found in “Remote Scan” on page 71. Setting up the ActKey utility 1. Install the ActKey utility from the DVD: Set-up will place an “ActKey” icon on your desktop.
7. To use ActKey in Local PC mode (i.e. push scanning), it must be set as the program to handle scanner events: (a) Click [Start] to select [Control Panel]. (b) Enter [View scanners and cameras] in [Search Control Panel]. (c) Click the [View scanners and cameras] under [Devices and Printers]. (d) Select [OKI Universal WIA] and click [Properties]. If the [User Account Control] dialog box appears, click [Yes]. (e) Click the [Events] tab. (f) Select an event for [Select an event].
PAPER RECOMMENDATIONS Your MFP will handle a variety of print media, including a range of paper weights and sizes. This section provides general advice on choice of media, and explains how to use each type. The best performance will be obtained when using standard 75~90g/m² paper designed for use in copiers and laser printers. Use of heavily embossed or very rough textured paper is not recommended.
CASSETTE TRAYS SIZE DIMENSIONS WEIGHT (G/M²) A6a 105 x 148mm Light 64 - 74g/m² A5 148 x 210mm Medium Light 75 - 82g/m² B5 182 x 257mm Medium 83 - 104g/m² 16K (184x260mm) 184 x 260mm Heavy 105 - 120g/m² Executive 184.2 x 266.7mm Ultra heavy1 121 - 176g/m² 16K (195x270mm) 195 x 270mm 16K (197x273mm) 197 x 273mm Ultra heavy2 177 - 220g/m² Tray 1/2: 64 - 176g/m² A4 210 x 297mm Letter 215.9 x 279.4mm Legal 13in. 215.9 x 330.2mm Legal 13.5in. 215.9 x 342.9mm Legal 14in.
MULTI PURPOSE TRAY The multi purpose tray can handle the same sizes as the cassette trays but in weights up to 220g/m². For very heavy paper stock use the rear output tray. This ensures that the paper path through the printer is almost straight. The multi purpose tray can feed paper widths from 76mm to 215.9mm and lengths from 127.0mm to 1320mm (banner printing). For paper lengths exceeding 356mm (Legal 14in.) use paper stock between 90g/m² and 128g/m² and the rear output tray.
LOADING PAPER CASSETTE TRAYS 1. Remove the paper tray from the machine. 2. Fan the paper to be loaded at the edges (1) and in the middle (2) to ensure that all sheets are properly separated, then tap the edges of the stack on a flat surface to make it flush again (3).
3. Load paper (letter headed paper face down and top edge towards the front of the printer), as shown. a b 4. Adjust the rear stopper (a) and paper guides (b) to the size of paper being used. 5. Close the paper tray gently. 6. Set the correct paper size. Refer to “Configuring the tray settings” on page 36 and “Registering custom sizes” on page 37. NOTE After closing the tray, the media selection screen will be displayed on the panel.
> Do not pull the paper tray out during printing (except as described below for the 2nd tray). NOTE > If you have two trays and you are printing from the 1st (upper) tray, you can pull out the 2nd (lower) tray during printing to reload it. However, if you are printing from the 2nd (lower) tray, do not pull out the 1st (upper) tray. This will cause a paper jam. > For face down printing, make sure the rear output tray (a) is closed (the paper exits from the top of the printer).
MULTI PURPOSE TRAY 1. Open the multi purpose tray (a). 2. Fold out the paper supports (b). c d b a d 3. Press gently down on the paper platform (c) to ensure it is latched down. 4. Load the paper and adjust the paper guides (d) to the size of paper being used. > For single-sided printing on headed paper load the paper into the multi purpose tray with pre-printed side up and top edge into the printer.
REGISTERING CUSTOM SIZES To load custom size paper, you need to register the width and length of the paper before printing. The range of the sizes you can set differs according to the paper tray. TRAY AVAILABLE SIZE RANGE Tray 1 Width: 105 to 216 mm (4.1 to 8.5 inches) Length: 148 to 356 mm (5.8 to 14.0 inches) Tray 2 (optional) Width: 148 to 216 mm (5.8 to 8.5 inches) Length: 210 to 356 mm (8.3 to 14.0 inches) MP tray Width: 64 to 216 mm (2.5 to 8.5 inches) Length: 127 to 1321 mm (5.0 to 52.
USER AUTHENTICATION AND ACCESS CONTROL If your Administrator has enabled access control on your machine, it will automatically start up in access control mode. You will not be able to use it until you have provided valid login information. If the access control setting is: > PIN; you will need to provide a valid PIN (personal identification number). > User name and password; you will need to provide a valid user name and password.
OPERATION FROM THE COMPUTER NOTE The authentication type specified on the computer overrides the one specified on the machine. Printing from Windows NOTE You cannot use the PCL XPS printer driver for this function. This procedure uses Windows 7 and NotePad as an example. The procedures and menus may differ depending on the OS you use. 1. Open the file you want to print. 2. From the File menu, select Print. 3. Choose the printer driver you want in Select Printer and click Preferences. 4.
Faxing (Windows only) NOTE This procedure uses Windows 7 and NotePad as an example. The procedures and menus may differ depending on the OS you use. 1. Open the file you want to fax. 2. From the File menu, select Print. 3. Select your machine (fax driver) in Select Printer and click Preferences. 4. On the Setup tab, click User Authentication.... 5. Select the Use User Authentication check box. 6. Enter the user name in Username and the password in Password.
OPERATION With its intuitive control panel, this Multi Function Product (MFP) is designed to be easy to use. After the machine has been configured, operating is quite straight forward. NOTE If your Administrator has enabled access control on your machine, it will automatically start up in access control mode. You will not be able to use it until you have provided valid login information. Refer to “User authentication and access control” on page 38 for details.
MULTI-TASKING Your machine can handle more than one task at a time. The table below details which combination of tasks can be performed.
LOADING DOCUMENT(S) The MFP can scan/copy/send document(s) either from the ADF (Automatic Document Feeder) or on the glass. If you need to send multiple pages, load your papers in the ADF. The ADF can hold up to 50 pages at one time. If you need to scan/copy/send pages from books, newspaper clippings, or paper with wrinkles or curls, place them on the glass.
PLACING DOCUMENT(S) IN THE ADF 1. If you have multiple pages, fan the pages to avoid paper jams. The ADF holds up to 50 pages at one time. a b c 2. Place the document with the text face UP in the ADF: > If your document is portrait, load with the top edge of the document in first. > If your document is landscape, load with the left edge of the document in first. 3. Adjust the Paper Guides to centre the document in the ADF.
PLACING DOCUMENT(S) ON THE GLASS 1. Open the document cover. 2. Place your document with the text face DOWN on the glass: > If your document is portrait, align its top edge to the upper-left corner of the glass. > If your document is landscape, align its right edge to the upper-left corner of the glass. 3. Close the document cover.
COPYING NOTE If your Administrator has enabled access control on your machine, it will automatically start up in access control mode. You will not be able to use it until you have provided valid login information. Refer to “User authentication and access control” on page 38 for details. BASIC OPERATION 1 2 3 4 1. Place your document(s) with text face UP in the ADF or face DOWN on the glass. 2. If required, press the Copy button (1) on the control panel to prompt the Copy screen.
ADVANCED OPERATION Using the options available you can alter the copy output to suit your needs: 1. Press the Right arrow key. 2. Select required parameter with Down arrow key and press the OK button or the Right arrow key to display the available options. 3. Using Up or Down arrow keys, select value and press OK. Options are (factory default settings in bold text): FEATURE OPTION DESCRIPTION Scan Size A4, A5, A6, B5, Letter, Legal 13, Legal 13.
FEATURE OPTION Image Settings Density DESCRIPTION -3, -2, -1, 0, +1, +2, +3 Adjust density Darker: Keep color intensity and darker image. Lighter: Reduce color intensity and gives lighter image. Document Type Text, Text&Photo, Photo, Photo (Glossy) Allows you to specify the type of images on the document. Resolution For Color Normal, Extra Fine Allows you to select the scanning resolution.
FEATURE OPTION DESCRIPTION Continuous Scan ON, OFF Allows you to continue scanning more documents. Allows you to construct a single scan job from multiple individual sheets or originals. Mixed Size ON, OFF Allows you to load originals of same width but different length in the ADF. The following document sizes can be set concurrently; A3 and A4 LEF, B4 and B5 LEF, A4SEF and A5 LEF. When enabled, the tray setting is automatic, you cannot specify a tray manually.
SCANNING INSTALLING SCANNER DRIVERS (TWAIN/WIA/ICA DRIVER) This section explains the procedure to install the scanner driver. Before using scan function, install the scanner driver. You can install TWAIN driver and WIA (Windows only) driver at the same time. Install the TWAIN driver and ICA driver (dedicate to the Mac OS X) separately. If you want to use the network scan function, follow the installation procedure below and register the information of your computer and then install the scanner driver.
If the scanner driver has been installed, the setup maintenance program of the scanner driver is displayed. Check the checkbox of Add and then click Next to proceed to the step 8. 8. Click Next. 9. Check the checkbox of Network scanner and click Next. 10. Select IP Address or Search MFP check box to enter the address of the machine and then click Next. If you want to set the IP Address, follow procedure 10.
11. If Search MFP is selected, select the machine and click Next. 12. Set the scanner driver name and click Next. 13. Enter the host name, IP address and port number and then click Configure. 14. Click Next. 15. Click Next.
16. Click Finish. For Mac OS X 1. Make sure that the machine is connected to the PC and the power switch of the machine is turned ON. Then, load the “Software DVD-ROM” on the drive of the PC. 2. Double-click the OKI icon on the desktop. 3. Double-click Drivers > Scanner > Installer for OS X 10.8. 4. Click Continue. 5. Click Continue. 6. Check the display and click Continue if OK.
7. Read the license agreement and click Continue. 8. Click Agree if you agree. 9. Click Install. To change the installation location of the driver, click Change Install Location. 10. Enter the administrator's name and password, and click OK. 11. Click Continue Installation. 12. Click Restart.
USING ACTKEY SOFTWARE Using the ActKey, you can start a scan job in specified settings with a click a button. MEMO ActKey does not support Mac OS X. Using WSD Scanning, Actkey does not work. When ActKey is installed, Network Configuration is also installed simultaneously. REFERENCE For details on how to start a scan job, refer to the Configuration Guide. Installing the Software 1. Insert the “Software DVD-ROM” into your computer. A window opens. 2. Select ActKey from Software. 3.
SETUP TO USE THE WSD SCAN The following explains how to set up the PC to use the WSD Scan function. In order to use the WSD Scan function, install this device on the PC. WSD Scan can be used from Scan To Computer and Remote Scan via Network. To use WSD Scan, the machine has to be connected with the computer which Windows Vista/ Windows7/ Windows8/ Windows Server 2008/ Windows Server 2008R2/ Windows Server 2012/ Windows Server 2012 R2 was installed via Network.
3. When the balloon message saying that the installation is complete is displayed on the task bar, click the balloon to check the details, and click Close. Check the device installation on the machine as follows. 4. Press the SCAN key on the operator panel. 5. Press the 6. Check that Select A Connecting PC is selected, and press OK. 7. Press the 8. Make sure that the device installation PC is displayed as the destination PC. to select Computer and then press OK.
> USB Memory > Shared Folder > Remote Scan NOTE Computer; select target application from the control panel on the MFP. Remote Scan; select target application from utility on your PC. “Remote Scan” is not shown when PC Scan Mode is in Simple Scan Mode. 4. Set your scanning options as required. For further details refer to the following sections. 5. Press Mono (2) to scan your document(s) in black and white, or Color (3) to scan your document(s) in color.
SCAN TO E-MAIL NOTE For illustration purposes only, the features shown are as accessed from the control panel. Using the options available, you can enter E-mail information and alter the scan output to suit your needs: 1. Place your document(s) with text face UP in the ADF or face DOWN on the glass. 2. Press the Scan button on the control panel to prompt the Scan Menu screen. 3. If required, use the arrow keys and scroll to E-mail, then press OK. 4.
FEATURE OPTION DESCRIPTION Add Destination To: (cont.) Cc: Bcc: (cont.) Direct Input LDAP Enter E-mail address using the on-screen keyboard. Simple Search Use the on-screen keyboard to enter a search value. Advanced Search Use Advanced Search to search the LDAP address book by user name and/or E-mail address. Search Method: User Name: E-mail Address: Scan Settings Can display up to 1000 addresses. Scan Size A4, A5, A6, B5, Letter, Legal 13, Legal 13.
FEATURE Scan Settings (cont.) OPTION Reply To DESCRIPTION Direct Input Enter E-mail address using the on-screen keyboard. (cont.) LDAP Simple Search Use the on-screen keyboard to enter a search value. Advanced Search Use Advanced Search to search the LDAP address book by user name and/or E-mail address. Search Method: User Name: E-mail Address: Edit E-mail Subject Select Subject Direct Input E-mail Body Select Text Direct Input Can display up to 1000 addresses.
NOTE > If you want to use the address book or group list features, be sure to register the E-mail addresses in advance. Refer to “Managing the address book” on page 78. > This machine allows you to send scanned document(s) to multiple E-mail addresses. Simply select the destination you require and press OK, then repeat until all the destinations you require are selected. > Up to 48 characters can be entered in the “Destination”, “Reply to” and the “Subject” fields.
SCAN TO SHARED FOLDER NOTE The MFP must be connected to a Network server to enable Scan to Shared Folder to be set up. Refer to the Configuration Guide for details. Before sending your document to a file server, profiles should be set up first to speed up the process. A profile contains a list of filing parameters such as your filing protocol, directory, file name and other scanning parameters. NOTE Profiles can be created and managed using the machine’s web page or the MFP Setup Tool.
FEATURE OPTION Scan Setting Image Settings (cont.) (cont.) DESCRIPTION Background Removal OFF, 1, 2, 3, 4, 5, 6 Allows you to block out the color background of the image (assuming document has a color background) such that the background color is not printed. Resolution 75dpi, 100dpi, 150dpi, 200dpi, 300dpi, 400dpi, 600dpi Allows you to select the appropriate resolution.
FEATURE OPTION Scan Setting Encrypted PDF (cont.) DESCRIPTION Not Encrypt Encrypt Compression Rate Low, Medium, High Color: High, Medium, Low Select the appropriate compression level. Mono (Grayscale): High, Medium, Low Note: Mono (Binary): High, Medium, Raw Edge Erase Select the appropriate encryption level. ON, OFF Mono (Binary); High = G4 Medium = G3 Use the keypad to enter the width settings. Input range: 5 to 50mm 7.
SCAN TO USB MEMORY 1. Plug the USB memory into the USB port at the front of the machine. 2. Place your document(s) with text face UP in the ADF or face DOWN on the glass. 3. Press the Scan button on the control panel to prompt the Scan Menu screen. 4. Using the Down arrow key, scroll to USB Memory and press OK. Using the options available, you can enter a file name and alter the scan output to suit your needs. FEATURE OPTION DESCRIPTION Scan Size A4, A5, A6, B5, Letter, Legal 13, Legal 13.
FEATURE OPTION Image Settings (cont.) Hue DESCRIPTION -3, -2, -1, 0, +1, +2, +3 Red/green balance adjustment. Low: Enhance red. High: Enhance green. Saturation -3, -2, -1, 0, +1, +2, +3 Saturation setting High: Enhance image sharpness Low: Reduce hue RGB Red: -3, -2, -1, 0, +1, +2, +3 Green: -3, -2, -1, 0, +1, +2, +3 Adjust RGB contrast settings. Use the arrow keys to increment and decrement the values and to move to the next color setting.
SCAN TO COMPUTER You can save the scanned data into your local computer. When you press the M or , the scan job starts and the ActKey utility and the C TWAIN driver start automatically. You can send the scanned document to a specified application, save it in a specified folder, or send it by fax. ONO OLOR In the WSD Scan connection, you can set an application to start and a location where you send or store document for each recipient.
CONNECTING VIA USB 1. Press the SCAN key on the operator panel. 2. Place your document with text face up in the ADF or face down on the document glass. 3. Press the to select Computer and then press OK. If the Network TWAIN setting is set to Disable, proceed to the step 6. 4. Check that Select A Connecting PC is selected and then press OK. 5. Press the to select From USB Interface and then press OK. 6. Press the to select Select An Application and then press OK. 7.
9. Press MONO ONO or C COLOR OLOR . MEMO If you select Application, the specified application starts and the scanned image is displayed on the application. If you select Folder, the scanned image is saved in the specified folder. If you select PC-FAX, the application for fax transmission starts. After sending the scanned image, send a fax with the fax transmission software on your computer. WSD SCAN CONNECTION 1. Press the SCAN key on the Operation Panel. 2.
REMOTE SCAN This will launch the Scanner driver from a utility installed on the PC (ActKey, PaperPort, Image, Adobe Photoshop, etc.) and will begin scanning. Connect the machine to a computer via USB or a network. TWAIN (USB connection and Network connection) and WSD Scan are supported. There are 3 Modes of Operation: Simple Scan Mode, Manual Scan Mode, and Secure Scan Mode.
SIMPLE SCAN MODE NOTE If you failed to start scan, please check whether the panel is in operation. For Windows 1. Place your document with text face up in the ADF or face down on the document glass. 2. Start ActKey on your computer. 3. Click the scan button you want. The scan job starts. Scan Button Name: Application1, Application2, Folder, PC-Fax MEMO If you select Application1 or Application2, the specified application starts and the scanned document is displayed on the application.
5. Start ActKey on your computer. 6. Click the scan button you want. The scan job starts. Scan Button Name: Application1, Application2, Folder, PC-Fax MEMO If you select Application1 or Application2, the specified application starts and the scanned document is displayed on the application. If you select Folder, the scanned document is saved in the specified folder. If you select PC-FAX, the application for fax transmission starts and the scanned document is sent to the application.
7. Press the to select the destination you want and then press OK. 8. Press or 9. Start the ActKey on your computer. 10. Click a scan button. MONO ONO C COLOR OLOR . For Mac OS X 1. Press the SCAN key on the operator panel. 2. Place your document with text face up in the ADF or face down on the document glass. 3. Press the 4. Check that the TWAIN is selected, and press OK. 5. Check that Select a connecting PC is selected and then press OK. 6.
SECURE SCAN MODE (FOR USB CONNECTION) For Windows 1. Press the SCAN key on the operator panel. 2. Place your document with text face up in the ADF or face down on the document glass. 3. Press the 4. Check that the TWAIN is selected, and press OK. 5. Check that Select a connecting PC is selected and then press OK. 6. Press the 7. Press 8. ActKey start on the computer. 9. Click the Scan button. MONO ONO to select Remote Scan and then press OK.
MANAGING PROFILES ADDING A NEW NETWORK PROFILE Register the information you configured on the computer as a profile. It is necessary when you perform Scan To Shared Folder with the computer. 1. Press the SETTING button on the control panel to prompt the Setting screen. 2. Using the Down arrow key, scroll to Profile and press OK. 3. Select the desired profile number. 4. Press the Right arrow key to prompt the Operation Menu screen. From here you can register or sort profiles. 5.
DELETING A NETWORK PROFILE To delete a network profile: 1. Press the SETTING button on the control panel to prompt the Setting screen. 2. Using the Down arrow key, scroll to Profile List and press OK. 3. Select the desired profile number. 4. Ensure Delete is highlighted then press the Right arrow key. 5. At the prompt: > press OK to continue deleting the profile entry, or... > use the Right arrow key to highlight No, then press OK to cancel.
MANAGING THE ADDRESS BOOK SETTING SENDER AND REPLY TO E-MAIL ADDRESSES (FROM/REPLY TO) You can set the E-mail address from which E-mails are sent and the address to which responses are sent. 1. Press the SETTING button on the control panel. 2. Using the Down arrow key, scroll to Admin Setup and then press OK. 3. Using the arrow keys and on-screen keyboard, enter the administrator password. NOTE The default password is “999999”. 4. Select Done and then press OK. 5.
CREATING E-MAIL TEMPLATES You can create up to five E-mail templates with various subject lines and body text. Registering a subject 1. Press the SETTING button on the control panel. 2. Using the Down arrow key, scroll to Admin Setup and then press OK. 3. Using the arrow keys and on-screen keyboard, enter the administrator password. NOTE The default password is “999999”. 4. Select Done and then press OK. 5. Using the Down arrow key, scroll to Scanner Setup and then press OK. 6.
ADDING AN E-MAIL ADDRESS ENTRY TO THE ADDRESS BOOK The machine can hold up to 1000 E-mail addresses in the address book. To assign a new E-mail address to the address book: 1. Press the SETTING button on the control panel. 2. Using the Down arrow key, scroll to Address Book and press OK. 3. Press OK to select E-mail Address. 4. Using the arrow keys, scroll to the required entry position and press OK. 5. Press OK to select Register. 6. Press the Right arrow key to select Name. 7.
8. Press the Left arrow key to exit the menu. MODIFYING AN E-MAIL ADDRESS ENTRY FROM THE ADDRESS BOOK To edit an E-mail address entry from the address book: 1. Press the SETTING button on the control panel. 2. Using the Down arrow key, scroll to Address Book and press OK. 3. Press OK to select E-mail Address. 4. Using the arrow keys, scroll to the required entry position and press OK. 5. Press OK to select Edit. 6. Modify the Name, E-mail Address and/or Group No.
DELETING A GROUP ADDRESS ENTRY FROM THE ADDRESS BOOK To delete a group address entry from the address book: 1. Press the SETTING button on the control panel. 2. Using the Down arrow key, scroll to Address Book and press OK. 3. Using the Down arrow key, scroll to E-mail Group and press OK. 4. Using the arrow keys, scroll to the required entry position and press OK. 5. Using the arrow keys, scroll to Delete and press OK. 6. At the prompt select Yes to continue or select No to cancel the operation.
PRINTING NOTE If your Administrator has enabled access control on your machine, it will automatically start up in access control mode. You will not be able to use it until you have provided valid login information. Refer to “User authentication and access control” on page 38 for details.
PRINT FROM USB MEMORY NOTE Supported file systems: FAT12, FAT16, FAT32. Supported file formats: JPEG, PDF (v1.7), M-TIFF (v6 Baseline), PRN (PCL, PS). Supported: Up to 32 GB capacity of USB memory. Not Supported: USB hubs, external USB HDDs and encrypted PDFs. NOTE Up to 100 files in supported file formats stored in USB memory are displayed on the file list. If more files are stored in USB memory, the list of the stored files may not be displayed properly.
5. If your file is contained within a folder: (a) Using the arrow keys, scroll to the required folder and press OK. NOTE If required, scroll to Folder Property and press OK to check the file information. (b) 6. Press OK to select Open Folder. Using the arrow keys scroll to the file you want to print and press the OK. NOTE If required, scroll to File Property and press OK to check the file information. 7. Ensure Select is highlighted, then press OK. 8.
SWITCHING ONLINE/OFFLINE If you wish to alter the print status of your machine: 1. Press the Print button (1) on the control panel to prompt the Print Menu screen. 1 2 3 4 2. Using the Down arrow key, scroll to Switch Online/Offline and press OK. 3. Using the arrow keys, scroll to your required option and press OK. NOTE If you switch the machine Offline it will disable the Copy function also. PRINTING WITH AirPrint AirPrint-enabled applications can print to an AirPrint-enabled device.
FAXING NOTE If your Administrator has enabled access control on your machine, it will automatically start up in access control mode. You will not be able to use it until you have provided valid login information. Refer to “User authentication and access control” on page 38 for details. When faxing, you can load only A4, letter, or legal size documents in the ADF, and A4 or letter size documents on the document glass. You cannot load mixed size documents.
ADVANCED OPERATION Using the options available, you can alter the fax output to suit your needs: FEATURE OPTION DESCRIPTION Speed Dial List Select the required speed dial number. Fax Add Destination You can select multiple entries. Entries must be registered in advance, refer to “Adding a speed dial entry to the phone book” on page 100. Group List Select the required group dial number. You can select multiple entries.
FEATURE Fax Functions (cont.) OPTION DESCRIPTION TTI ON, OFF Prints the sender name on the header of the transmitted fax. By default, the name you specified in Sender ID is printed. TTI Select user defined Select the user defined TTI header. Note: TTI must be ON. Transmit Confirmation Report ON, OFF Select ON to print a fax confirmation after transmission. Delayed Tx OFF Delayed transmission allows you to fax documents at a specific date and time.
Broadcasting This function allows you to send a fax to multiple recipients at the same time. By combining abbreviation dials, groups and entering addresses using the numeric keypad, you can specify up to 100 destinations at one time. NOTE When real time transmission (Memory Tx set to OFF) or polling is executed during broadcasting data, they are executed preferentially. In the case of polling, it is executed preferentially when there is only one address specified.
F Code communication F Code transmission is a function to communicate, using sub addresses or passwords in accordance with the ITU-T standard. By creating F code boxes/sub addresses/passwords, you can execute secure communication, bulletin box communication and polling communication. NOTE Up to 20 F code boxes can be registered. Sub address and ID code > A sub address is a number to distinguish various F code boxes that are set in the memory.
7. Press OK to select Register. 8. Select a type of F code box: > Bulletin Box - refer to “Registering an F code Bulletin box” on page 92 > Confidential Box - refer to “Registering an F code confidential box” on page 92. Registering an F code Bulletin box 1. Press OK to select Bulletin Box. 2. Press the Right arrow key to select Box Name. (a) Using the arrow keys and on screen keyboard, enter a box name. (b) Highlight Done and press OK.
3. Using the Down arrow, scroll to Sub-Address and press the Right arrow key. (a) Using the keypad enter the sub address. (b) Highlight Done and press OK. NOTE A sub address can be registered using up to 20 digits. Numbers, # and * can be registered. If you make a mistake when entering the digits, press the Clear button to delete and then enter the correct digit. 4. Using the Down arrow key, scroll to I.D.
Deleting an F code box NOTE You cannot delete an F code box in which documents are stored, it must be empty. 1. Press the SETTING button on the control panel. 2. Using the Down arrow key, scroll to Admin Setup and press OK. 3. Using the arrow keys and on-screen keypad, enter the Administrator password. Highlight Done and press OK. 4. Using the Down arrow key, scroll to Fax Setup and press OK. 5. Using the Down arrow key, scroll to Fcode Box and press OK. 6.
Receiving using a sub address (F code polling) By entering a sub address and ID code, a document stored in the bulletin box of a recipient machine can be taken out (polling). NOTE Before operating, ensure you have the necessary sub address and ID code to hand. 1. Press the Fax button on the control panel to prompt the Fax Ready screen. 2. Press OK to select Fax. 3. Using the Down arrow key, scroll to Fax Functions and press OK. 4. Using the Down arrow key, scroll to Fcode Polling and press OK. 5.
Printing stored documents Print secure received documents, documents received in the bulletin box and documents stored in the bulletin box. NOTE When a document is received into an F code box, the F code receiving notice is printed. Check the F code box number and print the stored document. 1. Press the SETTING button on the control panel. 2. Using the Down arrow key, scroll to Store Document Settings and press OK. 3. Using the Down arrow key, scroll to Print and press OK. 4.
Fax job view/cancel If you no longer require a stored fax job, you can cancel and remove it from your MFP’s memory. 1. Press the Fax button on the control panel to prompt the Fax Mode screen. 2. Using the arrow keys, scroll to Fax and press OK. 3. Using the Down arrow key, scroll to Fax Job View/Cancel and press OK. 4. Using the Down arrow key, scroll to the fax job you wish to delete and press OK. 5. Check the job contents, then press the Right arrow key. 6.
Receiving faxes The machine automatically starts fax reception. Receiving calls The telephone starts ringing when it receives calls. 1. Pick up the handset to talk when the machine rings. 2. If necessary, press the mono START button and then put down the handset to receive faxes. NOTE In case of connecting with far distance telephone, faxes can be received by pressing “remote receiver number”. Refer to page 114 of “Configuration Guide”.
DRD This mode allows the machine to detect a distinctive ring if it has been enabled on the phone line. In this mode, the machine distinguishes the DRD type of the sender. The machine then answers only when it matches the registered DRD type. There are several type of DRD ring pattern. The length of ring ON time and ring OFF time is different. It depends on the Country Code. Please set the Country Code and DRD Type for your suitable DRD ring pattern. You can register up to four DRD types.
MANAGING THE PHONE BOOK The following section describes how to add/remove/modify speed and group dial entries to/ from the Phone Book. ADDING A SPEED DIAL ENTRY TO THE PHONE BOOK The machine can hold up to 100 speed dial numbers in the phone book. To add a new speed dial number to the phone book: 1. Press the SETTING button on the control panel. 2. Using the Down arrow key, scroll to Phone Book and press OK. 3. Press OK to select Speed Dial List. 4.
17. Press the Left arrow key to exit the menu. ADDING A GROUP ENTRY TO THE PHONE BOOK The machine can hold up to 20 group dial settings. To add a new group dial number to the phone book: 1. Press the SETTING button on the control panel. 2. Using the Down arrow key, scroll to Phone Book and press OK. 3. Using the Down arrow key, scroll to Group No. Book and press OK. 4. Using the arrow keys, scroll to the required entry position and press OK. 5. Press OK to select Register. 6.
5. Using the arrow keys, scroll to Delete and press OK. 6. At the prompt select Yes to continue or select No to cancel the operation. 7. Press OK. 8. Press the Left arrow key to exit the menu. MODIFYING A SPEED DIAL ENTRY To modify a speed dial entry: 1. Press the SETTING button on the control panel. 2. Using the Down arrow key, scroll to Phone Book and press OK. 3. Press OK to select Speed Dial List. 4. Using the arrow keys, scroll to the required entry position and press OK. 5.
INTERNET FAX SENDING A FAX FROM YOUR PC NOTE You must have the fax driver installed on your PC. Download the latest fax driver from your support website. Basic operation 1. At the MFP: Place your document(s) with text face UP in the ADF or face DOWN on the glass. 2. Press the Fax button on the control panel to prompt the Fax Mode screen. 3. Using the Down arrow key, scroll to Internet Fax and press OK. 4. Set your destination and send properties as required.
11. (c) Enter comments if required. (d) If required select the Add an outside call number checkbox and enter the Outside call number as appropriate. On the Recipient tab: (a) Click the Recipients... button. (b) Select a fax number from the Phone book panel on the right hand side. Refer to “Adding fax numbers to the phone book” on page 107. (c) Press the Add button to add this number to the recipient list. (d) Repeat (b) and (c) as required to create the recipient list.
Advanced operation Using the options available, you can alter the fax output to suit your needs: FEATURE OPTION DESCRIPTION Internet Fax Add Destination To: Address Book Select E-mail address from the address book. Cc: Input range: 001-100 Bcc: Group List Select destination group from the list. Input range: 01-20 Tx History Displays the list of sent E-mails. Direct Input Enter E-mail address using the on-screen keyboard. LDAP Simple Search Use the on-screen keyboard to enter a search value.
FEATURE Scan Setting (cont.) OPTION DESCRIPTION File Name User defined Use the on-screen keyboard to enter an appropriate file name. Duplex Scan ON, OFF Turns the duplex (2-sided) function off or on. Continuous Scan ON, OFF Allows you to continue scanning more documents. Allows you to construct a single fax job from multiple individual sheets or originals. Refer to “Continuous scan mode” on page 109 for details. Compression Rate High, Medium, Low Select the appropriate compression level.
ADDING FAX NUMBERS TO THE PHONE BOOK NOTE you can register up to 1000 destinations. To add a fax destination number to the phone book: 1. From your application’s File menu, select Print. 2. In the Select Printer window, highlight the fax driver option. 3. Press the Preferences button to display the fax driver window. 4. Click the Phone book... button. The phone book screen displays. 5. Select FAX number -> New (FAX number). 6. Type in the fax number destination Name. 7.
8. Add recipients to the group list: NOTE Maximum 100 recipients in any one group. (a) Select a fax number from the Phone book panel on the right hand side. NOTE You can add a new fax number directly by clicking the New (FAX number)... button and adding an entry to the phone book panel. 9. (b) Press the Add-> button to add this number to the group list. (c) Repeat steps (a) and (b) as required to create the group list.
FUNCTIONS COMMON TO COPY, FAX AND SCAN OPERATIONS CONTINUOUS SCAN MODE If you need to scan, copy or fax multiple sets of documents from the ADF or document glass, enable the “Continuous Scan” option. NOTE The example below uses the fax feature, however, the scan and copy features follow the same process. To set the fax to continuous scan: 1. Place your document(s) with text face UP in the ADF or face DOWN on the glass. 2. Press the Fax button on the control panel to prompt the Fax Ready screen. 3.
MAINTENANCE REPLACING CONSUMABLE ITEMS Only use genuine original consumables to ensure the best quality and performance from your hardware. Non original products may adversely affect your printer's performance and invalidate your warranty. TONER CARTRIDGE REPLACEMENT NOTE When the LCD display indicates TONER LOW, or if print appears faded, first open the output tray and try tapping the cartridge a few times to evenly distribute the toner powder.
1. Gently raise the scanner. 2. Press the cover release (a) and open the output tray (b) fully. b a WARNING! If the MFP has been powered on, the fuser will be hot. This area is clearly labelled. Do not touch.
3. Note the positions of the four cartridges. It is essential that they go back in the same order. 1 2 3 4 (a) 1. Yellow cartridge 2. Magenta cartridge 3. Cyan cartridge 4. Black cartridge Slide the colored release collar on the cartridge to be replaced fully towards the right hand side of the printer. b a (b) 4. Lift the right-hand end of the cartridge and then draw the cartridge to the right to release the left-hand end as shown, and withdraw the toner cartridge out of the printer.
5. Clean the top of the ID unit with a clean, lint free cloth. 6. Remove the new cartridge from its box but leave its wrapping material in place for the moment. 7. Gently shake the new cartridge from end to end several times to loosen and distribute the toner evenly inside the cartridge. 8. Remove the wrapping material. 9. Holding the cartridge by its top centre, lower it into the printer over the image drum unit from which the old cartridge was removed. 10.
c b a 12. Gently wipe the LED head surface with a clean, lint free cloth. 13. Close the output tray and press down firmly so that the cover latches closed. 14. Gently lower the scanner.
IMAGE DRUM REPLACEMENT The image drum assembly comes complete with its own installation details which give full instructions on replacement. You are advised to follow these instructions carefully. REPLACING THE TRANSFER BELT UNIT The belt unit is located under the image drum assembly. Switch off the MFP and allow the fuser to cool for about 10 minutes before opening the cover. Refer to “Turning off your machine” on page 19 for details. 1. Gently raise the scanner. 2.
4. Place the assembly in a safe place away from direct sources of heat and light. CAUTION! The green image drum surface at the base of each cartridge is very delicate and light sensitive. Do not touch it and do not expose it to normal room light for more than 5 minutes. If the drum unit needs to be out of the printer for longer than this, please wrap the cartridge inside a black plastic bag to keep it away from light. Never expose the drum to direct sunlight or very bright room lighting. 5.
9. Holding the image drum assembly by its handles, lower it into place in the machine, locating the pegs at the sides into their slots in the sides of the printer cavity. 10. Close the output tray and press down firmly so that the cover latches closed. 11. Gently lower the scanner.
FUSER REPLACEMENT The fuser is located inside the printer just behind the toner cartridges. WARNING! If the MFP has recently been powered on, some fuser components will be very hot. Handle the fuser with extreme care, holding it only by its handle, which will only be mildly warm to the touch. A warning label clearly indicates the area. Switch off the MFP and allow the fuser to cool for about 10 minutes before opening the cover. Refer to “Turning off your machine” on page 19 for details. 1.
7. Holding the new fuser by its handle, make sure that it is the correct way round. The retaining levers (b) should be fully upright, and the two locating lugs (c) should be towards you. b c b 8. Lower the fuser into the printer, locating the two lugs (c) into their slots in the sides of the printer cavity. 9. Push the two retaining levers (b) towards the rear of the printer to lock the fuser in place. b b 10. Close the output tray and press down firmly so that the cover latches closed. 11.
CLEANING CAUTION! Use a clean, moist, lint-free cloth for cleaning. Do not use benzine, thinners or alcohol as a cleaning agent. ...THE UNIT CASING 1. Switch the printer off. Refer to “Turning off your machine” on page 19 for details. 2. Wipe the unit surface with a soft cloth moistened sparingly with water or neutral detergent. 3. Use a soft dry cloth to dry the unit surface. 4. Switch the printer on. ...
3. Gently wipe the LED head surface with a clean, lint free cloth. CAUTION! Do not use methyl alcohol or other solvents on the LED head as damage to the lens surface will occur. 4. Close the output tray and press down firmly at both sides so that the cover latches closed. 5. Gently lower the scanner.
...THE PAPER PATH IN THE ADF If marks are found on an image which has been read by the ADF, or the ADF does not feed documents smoothly, follow the cleaning procedure below. 1. Switch the MFP OFF. Refer to “Turning off your machine” on page 19 for details. 2. Open the ADF top cover. 3. Moisten a soft, clean, lint-free cloth and wipe the feed rollers (1) by moving the cloth from side to side. 1 2 6 5 7 3 4 4. Rotate the rollers forward with your finger and repeat step 3 until the rollers are clean.
...THE DOCUMENT GLASS The document glass needs to be cleaned occasionally to ensure optimum image quality and performance. 1. Open the document cover. 2. Moisten a soft, clean, lint free cloth and remove any marks, as shown. 3. Close the document cover.
INSTALLING UPGRADES This section explains how to install optional equipment into your MFP. This includes: > additional paper tray ADDITIONAL PAPER TRAY 1. Switch the MFP off and disconnect the power cable. Refer to “Turning off your machine” on page 19 for details. 2. Place additional paper tray on desired location. 3. Observing safety rules for lifting and, using locating guides, place machine on top of the additional paper tray. Model Number: N34311A 4. Fit retaining clips as shown. 5.
SETTING THE DRIVER DEVICE OPTIONS Once your new upgrade has been installed, you may need to update the printer driver so that the additional features are available to your applications. Accessories such as additional paper trays will only be usable if the printer driver on your computer knows they are there. In some cases the hardware configuration of your machine is automatically detected when the driver is installed.
TROUBLESHOOTING CHECKING THE MACHINE’S STATUS From the STATUS key on the control panel, you can check the status of your machine. The STATUS key illuminates or flashes when any trouble is occurring in your machine. 1. Press the STATUS key on the control panel to open the status menu. 2. Ensure that System Status is selected and then press OK. 3. Using the arrow keys, scroll to the item you want to check and then press OK.
CLEARING PAPER JAMS Provided that you follow the recommendations in this guide on the use of print media, and you keep the media in good condition prior to use, your MFP should give years of reliable service. However, paper jams occasionally do occur, and this section explains how to clear them quickly and simply. Jams can occur due to paper misfeeding from a paper tray or at any point on the paper path through the MFP.
IN THE PRINTER SECTION... 1. If a sheet is well advanced out of the top of the printer, simply grip it and pull gently to draw it fully out. If it does not remove easily, do not use excessive force. It can be removed from the rear later. 2. Gently raise the scanner. 3. Press the cover release (a) and open the output tray (b) fully. b a WARNING! If the MFP has been powered on, the fuser will be hot. This area is clearly labelled. Do not touch. 4.
5. Put the assembly down gently onto a piece of paper to prevent toner from marking your furniture and to avoid damaging the green drum surface, and cover. CAUTION! The green image drum surface at the base of the Image Drum is very delicate and light sensitive. Do not touch it and do not expose it to normal room light for more than 5 minutes. If the drum unit needs to be out of the printer for longer than this, please wrap the cartridge inside a black plastic bag to keep it away from light.
6. Look into the printer to check whether any sheets of paper are visible on any part of the belt unit. d c b a e CAUTION! Do not use any sharp or abrasive objects to separate sheets from the belt. This may damage the belt surface. (a) To remove a sheet with its leading edge at the front of the belt (a), lift the plastic guard (e) at the front of the printer, then carefully lift the sheet from the belt and pull it forwards into the internal drum cavity and withdraw the sheet.
through the drum cavity area. Then allow the pressure release lever to rise again. d NOTE If the sheet is well advanced into the fuser (only a short length is still visible), do not attempt to pull it back. (d) To remove a sheet in the fuser, move the two retaining levers (e) towards the front of the machine to release the fuser. Withdraw the fuser unit using the handle (f). f e e (e) Press release lever (g) and pull the trapped paper from the fuser.
(f) Replace fuser unit into the machine and move locking levers (e) toward the rear of the machine. e e NOTE Check that there is no paper remaining inside the machine. Remove the paper carefully so that it does not tear. If the paper tears, be sure to remove all of the pieces. 7. If you were duplex printing when the jam occurred, check the duplex paper path: (a) Pull the locking levers at each side of the transfer belt up and towards the front of the machine.
(d) Lower the belt unit into place, with the drive gear towards the rear of the printer. Locate the drive gear into the gear inside the printer by the rear right corner of the unit, and lower the belt unit flat inside the printer. (e) Push the locking levers towards the rear of the machine. This will secure the belt unit in place. 8. Holding the image drum assembly by its handles, lower it into place in the machine, locating the pegs at the sides into their slots in the sides of the printer cavity. 9.
> If the sheet is low down in this area and difficult to remove, it is probably still gripped by the fuser. In this case raise the output tray, reach around and press down on the fuser pressure release lever (d). d 11. If you are not using the rear exit tray, close it once any paper has been removed from this area. 12. Pull out the paper tray and ensure that all paper is stacked properly, is undamaged, and that the paper guides are properly positioned against the edges of the paper stack.
DEALING WITH UNSATISFACTORY PRINTING SYMPTOMS POSSIBLE CAUSES STEPS TO TAKE Vertical white lines can be seen on the printed page. The LED head is dirty. Wipe the LED head with a soft, lint-free cloth. The toner is low. Open the output tray and tap the cartridge a few times to evenly distribute any remaining toner. If symptoms persist, replace the toner cartridge. Foreign materials may be present in the image drum. Replace the image drum cartridge.
SYMPTOMS POSSIBLE CAUSES STEPS TO TAKE Horizontal Lines and spots appear periodically. When the interval is about 94mm (4in), the image drum (the green tube) is damaged or dirty. Wipe it lightly with a soft cloth. Replace the image drum cartridge when it is damaged. When the interval is about 30mm (1.2in), there may be foreign particles in the image drum cartridge. Open/close the output tray, and print again. When the interval is about 86mm (3.4in), the fuser unit is damaged.
FAX PROBLEM CHECKLIST If a problem occurs, read through the list of problems and solutions before calling for service. The machine will not dial a telephone number: Check the power cable and wall outlet. Make sure that the telephone line (not external telephone or handset) is connected to the LINE socket on the back of the machine. If an external telephone is installed, lift the handset and check for a dial tone. If there is no dial tone, there may be a problem with the telephone line.
Machine is connected to a PBX but it is not possible to dial out: Be certain that the dial prefix is entered before the telephone number for each number dialled or programmed into the machine. Additionally, the machine must be programmed for PBX operation before it will work with a PBX (refer to the Configuration Guide for details). Machine always answers before it’s possible to use the external telephone: If an external telephone is connected, increase the machine’s ring response setting.
SPECIFICATIONS MFP model Model Number MC363dn N34346A, N34346B ITEM MC363dn Dimensions 427 x 509 x 445mm (W x D x H) Weight 29Kg approx. Power supply 110 to 127VAC, 50/60Hz±2% 220 to 240VAC, 50/60Hz±2% Power consumption Off: <0.5 W Sleep: <1.5 W Power saving: < 20 W Stand-by: 100 W Operating (Average): 570 W Operating (Max.): Operating environment 1170 W Operating 10 to 32 °C/20 to 80% RH (optimum 25 °C wet, 2 °C dry) Idle: 0 to 43 °C/10 to 90% RH (optimum 26.
Regulatory wireless LAN statements -FCC Statement -IC Statement -Europe-CE Declaration of conformity. FCC statement FCC WARNING Changes or modifications not expressly approved by the party responsible for compliance could void the user’s authority to operate the equipment. Note: This equipment has been tested and found to comply with the limits for a Class B digital device, pursuant to part 15 of the FCC Rules.
Europe - CE Declaration of Conformity This equipment complies with the essential requirements of the European Union directive 1999/5/EC.
INDEX A Address book adding a group entry ........ 81 adding an email entry....... 80 deleting a group entry ...... 82 deleting an email entry..... 80 editing a group entry ........ 82 editing an email entry ...... 81 B Belt how to replace ................ 115 C Cleaning the LED head ........ 120 D Duplex paper size and weight limits .............................. 32 E Phone book adding a group dial entry............................. 101 adding a speed dial entry.............................
Oki contact details Oki Systems (UK) Ltd Oki Systèmes (France) S.A. OKI Systems Rus, LLC (Russia) Blays House Wick Road Egham Surrey TW20 0HJ Zone Silic - Immeuble Osaka 21 rue du Jura CS 90277 94633 RUNGIS Cedex Paris Sector B, 3rd Floor, Svyatogor-4 Business Center10/4, Letnikovskaya str.115114, Moscow Tel: +44 (0) 1784 274300 Fax: +44 (0) 1784 274301 http://www.oki.co.uk Tél: Standard 0820 200 410 (0.09€/min depuis une ligne fixe*) Hotline 01 76 54 21 50 (n° non surtaxé) Website: www.oki.
Oki Systems (Finland) Oy Polaris Capella Vänrikinkuja 3 02600 Espoo Tel: +358 (0) 207 900 800 Fax: +358 (0) 207 900 809 Oki Systems (Holland) b.v. Neptunustraat 27-29 2132 JA Hoofddorp Helpdesk: 0800 5667654 Tel: +31 (0) 23 55 63 740 Fax: +31 (0) 23 55 63 750 Website: www.oki.nl Oki Systems (Norway) AS Tevlingveien 23 N-1081 Oslo Tel: +47 (0) 63 89 36 00 Telefax: +47 (0) 63 89 36 01 Website: www.oki.no Var vänlig kontakta din Återförsäljare i första hand, för konsultation.
4-11-22 Shibaura, Minato-ku,Tokyo 108-8551, Japan www.oki.