Page: 1 Service Manual for OF5800 Chapter 0 Introduction OKIFAX 5800 Service Manual Adobe Acrobat printable reference copy of the OKIDATA Service Training Manual. 08/20/98 Note: This Adobe Acrobat version of the Okidata Service Training Manual was built with the pictures rendered at 300 dpi, which is ideal for printing, but does not display well on most displays. Copyright 1997, Okidata, Division of OKI America, Inc. All rights reserved.
Table of Contents Page Service Manual for OF5800 1 General Description 1.1 Product Description 1.2 Specification and Ratings 1.3 Features and Functions 1.4 Reports 1.5 Scanner Specifications 1.6 Printer Specifications 1.7 Memory Specifications 1.8 Supply Yields 2 Machine Operations 2.1 Interconnect Block Diagram 2.2 Main Control PCB 2.3 Network Control Unit (NCU) PCB 2.4 Power Supply Unit (PSU) 2.5 CCD Mount PCB 2.6 Sensors ....2.6.1 Sensor Locations ....2.6.2 Sensor Descriptions 2.7 Unit Assembly 2.
Table of Contents 3.2 Machine Parameter Adjustment ....3.2.1 Setting the Machine Parameters ....3.2.2 Clearing the Machine Parameters ........Machine Parameter A:0: ........Machine Parameter A:1 ........Machine Parameter A:2 ........Machine Parameter A:3 ........Machine Parameter A:4 ........Machine Parameter A:5~A:8 ........Machine Parameter A:9 ........Machine Parameter B:4 ........Machine Parameter B:4~G:9 ........Machine Parameter H:0 ........Machine Parameter H:1 ........Machine Parameter H:2 ........
Table of Contents ....Memory Switch G:5~G:9 ....Memory Switch H:0 - Operation ....Memory Switch H:1 - Operation ....Memory Switch H:2 - Operation ....Memory Switch H:3~H:9 3.5 Clear Programmed Data / User Settings 3.6 All RAM Clear 3.7 Setting Individual Autodialer Attributes 3.8 Unique Switchs Adjustment ....3.8.1 Setting the Unique Switches ....3.8.2 Clearing the Unique Switches ........Unique Switch A:0 - Dialer ........Unique Switch A:1~A:9 ........Unique Swtich B:0 ........Unique Switch B:1~B:9 .......
Table of Contents ....3.13.1 Function List ....3.12.2 LED Test ....3.13.3 LCD Test ....3.13.4 LCD Test ....3.13.5 SRAM Check ....3.13.6 DRAM Check ....3.3.17 RTC Test 3.14 Line Test ....3.14.1 Relay Test ....3.14.2 Tonal Signal Test ....3.14.3 DTMF Output Test 3.15 JP1, JP2 Battery Backup 3.16 DRAM Memory Backup 4 Troubleshooting Procedures 4.1 Troubleshooting Outline 4.2 Recording Paper Jam 4.3 Recording Paper Jam 4.4 Document Feeder Jam 4.5 Document Feeder Multi-feeding 4.6 Transmit Errors 4.
Table of Contents 5 Disassembly 5.0 Disassembly 5.1 Document Hopper / Document Tray / Paper Hopper 5.2 Main Control PCB , NCU PCB, Modular PCB 5.3 Front Cover and Control Panel PCB / LCD 5.4 Scanner Assy and Scanner Frame 5.5 Inverter PC Board / Scanner Lamp 5.6 Scanner Assy A, B, C and Inter Lock Switch 5.7 TX Cover and Lock Lever 5.8 DS1 / DS2 5.9 Press Roller 5.10 Separator Roller 5.11 Exit Roller / Feed Roller 5.12 Stamp 5.13 TX Motor 5.14 Contact Glass 5.15 Speaker 5.
Table of Contents ....Illustrated Part List 7: Housing ....Illustrated Part List 8A: Drive/Paper Take-Up Section 1 ....Illustrated Part List 8B: Drive/Paper Take-Up Section 1 ....Illustrated Parts List 9: Paper Take-Up Section 2 ....Illustrated Parts List 10: Transfer Unit ....Illustrated Parts List 11: Fusing Unit ....Illustrated Parts List 12: Options ....Illustrated Parts List 13: Consumables ....Illustrated Parts List 14: Accessories ....Illustrated Parts List 15: Packaging ....
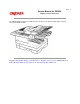
Page: 1 Service Manual for OF5800 Chapter 1 General Description The OKIFAX 5800 is a Group 3 facsimile machine. Documents are printed on plain paper using dry electrophotographic printing. Copyright 1997, Okidata, Division of OKI America, Inc. All rights reserved. See the OKIDATA Business Partner Exchange (BPX) for any updates to this material. (http://bpx.okidata.
Page: 2 Service Manual for OF5800 Chapter 1 General Description Item Type Telephone network Transmission control protocol Modem Coding Communication method Dual Access Error Correction Mode (ECM) Scanning method Recording method Resolution Horizontal: Scanning width Printing width Document size Document thickness Recording paper specifications Recording Paper Capacity Paper Cassette: Multipurpose tray: Power requirements Power consumption Environmental conditions Relative humidity: Weight Specificati
Lithium Battery Precautions: There is a danger of an explosion if the battery is installed incorrectly. Replace the battery with the equivalent type. Discard used batteries according to the battery manufacturer's instructions. OKIDATA does not recommend the independent replacement of this battery. The battery is sold only as a component part of the main control PCB and cannot be purchased separately from OKIDATA. Copyright 1997, Okidata, Division of OKI America, Inc. All rights reserved.
Page: 3 Service Manual for OF5800 Chapter 1 General Description Comment LCD: 2 line, 20 characters per line. language: English, French, Spanish and Portuguese. Transmit Terminal Identifier Alphanumeric or symbol, up to 22 characters (TTI) Subscriber ID Numeric, up to 20 characters AutoDial 200 total; 140 speed dial, 60 one-touch. 12 programmable one-touch (Up to 40 digits per location; 16 characters per location ID) Telephone index Select AutoDial entries in LCD by Location ID name.
Automatic reduction Half page reception Out of paper reception Closed network Silent operation Confirmation stamp Automatically reduces incoming documents to fit on receive paper Manual settings: 100%, 97%, 91%, 81%, 75%. Combines half page fax messages onto a single page. Receives up to 25 communications to memory if a Paper-Out, Toner-Out, or Cover Open condition exists. Proprietary network option Disables the Operation Complete tone Stamps transmit document while feeding.
Page: 4 Service Manual for OF5800 Chapter 1 General Description Report User settings list One-touch dial list Speed dial list Program one-touch list Group number list Function list T.30 monitor Confirmation Report Activity journal Cover page SecureMail box list SecureMail reception message Batch transmission box list Batch transmission document Command list Power failure report Check message Description Prints current machine settings as programmed by the user.
Page: 5 Service Manual for OF5800 Chapter 1 General Description Item Scanning resolution Scanning area Scanning reference point Document Contrast Grayscale Document feeder capacity Original document feeding direction Document scan time Primary Resolution Document Skew Specifications / Comments Horizontal: 12 dots/mm (304.8 dpi) Vertical: 15.4, 11.55, 7.7, 3.
Page: 6 Service Manual for OF5800 Chapter 1 General Description Item Printing resolution Printing method Developer Fusing method Toner yield Print area Printer reference Paper cassette capacity Receive paper tray capacity Auto reduction rate Printer warm up time Specifications / Comments Laser diode beam scanning Horizontal: Fax 609.6 dpi Vertical: Fax 586.
Page: 7 Service Manual for OF5800 Chapter 1 General Description Specifications / Comments 1 Megabyte - 78 pages Optional memory upgrade: Up to three, 2 MB upgrades can be installed for a total of 6 MB.
Page: 8 Service Manual for OF5800 Chapter 1 General Description Item Drum Cartridge Toner Cartridge Transfer unit Fuser unit Specifications / Comments 20,000 pages based on 4% document coverage Starter: 3,600 pages Supply: 5,500 pages * All yield based on 4% document coverage 50,000 pages 50,000 pages Copyright 1997, Okidata, Division of OKI America, Inc. All rights reserved. See the OKIDATA Business Partner Exchange (BPX) for any updates to this material. (http://bpx.okidata.
Page: 9 Service Manual for OF5800 Chapter 2 Machine Operations To be provided at a later time. Copyright 1997, Okidata, Division of OKI America, Inc. All rights reserved. See the OKIDATA Business Partner Exchange (BPX) for any updates to this material. (http://bpx.okidata.
Page: 10 Service Manual for OF5800 Chapter 2 Machine Operations The main control PCB controls the operations of all machine functions. Jumper JP1 on the main control PCB controls the data memory back-up. Memory data that is backed-up in the event of a power failure includes any stored documents. Jumper JP2 on the main control PCB controls the programmable data memory back-up.
Memory (EPROM, SRAM, DRAM) EPROM -- - The EPROM contains all program instructions for unit operation. SRAM --- The SRAM, which is backed-up by a lithium battery, is used to store user programmed information. DRAM --- The DRAM, which is backed-up by a battery, is used to store memorized documents along with being a buffer. Copyright 1997, Okidata, Division of OKI America, Inc. All rights reserved. See the OKIDATA Business Partner Exchange (BPX) for any updates to this material. (http://bpx.okidata.
Page: 11 Service Manual for OF5800 Chapter 2 Machine Operations The NCU PCB provides the connection to the telephone line. It consists of the interface circuit, dial pulse generator, ring signal detection and telephone control circuit. NCU PCB block diagram Major components of the NCU CML relay - Connects the telephone line to the phone or fax. (CML means Connect Machine to Line) S relay - Used to send dial pulse signals in pulse dialing.
Page: 12 Service Manual for OF5800 Chapter 2 Machine Operations The power supply unit receives the input line voltage and converts it to output voltages of +5 VDC, +24 VDC,+12 VDC, and -12 VDC. If an over current condition is sensed in the secondary circuit, power is interrupted. The power supply unit has three output connectors. The following table shows the connector outputs: CN1 to the Printer Mechanical Control PCB, CN2 to the Fuser Heater, and CN3 to the Main Control PCB.
Page: 13 Service Manual for OF5800 Chapter 2 Machine Operations The CCD (Charge Coupled Device) includes the photo sensitive device, charge transfer registers and output stage. The photo sensitive device is a MOS capacitor. It receives light which is reflected from the surface of the document through the lens and converts the received light energy into a series of electrical signals. These signals are then stored as a charge.
Page: 14 Service Manual for OF5800 Chapter 2 Machine Operations 2.6.1 Sensor Locations 2.6.2 Sensor Descriptions Copyright 1997, Okidata, Division of OKI America, Inc. All rights reserved. See the OKIDATA Business Partner Exchange (BPX) for any updates to this material. (http://bpx.okidata.
Page: 15 Service Manual for OF5800 Chapter 2 Machine Operations The following illustration shows the relative positions of the machine's sensors Copyright 1997, Okidata, Division of OKI America, Inc. All rights reserved. See the OKIDATA Business Partner Exchange (BPX) for any updates to this material. (http://bpx.okidata.
Page: 16 Service Manual for OF5800 Chapter 2 Machine Operations The following table gives a brief description of each sensor and its function.
Page: 17 Service Manual for OF5800 Chapter 2 Machine Operations 1. Fan Motor 2. Lower Fusing Roller 3. Paper Exit Sensor 4. Heater Lamp 5. Upper Fusing Roller 6. Paper Exit Roller 7. Toner Cartridge 8. Print Head Unit 9. Paper Lift-Up Plate 10. Paper Cassette Sensor 11. Paper Pick-up Roller 12. Paper Feed Roller 13. Paper Sensor 14. Paper Transfer Roller 15. Paper Take-up Sensor 16. Paper Take-up Roller (Tray) 17. Image Transfer Roller 18.
Copyright 1997, Okidata, Division of OKI America, Inc. All rights reserved. See the OKIDATA Business Partner Exchange (BPX) for any updates to this material. (http://bpx.okidata.
Page: 18 Service Manual for OF5800 Chapter 2 Machine Operations 2.8.1 Document Detection 2.8.2 Document Separation 2.8.3 Document Transport 2.8.4 Document Scanning 2.8.5 Document Discharge Copyright 1997, Okidata, Division of OKI America, Inc. All rights reserved. See the OKIDATA Business Partner Exchange (BPX) for any updates to this material. (http://bpx.okidata.
Page: 19 Service Manual for OF5800 Chapter 2 Machine Operations When a document is placed into the document feeder, Document Sensor 1 (DS1) is activated. Copyright 1997, Okidata, Division of OKI America, Inc. All rights reserved. See the OKIDATA Business Partner Exchange (BPX) for any updates to this material. (http://bpx.okidata.
Page: 20 Service Manual for OF5800 Chapter 2 Machine Operations Document separation is the process that allows a muliti-page document to feed through the scanner one page at a time. Separation occurs through the action of the separator roller and retard roller. As shown in the illustrations, documents in the feeder are pressed against the separator roller. The bottom document is separated from the remaining documents by the friction of the retard roller.
Page: 21 Service Manual for OF5800 Chapter 2 Machine Operations Following document separation, the feed roller advances the document. As it advances, the leading edge of the document activates the Document Sensor 2(DS2). Once DS2 is activated, the feed roller continues to rotate until the document reaches the scan wait position.
Page: 22 Service Manual for OF5800 Chapter 2 Machine Operations When the document reaches the scan wait position, the machine waits for the next command. It will start scanning the document when either the start or copy key is pressed. The light from the scanner lamp strikes the face of the document and is reflected into the lens through mirrors A, B, and C. In case the light intensity along the length of the scanner lamp is not uniform, shading compensation is provided to ensure even illumination.
Page: 23 Service Manual for OF5800 Chapter 2 Machine Operations The scanned document is discharged through the document exit by the exit press roller. Copyright 1997, Okidata, Division of OKI America, Inc. All rights reserved. See the OKIDATA Business Partner Exchange (BPX) for any updates to this material. (http://bpx.okidata.
Page: 24 Service Manual for OF5800 Chapter 2 Machine Operations 2.9.1 Recording Paper Feed Path A sheet of the recording paper is separated from the remaining paper by the friction of the pickup roller. The paper is moved along the paper guide until it reaches the platen roller. It is then fed by the rotation of the platen roller. Copyright 1997, Okidata, Division of OKI America, Inc. All rights reserved. See the OKIDATA Business Partner Exchange (BPX) for any updates to this material. (http://bpx.
Page: 25 Service Manual for OF5800 Chapter 2 Machine Operations Incoming data is received from the telephone line by the NCU and sent to the main control PC board. The modem, located on the main control board, demodulates the data. The data is then sent to the printer for image processing. The image processing is roughly divided into the following steps: 1. 2. 3. 4. 5.
Copyright 1997, Okidata, Division of OKI America, Inc. All rights reserved. See the OKIDATA Business Partner Exchange (BPX) for any updates to this material. (http://bpx.okidata.
Page: 26 Service Manual for OF5800 Chapter 2 Machine Operations The PC Drum is charged with static electricity before laser exposure. The Rotating Charge Brush and the Precharge-film are used to charge the surface of the drum. The rotating brush and the Precharge-film charging generate ozone in the printer. Because the charge is placed directly on the PC Drum, it can be charged by a low voltage. At the same time, the PC Drum can be evenly charged.
Page: 27 Service Manual for OF5800 Chapter 2 Machine Operations A electrostatic latent image is made by the laser beam emitted from the Print Head Unit. Sub-scanning Direction (vertical) When the printer receives the PRINT signal, the Polygon Motor and the Main Motor rotate and paper is fed into the printer.
Page: 28 Service Manual for OF5800 Chapter 2 Machine Operations Toner is applied to the electrostatic image on the PC Drum. A toner image is created on the drum surface. Part Name 1. Toner Hopper 2. Toner Agitating Screw 3. Toner Transport Roller 4. Doctor Blade 5. Sleeve Roller 6. Resin Seal 7. Bias Seal 8. PC Drum Function Contains toner. Agitates the toner in the Toner Hopper and sends the toner to the Toner Transport Roller. Transports the toner to the Sleeve Roller.
Partner Exchange (BPX) for any updates to this material. (http://bpx.okidata.
Page: 29 Service Manual for OF5800 Chapter 2 Machine Operations An image transfer roller system is used to transfer the toner image from PC Drum to the paper. The transfer charge (+3.2KV) is passed through the transfer roller onto the receive paper, which pulls the toner from the drum onto the receive paper. NOTE: Do NOT clean the Image Transfer Roller with solvent. Use a dry cloth. Copyright 1997, Okidata, Division of OKI America, Inc. All rights reserved.
Page: 30 Service Manual for OF5800 Chapter 2 Machine Operations 2.10.5.1 An Overview 2.10.5.2 Fusing Temperature Control Circuit Copyright 1997, Okidata, Division of OKI America, Inc. All rights reserved. See the OKIDATA Business Partner Exchange (BPX) for any updates to this material. (http://bpx.okidata.
Page: 31 Service Manual for OF5800 Chapter 2 Machine Operations The toner image transferred to the paper is securely fixed by a heat roller fusing system. The toner image is fused by Upper Fusing Roller heated by the Heater Lamp, and securely fixed by the pressure between the Upper and Lower Fusing Rollers. A Thermistor (TH1) detects and controls the Upper Fusing Roller temperature. The Thermal Fuse (TF1) opens when the temperature becomes approx. 133°C and shuts down the power to the Heater Lamp.
Page: 32 Service Manual for OF5800 Chapter 2 Machine Operations The Thermistor (TH1 detects the surface temperature of the Upper Fusing Roller and inputs that analog voltage into IC1-77. Corresponding to this data, the Heater Lamp ON/OFF signal is output from IC1-54, causing the Heater Lamp (H1) to turn ON or OFF to control the fusing temperature.
Page: 33 Service Manual for OF5800 Chapter 2 Machine Operations Copyright 1997, Okidata, Division of OKI America, Inc. All rights reserved. See the OKIDATA Business Partner Exchange (BPX) for any updates to this material. (http://bpx.okidata.
Page: 34 Service Manual for OF5800 Chapter 2 Machine Operations Copyright 1997, Okidata, Division of OKI America, Inc. All rights reserved. See the OKIDATA Business Partner Exchange (BPX) for any updates to this material. (http://bpx.okidata.
Page: 35 Service Manual for OF5800 Chapter 2 Machine Operations Copyright 1997, Okidata, Division of OKI America, Inc. All rights reserved. See the OKIDATA Business Partner Exchange (BPX) for any updates to this material. (http://bpx.okidata.
Page: 36 Service Manual for OF5800 Chapter 2 Machine Operations Copyright 1997, Okidata, Division of OKI America, Inc. All rights reserved. See the OKIDATA Business Partner Exchange (BPX) for any updates to this material. (http://bpx.okidata.
Page: 37 Service Manual for OF5800 Chapter 2 Machine Operations Copyright 1997, Okidata, Division of OKI America, Inc. All rights reserved. See the OKIDATA Business Partner Exchange (BPX) for any updates to this material. (http://bpx.okidata.
Page: 38 Service Manual for OF5800 Chapter 2 Machine Operations Copyright 1997, Okidata, Division of OKI America, Inc. All rights reserved. See the OKIDATA Business Partner Exchange (BPX) for any updates to this material. (http://bpx.okidata.
Page: 39 Service Manual for OF5800 Chapter 3 Adjustment Procedures The OKIFAX 5800 features maintenance modes for machine adjustment. Each mode is listed below along with the command used to activate the mode and a brief functional description. Set or Clear Machine Parameters Used to set or clear machine parameters. Set or Clear Memory Switches Used to set or clear memory switches. Clear Programmed Data / User Settings Erases user-programmed information (date, time, TTI, autodialer, etc.
Page: 40 Service Manual for OF5800 Chapter 3 Adjustment Procedures 3.2.1 Setting the Machine Parameters 3.2.2 Clearing the Machine Parameters Copyright 1997, Okidata, Division of OKI America, Inc. All rights reserved. See the OKIDATA Business Partner Exchange (BPX) for any updates to this material. (http://bpx.okidata.
Page: 41 Service Manual for OF5800 Chapter 3 Adjustment Procedures These switches are used to program internal machine parameters. The primary back up battery maintains these settings if power is lost. 1. From standby, press PROGRAM, *,0. 2. Press ENTER. 3. Select the desired parameter by pressing a one-touch key plus a number on the keypad. For example, to access parameter B:1,press "B" plus the number "1" on the numeric keypad. 4. Press ENTER. (The bits are numbered 7 through 0.
Page: 42 Service Manual for OF5800 Chapter 3 Adjustment Procedures Resets the machine parameters to factory defaults. 1. From standby, press PROGRAM, *, 0 PROGRAM. 2. Press ENTER. 3. Press ENTER. The machine parameters will reset to ractory defaults. Note: To finish the operation without clearing the parameters, press STOP. Copyright 1997, Okidata, Division of OKI America, Inc. All rights reserved. See the OKIDATA Business Partner Exchange (BPX) for any updates to this material. (http://bpx.okidata.
Page: 43 Service Manual for OF5800 Chapter 3 Adjustment Procedures Factory Setting Only Copyright 1997, Okidata, Division of OKI America, Inc. All rights reserved. See the OKIDATA Business Partner Exchange (BPX) for any updates to this material. (http://bpx.okidata.
Page: 44 Service Manual for OF5800 Chapter 3 Adjustment Procedures Adjustment Usage / Comments 7 6 Initial Setting 0 1 Non-loaded cable compensation (TX) 5 4 0 1 Non-loaded cable compensation (RX) 0: 0 db 0: 0: 0 db 0: 3 2 1 0 0 0 0 0 Factory use only Bit 0: 4 db 1: 0: 4 db 1: 1: 8 db 0: 1: 8 db 0: 1: 12 db 1: 1: 12 db 1: Copyright 1997, Okidata, Division of OKI America, Inc. All rights reserved. See the OKIDATA Business Partner Exchange (BPX) for any updates to this material. (http://bpx.
Page: 45 Service Manual for OF5800 Chapter 3 Adjustment Procedures Bit 7 6 5 4 3 2 1 0 Initial Setting 1 0 1 0 1 0 0 0 Adjustment Factory use only Factory use only Factory use only Factory use only DTMF output level attenuation Usage/Comments See table below Machine Parameter A:2 ... DTMF output level attenuation -- (Factory default is -8 dB).
Page: 46 Service Manual for OF5800 Chapter 3 Adjustment Procedures Copyright 1997, Okidata, Division of OKI America, Inc. All rights reserved. See the OKIDATA Business Partner Exchange (BPX) for any updates to this material. (http://bpx.okidata.
Page: 47 Service Manual for OF5800 Chapter 3 Adjustment Procedures Copyright 1997, Okidata, Division of OKI America, Inc. All rights reserved. See the OKIDATA Business Partner Exchange (BPX) for any updates to this material. (http://bpx.okidata.
Page: 48 Service Manual for OF5800 Chapter 3 Adjustment Procedures Factory use only Copyright 1997, Okidata, Division of OKI America, Inc. All rights reserved. See the OKIDATA Business Partner Exchange (BPX) for any updates to this material. (http://bpx.okidata.
Page: 49 Service Manual for OF5800 Chapter 3 Adjustment Procedures Copyright 1997, Okidata, Division of OKI America, Inc. All rights reserved. See the OKIDATA Business Partner Exchange (BPX) for any updates to this material. (http://bpx.okidata.
Page: 50 Service Manual for OF5800 Chapter 3 Adjustment Procedures Copyright 1997, Okidata, Division of OKI America, Inc. All rights reserved. See the OKIDATA Business Partner Exchange (BPX) for any updates to this material. (http://bpx.okidata.
Page: 51 Service Manual for OF5800 Chapter 3 Adjustment Procedures Factory use only. Copyright 1997, Okidata, Division of OKI America, Inc. All rights reserved. See the OKIDATA Business Partner Exchange (BPX) for any updates to this material. (http://bpx.okidata.
Page: 52 Service Manual for OF5800 Chapter 3 Adjustment Procedures Copyright 1997, Okidata, Division of OKI America, Inc. All rights reserved. See the OKIDATA Business Partner Exchange (BPX) for any updates to this material. (http://bpx.okidata.
Page: 53 Service Manual for OF5800 Chapter 3 Adjustment Procedures Copyright 1997, Okidata, Division of OKI America, Inc. All rights reserved. See the OKIDATA Business Partner Exchange (BPX) for any updates to this material. (http://bpx.okidata.
Page: 54 Service Manual for OF5800 Chapter 3 Adjustment Procedures Copyright 1997, Okidata, Division of OKI America, Inc. All rights reserved. See the OKIDATA Business Partner Exchange (BPX) for any updates to this material. (http://bpx.okidata.
Page: 55 Service Manual for OF5800 Chapter 3 Adjustment Procedures Factory use only Copyright 1997, Okidata, Division of OKI America, Inc. All rights reserved. See the OKIDATA Business Partner Exchange (BPX) for any updates to this material. (http://bpx.okidata.
Page: 56 Service Manual for OF5800 Chapter 3 Adjustment Procedures 3.3.1 Setting the Memory Switches 3.3.2 Clearing the Memory Switches Copyright 1997, Okidata, Division of OKI America, Inc. All rights reserved. See the OKIDATA Business Partner Exchange (BPX) for any updates to this material. (http://bpx.okidata.
Page: 57 Service Manual for OF5800 Chapter 3 Adjustment Procedures These switches are used to program internal machine parameters. The primary back up battery maintains these settings if power is lost. 1. From standby, press PROGRAM, *, 1. 2. Press ENTER. 3. Select the desired parameter by pressing a one-touch key plus a number on the keypad. For example, to access memory switch B:1, press "B" plus the number "1" on the numeric keypad. 4. Press ENTER. (The bits are numbered 7 through 0.
Partner Exchange (BPX) for any updates to this material. (http://bpx.okidata.
Page: 58 Service Manual for OF5800 Chapter 3 Adjustment Procedures Resets the memory switches to factory defaults. 1. From standby, press PROGRAM, *, 1, PROGRAM. 2. Press ENTER. 3. Press ENTER. The memory switches will reset to factory defaults. Note: To finish the operation without clearing the memory switches, press STOP or PROGRAM. Copyright 1997, Okidata, Division of OKI America, Inc. All rights reserved. See the OKIDATA Business Partner Exchange (BPX) for any updates to this material. (http://bpx.
Page: 59 Service Manual for OF5800 Chapter 3 Adjustment Procedures The following table provides a quick reference to the memory switches. Group A Dialer A:0 CED detection Dial tone detection Phone line type A:1 PBX mode dial pause A:2 through A:4 Factory use only A:5 Ring signal detect time Number of rings Dual ring detection Long ring detection Ring frequency detection B:2 Data signaling rate V17/V33(DCS) Set remote machine receiving direct. European date format on TTI.
Group D: Reception D:0 Number of HDLC end flags. Carrier detection level. D:4 Silent Detection Sensitivity Group E: Scanner E:0 Background level. Effective scan width. Document TX length limit. D:1 EYE-Q check level at 7200 bps. EYE-Q check level at 9600 bps. EYE-Q check level at 12000 bps. EYE-Q check level at 14400 bps. D:5 through D:9 Factory use only D:2 EYE-Q slice level. Check EYE-Q. EYE-Q check level at 2400 bps. EYE-Q check level at 4800 bps.
Display error line. Total line monitor. Secure Mail notification Sort autodialer printout. Print check message if power is lost. Print page if error occurs during memory transmission. Print check message. T.30 monitor auto print if error will occur. T.30 monitor auto print. display modem speed. Print transaction Factory use only. duration. Erase polled document. Print TCR after batch transmission. Memory Switch A:0 - dialer Copyright 1997, Okidata, Division of OKI America, Inc. All rights reserved.
Page: 60 Service Manual for OF5800 Chapter 3 Adjustment Procedures Factory use only. Copyright 1997, Okidata, Division of OKI America, Inc. All rights reserved. See the OKIDATA Business Partner Exchange (BPX) for any updates to this material. (http://bpx.okidata.
Page: 61 Service Manual for OF5800 Chapter 3 Adjustment Procedures Bit 7 6 5 4 Initial Setting 0 1 1 0 Adjustment Factory use only Ring signal detect time 3 0 Number of rings 0: 1 ring 1: 2 rings 2 0 1 0 0 1 Dual ring detection: 0:No 1:Yes Long ring detection: 0:No 1:Yes Ring frequency detection 0:No 1:Yes Usage / Comments Sets the time an incoming ring will not be detected after hanging up in the Fax/Tel Ready mode. 654 1 1 0 800 ms. 1 1 0 700 ms. 1 0 1 600 ms. 1 0 0 500 ms. 0 1 1 400 ms.
Page: 62 Service Manual for OF5800 Chapter 3 Adjustment Procedures Copyright 1997, Okidata, Division of OKI America, Inc. All rights reserved. See the OKIDATA Business Partner Exchange (BPX) for any updates to this material. (http://bpx.okidata.
Page: 63 Service Manual for OF5800 Chapter 3 Adjustment Procedures Copyright 1997, Okidata, Division of OKI America, Inc. All rights reserved. See the OKIDATA Business Partner Exchange (BPX) for any updates to this material. (http://bpx.okidata.
Page: 64 Service Manual for OF5800 Chapter 3 Adjustment Procedures Bit 3 2 1 0 -15 dB 1 1 1 1 -14 dB 1 1 1 0 -13 dB 1 1 0 1 -12 dB 1 1 0 0 -11 dB 1 0 1 1 -10 dB 1 0 1 0 -9 dB 1 0 0 1 -8 dB 1 0 0 0 -7 dB 0 1 1 1 -6 dB 0 1 1 0 -5 dB 0 1 0 1 -4 dB 0 1 0 0 -3 dB 0 0 1 1 -2 dB 0 0 1 0 -1 dB 0 0 0 1 -0 dB 0 0 0 0 Copyright 1997, Okidata, Division of OKI America, Inc. All rights reserved. See the OKIDATA Business Partner Exchange (BPX) for any updates to this material. (http://bpx.okidata.
Page: 65 Service Manual for OF5800 Chapter 3 Adjustment Procedures Copyright 1997, Okidata, Division of OKI America, Inc. All rights reserved. See the OKIDATA Business Partner Exchange (BPX) for any updates to this material. (http://bpx.okidata.
Page: 66 Service Manual for OF5800 Chapter 3 Adjustment Procedures Factory use only Copyright 1997, Okidata, Division of OKI America, Inc. All rights reserved. See the OKIDATA Business Partner Exchange (BPX) for any updates to this material. (http://bpx.okidata.
Page: 67 Service Manual for OF5800 Chapter 3 Adjustment Procedures Bit 7 Initial Setting Adjustment 0 Program individual autodialer attributes. 0: No 1: Yes 6 0 5 0 4 3 2 0 0 0 1 1 1 1 Relay broadcast 0: No 1: Yes Proprietary handshake 0: No 1: Yes Factory use only Factory use only Sending RTC signal when transmission is canceled 0: Yes 1: No Cancel redial if T.4.1 or T4.4 error occurs.
Page: 68 Service Manual for OF5800 Chapter 3 Adjustment Procedures Factory use only Copyright 1997, Okidata, Division of OKI America, Inc. All rights reserved. See the OKIDATA Business Partner Exchange (BPX) for any updates to this material. (http://bpx.okidata.
Page: 69 Service Manual for OF5800 Chapter 3 Adjustment Procedures Copyright 1997, Okidata, Division of OKI America, Inc. All rights reserved. See the OKIDATA Business Partner Exchange (BPX) for any updates to this material. (http://bpx.okidata.
Page: 70 Service Manual for OF5800 Chapter 3 Adjustment Procedures Copyright 1997, Okidata, Division of OKI America, Inc. All rights reserved. See the OKIDATA Business Partner Exchange (BPX) for any updates to this material. (http://bpx.okidata.
Page: 71 Service Manual for OF5800 Chapter 3 Adjustment Procedures Factory use only Copyright 1997, Okidata, Division of OKI America, Inc. All rights reserved. See the OKIDATA Business Partner Exchange (BPX) for any updates to this material. (http://bpx.okidata.
Page: 72 Service Manual for OF5800 Chapter 3 Adjustment Procedures Bit 7 Initial Setting 0 6 5 4 3 2 0 1 0 0 1 1 0 0 1 Adjustment Number of HDLC end flags. Factory use only Group Delay Equalizer 0:No 1:Yes Digital Cable Equalizer 0:Free 1:Hold Carrier detection level 0: -43/48 dB 1: -47/52 dB Usage / Comments Defines the number of HDLC end flags. Setting the switch to "1" increases the receive sensitivity. Copyright 1997, Okidata, Division of OKI America, Inc. All rights reserved.
Page: 73 Service Manual for OF5800 Chapter 3 Adjustment Procedures Copyright 1997, Okidata, Division of OKI America, Inc. All rights reserved. See the OKIDATA Business Partner Exchange (BPX) for any updates to this material. (http://bpx.okidata.
Page: 74 Service Manual for OF5800 Chapter 3 Adjustment Procedures Bit 7 Initial Setting 0 6 1 5 4 3 2 1 0 0 0 1 0 1 0 Adjustment EYE-Q slice level 0: Disable 1: Enable Check EYE-Q 0:No 1:Yes Usage / Comments Setting this bit to "1" enables memory switch D:2,bits 0-3 and memory switch D:1, bits 0-7, and enables EYE-Q check Adjustment. 0: Line condition status (EYE-Q) is not checked after checking TCF. 1: Line condition status (EYE-Q) is checked after checking TCF. Factory use only.
Page: 75 Service Manual for OF5800 Chapter 3 Adjustment Procedures Bit 7 6 5 4 3 2 1 Initial Setting 0 0 0 0 0 0 0 0 0 Adjustment Factory use only Factory use only Factory use only Factory use only Factory use only Factory use only Delete receive echo of CFR at the receiver side 0:No 1:Yes Expand FSK receive time after detecting flat 0: 3.3 seconds 1: 10 seconds Usage / Comments Copyright 1997, Okidata, Division of OKI America, Inc. All rights reserved.
Page: 76 Service Manual for OF5800 Chapter 3 Adjustment Procedures Factory use only Copyright 1997, Okidata, Division of OKI America, Inc. All rights reserved. See the OKIDATA Business Partner Exchange (BPX) for any updates to this material. (http://bpx.okidata.
Page: 77 Service Manual for OF5800 Chapter 3 Adjustment Procedures Bit 7 6 5 4 3 2 Initial Setting 0 0 0 0 0 1 1 0 0 1 Adjustment Usage / Comments Factory use only Factory use only Factory use only Factory use only Factory use only Background level The background level measures the reflective 0: Automatic ability of scanned documents. Performed with 1: Fixed each transmission or copy function. Effective scan width 0: Q4 = 208 mm (8.2") Default 1: A4 = 216 mm (8.
Page: 78 Service Manual for OF5800 Chapter 3 Adjustment Procedures Factory use only Copyright 1997, Okidata, Division of OKI America, Inc. All rights reserved. See the OKIDATA Business Partner Exchange (BPX) for any updates to this material. (http://bpx.okidata.
Page: 79 Service Manual for OF5800 Chapter 3 Adjustment Procedures Bit 7 6 Initial Setting 0 1 5 0 4 3 0 0 Adjustment Factory use only CML relay off time after dialing. 0: 1 sec. 1: 200 ms. DTMF tones heard through handset. 0: No 1: Yes Factory use only Factory use only Usage / Comments When dialing from the keypad, phone line noise may occur as the CML relay switches on and off. Set this witch to '0" to avoid this. Determines if DTMF tones are produced through the handset in off-hook dialing.
Page: 80 Service Manual for OF5800 Chapter 3 Adjustment Procedures Copyright 1997, Okidata, Division of OKI America, Inc. All rights reserved. See the OKIDATA Business Partner Exchange (BPX) for any updates to this material. (http://bpx.okidata.
Page: 81 Service Manual for OF5800 Chapter 3 Adjustment Procedures Copyright 1997, Okidata, Division of OKI America, Inc. All rights reserved. See the OKIDATA Business Partner Exchange (BPX) for any updates to this material. (http://bpx.okidata.
Page: 82 Service Manual for OF5800 Chapter 3 Adjustment Procedures Factory use only Copyright 1997, Okidata, Division of OKI America, Inc. All rights reserved. See the OKIDATA Business Partner Exchange (BPX) for any updates to this material. (http://bpx.okidata.
Page: 83 Service Manual for OF5800 Chapter 3 Adjustment Procedures Copyright 1997, Okidata, Division of OKI America, Inc. All rights reserved. See the OKIDATA Business Partner Exchange (BPX) for any updates to this material. (http://bpx.okidata.
Page: 84 Service Manual for OF5800 Chapter 3 Adjustment Procedures Factory use only Copyright 1997, Okidata, Division of OKI America, Inc. All rights reserved. See the OKIDATA Business Partner Exchange (BPX) for any updates to this material. (http://bpx.okidata.
Page: 85 Service Manual for OF5800 Chapter 3 Adjustment Procedures Bit Initial Setting 7 0 6 0 5 4 0 0 3 1 2 1 1 1 0 0 Adjustment Display error line 0: No 1: Yes Total line monitor 0: No 1: Yes Factory use only Sort autodialer printout 0: Sort by autodialer location 1: Sort by location ID Print check message if power is lost 0: No 1: Yes Print page if error occurs during memory transmission.
Page: 86 Service Manual for OF5800 Chapter 3 Adjustment Procedures Bit 7 6 5 4 3 2 Initial Setting 0 0 0 0 1 1 1 1 0 0 Adjustment Factory use only Factory use only Factory use only Factory use only Factory use only T.30 monitor auto print if error occurs. 0: No 1: Yes T.30 monitor auto print. 0: No 1: Yes Display modem speed 0: No 1: Yes Usage / Comments The T.30 monitor will only print after a communication error occurs. Enabling this switch causes the unit to print a T.
Page: 87 Service Manual for OF5800 Chapter 3 Adjustment Procedures Bit 7 6 5 4 3 2 1 Initial Setting 0 0 0 0 0 0 1 0 1 Adjustment Factory use only Factory use only Factory use only Factory use only Factory use only Factory use only Erase polled document 0: No 1: Yes Print TCR after the broadcast transmit 0: No 1: Yes Usage / Comments Determine if a document stored for polling is erased after being polled. Copyright 1997, Okidata, Division of OKI America, Inc. All rights reserved.
Page: 88 Service Manual for OF5800 Chapter 3 Adjustment Procedures Factory use only Copyright 1997, Okidata, Division of OKI America, Inc. All rights reserved. See the OKIDATA Business Partner Exchange (BPX) for any updates to this material. (http://bpx.okidata.
Page: 89 Service Manual for OF5800 Chapter 3 Adjustment Procedures User programmed information such as autodialer entries, date, time, Transmit Terminal Identifier (TTI), Subscriber ID, etc., are stored in the unit's Random Access Memory (RAM). The primary back up battery maintains these settings if power is lost. This function does not clear the soft parameters.
Page: 90 Service Manual for OF5800 Chapter 3 Adjustment Procedures The All RAM Clear setting will erase all user programmed information, all documents in memory, and reset the memory switches to factory defaults. This feature may also be used to try and clear a machine malfunction or lock up. If possible, when the All RAM Clear is used to reset a malfunction or lock up, it is advisable to print the machine settings, one-touch and speed dial listings to help in reprogramming this information. 1.
Page: 91 Service Manual for OF5800 Chapter 3 Adjustment Procedures This function allows the user to configure an individual one-touch or speed dial entry with the settings shown in Memory Switches B:0, B:1, and B:2 To set the individual attributes: 1. Change memory switch B:5, bit 7 to a "1". (See setting 3.3.1 Setting the Memory Switches for more information on changing Memory switch B:5.) 2. When the function is enabled, an "Attribute" option is added to the autodialer programming steps.
Bit 3 2 1 0 -15 dB 1 1 1 1 -14 dB 1 1 1 0 -13 dB 1 1 0 1 -12 dB 1 1 0 0 -11 dB 1 0 1 1 -10 dB 1 0 1 0 -9 dB 1 0 0 1 -8 dB 1 0 0 0 -7 dB 0 1 1 1 -6 dB 0 1 1 0 -5 dB 0 1 0 1 -4 dB 0 1 0 0 -3 dB 0 0 1 1 -2 dB 0 0 1 0 -1 dB 0 0 0 1 -0 dB 0 0 0 0
Copyright 1997, Okidata, Division of OKI America, Inc. All rights reserved. See the OKIDATA Business Partner Exchange (BPX) for any updates to this material. (http://bpx.okidata.
Page: 92 Service Manual for OF5800 Chapter 3 Adjustment Procedures 3.8.1 Setting the Unique Switches 3.8.2 Clearing the Unique Switches Copyright 1997, Okidata, Division of OKI America, Inc. All rights reserved. See the OKIDATA Business Partner Exchange (BPX) for any updates to this material. (http://bpx.okidata.
Page: 93 Service Manual for OF5800 Chapter 3 Adjustment Procedures These switches are used to program internal machine parameters. The primary back up battery maintains these settings if power is lost. 1. From standby, press PROGRAM, *, 4. 2. Press ENTER. 3. Select the desired unique switch by pressing a one-touch key plus a number on the keypad. For example, to access parameter B:1, press "B" plus the number "1" on the numeric keypad. 4. Press ENTER.
Copyright 1997, Okidata, Division of OKI America, Inc. All rights reserved. See the OKIDATA Business Partner Exchange (BPX) for any updates to this material. (http://bpx.okidata.
Page: 94 Service Manual for OF5800 Chapter 3 Adjustment Procedures Resets the unique switches to factory defaults. 1. From standby, press PROGRAM, *, 4, PROGRAM. 2. Press ENTER. 3. Press ENTER. The Parameters will reset to factory defaults. Note: To finish the operation without clearing the unique switches , press STOP or PROGRAM Copyright 1997, Okidata, Division of OKI America, Inc. All rights reserved. See the OKIDATA Business Partner Exchange (BPX) for any updates to this material. (http://bpx.
Page: 95 Service Manual for OF5800 Chapter 3 Adjustment Procedures Copyright 1997, Okidata, Division of OKI America, Inc. All rights reserved. See the OKIDATA Business Partner Exchange (BPX) for any updates to this material. (http://bpx.okidata.
Page: 96 Service Manual for OF5800 Chapter 3 Adjustment Procedures Factory use only Copyright 1997, Okidata, Division of OKI America, Inc. All rights reserved. See the OKIDATA Business Partner Exchange (BPX) for any updates to this material. (http://bpx.okidata.
Page: 97 Service Manual for OF5800 Chapter 3 Adjustment Procedures Copyright 1997, Okidata, Division of OKI America, Inc. All rights reserved. See the OKIDATA Business Partner Exchange (BPX) for any updates to this material. (http://bpx.okidata.
Page: 98 Service Manual for OF5800 Chapter 3 Adjustment Procedures Factory use only Copyright 1997, Okidata, Division of OKI America, Inc. All rights reserved. See the OKIDATA Business Partner Exchange (BPX) for any updates to this material. (http://bpx.okidata.
Page: 99 Service Manual for OF5800 Chapter 3 Adjustment Procedures Copyright 1997, Okidata, Division of OKI America, Inc. All rights reserved. See the OKIDATA Business Partner Exchange (BPX) for any updates to this material. (http://bpx.okidata.
Page: 100 Service Manual for OF5800 Chapter 3 Adjustment Procedures Copyright 1997, Okidata, Division of OKI America, Inc. All rights reserved. See the OKIDATA Business Partner Exchange (BPX) for any updates to this material. (http://bpx.okidata.
Page: 101 Service Manual for OF5800 Chapter 3 Adjustment Procedures Bit 7 6 5 4 3 2 1 0 Initial Setting 0 0 0 0 0 0 0 0 Adjustment Factory use only Factory use only Factory use only Factory use only Factory use only Factory use only Factory use only Call request upon memory overflow while receiving two or more pages. 0: No 1: Yes Usage / Comments Copyright 1997, Okidata, Division of OKI America, Inc. All rights reserved. See the OKIDATA Business Partner Exchange (BPX) for any updates to this material.
Page: 102 Service Manual for OF5800 Chapter 3 Adjustment Procedures Factory use only Copyright 1997, Okidata, Division of OKI America, Inc. All rights reserved. See the OKIDATA Business Partner Exchange (BPX) for any updates to this material. (http://bpx.okidata.
Page: 103 Service Manual for OF5800 Chapter 3 Adjustment Procedures Bit 7 6 5 4 3 2 1 0 Initial Setting 0 0 0 0 0 0 0 1 Adjustment Factory use only Factory use only Factory use only Factory use only Factory use only Factory use only Factory use only Hyper Fine resolution 0: No 1: Yes Usage / Comments When set at "1" Super fine(SFine) resolution changes to Hyper fine(I-Fine) resolution. Copyright 1997, Okidata, Division of OKI America, Inc. All rights reserved.
Page: 104 Service Manual for OF5800 Chapter 3 Adjustment Procedures Factory use only Copyright 1997, Okidata, Division of OKI America, Inc. All rights reserved. See the OKIDATA Business Partner Exchange (BPX) for any updates to this material. (http://bpx.okidata.
Page: 105 Service Manual for OF5800 Chapter 3 Adjustment Procedures Bit Initial Setting 7 0 6 1 5 1 4 0 3 1 2 1 1 1 0 1 Adjustment Usage / Comments Factory use only Smoothing in 300x400 dpi mode 0: No 1: Yes Smoothing in SFine receive mode 0: No 1: Yes Smoothing in Fine receive mode 0: No 1: Yes Smoothing in Fine copy mode 0: No 1: Yes Smoothing in Normal receive resolution 0: No 1: Yes Smoothing in Normal, Fine and SFine resolutions in rx mode 0: No 1: Yes Smoothing in Normal, Fine and SFine
Page: 106 Service Manual for OF5800 Chapter 3 Adjustment Procedures Bit 7 6 5 4 Initial Setting 0 0 0 1 3 2 1 0 0 0 0 0 Adjustment Factory use only Factory use only Factory use only Print pages upon running out of toner 0: No 1: Yes Factory use only Factory use only Factory use only Factory use only Usage / Comments When the Low Toner alarm occurs, this switch determines if the unit will continue to print an additional 50 pages. Copyright 1997, Okidata, Division of OKI America, Inc.
Page: 107 Service Manual for OF5800 Chapter 3 Adjustment Procedures Bit 7 6 5 4 3 2 1 0 Initial Setting 0 0 0 0 1 1 0 1 Adjustment Printer auto shut off time Usage / Comments Time until the power supply turns the fusing unit off after printing has completed Copyright 1997, Okidata, Division of OKI America, Inc. All rights reserved. See the OKIDATA Business Partner Exchange (BPX) for any updates to this material. (http://bpx.okidata.
Page: 108 Service Manual for OF5800 Chapter 3 Adjustment Procedures Bit 7 6 5 4 3 2 1 0 Initial Setting 0 0 0 0 0 0 1 1 Adjustment Printing Density Usage / Comments Copyright 1997, Okidata, Division of OKI America, Inc. All rights reserved. See the OKIDATA Business Partner Exchange (BPX) for any updates to this material. (http://bpx.okidata.
Page: 109 Service Manual for OF5800 Chapter 3 Adjustment Procedures Bit Initial Setting 7 0 6 0 5 4 3 2 1 0 0 0 0 0 0 0 Adjustment Control current for image transfer Usage / Comments Copyright 1997, Okidata, Division of OKI America, Inc. All rights reserved. See the OKIDATA Business Partner Exchange (BPX) for any updates to this material. (http://bpx.okidata.
Page: 110 Service Manual for OF5800 Chapter 3 Adjustment Procedures See Section 4.16 for an explanation of these two switches Copyright 1997, Okidata, Division of OKI America, Inc. All rights reserved. See the OKIDATA Business Partner Exchange (BPX) for any updates to this material. (http://bpx.okidata.
Page: 111 Service Manual for OF5800 Chapter 3 Adjustment Procedures Factory use only Copyright 1997, Okidata, Division of OKI America, Inc. All rights reserved. See the OKIDATA Business Partner Exchange (BPX) for any updates to this material. (http://bpx.okidata.
Page: 112 Service Manual for OF5800 Chapter 3 Adjustment Procedures Factory use only Copyright 1997, Okidata, Division of OKI America, Inc. All rights reserved. See the OKIDATA Business Partner Exchange (BPX) for any updates to this material. (http://bpx.okidata.
Page: 113 Service Manual for OF5800 Chapter 3 Adjustment Procedures Bit Initial Setting 7 0 6 5 0 0 4 3 2 1 0 1 1 1 1 0 Adjustment Flash key On/Off time Usage / Comments Sets the flash time when the Flash key is depressed. Copyright 1997, Okidata, Division of OKI America, Inc. All rights reserved. See the OKIDATA Business Partner Exchange (BPX) for any updates to this material. (http://bpx.okidata.
Page: 114 Service Manual for OF5800 Chapter 3 Adjustment Procedures Factory use only Copyright 1997, Okidata, Division of OKI America, Inc. All rights reserved. See the OKIDATA Business Partner Exchange (BPX) for any updates to this material. (http://bpx.okidata.
Page: 115 Service Manual for OF5800 Chapter 3 Adjustment Procedures Bit Initial Setting 7 0 6 2 5 4 2 0 3 2 1 0 0 0 0 0 Adjustment Factory use only LCD error message 0: Remains in LCD 1: Returns to standby Buffer/Keypad volume Usage / Comments After an error message has printed, the setting of this switch determines if the error message will remain in the display Factory use only Factory use only Factory use only Factory use only Copyright 1997, Okidata, Division of OKI America, Inc.
Page: 116 Service Manual for OF5800 Chapter 3 Adjustment Procedures Factory use only Copyright 1997, Okidata, Division of OKI America, Inc. All rights reserved. See the OKIDATA Business Partner Exchange (BPX) for any updates to this material. (http://bpx.okidata.
Page: 117 Service Manual for OF5800 Chapter 3 Adjustment Procedures To print the T.30 monitor, press PROGRAM, *, 5. After printing, the unit will return to standby. Copyright 1997, Okidata, Division of OKI America, Inc. All rights reserved. See the OKIDATA Business Partner Exchange (BPX) for any updates to this material. (http://bpx.okidata.
Page: 118 Service Manual for OF5800 Chapter 3 Adjustment Procedures This mode causes the unit to print a summary list of the unit's programming modes. To print the program mode list, press PROGRAM, *, 8. After printing the unit will return to standby. Copyright 1997, Okidata, Division of OKI America, Inc. All rights reserved. See the OKIDATA Business Partner Exchange (BPX) for any updates to this material. (http://bpx.okidata.
Page: 119 Service Manual for OF5800 Chapter 3 Adjustment Procedures This mode offers the ability to print a test pattern and monitor certain unit output functions. Included are life monitor, and life monitor clear, printer test, stamp test, and a background level setting. 1. Press PROGRAM, *, 9 to enter the test mode. Press PROGRAM to scroll through the test modes. 2. Press ENTER to select the desired test mode. Copyright 1997, Okidata, Division of OKI America, Inc. All rights reserved.
Page: 120 Service Manual for OF5800 Chapter 3 Adjustment Procedures The life monitor displays the current software version and the total number of pages scanned, printed, and transmitted. 1. Press PROGRAM, *, 9 , ENTER. 2. Press One-touch A-D to select the desired display. Press STOP to exit the test mode.
Page: 121 Service Manual for OF5800 Chapter 3 Adjustment Procedures The life monitor keeps a count of the pages scanned, printed and transmitted. This mode clears the page counter in the Life Monitor. 1. Press PROGRAM, *, 9, PROGRAM. 2. Press ENTER. 3. Press ENTER. The counters will be reset. Note: To complete the operation without performing initialization, press STOP or PROGRAM. Copyright 1997, Okidata, Division of OKI America, Inc. All rights reserved.
Page: 122 Service Manual for OF5800 Chapter 3 Adjustment Procedures The Printer Test mode offers two different tewt pattrns as shown below. 1. Press PROGRAM, *, 9, PROGRAM, PROGRAM, then press ENTER. 2. Press A or B to select the desired pattern. The selected pattern will print continuously. Press STOP to cancel the printing. 3. To select another pattern, repeat the step 2. Or press STOP to exit the printer test mode. 4. Press STOP to return to standby.
Page: 123 Service Manual for OF5800 Chapter 3 Adjustment Procedures This mode tests the operation of the stamp. 1. Insert one sheet of paper into the document feeder of the fax machine. 2. Press PROGRAM, *, 9, PROGRAM, PROGRAM, PROGRAM, then press ENTER, and then START. The page will be stamped while it is fed through the document feeder. 3. Press STOP to return to standby. Copyright 1997, Okidata, Division of OKI America, Inc. All rights reserved.
Page: 124 Service Manual for OF5800 Chapter 3 Adjustment Procedures The background level is an established threshold used to help measure the reflective ability of a scanned document. This threshold can change if the scanner lamp, CCD, or the ballast is replaced; therefore this mode should be used to reset the threshold when these items are changed.
Page: 125 Service Manual for OF5800 Chapter 3 Adjustment Procedures This function instructs the unit to print a list of the machine parameter, memory switch and unique switch settings. The list shows the default and current settings for each. After printing, the unit returns to standby. 1. Press PROGRAM, *, A. Copyright 1997, Okidata, Division of OKI America, Inc. All rights reserved. See the OKIDATA Business Partner Exchange (BPX) for any updates to this material. (http://bpx.okidata.
Page: 126 Service Manual for OF5800 Chapter 3 Adjustment Procedures This factory functions provide several machine tests including LED and LCD tests, a keypad test, memory tests, a RTC test, and optional RS-232C serial port test. 1. Press PROGRAM, *, B. 2. To select the desired test mode, press A-H as indicated in the following list. (A detailed explanation of each mode follows this list.
Page: 127 Service Manual for OF5800 Chapter 3 Adjustment Procedures Press PROGRAM, *, B. Then press A. A list of the Factory Functions will print. After printing, the unit will return to standby. Copyright 1997, Okidata, Division of OKI America, Inc. All rights reserved. See the OKIDATA Business Partner Exchange (BPX) for any updates to this material. (http://bpx.okidata.
Page: 128 Service Manual for OF5800 Chapter 3 Adjustment Procedures 1. Press PROGRAM, * , B. Then press B. All LEDs will turn on. 2. Press STOP to exit the test mode. The following options are available: PROGRAM = All LEDs will turn on. < key = All LEDs will turn off. Copyright 1997, Okidata, Division of OKI America, Inc. All rights reserved. See the OKIDATA Business Partner Exchange (BPX) for any updates to this material. (http://bpx.okidata.
Page: 129 Service Manual for OF5800 Chapter 3 Adjustment Procedures This mode displays two test patterns in LCD. 1. Press PROGRAM, *, B. Then press C. The following options are available: PROGRAM = All Dots turn on. < key = All Dots turn off. 2. Press STOP to exit the test mode. Copyright 1997, Okidata, Division of OKI America, Inc. All rights reserved. See the OKIDATA Business Partner Exchange (BPX) for any updates to this material. (http://bpx.okidata.
Page: 130 Service Manual for OF5800 Chapter 3 Adjustment Procedures 1. Press PROGRAM, *, B. Then press D. 2. As each button on the keypad is pressed, a representative name as show in the table on the next page will be displayed. 3. Press the STOP button twice to cancel the key panel test.
Page: 131 Service Manual for OF5800 Chapter 3 Adjustment Procedures This mode is used to test the SRAM memory where user programmed parameters such as date, time, TTI, etc are stored. Note: When this test is executed, an All RAM Clear will be performed by the unit. The All RAM Clear erases all user settings and resets all memory switches, machine parameters and unique switches to factory defaults. 1. Press PROGRAM, *, B. Then press E. The values FF, AA, 55, and 00 are written to, then read from, memory.
Page: 132 Service Manual for OF5800 Chapter 3 Adjustment Procedures This mode is used to test the DRAM memory, or document memory. Note: When this test is performed, an All RAM Clear will be performed by the unit. The All RAM Clear erases all user settings and resets all memory switches, machine parameters and unique switches to factory defaults. This is a read/write test that requires a few moments to complete. Note: Perform a DRAM test whenever a memory upgrade is added to the unit. 1.
Page: 133 Service Manual for OF5800 Chapter 3 Adjustment Procedures This test mode is not applicable to field service of the OKIFAX 5800. Copyright 1997, Okidata, Division of OKI America, Inc. All rights reserved. See the OKIDATA Business Partner Exchange (BPX) for any updates to this material. (http://bpx.okidata.
Page: 134 Service Manual for OF5800 Chapter 3 Adjustment Procedures This mode offers several internal tests and the ability to monitor certain unit output functions. Included are relay tests, modem signal output monitoring, and DTMF output monitoring. 1. Press PROGRAM, *, C to enter the test mode. The tests are contained within three main menus. Copyright 1997, Okidata, Division of OKI America, Inc. All rights reserved. See the OKIDATA Business Partner Exchange (BPX) for any updates to this material.
Page: 135 Service Manual for OF5800 Chapter 3 Adjustment Procedures This mode tests the on/off operation of various relays and switches. 1. Press PROGRAM, *, C, ENTER. A list of abbreviations representing the various relays and switches will appear in the display. 2. The one-touch keys are used to toggle the various relays and switches on and off as outlined below. When a relay or switch is turned on, an asterisk(*) will appear to the left of the item’ s abbreviation in the LCD.
Page: 136 Service Manual for OF5800 Chapter 3 Adjustment Procedures The tonal signal test permits the unit's output tones to be monitored. In order to monitor the tones, an external monitoring device must be connected to the telephone line. 1 Press PROGRAM, *, C, PROGRAM, ENTER. 2. To output a desired tonal signal, press the corresponding one-touch key as shown in the following table. For example, to monitor the 2100 Hz CED tone, press I. The output signal will begin.
Page: 137 Service Manual for OF5800 Chapter 3 Adjustment Procedures The DTMF output test permits the unit’ s DTMF tones to be monitored. Note: To monitor the tones, an external monitoring device must be connected to the phone line jack. 1. Press PROGRAM, *, C, press PROGRAM twice, then press ENTER. 2. Pressing a button on the numeric key pad or one-touch button will produce DTMF tones according to the following table.
Page: 138 Service Manual for OF5800 Chapter 3 Adjustment Procedures Jumper JP1 on the main control PCB is used for battery back-up of the DRAM. Any documents stored in DRAM. Removing JP1 will initialize the DRAM. If the power is turned off, the battery will provide up to 1 week of backup-for 1 meg of memory when fully charged. Jumper JP2 on the main control PCB is used for battery back-up of the SRAM. All user programmed data and internal Parameter settings are held in SRAM.
Page: 139 Service Manual for OF5800 Chapter 3 Adjustment Procedures The images stored in DRAM are protected by battery backup for up to 108 hours for a single event in a 40 hour period. In other words, once power is lost and then restored, the unit will not backup documents for the next 40 hours. This time frame allows the batteries to fully recharge. This 40 hour time period can be eliminated by changing Unique Switch H:2, bit 7, to a 1.
Page: 140 Service Manual for OF5800 Chapter 4 Troubleshooting Procedures Before troubleshooting a unit check the following: Is the power cord correctly connected to the machine? Is the telephone handset and the telephone line cord connected correctly? Is there paper in the paper cassette? Are all covers closed correctly? Before disassembly or making any adjustments be sure the power cord is disconnected from the unit.
Page: 141 Service Manual for OF5800 Chapter 4 Troubleshooting Procedures Symptom: Recording paper did not exit paper cassette properly, or a jam occurred in print area. Suggested corrective action: 1. 2. 3. 4. 5. 6. 7. 8. Verify that the recording paper conforms to the type specified for use in the machine and that has not been damaged or exposed to moisture. Make sure the recording paper is properly loaded into the paper tray and cassette and the cassette is properly closed.
Page: 142 Service Manual for OF5800 Chapter 4 Troubleshooting Procedures Symptom: Recording paper jammed as it was exiting the unit into receive paper tray. Suggested corrective action: 1. Check for obstruction in the paper path. 2. Check the paper exit sensor (PC3) for proper operation. 3. Clean the exit roller using a lint-free cloth moistened with a cleaning solution designed for use on rubber rollers. Replace the exit roller if worn or damaged. 4. Verify the fuser rollers are clean and not damaged.
Page: 143 Service Manual for OF5800 Chapter 4 Troubleshooting Procedures Symptom: Original document did not feed into or exit scanner properly, document feeder error message. Suggested corrective action: 1. Verify the original documents conform to the specifications designed for use in the machine and that they are not damaged in any way. 2. Verify the number of documents placed into the feeder does not exceed its maximum capacity. 3. Verify the scanner cover is closed properly. 4.
Page: 144 Service Manual for OF5800 Chapter 4 Troubleshooting Procedures Symptom: Two or more pages of a multi-page document are fed at once. Suggested corrective action: 1. Verify that the original documents conform to the specifications designed for use in the machine and they are not damaged in any way. 2. Verify the pages of the document are not stuck together from glue, wet or damp correction fluid, tape, etc. 3. Verify the feed roller, separator roller and retard roller are clean and not damaged.
Page: 145 Service Manual for OF5800 Chapter 4 Troubleshooting Procedures Symptom: Check message prints after attempting a transmission Suggested corrective action: 1. Reference the error code on the check message or the journal to the error code list contained in this section. Copyright 1997, Okidata, Division of OKI America, Inc. All rights reserved. See the OKIDATA Business Partner Exchange (BPX) for any updates to this material. (http://bpx.okidata.
Page: 146 Service Manual for OF5800 Chapter 4 Troubleshooting Procedures Symptom: A black line appears on all documents transmitted or copied. Suggested corrective action: 1. Print a document from memory (mode list, journal, etc.) to determine if the problem is in the scanner. If the black line is not on the memory print outs, the problem is not in the scanner. 2. Check for a foreign object in the feeder. 3. Clean the contact glass and the scanner mirrors. 4.
Page: 147 Service Manual for OF5800 Chapter 4 Troubleshooting Procedures Symptom: The unit will not transmit Suggested corrective action: 1. Verify the telephone line cord is properly installed and plugged into the correct type of wall jack. 2. Check for dial tone at the unit and at the wall jack. If no dial tone is present at the unit, check fuses PS1 and PS2 on the NCU pcb. 3. Verify that the correct telephone number has been dialed or that the correct telephone number is programmed in the autodialer.
Page: 148 Service Manual for OF5800 Chapter 4 Troubleshooting Procedures Symptoms: Check message prints after attempting a reception Suggested corrective action: 1. Reference the error code on the check message or the journal to the error code list contained in this section. Copyright 1997, Okidata, Division of OKI America, Inc. All rights reserved. See the OKIDATA Business Partner Exchange (BPX) for any updates to this material. (http://bpx.okidata.
Page: 149 Service Manual for OF5800 Chapter 4 Troubleshooting Procedures Symptom: The unit rings but will not auto-answer. Suggested corrective action: 1. 2. 3. 4. 5. Check the power cord and AC switch. Verify the telephone line is properly installed. Verify recording paper in the unit. Check memory capacity. The unit will answer incoming calls if memory is full. Check the number of rings the unit is set to answer on. If set to a high number of rings, the transmitting unit may "time out." 6.
Page: 150 Service Manual for OF5800 Chapter 4 Troubleshooting Procedures 4.11.1 Original Document Jam 4.11.2 Printed document jams Copyright 1997, Okidata, Division of OKI America, Inc. All rights reserved. See the OKIDATA Business Partner Exchange (BPX) for any updates to this material. (http://bpx.okidata.
Page: 151 Service Manual for OF5800 Chapter 4 Troubleshooting Procedures To clear an original document jam: 1. Open the Scanner cover by holding the Scanner cover release. 2. Lift the original document from the machine. 3. Gently close the Scanner cover, making sure both sides are snapped down securely. Then re-try the transmission. Copyright 1997, Okidata, Division of OKI America, Inc. All rights reserved. See the OKIDATA Business Partner Exchange (BPX) for any updates to this material. (http://bpx.
Page: 152 Service Manual for OF5800 Chapter 4 Troubleshooting Procedures To clear a printout (either a received fax or a copy) jammed inside the printer: 1. Open the printer cover by pressing the printer cover release on the top of your fax machine. 2. Gently pull the jammed page up and out. 3. Close the printer cover, pressing firmly on the both sides of the printer cover until you hear it click. To clear a document jammed at the paper cassette: 1. Pull forward on the paper cassette to open it. 2.
To clear a document jammed at the multipurpose tray: 1. Remove the paper stack from the tray and pull out the jammed paper. Copyright 1997, Okidata, Division of OKI America, Inc. All rights reserved. See the OKIDATA Business Partner Exchange (BPX) for any updates to this material. (http://bpx.okidata.
Page: 153 Service Manual for OF5800 Chapter 4 Troubleshooting Procedures The following provides guidelines for troubleshooting the print engine. Before removing any portion of the machine or making any internal adjustments, be sure power to the unit is OFF. Suggested corrective actions should be performed in order as listed. Most conditions can be corrected by performing routine preventative maintenance. If printer or print quality problems occur, check the following.
Black pages Verify that the drum and toner cartridge are installed properly. Remove the drum cartridge and clean the contacts on Printout too light Printout too dark Blurred background the toner cartridge inside the unit. If the problem persists, replace the drum. Replace the drum cartridge. Replace the print head unit. Replace the high voltage power supply. Replace the printer mechanical controller Replace the printer interface pcb.
Uneven print density The toner may be unevenly distributed inside the toner Irregularities White (Black) Line cartridge. Remove the cartridge from the printer and shake it a few times to redistribute the toner inside. Verify operation of the drum cartridge. Check for moisture on the drum surface. If moisture is found, allow the drum to dry.
Toner smudges Remove the toner cartridge from the printer and shake White spots at intervals it a few times. If the problem persists, replace the cartridge. Clean the fuser unit rollers. Clean the transport roller. Install a new cartridge if needed. Replace the drum cartridge. Verify that a clear image is being placed on the drum by printing a document and opening the printer cover before the document completes printing.
Page: 154 Service Manual for OF5800 Chapter 4 Troubleshooting Procedures Use a mild cleaning solution on a lint-free cloth to wipe the machine’ s cover, handset and paper cassette tray. Never spray cleaner directly onto the fax machine as the spray could damage components inside the fax. Copyright 1997, Okidata, Division of OKI America, Inc. All rights reserved. See the OKIDATA Business Partner Exchange (BPX) for any updates to this material. (http://bpx.okidata.
Page: 155 Service Manual for OF5800 Chapter 4 Troubleshooting Procedures Excessive dust on the equipment and power supply air vents can cause overheating. Remove dust periodically with a vacuum cleaner or brush. Note: Do not wipe with a damp cloth. Copyright 1997, Okidata, Division of OKI America, Inc. All rights reserved. See the OKIDATA Business Partner Exchange (BPX) for any updates to this material. (http://bpx.okidata.
Page: 156 Service Manual for OF5800 Chapter 4 Troubleshooting Procedures If the unit is not feeding documents properly, perform this procedure: 1. Turn off your fax machine. 2. Get a soft, lint-free cloth. 3. Moisten the cloths as follows: One of the two cloths with isopropyl alcohol and the other cloth with a cleaner suitable for use on platen/rubber rollers. 4. Open the scanner cover by holding the scanner cover release. 5. Use the moistened cloth (see step 2 and 3) to clean the face of rollers.
Page: 157 Service Manual for OF5800 Chapter 4 Troubleshooting Procedures Do not clean the transfer roller with liquid cleaner. Cleaning with a liquid solution could damage the transfer roller. Copyright 1997, Okidata, Division of OKI America, Inc. All rights reserved. See the OKIDATA Business Partner Exchange (BPX) for any updates to this material. (http://bpx.okidata.
Page: 158 Service Manual for OF5800 Chapter 4 Troubleshooting Procedures The following error messages appear in the unit’ s LCD and assist in troubleshooting machine problems. If you receive one of the following messages, follow the directions and then press Stop to return to standby. Reset Document Insert Document Hang Up Error Call For Service Too Many Characters Invalid Number No Number Stored Communication Error Close Top Cover Please Remove Paper No Report Enter No. (00-99) Enter No.
Invalid l.D. Code Memory Overflow All Commands In Use Check # Of Pages Please Supply Toner Check Paper Size Check Rx Paper Check Tray Paper Check Cassette Paper Too many Locations Scanner In Use Feeder In Use Printer In Use Polling In Use Document Stored Invalid Passcode No Passcode No PIN Number No Dept. Code Please Call Service The SecureMail passcode you entered in not valid. Try entering your passcode again.
Copyright 1997, Okidata, Division of OKI America, Inc. All rights reserved. See the OKIDATA Business Partner Exchange (BPX) for any updates to this material. (http://bpx.okidata.
Page: 159 Service Manual for OF5800 Chapter 4 Troubleshooting Procedures If an error occurs during a communication, a check message will be printed. The following provides an explanation of the information found on check messages. A possible solution to the problem The date and time of the attempted communication The sending location (if the remote fax has a Location ID) The number of pages which got through before the error terminated the call The error code. The sample document.
Page: 160 Service Manual for OF5800 Chapter 4 Troubleshooting Procedures D.0.1 Congestion tone was detected. Try the call again. D.0.2 The remote fax machine is busy. Call again. D.0.3 The STOP button was pressed while the unit was dialing. Try the call again. D.0.6 The autodialer number was not programmed. Program the autodialer number. D.0.7 The dialing time out occurred because the remote unit did not answer. Try the call again. D.0.8 Dial tone was not detected. Try the call again.
Page: 161 Service Manual for OF5800 Chapter 4 Troubleshooting Procedures R.1.1 T1 time-out. The calling unit was not a fax machine or the transmitting unit is having difficulties. R.1.2 Compatibility error. The calling unit is attempting to poll a document that does not exist, has secure tx enabled or is attempting to transmit to a nonexistent secure mailbox. R.1.4 The Stop button was pressed during reception. R.2.1 A compatibility error (closed network, junk fax detection) occurred. R.2.
Page: 162 Service Manual for OF5800 Chapter 4 Troubleshooting Procedures T.1.1 T1 time-out. The remote fax machine didn't respond to your machine. This usually occurs during a manual transmission or when an incorrect number was dialed. Call someone at the remote machine. T.1.4 The STOP button was pressed during transmission. T.2.1 CFR or FTT was not received from the remote machine.
Page: 163 Service Manual for OF5800 Chapter 4 Troubleshooting Procedures The error messages on Check Message printouts indicate the following: Here's a brief summary: Error Message Check condition of remote fax Repeat transmission Check receive documents Memory Full Dialing number is not set Stopped Message Area is Blank Line is busy Possible Meanings Remove machine malfunctioned No handshake signals from remote machine Wrong phone number reached Poor phone line
Page: 164 Service Manual for OF5800 Chapter 4 Troubleshooting Procedures When "Please Call Service" appears in the display, access unique switches F5 and F6 to determine the cause of the error. To access the unique switches: 1. 2. 3. 4. 5. Press PROGRAM, *, 4, ENTER. Press one-touch F plus the number 5 (or 6) on the numeric keypad. Press ENTER. If the switch is set to a 1, the error indicated in the following table occurred. Once the errors has been cleared, the setting returns to 0.
5* 0 Detection of laser error 0: No 1:Yes 4 0 Detection polygon motor error 0: No 1:Yes 3 0 Detection fan motor error 0: No 1:Yes 2* 0 Detection of temperature malfunction in the fuser unit. 0: No 1:Yes 1* 0 Detection of paper jam in print area 0: No 1:Yes 0* 0 Detection of paper jam inside the printer area 0: No 1:Yes Another error message is in the LCD for these errors. Please see the aforementioned error message list. Copyright 1997, Okidata, Division of OKI America, Inc. All rights reserved.
Page: 165 Service Manual for OF5800 Chapter 4 Troubleshooting Procedures Symptom: "Please Call Service" is in the display. Unique switch F5, position 3 is set to a 1. Suggested corrective action: 1. Turn the unit off and then on. 2. Replace the printer mechanical controller board and or the print head unit.. Copyright 1997, Okidata, Division of OKI America, Inc. All rights reserved. See the OKIDATA Business Partner Exchange (BPX) for any updates to this material. (http://bpx.okidata.
Page: 166 Service Manual for OF5800 Chapter 4 Troubleshooting Procedures Symptom: "Please Call Service" error is in the LCD. Unique switch F6, position 5 is set to a 1. Suggested corrective action: 1. Replace the printer mechanical controller board. 2. Replace the print head. Copyright 1997, Okidata, Division of OKI America, Inc. All rights reserved. See the OKIDATA Business Partner Exchange (BPX) for any updates to this material. (http://bpx.okidata.
Page: 167 Service Manual for OF5800 Chapter 4 Troubleshooting Procedures Symptom: "Please Call Service" error is in the LCD. Unique switch F6, position 4 is set to a 1. Suggested corrective action: 1. Replace the printer mechanical controller board. 2. Replace the print head unit. Copyright 1997, Okidata, Division of OKI America, Inc. All rights reserved. See the OKIDATA Business Partner Exchange (BPX) for any updates to this material. (http://bpx.okidata.
Page: 168 Service Manual for OF5800 Chapter 4 Troubleshooting Procedures Symptom: "Please Call Service" error is in the LCD. Unique switch F6, position 3 is set to a 1. Suggested corrective action: 1. Verify the fan rotates when the power is on. 2. If the fan does not rotate, replace the fan motor. 3. If the fan does rotate, replace the printer mechanical controller board. Copyright 1997, Okidata, Division of OKI America, Inc. All rights reserved.
Page: 169 Service Manual for OF5800 Chapter 4 Troubleshooting Procedures Symptom: "Please Call Service" error is in the LCD. Unique switch F6, position 2 is set to a1. Suggested corrective action: 1. Verify the heater lamp turns on when the power is turned on. 2. If the lamp turns on, check the thermistor surface for dirt. If dirty, clean the thermistor. 3. If after cleaning the thermistor, the unit does not operate properly, check the resistance between the two thermistor leads.
Page: 170 Service Manual for OF5800 Chapter 5 Disassembly Before disassembling, disconnect the power cord, line cord and handset. Disassembly procedures for the following items will be shown in this section. 1. 2. 3. 4. 5. 6. 7. 8. 9. 10. 11. 12. 13. 14. 15. 16. 17. 18. 19. 20. 21. 22. 23. 24. 25. 26. 27. 28. 29. 30. 31. 32.
Page: 171 Service Manual for OF5800 Chapter 5 Disassembly 1. Pull out the document hopper and paper hopper. 2. Pull out the document tray. Copyright 1997, Okidata, Division of OKI America, Inc. All rights reserved. See the OKIDATA Business Partner Exchange (BPX) for any updates to this material. (http://bpx.okidata.
Page: 172 Service Manual for OF5800 Chapter 5 Disassembly 1. Remove the four rear cover mounting screws. 2. Remove the rear cover. 3. Disconnect the connectors. 4. Remove the modular PCB mounting screws and remove the modular PCB.
5. Remove the three main control PCB mounting screws and the NCU PCB mounting screw, then remove the main control PCB and NCU PCB. Copyright 1997, Okidata, Division of OKI America, Inc. All rights reserved. See the OKIDATA Business Partner Exchange (BPX) for any updates to this material. (http://bpx.okidata.
Page: 173 Service Manual for OF5800 Chapter 5 Disassembly 1. Remove the trays and hopper. 2. Remove the four front cover mounting screws and disconnect the control panel PCB connectors. 3. Remove the control panel assy and remove the front cover. 4. Remove the two panel lower cover mounting screws and remove the panel lower cover. 5. Disconnect the LCD connectors. 6. Remove the control panel PCB mounting screws and remove the control panel PCB. 7. Remove the rubber contact and remove the LCD.
Page: 174 Service Manual for OF5800 Chapter 5 Disassembly 1. Remove the tray and hopper, then remove the front cover and rear cover. 2. Remove the four scanner assy mounting screws and remove the scanner assy. 3. Turn the scanner assy upside down, then remove the three scanner frame mounting screws and remove the scanner frame. Copyright 1997, Okidata, Division of OKI America, Inc. All rights reserved. See the OKIDATA Business Partner Exchange (BPX) for any updates to this material. (http://bpx.okidata.
Page: 175 Service Manual for OF5800 Chapter 5 Disassembly 1. Remove the scanner frame. 2. Disconnect the inverter pc board connectors. 3. Remove the two inverter pc board mounting screws and remove the inverter pc board. 4. Remove the two clamps and remove the scanner lamp. Copyright 1997, Okidata, Division of OKI America, Inc. All rights reserved. See the OKIDATA Business Partner Exchange (BPX) for any updates to this material. (http://bpx.okidata.
Page: 176 Service Manual for OF5800 Chapter 5 Disassembly 1. Remove the six support bracket mounting screws and remove the support brackets. 2. Remove the interlock switch. 3. Open scanner assy A and remove scanner assy C. 4. Open and remove scanner assy A. Copyright 1997, Okidata, Division of OKI America, Inc. All rights reserved.
Partner Exchange (BPX) for any updates to this material. (http://bpx.okidata.
Page: 177 Service Manual for OF5800 Chapter 5 Disassembly 1. Remove scanner assy A. 2. Remove the six TX cover mounting screws and remove the TX cover. 3. Remove the two springs and remove the lock lever. Copyright 1997, Okidata, Division of OKI America, Inc. All rights reserved. See the OKIDATA Business Partner Exchange (BPX) for any updates to this material. (http://bpx.okidata.
Page: 178 Service Manual for OF5800 Chapter 5 Disassembly 1. Remove the TX cover. 2. Remove the DS1 mounting screw and remove DS1 and DS2. Copyright 1997, Okidata, Division of OKI America, Inc. All rights reserved. See the OKIDATA Business Partner Exchange (BPX) for any updates to this material. (http://bpx.okidata.
Page: 179 Service Manual for OF5800 Chapter 5 Disassembly 1. Remove the TX cover. 2. Remove the press roller as shown. Copyright 1997, Okidata, Division of OKI America, Inc. All rights reserved. See the OKIDATA Business Partner Exchange (BPX) for any updates to this material. (http://bpx.okidata.
Page: 180 Service Manual for OF5800 Chapter 5 Disassembly 1. Remove the TX cover. 2. Remove the E-ring, bearings, and separator gear. 3. Remove the separator roller. Copyright 1997, Okidata, Division of OKI America, Inc. All rights reserved. See the OKIDATA Business Partner Exchange (BPX) for any updates to this material. (http://bpx.okidata.
Page: 181 Service Manual for OF5800 Chapter 5 Disassembly 1. Remove the scanner assy B. 2. Remove the two gear cover mounting screws and remove the gear cover. 3. Remove the three inner guide B mounting screws and remove the inner guide B. 4. Remove the exit roller and remove the feed roller. Copyright 1997, Okidata, Division of OKI America, Inc. All rights reserved. See the OKIDATA Business Partner Exchange (BPX) for any updates to this material. (http://bpx.okidata.
Page: 182 Service Manual for OF5800 Chapter 5 Disassembly 1. Remove scanner frame C. 2. Remove the stamp mounting screw and remove the stamp. Copyright 1997, Okidata, Division of OKI America, Inc. All rights reserved. See the OKIDATA Business Partner Exchange (BPX) for any updates to this material. (http://bpx.okidata.
Page: 183 Service Manual for OF5800 Chapter 5 Disassembly 1. Remove scanner frame C. 2. Remove the two tx motor assy mounting screws and remove the motor assy. 3. Remove the two tx motor mounting screws and remove the tx motor. NOTE: If you hear a grinding noise when the paper is being fed or if the motor does not turn, check the orange vibration damper for clearance. Copyright 1997, Okidata, Division of OKI America, Inc. All rights reserved.
Page: 184 Service Manual for OF5800 Chapter 5 Disassembly 1. Remove scanner frame C. 2. Release the locking tabs and slide the contact glass. Copyright 1997, Okidata, Division of OKI America, Inc. All rights reserved. See the OKIDATA Business Partner Exchange (BPX) for any updates to this material. (http://bpx.okidata.
Page: 185 Service Manual for OF5800 Chapter 5 Disassembly 1. Remove the scanner assy. 2. Remove the four middle frame mounting screws and remove the middle frame. 3. Remove the two speaker mounting screws and remove the speaker. Copyright 1997, Okidata, Division of OKI America, Inc. All rights reserved. See the OKIDATA Business Partner Exchange (BPX) for any updates to this material. (http://bpx.okidata.
Page: 186 Service Manual for OF5800 Chapter 5 Disassembly 1. Remove the scanner assy. 2. Remove the middle frame. 3. Remove the inner cover A and inner cover B. 4. Remove the two connector PCB 1 mounting screws and remove the connector PCB 1. 5. Remove the two connector PCB 2 mounting screws and remove the connector PCB 2. Copyright 1997, Okidata, Division of OKI America, Inc. All rights reserved. See the OKIDATA Business Partner Exchange (BPX) for any updates to this material. (http://bpx.okidata.
Page: 187 Service Manual for OF5800 Chapter 5 Disassembly 1. Remove the scanner assy. 2. Remove the middle frame. 3. Open the Printer Cover. 4. Remove the two rear PCB cover mounting screws and remove the rear PCB cover. 5. Remove the five rear frame mounting screws and remove the rear frame. 6. Remove the printer I/F PCB mounting screw, disconnect the two connectors, and remove the printer I/F PCB. 7.
Copyright 1997, Okidata, Division of OKI America, Inc. All rights reserved. See the OKIDATA Business Partner Exchange (BPX) for any updates to this material. (http://bpx.okidata.
Page: 188 Service Manual for OF5800 Chapter 5 Disassembly 1. Remove the scanner assy. 2. Remove the middle frame. 3. Remove the rear PCB cover. 4. Remove the six front frame mounting screws and remove the front frame. 5. Release the four locking tabs and remove the printer unit.
Copyright 1997, Okidata, Division of OKI America, Inc. All rights reserved. See the OKIDATA Business Partner Exchange (BPX) for any updates to this material. (http://bpx.okidata.
Page: 189 Service Manual for OF5800 Chapter 5 Disassembly 1. Open the printer cover. 2. Remove harness cover A (see section 5.20) 3. Remove the two image transfer unit mounting screws. 4. Disconnect the two connectors. 5. Remove the image transfer unit. Copyright 1997, Okidata, Division of OKI America, Inc. All rights reserved. See the OKIDATA Business Partner Exchange (BPX) for any updates to this material. (http://bpx.okidata.
Page: 190 Service Manual for OF5800 Chapter 5 Disassembly 1. Open the printer cover. 2. Remove the toner cartridge and the drum cartridge. 3. Remove the harness cover A mounting screw and remove harness cover A. 4. Remove the harness cover B mounting screw and disconnect the connector (CN1) of PWB-F, then remove the harness cover B. 5. Remove the image transfer unit. 6. Slide and remove the printer cover. Copyright 1997, Okidata, Division of OKI America, Inc. All rights reserved.
Page: 191 Service Manual for OF5800 Chapter 5 Disassembly 1. Open the printer cover 2. Remove the PWB-F cover mounting screw, release the three tabs, and remove the PWB-F cover. 3. Remove the four PWB-F mounting screws and disconnect the two connectors. 4. Remove the PWB-F. Copyright 1997, Okidata, Division of OKI America, Inc. All rights reserved. See the OKIDATA Business Partner Exchange (BPX) for any updates to this material. (http://bpx.okidata.
Page: 192 Service Manual for OF5800 Chapter 5 Disassembly 1. Open the printer cover. 2. Remove the high voltage unit cover. 3. Disconnect the connector. 4. Remove the paper sensor (PS). Copyright 1997, Okidata, Division of OKI America, Inc. All rights reserved. See the OKIDATA Business Partner Exchange (BPX) for any updates to this material. (http://bpx.okidata.
Page: 193 Service Manual for OF5800 Chapter 5 Disassembly 1. Remove the printer cover. 2. Remove the six PWB-E cover mounting screws and the earth wire. 3. Remove the six PWB-E mounting screws and remove PWB-E. Copyright 1997, Okidata, Division of OKI America, Inc. All rights reserved. See the OKIDATA Business Partner Exchange (BPX) for any updates to this material. (http://bpx.okidata.
Page: 194 Service Manual for OF5800 Chapter 5 Disassembly 1. Remove the printer cover. 2. Remove the image transfer unit. 3. Remove the drive tension section of the fusing unit mounting screw. 4. Remove the transport gear. 5. Release the spring and remove the drive gear section of the fusing unit. 6. Remove the four fusing guide plate mounting screws. 7. Pull the heater lamp out of the lamp holder from the left side.
Copyright 1997, Okidata, Division of OKI America, Inc. All rights reserved. See the OKIDATA Business Partner Exchange (BPX) for any updates to this material. (http://bpx.okidata.
Page: 195 Service Manual for OF5800 Chapter 5 Disassembly 1. 2. 3. 4. 5. 6. 7. Remove the printer cover unit. Remove the image transfer unit. Remove the drive tension section of the fusing unit. Remove the transport gear. Release the spring and remove the drive gear section of the fusing unit. Remove the fusing guide plate. Remove the four fusing unit mounting screws and remove the fusing unit.
Page: 196 Service Manual for OF5800 Chapter 5 Disassembly 1. Remove the printer cover unit. 2. Remove image transfer unit. 3. Remove the drive tension section of the fusing. 4. Remove the transport gear. 5. Release the spring and remove the drive gear section of the fusing unit. 6. Remove the fusing guide plate. 7. Remove the fusing unit. 8. Remove the thermistor mounting screw and remove the thermistor. Copyright 1997, Okidata, Division of OKI America, Inc. All rights reserved.
Page: 197 Service Manual for OF5800 Chapter 5 Disassembly 1. Remove the printer cover. 2. Remove the image transfer unit. 3. Remove the drive tension section of the fusing unit. 4. Remove the transport gear. 5. Release the spring and remove the drive gear section of the fusing unit. 6. Remove the fusing guide plate. 7. Remove the fusing unit. 8. Disconnect the connector and remove the paper exit sensor. Copyright 1997, Okidata, Division of OKI America, Inc. All rights reserved.
Page: 198 Service Manual for OF5800 Chapter 5 Disassembly 1. Open the printer cover. 2. Remove the seven print head mounting screws and remove the print head unit. Copyright 1997, Okidata, Division of OKI America, Inc. All rights reserved. See the OKIDATA Business Partner Exchange (BPX) for any updates to this material. (http://bpx.okidata.
Page: 199 Service Manual for OF5800 Chapter 5 Disassembly 1. Remove the cassette unit. 2. Remove the cassette. 3. Remove the two cassette PCB mounting screws, disconnect the connector, and remove the cassette PCB. 4. Remove the PS/cassette sensor mounting the screw and remove the PS/cassette sensor.
Copyright 1997, Okidata, Division of OKI America, Inc. All rights reserved. See the OKIDATA Business Partner Exchange (BPX) for any updates to this material. (http://bpx.okidata.
Page: 200 Service Manual for OF5800 Chapter 5 Disassembly 1. Remove the cassette unit. 2. Remove the cassette. 3. Remove the gear frame F mounting screw and remove the gear frame F. 4. Remove the gear frame R mounting screw and remove the gear frame R. 5. Remove the E-ring and remove the clutch assembly and pickup roller W. 6. Remove the solenoid mounting screw and remove the solenoid.
Copyright 1997, Okidata, Division of OKI America, Inc. All rights reserved. See the OKIDATA Business Partner Exchange (BPX) for any updates to this material. (http://bpx.okidata.
Page: 201 Service Manual for OF5800 Chapter 5 Disassembly 1. Remove the cassette unit. 2. Remove the cassette. 3. Release the feed gear locking tabs and remove the feed gear. 4. Remove the E-ring and bearings and remove the feed roller. 5. Remove the press roller w mounting screw and remove the press roller. Copyright 1997, Okidata, Division of OKI America, Inc. All rights reserved. See the OKIDATA Business Partner Exchange (BPX) for any updates to this material. (http://bpx.okidata.
Page: 202 Service Manual for OF5800 Chapter 5 Disassembly 1. Remove the cassette unit. 2. Remove the cassette. 3. Remove the two bottom stay mounting screws and remove the bottom stay. Copyright 1997, Okidata, Division of OKI America, Inc. All rights reserved. See the OKIDATA Business Partner Exchange (BPX) for any updates to this material. (http://bpx.okidata.
Page: 203 Service Manual for OF5800 Chapter 6 Illustrated Parts List Illustrated Part List 1: Panel/Cover/Hopper Illustrated Part List 2A (1/3): Transmission Illustrated Part List 2B (2/3): Transmission Illustrated Part List 2C (3/3): Transmission Illustrated Part List 3: Scanner Frame Illustrated Part List 4: Bottom Chassis Illustrated Part List 5: Cassette Illustrated Part List 6: Power Supply Illustrated Part List 7: Housing Illustrated Part List 8A (1 of 2): Drive/Paper Take-Up Sect
Copyright 1997, Okidata, Division of OKI America, Inc. All rights reserved. See the OKIDATA Business Partner Exchange (BPX) for any updates to this material. (http://bpx.okidata.
Page: 204 Service Manual for OF5800 Chapter 6 Illustrated Parts List @ PICTURES AT TOP OF SECTIONS Item No.
116 117 118 119 120 121 122 123 124 125 126 127 128 129 130 131 132 133 134 135 53079201 53079001 53078501 53078301 53079101 52095501 52095502 D650317C6X D650302C6X D650303C6X D650311C6X D650332C6X D650327C5X D650328C6X D650334C6X D650335C6X D22031006X D22030906X D65032906X D65016206X D650330C6X D650331C6X D65033705X D65083204XX D65084205XX D65033906X D65033705XA PANEL LOWER COVER FRONT COVER REAR COVER O.P.
Page: 205 Service Manual for OF5800 Chapter 6 Illustrated Parts List Item No.
111/F15 0 112 113 114 115 115/F15 0 116 117 118 119 137 123 124 125 126 127 128 129 130 131 133 134 135 136 52204901 Z902766050 TORQUE LIMITER D65011506X D65011606X D65011706X D65010606X D65A106050 RETARD GEAR 20T RETARD GEAR 17/38 RETARD GEAR 32T INNER GUIDE B INNER GUIDE B D65016106X D65011805X D67023406X D65017006X D65017706X D65012906X D65013106X D65012806X D650126H6X D67012806X D65016506X D65016606X D65016706X D65016406X DFGS3S3B5X7 D56019706X D65017506X D65017606X BRUSH B INNER FRAME GEAR 20 GEA
Page: 206 Service Manual for OF5800 Chapter 6 Illustrated Parts List Item No.
Copyright 1997, Okidata, Division of OKI America, Inc. All rights reserved. See the OKIDATA Business Partner Exchange (BPX) for any updates to this material. (http://bpx.okidata.
Page: 207 Service Manual for OF5800 Chapter 6 Illustrated Parts List Item No.
Copyright 1997, Okidata, Division of OKI America, Inc. All rights reserved. See the OKIDATA Business Partner Exchange (BPX) for any updates to this material. (http://bpx.okidata.
Page: 208 Service Manual for OF5800 Chapter 6 Illustrated Parts List Item No.
Copyright 1997, Okidata, Division of OKI America, Inc. All rights reserved. See the OKIDATA Business Partner Exchange (BPX) for any updates to this material. (http://bpx.okidata.
Page: 209 Service Manual for OF5800 Chapter 6 Illustrated Parts List Item No.
118/F15 0 119 120 121 122 123 55083001 124 55082601 125 126 127 128 129 129/F15 0 130 131 132 133 134 Not Shown Not Shown D650821050 PCB NCU D65081605XX D13032006X Z068665710 Z066863010 D49087105XX D65080505XX D65083504XX D65084504XX D65083604XX D65084604XX D65083405XX D650843050 PCB CONNECT 1 MODULAR JACK COVER CBL - CLAMP EDS - 1208U SPACER KGLS18RT PCB MODULAR PCB PRINTER I/F CBL - ASSY MAIN - I/F2 CBL - ASSY MAIN - I/F2 CBL - ASSY MAIN - 232C 1 CBL - ASSY MAIN - 232C 2 CBL - ASSY MAIN - NCU1 CBL - A
Page: 210 Service Manual for OF5800 Chapter 6 Illustrated Parts List Item No.
118 119 121 122 123 124 125 126 127 128 129 130 131 132 133 134 135 136 137 138 139 140 51240101 51239801 53351101 50412601 50412301 55082701 51240001 51239901 D65042206X D65042006X D65041705X D65041805X D65041406X D65043006X D65043106X D65042606X D65042706X D65081804XX D65080805XX Z902639350 D65042106X D48031106X D02001006X D65042305X D67012806X D65044006X D65044106X D65044206X D65044306X D65044406X FEED GEAR W GEAR 23 GEAR FRAME F GEAR FRAME R FEED ROLLER W PRESS ROLLER W PRESS SPRING W FEELER FEELER
Page: 211 Service Manual for OF5800 Chapter 6 Illustrated Parts List ITEM NO. 006-001 OKIDATA P/N REFERENCE P/N DESCRIPTION 56416501 D65060012X POWER SUPPLY ASSY RSPL RSPL Copyright 1997, Okidata, Division of OKI America, Inc. All rights reserved. See the OKIDATA Business Partner Exchange (BPX) for any updates to this material. (http://bpx.okidata.
Page: 212 Service Manual for OF5800 Chapter 6 Illustrated Parts List Item No. OKIDATA P/N 021-003 104 56514101 106 53078701 111 53078601 117 119 121 REFERENCE P/N D651001C6X D65180105XX D65100206X D651003C6X D65100406X D651005C6X D65100606X DESCRIPTION DUCT FAN MOTOR COVER TOP COVER ACTUATOR LOCK LEVER TENSION SPRING RSPL RSPL RSPL RSPL Copyright 1997, Okidata, Division of OKI America, Inc. All rights reserved. See the OKIDATA Business Partner Exchange (BPX) for any updates to this material.
Page: 213 Service Manual for OF5800 Chapter 6 Illustrated Parts List Item No.
126 127 128 129 130 131 132 133 134 135 136 137 138 139 140 141 142 143 144 146 147 148 149 151 152 153 154 155 56514001 50932401 53351001 50608301 D65102706X D65102806X D65102906X D65103006X D65103106X D65180305XX D65103206X D65103306X D65103406X D65103506X D65180405XX D65103606X D6510306X D65180505XX D65103806X D65103906X D65104006X D65104106X D65104206X D65104306X D65104406X D65104506X D65104606X D65104706X D65104806X D65104906X D65105006X D65180605XX 1 GEAR 22/45T GEAR 25/72T GEAR 29/65T LEFT FRAME
Page: 214 Service Manual for OF5800 Chapter 6 Illustrated Parts List Item No. OKIDATA P/N 157 158 160 161 162 163 164 REFERENCE P/N D65105106X D65180705XX D65105206X D65105306X D65105406X D65105506X D65105606X DESCRIPTION RSPL EDGE COVER CONNECTOR WASHER SHOULDER SCREW RUBBER FOOT SEAL LABEL Copyright 1997, Okidata, Division of OKI America, Inc. All rights reserved. See the OKIDATA Business Partner Exchange (BPX) for any updates to this material. (http://bpx.okidata.
Page: 215 Service Manual for OF5800 Chapter 6 Illustrated Parts List Item No.
122 123 124 125 126 127 128 129 130 131 132 133 137 138 139 140 141 142 144 145 146 147 148 149 150 151 152 D65107406X D65107506X D65107606X D65107706X D65107806X D65107906X D65108006X D65108106X D65108206X D65108306X D65108406X D65108506X D65108606X D65181205XX D65108706X D65108806X D65108906X D65109006X D65109106X D65109206X D65181305XX D65181405XX D65109306X D65181505XX D65181605XX D65109406X PRESSURE SPRING HOLDER GROUND PLATE SPACER REGULATING PLATE LEVER COVER LIFTING PLATE CAM TENSION SPRING GROUND
Page: 216 Service Manual for OF5800 Chapter 6 Illustrated Parts List Item No.
Copyright 1997, Okidata, Division of OKI America, Inc. All rights reserved. See the OKIDATA Business Partner Exchange (BPX) for any updates to this material. (http://bpx.okidata.
Page: 217 Service Manual for OF5800 Chapter 6 Illustrated Parts List Item No.
125 126 127 128 129 130 131 132 133 134 135 136 137 138 139 56113901 53351301 D65113506X D65181905XX D65113606X D65182005XX D65113706X D65113806X D65182105XX D65113906X D65114006X D65114106X D65114206X D65114306X D65114406X D65182305XX D65182405XX FUSING ROLLER-LWR THERMISTOR TERMINAL THERMOSTAT TERMINAL FRAME-RT TUBE LAMP HOLDER SEPARATOR SEPARATOR ROLL GEAR 40T ACTUATOR TENSION SPRING PHOTO INTERRUPTER HARNESS RSPL RSPL Copyright 1997, Okidata, Division of OKI America, Inc. All rights reserved.
Page: 218 Service Manual for OF5800 Chapter 6 Illustrated Parts List Item No. OKIDATA P/N 103 104 105 106 107 70032301 70032401 70033401 70033501 70033601 REFERENCE P/N D65080605XX D56081205XX D251520C4X ZA10097870 D400327A6X DESCRIPTION RSPL PCB RS232C PCB MEMORY HANDSET CURL CORD HANDSET HOLDER Dual Line / 33.6 KBPS Modem Kit 2 MB Fax Memory Expansion Card Kit RS232C Serial Interface Kit GDI Windows Printer Interface Kit Telephone Handset Copyright 1997, Okidata, Division of OKI America, Inc.
Page: 219 Service Manual for OF5800 Chapter 6 Illustrated Parts List Item No. OKIDATA P/N 201 202 52111401 56113601 REFERENCE P/N Z902753550 Z902752650 DESCRIPTION RSPL TONER CARTRIDGE DRUM CARTRIDGE Copyright 1997, Okidata, Division of OKI America, Inc. All rights reserved. See the OKIDATA Business Partner Exchange (BPX) for any updates to this material. (http://bpx.okidata.
Page: 220 Service Manual for OF5800 Chapter 6 Illustrated Parts List Item No. OKIDATA P/N 098-001 101 102 103 104 105 108 109 110 111 56113601 112 52111401 REFERENCE P/N ZA10033600 D251520C4X ZA10097870 DESCRIPTION Z900879050 POWER SUPPLY CORD D400327A6X Z902752650 Z902753550 HANDSET HOLDER DRUM CARTRIDGE TONER CARTRIDGE RSPL MODULAR CORD M-M HANDSET CURL CORD Copyright 1997, Okidata, Division of OKI America, Inc. All rights reserved.
Page: 221 Service Manual for OF5800 Chapter 6 Illustrated Parts List Item No. OKIDATA P/N 201 202 203 53591501 REFERENCE P/N D65980-106XX D65970106X D65900105X DESCRIPTION RSPL PACK CASE STYROL OP. MANUAL KIT Copyright 1997, Okidata, Division of OKI America, Inc. All rights reserved. See the OKIDATA Business Partner Exchange (BPX) for any updates to this material. (http://bpx.okidata.
Page: 222 Service Manual for OF5800 Chapter 6 Illustrated Parts List Item No.
Page: 223 Service Manual for OF5800 Chapter 6 Illustrated Parts List PLEASE NOTE: Hardcopy service documentation is available in the OKIFAX 5800 Service Training Kit, P/N 58220501. On-line versions are available through OKIDATA's Web Site, www.okidata.com Item No. OKIDATA P/N 58220501 58323001 59276901 59277001 REFERENCE P/N DESCRIPTION RSPL Kit: OF5800 Service Training Sheet: ID/Read Me First Manual: Certification Manual: Service Copyright 1997, Okidata, Division of OKI America, Inc.
Page: 224 Service Manual for OF5800 Chapter 6 Illustrated Parts List Item No. OKIDATA P/N 62209801 REFERENCE P/N DESCRIPTION RSPL OKIFAX 5800 120 Volt Copyright 1997, Okidata, Division of OKI America, Inc. All rights reserved. See the OKIDATA Business Partner Exchange (BPX) for any updates to this material. (http://bpx.okidata.
Page: 225 Service Manual for OF5800 Chapter 7 Recommended Spare Parts List OKI PART # DESCRIPTION 50117901 ASSY. CASSETTE 50223701 PRINTHEAD UNIT 50223801 ASSY. DOCUMENT TRAY 50223901 FUSING UNIT 50411801 ASSY. RETARD ROLLER 50411901 ASSY. SEPARATOR ROLLER 50412001 FEED ROLLER 50412101 ASSY. DS1/DS2 50412201 ASSY. IL SWITCH 50412301 ASSY.
52095501 ONE TOUCH LABEL 52095502 ONE TOUCH LABEL 52204901 RETARD FILM 53078101 ONE TOUCH PANEL 53078201 SCANNER COVER 53078301 O.P. COVER 53078401 ASSY. PANEL COVER 53078501 REAR COVER 53078601 TOP COVER 53078701 COVER 53078801 CASSETTE SIDE COVER L 53078901 CASSETTE SIDE COVER R 53079001 FRONT COVER 53079101 SCANNER FRONT COVER 53079201 PANEL LOWER COVER 53079301 ONE TOUCH SHEET 53351001 SEPARATOR 53351101 GEAR FRAME F 53351201 ASSY.
55626401 LCD DISPLAY 55700501 PAPER HOPPER 55700601 ASSY. DOCUMENT HOPPER 56113701 LAMP 56113801 MIRROR B 56113901 TUBE LAMP 56416501 ASSY.
PW BOARD-G BUSHING GEAR 16T HOLDER END GUIDE BRUSH B EXIT PRESS ROLLER PWB-HV (WITH IC) PHOTO INTERRUPTER CAM CLUTCH SPRING SLIDE PLATE GEAR FRAME R COVER GLASS OUTER GUIDE A FOOT HARNESS GEAR 30T ROLLER HOLDER LIFTING PLATE TORSION SPRING FEELER HINGE BEARING BRUSH A EARTH SPRING S PHOTO INTERRUPTER HARNESS
CAM PRESSURE SPRING PLATE SPRING CBL-ASSY. NCU MODULAR CBL-ASSY. MAIN 232C 2 CBL-ASSY. MAIN 232C 1 CBL-ASSY. MAIN NCU1 CASSETTE FRAME DOCUMENT HOPPER B LOCK LEVER SHAFT RETARD GEAR 32T SIDE ROLLER MOTOR LENS CASSETTE ASSY GEAR LEVER SPRING GEAR GEAR ARM TENSION SPRING HOLDER Copyright 1997, Okidata, Division of OKI America, Inc. All rights reserved. See the OKIDATA Business Partner Exchange (BPX) for any updates to this material. (http://bpx.okidata.