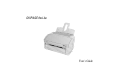
OKIPAGE 8w Lite User’s Guide
Preface Every effort has been made to ensure that the information in this document is complete, accurate, and up to date. Oki assumes no responsibility for the results of errors beyond its control. Oki also cannot guarantee that changes in software and equipment made by other manufacturers and referred to in this guide will not affect the applicability of the information in it. Mention of software products manufactured by other companies does not necessarily constitute endorsement by Oki.
English EEC compatibility This product complies with the requirements of the Council Directives 89/336/EEC (amended by 92/31/ EEC) and 73/23/EEC (amended by 93/68/EEC) on the approximation of the laws of the member states relating to electromagnetic compatibility and low voltage. Energy Star As an Energy Star Partner, Oki has determined that this product meets the Energy Star guidelines for energy efficiency.
Table of contents Table of contents . . . . . . . . . . . . . . . . . . . . . . . . . . iv Image drum . . . . . . . . . . . . . . . . . . . . . . . . . . . . . . .10 When to replace image drum . . . . . . . . . . . . . .10 Image drum life . . . . . . . . . . . . . . . . . . . . . . . . .10 Replacing image drum . . . . . . . . . . . . . . . . . . .10 Resetting drum counter . . . . . . . . . . . . . . . . . . .11 Macintosh . . . . . . . . . . . . . . . . . . . . . . . . . .11 Windows . . . . . . . . . . . .
English Safety instructions This printer has been carefully designed to give years of safe, reliable performance. As with all electrical equipment, however, there are a few basic precautions that should be taken to avoid personal injury or damaging the printer: • Read this user’s guide carefully and save it for future reference. • Read and follow all warning and instruction labels on the printer itself. • Disconnect the printer before cleaning. Use only a damp cloth.
plugged into the outlet should not exceed 13 amperes. • The printer has been dropped, or the cabinet is damaged. • The power outlet into which the printer is connected must remain accessible at all times. • The printer does not function normally when following the operating instructions. • Opening any cover may expose hot surfaces. These are clearly labelled. Do NOT touch them. • Do not insert anything into the ventilation slots on the printer; you could get a shock or cause a fire.
English Toner cartridge and image drum handling • Leave unused toner cartridges and image drum units in their packages until needed. When replacing a toner cartridge or image unit, reuse the packaging to dispose of the old toner cartridge or image drum unit. • Do not expose the toner cartridges and image drum units to light for more than five minutes. Never expose the green drum (inside the image drum unit) to direct sunlight. • Always hold the image drum unit by the ends — never by the middle.
Paper Paper and envelope types • The manufacturer of this printer recommends the following guidelines when selecting paper and envelopes for use in your printer: Avoid using paper with perforations, cut outs and ragged edges. • Do not use envelopes with windows or metal clasps. • • Do not use envelopes with self sealing flaps. • Avoid using damaged or curled envelopes. • 4 Paper and envelopes should be stored flat and away from moisture, direct sunlight and heat sources.
English Loading paper 1. Set the left paper guide to the marker for the required paper size and move the right guide to a position slightly wider than your paper width. Manual feed Use manual feed for envelopes, transparencies and other print media as follows: 1. Adjust the paper guides (1) to the width of the media being used. 1 1 2. 3. 4. Insert the paper so that it is up against and flush with the left paper guide.
Print quality adjustments The process used to fuse (fix) the printed image to the paper involves a mixture of pressure and heat. Too much heat will cause lightweight paper to crease or curl and corrugations in transparencies. Too little heat will cause the image not to fuse fully into heavyweight paper. The print quality for different types of paper is set by default according to the paper size.
English Macintosh Windows 1. Open the Chooser from the Apple menu. 1. Start the status monitor. 2. Click on the printer icon that is being used, then click on the Preferences button. 2. Click on Printer Setup tab — Printer Menu button — Paper tab. 3. Click on the Print button and then click on the Advanced button. 3. Click on the button for the paper tray being used. 4. 4. Click on the box next to Thickness and select the required thickness of paper.
Toner When to replace toner cartridge After the message Toner Low displays, the printer will print about 100 more pages, then display the message Toner Empty and stop printing. Printing will resume after a new toner cartridge has been installed. ing roller with toner. The first toner cartridge normally produces between 500 and 700 pages after installation. CAUTION: The use of original toner or toner cartridges is highly recommended.
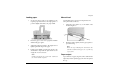
Replacing toner cartridge 4. English Insert the cartridge into the printer, left end (1) first as illustrated. WARNING Be careful when handling the toner cartridge. Do not let toner spill on your clothing or other porous materials. 1. Open the cover and remove the used toner cartridge. 2. Shake the new toner cartridge to distribute toner evenly. 3. Unwrap the new toner cartridge and carefully peel off the sealing tape (1). 1 2 1 User’s Guide 5.
Image drum When to replace image drum As the image drum approaches its end of life, a Change Drum message appears. Change the image drum when the print quality becomes faint or begins to deteriorate. Image drum life The life of an image drum depends on a number of factors, including temperature and humidity, the type of paper used, and the number of pages per job. CAUTION: Never expose the image drum unit to light for more than 5 minutes. Never expose the image drum unit to direct sunlight.
English Resetting drum counter 1 After replacing the image drum, reset the drum counter to keep a correct count of the number of pages printed on the image drum. Macintosh 4. Remove the tape and shipping insert from the image drum. 5. Install a new toner cartridge. Refer to ‘Replacing toner cartridge’. 1. Click on Print Desktop from the File menu. 2. Click on the Options button. 3. Click on the Reset Drum Counter: Reset button. 4. Click on the Save button, then click on the Cancel button.
Fonts What is a font? A font refers to a set of printable characters in a particular typeface of a specific size (e.g. 12 point) and style (e.g. roman, bold or bold-italic). In computer printing, however, this term has been used in a wider context to refer to all sizes and styles of a particular typeface. In printers, fonts may be divided into two basic types: bitmap fonts and scalable (or outline) fonts.
English Printer maintenance Transporting the printer If you need to transport the printer to another location, including return for service, please take the following precautions: 1. 2. Remove the toner cartridge and the image drum cartridge from the printer and seal in the black, light-proof bag provided. Try to ensure that the printer remains the right way up during transportation to avoid spillage of any residual toner.
Cleaning LED array Clean the LED array whenever a new toner cartridge is installed; if there is faded vertical areas; light printing down a page. Wipe the LED array (1) gently with the cleaning pad that came with the new toner cartridge or use an antistatic cleaning pad that is generally available for computer cleaning.
English Troubleshooting Paper jams 1. Remove any paper from the tray and clear any mis-fed sheets. 2. Open the cover. WARNING The fuser area will be hot. This area is clearly marked. Do not touch it. 5. Re-install the image drum, ensuring that it correctly locates into the slots on each side of the printer. 6. Close the top cover. 7. The printer will warm up and commence printing when ready. The page lost through the jam will normally be reprinted.
Print quality problems Symptom Before consulting a service representative regarding a print quality problem, check the table below to see if there is a solution, or something you might have overlooked. To verify print quality problems, try printing several pages to check that the problem is persistent. Symptom Blank sheets printed. Entire page prints faintly. Problem Oblong area of faint print appears on each page.
English Symptom Pages curl excessively. Problem Moisture in paper. Improper storage. High humidity. User’s Guide Solution Printing on wrong side of Turn paper over in tray. paper. (Note arrow on paper package). Install paper print side down in tray. Avoid storing paper in areas of excessive temperature and humidity. Store paper in protective wrapping.
Hardware problems Symptom Problem Solution Graphic image prints partly on one page, partly on the next. Change the resolution, Insufficient printer memory for this image reduce the image size, or install more at this resolution. memory in your printer. When you try to print nothing happens, but printer indicates it is ready to receive data. Configuration error. Check cable connection. If more than one printer is available, make sure your printer has been selected. Garbage prints.
English Specifications Printning process: LED array imaging to organic photoconductive drum at 8 pages per minute (ppm) Operating systems: Macintosh OS version 8.1 upwards Windows 3.1x, Windows 95/98, Windows NT4.0 Power supply: Voltage: 230V±10% to 240V ±10% AC Frequency: 50/60Hz ±2% Power Cable: 1.8m separate cable, terminated with country specific plug. Paper handling: Input tray: Manual feed: Physical: Dimensions: Weight: 264 × 324 × 346mm (H × W × D) Approx. 4.
Product life: Duty: 30,000 pages or 5 years, max of 2,500 pages per month Reliability: MTBF: 5,700 print hours at 2.
English Index C I Cleaning page . . . . . . . . . . . . . . . . . . . . . . . . . . . . . . . .13 Drum counter . . . . . . . . . . . . . . . . . . . . . . . . . . . . . . . .11 Image drum Life . . . . . . . . . . . . . . . . . . . . . . . . . . . . . . . . . . . . 10 Replacing . . . . . . . . . . . . . . . . . . . . . . . . . . . . . . . 10 Resetting drum counter . . . . . . . . . . . . . . . . . . . . 11 E L Envelope types . . . . . . . . . . . . . . . . . . . . . . . . . . . . . . . .
P T Paper Loading paper. . . . . . . . . . . . . . . . . . . . . . . . . . . . . 5 Manual feed . . . . . . . . . . . . . . . . . . . . . . . . . . . . . . 5 Paper jams . . . . . . . . . . . . . . . . . . . . . . . . . . . . . . . . . . 15 Paper output. . . . . . . . . . . . . . . . . . . . . . . . . . . . . . . . . . 5 Paper types. . . . . . . . . . . . . . . . . . . . . . . . . . . . . . . . . . . 4 Print quality adjustments Macintosh . . . . . . . . . . . . . . . . . . . . . . . . . . . . . . . .
English OKI SYSTEMS COMPANIES Oki Systems (UK) Limited 550 Dundee Road Slough Trading Estate Slough Berks SL1 4LE Tel: +44 (0) 1753 819 819 Fax: +44 (0) 1753 819 899 http://www.oki.co.uk Oki Systems (Ireland) Limited The Square Industrial Complex Tallaght Dublin 24 Tel: +353 (01) 459 8666 Fax: +353 (01) 459 8840 http://www.oki.ie Hawthorn Business Centre Adelaide Industrial Estate Falcon Road Belfast BT12 6HP Tel: +44 (01232) 572 355 Fax: +44 (01232) 572 350 http://www.oki.