Pacemark 4410 Setup Guide 59290803
Every effort has been made to ensure that the information in this document is complete, accurate, and up-to-date. Oki Data assumes no responsibility for the results of errors beyond its control. Oki Data also cannot guarantee that changes in software and equipment made by other manufacturers and referred to in this guide will not affect the applicability of the information in it. Mention of software products manufactured by other companies does not necessarily constitute endorsement by Oki Data.
Overview Conventions Used in this Setup Guide ................................................... 2 Safety ................................................................................................. 3 Introduction ...................................................................................... 5 Pacemark 4410 Features ......................................................................... 5 Select a Location ....................................................................................
Installation for Windows 2000 ............................................................. 36 Installation for Windows 95/98 ............................................................ 40 Installation for Windows NT 4.0 .......................................................... 43 Installation for Windows 3.1x .............................................................. 46 Front Panel Overview .................................................................... 49 Print Mode ............................
Safety Your OKI printer has been carefully designed to give you years of safe, reliable performance. As with all electrical equipment, there are a few basic precautions you should take to avoid hurting yourself or damaging the printer: • Read the setup and operating instructions in this manual carefully. Be sure to save it for future reference. • Read and follow all warning and instruction labels on the printer itself. • Unplug the printer before you clean it.
• To avoid damaging the power cord, do not put anything on it or place it where it will be walked on. If the cord becomes damaged or frayed, replace it immediately. • If you’re using an extension cord or power strip with the printer, make sure that the total of the amperes required by all the equipment on the extension is less than the extension’s rating. Generally, the total ratings of all equipment plugged into any one power line should not exceed 15 amperes.
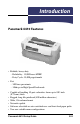
Introduction Pacemark 4410 Features • Reliable, heavy-duty - Reliability: 15,000 hours MTBF - Duty Cycle: 35,000 pages/month • Fast - 300 lines per minute - 1066 cps in High Speed Draft mode • Capable of handling 10-part carbonless forms up to 0.03 inch (0.
Select a Location • Firm, level surface capable of supporting approximately 95 lbs.
Unpacking Getting Started Caution! The Pacemark 4410 printer weighs approximately 95 lbs. (43 kg). Be very careful to take appropriate precautions when lifting it. We recommend that at least two people participate when lifting the printer. Check the contents: 1 2 3 4 5 1 Printer 2 Ribbon Cartridge 3 Paper Guide 4 Power Cord 5 Cable (only included with 4410s which have Print Server pre-installed) If anything is missing or damaged, contact your dealer immediately.
Documentation Provided Setup Guide The document you’re holding. OKIcare™ Brochure This brochure explains the Pacemark 4410 service enhancement programs available in the U.S. and Canada. On-line User’s Guide In addition to the printer drivers, the Pacemark 4410 CD contains • Adobe® Acrobat Reader® 3.0 software • User’s Guide Acrobat® file: Recommended minimum requirements for viewing the on-line User’s Guide: desktop area = 800 x 600 pixels color palette = 256 colors.
Installing the Printer Getting to Know the Pacemark 4410 Front View Tear Bar Cover Rear-Feed Access Cover Printhead Access Cover Control Panel Front Access Door Rear View On/Off Switch Tear Bar Cover Rear-Feed Access Cover Serial Port Back Access Door Power Cord Port Pacemark 4410 Setup Guide Port Access Cover Parallel Port Network/Option Slot E-9
Installation Remove the Shipping Restraints Save the shipping restraints and packing materials in case you ever need to ship the printer. 1. Remove the pieces of shipping tape, then peel the protective plastic film off the digital display. 2. Press on the area(s) marked “PUSH” and open the printhead access cover. 3. Remove the printhead shipping restraint and its retaining screw.
4. Remove the red rubber shipping restraints (1) at either end. 1 5. Open the tear bar cover, remove the shipping restraint and close the cover. Caution! Avoid the sharp, serrated tear bar.
Install the Ribbon Cartridge Prepare the Cartridge 1. Swing out the ribbon arms at either end of the cartridge until they snap into place. 2. Push in on the white plastic ribbon restraint (1) at the right end of the cartridge (this engages the ribbon take-up knob). 1 3. Pull out the red shipping restraint (1) and turn the blue knob (2) counterclockwise (in the direction of the molded arrows) to take up any excess slack in the ribbon.
Load the Cartridge 1. Move the printhead to the ribbon loading area (1). Caution! Make sure the printer is turned off before proceeding. 1 2. Install the ribbon cartridge in the printer: place the ribbon arms (1) over the metal tabs (2) at either end, then press down on the cartridge.
3. Feed the ribbon behind the printhead (1), threading it around the black guides (2) on either side of the printhead. Be careful not to twist the ribbon: this can cause jams. 1 2 4. Turn the blue knob counter clockwise (in the direction of the molded-on arrows) to take up any slack in the ribbon. Caution! Do NOT turn the knob clockwise: this can cause the ribbon to jam. 5. Close the printhead access cover.
Install the Paper Guide Hold the paper guide as shown and place it in the slots on the back of the printer.
Connect to the Computer/Network Connecting the Parallel Port The parallel port is a standard IEEE-1284-compatible, 36-pin port. It requires a shielded IEEE-1284-compatible, bi-directional cable no longer than 6 ft. (1.8 m). 1. Open the port access cover. 2. Plug the interface cable into the parallel port and secure it with the wire loops. 3. Close the port access cover, and attach the other end of the cable to the computer and secure it with the screws.
Connecting the Serial Port The serial port is a standard RS-232C, 25-pin port, with selectable baud rates of up to 38.4 Kbps. It requires a shielded RS-232C cable which is UL and CSA approved and no more than 50 feet (15 m) in length. 1. Open the port access cover and plug the interface cable into the serial port. 2. Secure the cable with the screws and close the port access cover. 3. Attach the other end of the cable to the computer and secure it with the screws.
Connecting the Ethernet® Port (for Pacemark 4410 with Print Server Pre-Installed) The installed print server is EtherNet 10/100BaseT. The Ethernet port requires a cable with two twisted-wire pairs and an RJ45 plug for connection to the network. See the OkiLAN 6100e User’s Manual included with your printer for additional information. 1. Open the port access cover. 2. Plug one end of the short cable included with the printer into the network board and the other end of the cable into the parallel port.
3. Secure the cable at both ends, then close the port access cover. 4. Plug the RJ45 connector into the EtherNet connector on the OkiLAN board, then connect the opposite end of the cable into the network.
Connect to Power 1. Attach the power cord to the back of the printer. 2. Plug the opposite end into a suitable, grounded outlet.
Load Paper Front Feed Continuous Forms Paper Specifications: Front Feed Maximum thickness: 0.031 inches (0.79 mm) Type Weight Single Part Width 2 12 to 24 lb. (45 to 90 g/m ) 2 3* to 16.5 inches (76 to 419 mm) Carbonless (1 + 9 max.) 9 to 11 lb. (34 to 41 g/m ) 3* to 16.5 inches (76 to 419 mm) Interleaf (1 + 6 max) 9 to 14 lb. (34 to 52.5 g/m2) 9 lb. (34 g/m2) carbon 3* to 16.5 inches (76 to 419 mm) Labels 0.011 inch (0.
2. Pull the front access door out and lift it up into the open position. Lock Lever Pins Tractor Pin Cover 3. Pull the lock levers forward to unlock the tractors, and position the tractors to roughly fit the width of the continuous forms you will be using. The movement of the left tractor is limited to ensure that the paper covers the paper-out sensor.
4. Center the supports between the tractors. Left Tractor 1. Open the left tractor pin cover, place the paper holes on the pins, then close the cover. 2. Move the left tractor to align the edge of the paper with the appropriate reference mark (1: this sets the print indent from the paper edge at 0 to 1.5 inches in 0.
Right Tractor 1. Open the right tractor pin cover, place the paper holes over the pins and close the cover. 2. Fine tune the position of the right tractor to center the holes in the paper on the pins of both tractors, then push the lock lever back. Finish Up 1. Make sure that the feed stack of paper is directly aligned (left-right) with its entry point into the tractors: this will promote a smooth flow of paper into the printer. 2. Close the front access door. 3.
The printer is set to a default front-feed paper width of 13.6 inches (136 columns). If you are using 9-inch paper, you must enter the printer menu and change the setting to 8 inches (80 columns) to avoid printing on the platen and damaging the printhead. Other paper widths must be set using your software application. To change the menu setting to 8 inches, turn the printer on, then: a. Press MENU. b. Press GROUP until Front Feed appears on the display. c. Press ITEM until Page Width appears on the display.
Rear Feed Continuous Forms Paper Specifications: Rear Feed Maximum thickness: 0.014 inch (0.36 mm) Type Weight Width Single Part 12 to 24 lb. (45 to 90 g/m2) 3* to 16.5 inches (76 to 419 mm) Carbonless (1 + 5 max.) 9 to 11 lb. (34 to 41 g/m2) 3* to 16.5 inches (76 to 419 mm) Interleaf (1 + 3 max) 9 to 14 lb. (34 to 52.5 g/m2) 9 lb. (34 g/m2) carbon 3* to 16.5 inches (76 to 419 mm) * For paper widths less than 4 inches (102 mm), remove the support between the tractors.
2. Push on the rear-feed access cover tabs and push the cover back, then push on the back access door to release it. Lock Lever Pins Tractor Pin Cover 3. Pull the lock levers forward to unlock the tractors, and position the tractors to roughly fit the width of the continuous forms you will be using. The movement of the right tractor (as viewed from the back of the printer) is limited to ensure that the paper covers the paper-out sensor.
4. Center the support between the tractors, then position the paper guide (1) over the support (2). 1 2 Right Tractor (viewed from the back of the printer) 1. Open the tractor pin cover, place the paper holes on the pins, then close the cover. 2. Move the tractor to align the edge of the paper with the appropriate reference mark (1: this sets the print indent from the paper edge at 0 to 1.5 inches in 0.1-inch increments), then push the lock lever back.
Left Tractor (viewed from the back of the printer) 1. Open the tractor cover, place the paper holes over the pins and close the cover. 2. Fine tune the position of the right tractor to center the paper holes on the pins of both tractors, then push the right lock lever back. Finish Up 1. Make sure that the feed stack of paper is directly aligned (left-right) with its entry point into the tractors: this will promote a smooth flow of paper into the printer. 2.
damaging the printhead. Other paper widths must be set using your software application. To change the menu setting to 8 inches, turn the printer on, then: a. Press MENU. b. Press GROUP until Rear Feed appears on the display. c. Press ITEM until Page Width appears on the display. d. Press OPTION once to switch to the 8-inch setting. e. Press STORE to save the 8-inch setting. f. Press MENU to exit the menu mode. The Top of Form (TOF) for the rear feed paper path is set at the factory to 0.
Changing Paper Paths Manually To change paper paths manually: 1. Press PARK. The current paper retracts from the paper path. 2. Press PATH. The alternate paper automatically loads into the paper path. Run the Self Tests Font Sample Test To print a sample of the available fonts: 1. Make sure continuous form paper at least 8 inches wide is loaded and that the printer is turned off. 2. Press and hold LF (1) while turning the printer on. 1 To stop the test before it is complete, press ON-LINE/RESET.
Rolling ASCII Test To print a Rolling ASCII test: 1. Make sure that continuous form paper at least 9 inches wide is loaded and that the printer is turned off. Caution! If you have 9-inch paper loaded, be sure that the Page Width menu setting for the paper path you are using is changed from 13.6 inches to 8 inches before starting the Rolling ASCII test. If you don’t, the printhead could be damaged. 2. Press and hold PATH/TOF (1) while turning the printer on. 1 To stop the test, press ON-LINE/RESET.
Select an Emulation Your printer has three emulations: • Epson® FX • IBM® Proprinter III (PPSII): the factory setting • OKI® Microline® Standard Changing Emulations 1. Press MENU to enter the menu mode. The display reads MENU GROUP Printer Control 2. Press ITEM. The display reads Printer Control Emulation Mode 3. Press OPTION. The display reads Emulation Mode IBM-PPR * 4. Press OPTION until the emulation you wish to use appears on the second line of the display. 5. Press STORE to save the setting.
E-34 Pacemark 4410 Setup Guide
Installing the Software The Pacemark 4410 CD Included on the Pacemark 4410 CD: • Pacemark 4410 Printer Drivers • Pacemark 4410 On-Line Registration Program • Pacemark 4410 User’s Guide • Adobe® Acrobat® Reader® Software Printer Drivers The Pacemark 4410 CD includes printer drivers for printing in the following Windows® environments: • Windows 2000 • Windows 98 & 95 • Windows NT 4.0 • Windows 3.
On-Line User’s Guide The Pacemark 4410 CD also includes the OKI Pacemark 4410 On-Line User’s Guide, as well as the Adobe Acrobat Reader software required to view the User’s Guide. When installed, the User’s Guide takes up approximately 73 MB of space on your hard drive. If you prefer, you can view the User’s Guide directly from the CD (\Manuals\English\e4410m.pdf). Printing the OKI Pacemark 4410 On-Line User’s Guide With the User’s Guide open in Acrobat Reader: 1. Select File, Print. 2.
These instructions assume “D” is the location of your CD-ROM drive. Have your original Microsoft Windows 2000 CD handy. You may be prompted for it during the installation. 1. Close any open applications, and make sure that the printer is connected to the PC and turned on. 2. Insert the Pacemark 4410 CD in your CD-ROM drive. 3. Click Start Settings Printers. 4. Double-click Add Printer. The Add Printer Wizard begins. 5. Follow the on-screen instructions. 6.
To Install the On-Line Registration Program in Windows 2000 These instructions assume “D” is the location of your CD-ROM drive. 1. Make sure all applications are closed and the Pacemark 4410 CD is in your CD-ROM drive. 2. Click Start ® Run. 3. Type D:/install, and click OK. 4. Click the button beside On-Line Registration. 5. Follow the instructions on your screen. To Run the On-Line Registration Program in Windows 2000 1. Click Start ® Programs ® PM4410. 2. Click OKI Pacemark 4410 On-Line Registration. 3.
Next, install the On-Line User’s Guide in Windows 2000 These instructions assume “D” is the location of your CD-ROM drive. 1. Make sure all applications are closed and the Pacemark 4410 CD is in your CD-ROM drive. 2. Click Start ® Run. 3. Type D:/install, and click OK. 4. Click the button beside On-Line Manual. 5. Follow the instructions on your screen. Viewing the On-Line Pacemark User’s Guide in Windows 2000 1. Click Start ® Programs ® PM4410. 2. Click OKI Pacemark 4410 On-Line Manual.
Installation for Windows 95/98 To Install the Pacemark 4410 Printer Driver on Windows 95/98 Minimum System Requirements for Windows 95/98: CPU: i486DX, 66 MHz (90 MHz pentium recommended) RAM: 8 MB (16 MB recommended) Empty hard disk space: 2 MB for use by print spooler 73 MB for User’s Guide (optional) 10 MB for Adobe Acrobat Reader Software (optional) These instructions assume “D” is the location of your CD-ROM drive. 1.
To Install the On-Line Registration Program in Windows 95/98 These instructions assume “D” is the location of your CD-ROM drive. 1. Close any open applications and insert the Pacemark 4410 CD in your CD-ROM drive. 2. Click Start ® Run. 3. Type D:/install and click OK. 4. Click the button beside On-Line Registration. 5. Follow the instructions on your screen. To Run the On-Line Registration Program in Windows 95/98 1. Click the Start button on the Windows taskbar. 2. Choose Programs ® PM4410. 3.
To Install the On-Line Pacemark 4410 User’s Guide in Windows 95/98 First, make sure Adobe Acrobat Reader is installed To view the on-line Pacemark 4410 User’s Guide, you must have Adobe Acrobat Reader version 3 or 4 installed on your computer. If you do not already have Acrobat Reader installed, it is provided on the Pacemark 4410 CD. To install Acrobat Reader in Windows 95/98: These instructions assume “D” is the location of your CD-ROM drive. 1.
To view the manual from the Pacemark 4410 CD, open Acrobat Reader, click File ® Open, browse to the Manuals\English directory on the CD, and double-click e4410m.pdf . Installation for Windows NT 4.0 Minimum System Requirements for Windows NT 4.
To Install the On-Line Registration Program in Windows NT 4.0 These instructions assume “D” is the location of your CD-ROM drive. 1. Close any open applications and insert the Pacemark 4410 CD in your CD-ROM drive. 2. Click Start Run. 3. Type D:/install and click OK. 4. Click the button beside On-Line Registration. 5. Follow the instructions on your screen. ® To Run the Electronic Registration Program in Windows NT 4.0 1. Click Start Programs ® PM4410. 2. Click OKI Pacemark 4410 On-Line Registration. 3.
To Install the On-Line Pacemark 4410 User’s Guide in Windows NT 4.0 First, make sure Adobe Acrobat Reader is installed To view the on-line Pacemark 4410 User’s Guide, you must have Adobe Acrobat Reader version 3 or 4 installed on your computer. If you don’t already have Acrobat Reader installed, Acrobat Reader 4.05 is provided on the Pacemark 4410 CD. To install Acrobat Reader in Windows NT 4.0: These instructions assume “D” is the location of your CD-ROM drive. 1.
Installation for Windows 3.1x Minimum System Requirements for Windows 3.1x: CPU: i486DX, 66 MHz (90 MHz pentium recommended) RAM: 8 MB (16 MB recommended) Empty hard disk space: 2 MB for use by print spooler 73 MB for User’s Guide (optional) 5 MB for Adobe Acrobat Reader Software (optional)— 12 MB recommended To Install the Pacemark 4410 Printer Driver and On-Line Registration Program in Windows 3.1x These instructions assume “D” is the location of your CD-ROM drive. 1.
To Install the On-Line Pacemark 4410 User’s Guide in Windows 3.1x First, make sure Adobe Acrobat Reader is installed To view the on-line Pacemark 4410 User’s Guide, you must have Adobe Acrobat Reader version 3.01 installed on your computer. Acrobat Reader 3.01 is provided on the Pacemark 4410 CD. If you already have Acrobat Reader installed, you do not need to reinstall it. To Install Acrobat Reader in Windows 3.1x: These instructions assume “D” is the location of your CD-ROM drive. 1.
E-48 Pacemark 4410 Setup Guide
Front Panel Overview Print Mode Power Light: indicates that printer is turned on. MENU Button: Press to enter Menu mode. Alarm Light: On: indicates printer error, such as paper out. Blinking: Indicates printer error such as ROM/RAM error, spacing error, etc. Status Light: On: indicates that printer is ready to receive data. Blinking: Printer is in Print Suppress mode.
PATH/TOF Button: With printer off line: Press to switch paper paths Hold to set current paper position as Top of Form CONFIG Button: With printer off line and no data being sent: Press to switch between preset menu configurations CFG1 and CFG2. For more information on the preset menu configurations, see Section 1 of the OKI Pacemark 4410 On-Line User’s Guide.
Menu Mode MENU Button: Press to exit Menu mode. With SHIFT, press to print out a listing of the current menu settings. ON-LINE/RESET Button: Press to exit Menu mode. STORE Button: Press to save the new setting. GROUP Button: Press to page through available groups in the menu. With SHIFT, press to page backwards through available groups. OPTION Button: Press to page through available setting values for the selected item. With SHIFT, press to page backwards through available setting values.
Top of Form (TOF) The red line (1) on the paper shield indicates where the Top of Form (TOF) is located. 1 The TOF must be set separately for each paper path. The factory setting for TOF is 0.35 inch (9 mm) down from the top of the page. Setting the TOF The TOF can be set with the printhead access cover open. The printer can be either on or off-line.
If you have the Forms Tear-Off feature turned on in the menu, before performing the steps below, press and hold TEAR to move the paper into the print position, Then, while holding SHIFT, press TEAR to release the tear, and follow the instructions below. 1. To move the TOF up: a. Press and hold SHIFT (1) while pressing LF/Micro Feed Down (2). b. Press and hold SHIFT, then press PATH/TOF to save the setting. 2. To move the TOF down: a. Press and hold SHIFT (1) while pressing FF/LOAD/Micro Feed Up (3). b.
Temporarily Changing the Print Start Position To set the print start position lower for one page only: press LF (1) until you reach the position on the paper where you want the printing to start.
Printer Features Preset Menu Configurations Once you have made changes in Menu settings, you can save them in one of two preset storage areas — CFG1 and CFG2 — and use them instead of the factory settings. To switch back and forth between stored settings: 1. Press ON-LINE/RESET. The printer goes off line. 2. Press CONFIG. The CFG designation on the display changes. 3. Press ON-LINE/RESET. The printer goes back on line with the new CFG showing on the display.
Forms Tear-Off Feature Caution! Never engage Forms Tear-Off when printing on labels. Forms Tear-Off automatically moves continuous forms up to the tear position after the interval you select, then moves it back down again for printing when the printer receives more data. This feature is normally turned off. To activate it: 1. Press MENU to enter the menu mode. 2. Press GROUP until the paper path you are using appears on the second line of the display. 3.
Adjusting the Tear-Off Position The tear-off positions for the front and rear paper paths are set independently. To adjust the tear-off position for the paper currently in the paper path: 2 1 3 • Hold SHIFT (1) and press FF/LOAD/Micro Feed Up (2) repeatedly to move the continuous forms up • Hold SHIFT (1) and press LF/Micro Feed Down (3) repeatedly to move the continuous forms down.
E-58 Pacemark 4410 Setup Guide
Specifications For additional specifications, see Appendix A in the on-line Pacemark 4410 User’s Guide.
E-60 Pacemark 4410 Setup Guide
Limited Warranty Oki Data Americas, Inc. (Oki Data) warrants this printer to be free from defect in material and workmanship and will remedy any such defect according to the terms of this Limited Warranty. This Limited Warranty extends to the original purchaser only. This Limited Warranty does not extend to network setup, application conflicts, or consumable items, including but not limited to ribbons, fuses, etc.
A written receipt for the product, showing the date of purchase, dealer’s name, and serial number of the Pacemark 4410 printer, must accompany any request or claim for work to be performed under this Limited Warranty. This Limited Warranty shall not apply if the product has been damaged due to abuse, misuse, misapplication, accident, or as a result of service or modification by any other than an authorized Oki Data service center.
United States Oki Data Americas, Ltd. Tel: 1-800-OKI-DATA (1-800-654-3282) Fax: 1-609-222-5247 Canada Oki Data Americas, Ltd. Tel: 1-800-OKI-DATA (1-800-654-3282) Fax: 905-238-4427 Brazil Oki Data do Brasil, Ltda. Tel: (5511) 5589-1518 Fax: (5511) 5584-0267 Mexico Oki Data de Mexico, S.A. de C.V. Tel: 525-263-8780 Fax: 525-250-3501 This Limited Warranty applies to this printer. However, the procedure for obtaining service may vary outside the continental United States.
E-64 Pacemark 4410 Setup Guide
FCC/IC/CE Statements Declaration of Conformity We declare here that this device has been tested and found to comply with the FCC Standards, Part 15 Class B. Model Name: Dot Matrix Printer PM4410 Model Number: D21001A This device complies with Part 15 of FCC Rules. Operation is subject to the following two conditions: This device may not cause harmful interference, and (2) this device must accept any interference received, including interference that may be cause undesired operation.
Federal Communications Commission (FCC) Radio Frequency Interference (RFI) Statement WARNING: This equipment has been tested and found to comply with the limits for a Class B digital device, pursuant to Part 15 of the FCC rules. These limits are designed to provide reasonable protection against harmful interference in a residential installation.
Material Safety Data Sheet MSDS No. 58077401 for Pacemark 4410 Black Ribbon, P/N 40629302 For more information, contact Oki Data at: 2000 Bishops Gate Blvd. Mount Laurel, NJ 08054-4620 For Emergency Information, call 1-800-OKI-DATA (1-800-6543282 — US and Canada only). Emergency First Aid Procedures Emergency Procedure Contact occurs with eyes. Flush eyes with large quantities of water for 15 minutes, keeping eyelids open with fingers. Seek medical attention. Contact occurs with skin.
Fire and Explosion Hazard Data Flash Point (Method Used): N/A Flammable Limits, LEL/UEL: N/A Extinguishing Media: Water mist, Foam, Dry powder, CO2 gas Special Fire and Explosion Procedures: None Unusual Fire and Explosion Hazards: None Health Hazard Data Routes of Entry: Ingestion, Eyes, Skin Health Hazards: None Reactivity Data Stability: Stable Polymerization: Will not occur.
Pacemark 4410 Printed User’s Guide Request Form Pacemark Model (check one): ❏ 4410 ❏ 4410 Network Version Serial No.