
Printer Developer's Guide
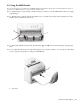
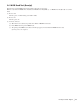

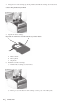
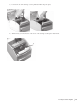
Table Of Contents
- Contents
- 1. Setting Up the Printer
- 1.1. Select a Location
- 1.2 Where to install your printer
- 1.3 Unpacking
- 1.4 Installing the Printer
- 1.5 Installing the Paper
- 2. Using the Printer
- 3. Maintenance
- 4. Troubleshooting and Repair
- 5. Specifications
- 5.1 Introduction
- 5.2 General Specifications
- 5.3 Communication Interface Specifications
- 5.4 Physical Characteristics
- 5.5 Logical Characteristics
- 5.6 Printer Performance
- 5.7 Media Specifications
- 5.8 Paper Feed Specifications
- 5.9 MICR Specifications (Only with MICR type)
- 5.10 Auto Cutter Specifications
- 5.11 Ribbon Specifications
- 5.12 Reliability
- 6. Command Description
- 7. Using the Unitool Printer Driver
- 1. Setting Up the Printer
46
OKIPOS 425D
|
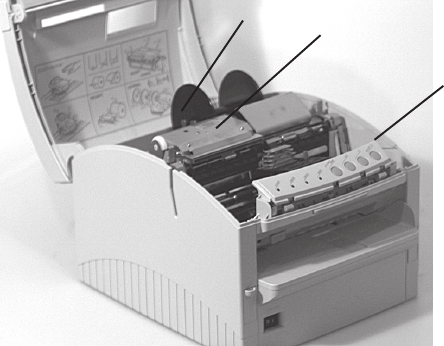
2.8 Using the Auto Cutter
This printer is equipped with an Auto Cutter. Follow the procedure below to automatically cut the Roll Paper (Receipt).
Note 1: Make sure that “Auto Cutter Unit” items in the menu are set to “Yes.” If there are any “No” items, change them to
“Yes.”
Note 2: Never touch the Auto Cutter Window part (paper route); this could cause an injury.
Note 3: Do not operate the Auto Cutter (1) when a foreign object is in the Auto Cutter Window (paper route) (2) or when
paper is jammed. Do not use Roll Paper that does not match the specifications. Using such paper may damage the
Auto Cutter or may shorten its life.
o425_85.jpg
How to Use
1. Manual operation
When SW 3 (2) is pressed, the cutter cuts the paper partially (1 point remains) once regardless of media mode and media
status. When “Auto Cutter Unit = No” is set in the menu, the switch does not work even if you press it down. Manual
operation does not cut the paper fully.
2. Operation from your host computer
Send Command “US*0E*02”: One full cut.
Send Command “US*0E*03”: One partial cut (1 point remains).
1
2
3