
User's Manual
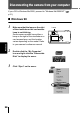
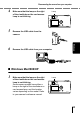
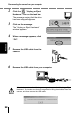
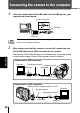
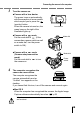
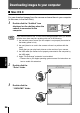
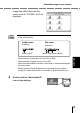
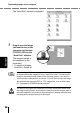
Table Of Contents
- CAMERA OPERATION
- INDEX
- Contents
- Getting started
- Shooting basics
- Advanced shooting
- Using the self-timer
- Shooting pictures sequentially (Sequential shooting)
- Varying the image brightness (Exposure compensation)
- Selecting the metering area (Spot metering)
- Adjusting the color tone (White balance)
- Selecting the image quality and size (Record mode)
- Panorama shooting
- Taking two-in-one pictures
- Taking a picture of yourself (Self-portrait shooting)
- Playback
- Camera settings
- Print settings
- Troubleshooting
- Specifications
- Index
- CONNECTING THE CAMERA TO A PC

Downloading images to your computer
28
Macintosh
The “Hard Disk” window is displayed.
5
Drag & drop the image
you want to save in the
computer (in this case,
P1010012.JPG) to the
“Hard Disk” window.
The image is saved in
the computer (in the
Hard disk).
• To select all images,
click Edit > Select all.
When the image file has been copied to the computer, you can view images
by double-clicking the image files in the “Hard Disk” folder. The files will be
opened in the default image viewer of the operating system. If you want to
view the image a different size or process it, you will need to open the image
with software that supports JPEG or TIFF images files, such as Paint Shop
Pro, Photoshop or CAMEDIA Master software.
The lamp on the right of the viewfinder or the card access lamp blinks while
the image is being copied. Never open the card cover on the camera, load or
remove the batteries, or connect or disconnect the AC adapter while the lamp
is blinking as the image files may be destroyed.