DIRECTREC DR-2000 Executive Kit INSTRUCTIONS Thank you for purchasing an Olympus DIRECTREC. Please read these instructions for information about using the product correctly and safely. Keep the instructions handy for future reference.
Main Features This product is equipped with the following features. ● New and improved microphone system reduces extraneous sounds such as wind or machine noise created while recording and thus enabling a higher quality of sound recording than ever before. ● New design and location of buttons enable single-handed control without ever having to visually check the placement of function buttons. Directrec fits easily into your hand providing effortless control coupled with superb P.4).
Table of Contents Introduction Identification of Parts ............................ 4 Minimum Requirement ......................... 5 Getting Ready Installing DSS Player Software ............ 6 Uninstalling DSS Player Software ........ 7 Using Online Help ................................. 8 Let’s Get Started Connection to Your PC ......................... 9 Running DSS Player ........................... 10 Window Names ................................... 11 Using the Remote Edit Window ........
Identification of Parts 1 1Built-in microphone 2Record/Play indicator light 6 7 8 2 3 4 5 3B (Programmable) button 4Slide REC (Record)/ STOP/ PLAY/ REV (Review) switch 5FF (Fast Forward) button 6NEW button 7A (Programmable) button 8REW (Rewind) button 9Built-in speaker 0C (Programmable) button !USB Cable 9 0 ! 4
Minimum Requirement Make sure that your computer meets the Minimum requirements listed below. Please check with your system administrator or your Olympus Professional Dealer.
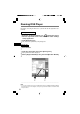
Installing DSS Player Software Before you connect your Directrec to your PC, you must first install the DSS Player software. Make sure to exit all running applications, eject the floppy disk if you are using one, and logon as administrator if you are running Windows 2000/XP (Professional only) on the network. 6 1 2 3 Insert Olympus DSS Player CD into the CD-ROM drive. 4 Proceed with the installation according to the instructions on the screen. The installation program will start automatically.
Uninstalling DSS Player Software To uninstall any of the software components of the DSS player software installed on your PC, follow the steps below. 1 2 3 4 5 Exit DSS Player program. Click the [start] button on the taskbar. Select [Add/Remove programs] from the [Control Panel]. A list of installed applications is displayed. Select [Olympus DSS Player Pro], then click the [Change/Remove] button. Proceed with the uninstallation according to the instructions on the screen. ...............................
Using Online Help For information on the DSS Player usage and features, refer to the online Help. To start online Help: • Click the [start] button, then select [All Programs], [Olympus DSS Player Pro], [Dictation Help]. • While DSS Player is running, select the [Help] menu, [Contents]. • While DSS Player is running, press F1 on the keyboard. ......................................................................................................................................
Connection to Your PC Be sure to install the DSS Player software before connecting the Directrec to the PC. However, if you do connect the Directrec before or during the software installation, the “Add New Hardware Wizard” will appear. In this case, cancel the wizard by pressing the [Cancel] button in the wizard screen and then install or continue the installation of DSS Player software.
Running DSS Player By default, connecting the Directrec to your PC will start the application automatically. Disabling automatic start 1 2 Right-click the Device Detector icon in the System Tray in the lower right hand corner of the screen, then select “Settings startup application”. Click [DSS Player Pro]. The check mark on [DSS Player Pro] disappears. Manual start 1 2 3 Start Windows. Click the [start] button, then select [All Programs]. All program menus will be displayed.
Window Names Main Window(Windows XP) 1 4 2 3 * Main screen is displayed when DSS Player is started Massage Tray 1Playback Control Bar Provides the control buttons to play and stop dictation files. 2Dictation Tree View Displays the directory structure of the DSS, WAVE-format files stored on your PC’s hard disk. Recordings made using Directrec will be saved as a file in the Message Tray ( ) in the Dictation Folder ( ). 3Device Tree View Displays the directory structure of the Directrec.
Using the Remote Edit Window For enjoyable recording experience, use Directrec with the DSS Player software to record to your PC. The DSS Player can be configured to provide you with complete remote control over your recording session from the Directrec without the use of the PC mouse. Starting the [Remote Edit] window for the DSS Player main window 1 2 3 Ensure Directrec is properly connected to your PC and then start the DSS Player. DSS Player main window appears.
ndow Starting the [Remote Edit] window without opening the DSS Player main window With a push of a button on the Directrec, you can set your PC to open the [Remote Edit] window directly without entering the DSS Player main window. 1 2 From the DSS Player main window, click the [Tools] menu, select [Options...], then click the [Directrec] tab. Check [Start Remote Edit window automatically when Dictation Module is launched] and then click the [OK] button. The pre-settings are now complete.
Direct Recording New Recording 1 From the DSS Player main window, click the [File] menu, then select [New File], or click the icon. [Remote Edit] window appears. 2 2,3 Move the slide switch on the Directrec to the REC position or press the (Record) button in the [Remote Edit] window to start recording. The red record/play indicator light on Directrec will become lit. Point the microphone at the sound source.
Overwrite Recording You can overwrite a previous recording from any point within the file. Note that the overwritten recordings will be premanently erased. 1 2 2,3 Make sure you are at the starting point of the recording to be overwritten. Move the slide switch on the Directrec to the REC position or press the (Record) button in the [Remote Edit] window. The record/play indicator light on the Directrec will light up and Overwrite Recording will start.
Direct Recording Insert Recording Additional recording can be inserted into a previously recorded file. 1 2 3 3,4 Check ( )“Insert recording” box in the [Remote Edit] window. Make sure you are at the right position in the file where recording insert should take place. While playing the file, move the slide switch on the Directrec to the REC (Record) position or press the button in the [Remote Edit] window to start inserting an additional recording.
Playback (Playing a Dictation File) 1 Move the slide switch on the Directrec to the PLAY position or press the (Play) button in the [Remote Edit] window to start playback. The green record/play indicator light on Directrec will become lit. 1,3 2 Adjust the volume slider in the [Remote Edit] window to the required level. The recording will be played through the Directrec speaker.
Playing (Playing a Dictation File) Playback functions Various functions are available with Directrec and the [Remote Edit] window to playback a recorded file. Directrec playback functions Operation Playback functions Fast Forward (FF) Press the FF button once while stopped. Rewind (REW) Press the REW button once while stopped. How to Cancel Move the slide switch to a position other than the STOP position. ➥ The Directrec starts the operation of the set position.
Save Recording 2,3 4 1 To save the current recording, move the slide switch on the Directrec to the STOP position or press the (Stop) button to stop recording. 2 Either press the NEW button on icon on the Directrec or click the toolbar in the [Remote Edit] window. [File Save] window will appear to save the data. 3 To save the file, either press the NEW button on Directrec or click the [Save] button on the [Remote Edit] window. The recorded data will be saved.
Microphone Sensitivity Microphone sensitivity is adjustable to meet recording needs. 1 Select from the “Sensitivity” box either “Dictation” or “Conference” in the [Remote Edit] window. Conference :The high-sensitivity mode suitable for recording the ambient sounds. Dictation :The low-sensitivity mode suitable for recording dictation. 1 ......................................................................................................................................
Index Marks Index marks can be placed in a file during recording or playback to provide a quick and easy way of identifying important sections in the file. Setting an Index Mark 1 1 Either press the A button on icon on the Directrec, or click the toolbar in the [Remote Edit] window while recording or playing. Index Mark will now be set. A icon will appear on the time axis bar in the [Remote Edit] window. The index mark can also be set by selecting [New Index Mark] in the [Tools] menu.
Index Marks Locating an Index Mark The icon on the time axis bar in the [Remote Edit] window indicates the position of the Index Mark. To jump to a marked position follow this procedure. 1 Either press FF or REW button on Directrec twice, or click the button on the [Remote Edit] window. The Playback slider will automatically jump to the Index Mark( ) position.
Clearing an Index Mark 1 2 Locate the index mark you want to clear. Click the icon on the toolbar in the [Remote Edit] window. Or, select the [Delete Index Mark] in the [Tools] menu. The index mark is erased. ...................................................................................................................................... Note • Index marks cannot be set or cleared in a locked file. Please see the Online Help for further details (☞P.8).
Setting Priority Levels You can set a priority level on each file recorded. 1 1 Press the B button on Directrec. The “Priority” setting box in the [Remote Edit] window will be checked on and off every time this button is pressed. With check : High level. Without check : Normal level. You can also check the priority setting on /off by using the [Remote Edit] window.
System Sounds The Directrec beeps to alert you to button operations. System sounds may be turned off. 1 Click the icon on the toolbar in the [Remote Edit] window. Or, select the [Directrec Configuration Tool] in the [Tools] menu. The [Directrec Configuration Tool] dialog box will appear. 1 2 Select the [Customizing] tab and check the [Enable Beep Sound] box. 3 Click [Upload Settings]. With check: System sound is On Without check: System sound is Off The settings are now completed.
Setting Job Data The files recorded in your PC by Directrec contain Author ID and Work Type as header information. The details in header information can be easily changed by using the DSS Player. Registering Author ID and Work Type ID in DSS Player Up to the User ID and ten Work Type ID can be registrered in the DSS Player. 1 2 Ensure Directrec is not connected. 3 Click the [Save] button. From the DSS Player main window, click the [Download] menu, then select [Create & Send Job Data...].
Directrec Default User ID to Directrec The Directrec User ID plays an essential part in the file naming process of new recordings. The default User ID is “DR2000”. In order to change the default user ID, follow the procedure below. 1 Click the icon on the toolbar in the [Remote Edit] window. Or, select the [Directrec Configuration Tool] in the [Tools] menu. The [Directrec Configuration Tool] dialog box will appear. 1 2 Input your user ID into the [User ID] box and click [Upload Settings].
Setting Job Data Setting an Author ID Either the Directrec default Author ID or any DSS Player registered Author ID (☞P.26) can be set in as header information. 1 Click the icon on the toolbar in the [Remote Edit] window. The [Set Job Data] window will appear. 1 2 3 Select the desired Author ID from the Author ID list box. Click the [OK] button. All recordings made by the author during the session will include the set ID as part of the header information. 2 3 ......................................
Setting a Work Type Any Work Type registered (☞P.26) in the DSS Player can be set as header information. 1 Select the registered Work Type in the Work Type ID setting in the [Remote Edit] window. All recordings made with the new Work Type ID will have the new Work Type as part of the header information.
Directrec Button Function Customization Using [Directrec Configuration Tool], Directrec button functions can be easily customized to suit individual user needs. Customizing Directrec Buttons 1 Select [Directrec Configuration Tool] in the [Tools] menu in the [Remote Edit] window. Or, click the icon on the toolbar. The [Directrec Configuration Tool] dialog box will appear. 1 2 Select the function to be assigned to each button and click [Upload Settings].
Customization List of Customizable buttons and Available Functions Functions available for settings List of customizable buttons Default settings NEW NEW NEW, REW, FF, INDEX*1, REW REW PRIORITY*2, INSERT/ FF FF A B Application (INDEX/DSS Player) Application (PRIORITY) C Application (EXIT) OVERWRITE*3, DISABLE*4, Application*5 *1: [INDEX] button function ....To insert an index mark using the [Remote Edit] window. *2: [PRIORITY] button function....
Directrec Button Function Customization Programming Shortcut Keys (Registration) You can customize the functions of other applications to the Directrec buttons. This enables you to use the other application software easily while dictating with Directrec. The selected application shortcut keys can be programmed to Directrec Programmable (A, B, C) buttons by using [Directrec Configuration Tool]. By doing so, the Directrec buttons can be used to start the applications and command the functions.
ion The default programmed shortcut keys are shown below. Button Assigned command A Application (To insert an index mark) B Application (To assign the “Priority” settings) C Application (Exit the Remote Edit window) Shift+FF Jump to the index mark Shift+A To turn up the volume Shift+B To turn down the volume Shift+NEW Switching Insert/Overwrite Recording Only the programmable (A, B, C) buttons can be programmed. Programming of the NEW, REW or FF button is not possible.
Directrec Button Function Customization 3 Browse and Select the application executable and click [Open]. The application shortcut is now set. For example, if you select Microsoft Word “winword.exe” executable file, “winword” will be added to the [Directrec Configuration Tool] dialog box. 3 4 Select the tab added to the [Directrec Configuration Tool] dialog box and program the shortcut key to Directrec Programmable (A, B, C) buttons. The registered contents will be automatically saved as a template.
Troubleshooting For the latest information not included in the user manual, please refer to the Online Help (☞P8). Symptom Probable cause Action Unable to use Directrec controls DSS Player (included in the package) is not installed. The [Remote Edit] window in the DSS Player (included in the package) is not open. Install the DSS Player (☞P.6). Open the [Remote Edit] window first and then use Directrec. No playback tone heard The sound volume in the [Remote Edit] window is set to 0.
Specifications Recording format: DSS (Digital Speech Standard) Input level: –70 dBv Overall frequency response: 100 to 15,000 Hz Maximum working output (5 V DC): 300 mW or more (8 Ω speaker) External dimensions: 157 x 49 x 27 mm (without protrusions) Weight: 200 g Cable length: 2.5 m Plug shape: USB connector A type Technical Assistance And Support DR-2000 is part of the Olympus Professional Dictation System.
Shinjuku Monolith, 3-1 Nishi-Shinjuku 2-chome, Shinjuku-ku, Tokyo 163-0914, Japan. Tel. 03-3340-2111 Two Corporate Center Drive, PO BOX 9058 Melville, NY 11747-9058, U.S.A. Tel. 1-800-622-6372 (Premises/Goods delivery) Wendenstrasse 14-18, 20097 Hamburg, Germany. Tel. 040-237730 (Letters) Postfach 10 49 08. 20034 Hamburg. Germany. 2-8 Honduras Street, London EC1 0TX, United Kingdom, Tel. 020-7253-2772 http://www.olympus.