DIGITAL CAMERA FE-130/X-720/X-740 FE-140/X-725 Advanced Manual Detailed explanations of all the functions for getting the most out of your camera. Thank you for purchasing an Olympus digital camera. Before you start to use your new camera, please read these instructions carefully to enjoy optimum performance and a longer service life. Keep this manual in a safe place for future reference. We recommend that you take test shots to get accustomed to your camera before taking important photographs.
e_advanced_001_tsukaikata_7.fm Page 2 Tuesday, December 27, 2005 9:19 AM How to use this manual gP. 3 Search for a topic XXXTable of Contents Contents How to use this manual............................................................................... 2 Contents...................................................................................................... 3 1 Button operations ................................................
D4310_Advance_eTOC.fm Page 3 Friday, December 23, 2005 11:36 AM Contents How to use this manual............................................................................... 2 Contents...................................................................................................... 3 1 Button operations ................................................8 Test out the functions of the camera buttons by following the illustrations and actually trying them out on the camera. 3 POWER button ..........
2 Menu operations .................................................15 Learn everything about the menus, from basic operations to the functions of each menu and their various settings. About the menus ....................................................................................... 16 Shooting mode menu ................................................................................ CAMERA MENU ................................................................................. DIGITAL ZOOM ............
SETUP menu............................................................................................. MEMORY FORMAT (FORMAT) ......................................................... Formatting the internal memory or card BACKUP ............Copying pictures in the internal memory to the card W..................................................... Selecting a display language COLOR ................................... Setting the color of the menu screens PIXEL MAPPING ................
To download and save images to a computer without using OLYMPUS Master ........................................................... 54 5 Getting to know your camera better .................55 Find out more about your camera and learn what to do when you have a question regarding operations. Shooting tips and information .................................................................... Tips before you start taking pictures ...................................................
6 Miscellaneous .....................................................69 Read about convenient functions and safety precautions on how to use your camera more effectively. Camera care .............................................................................................. 69 The battery................................................................................................. 70 Useful use of the accessories.................................................................... The card.........
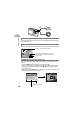
1 Button operations G1 Button operations 3 4 1 2 5 Button operations 1 Monitor 1 POWER button Power on: Turning the camera on and off The camera turns on in shooting mode. • Monitor turns on • Lens extends 2 Shutter button Shooting picture Shooting still picture Set the mode dial to h, i, l, k, L, j, h, SCN and lightly press the shutter button (halfway). The green lamp lights when the focus and exposure are locked (focus lock). Now press the shutter button all the way (fully) to shoot a picture.
3 q button (Playback) Switching to playback mode/Turning the camera on and off 4 K button (Shooting) Switching to shooting mode The camera switches to shooting mode. 5 Mode dial Switching shooting mode Set the mode dial to the desired mode to shoot. 1 Button operations The camera switches to playback mode. The last picture taken is displayed. • Press the arrow pad to view other pictures. • Use the zoom lever to switch between close-up playback, index display and calendar display.
6 5 Button operations 1 h Shooting pictures using image blur reduction This function reduces the blur incurred by a moving subject or camera movement when taking pictures. n Recording movie The camera switches to the movie recording mode. Audio recording is not available. This lights red during movie recording. The remaining recording time is displayed. When the remaining recording time reaches 0, recording stops.
6 Zoom lever Zooming while shooting/close-up playback Shooting mode: Zooming in on your subject HQ 2592×1944 4 4 HQ 2592×1944 Optical zoom magnification: 3X Playback mode: Switching the picture display W T HQ T 1 Button operations Telephoto: Pull the zoom lever toward T. Wide-angle: Push the zoom lever toward W. W ’06 06.02 02.
e d 9 0 +2.0 c 8 HQ 2592×1944 1 Button operations Exposure compensation Self-timer 7 a b 7 MENU button Macro mode/ Super macro mode 4 Flash mode Displaying the top menu Displays the top menu on the monitor. 8 Arrow pad (O/N/X/Y) Use the arrow pad to select the playback picture and the items on the menus. 9 F button Press to set the settings. 0 OF button Press the OF button in shooting mode. Press X/Y to adjust, and press F. Y: Adjusts toward [+]. X: Adjusts toward [–]. +2.
b NY button Self-timer shooting Press the NY button repeatedly in shooting mode. Press F to set. Y ON Y OFF After setting this function, press the shutter button fully. Cancels self-timer function. • The self-timer lamp lights for approximately 10 seconds, blinks for approximately 2 seconds, and then the picture is taken. • Press the NY button to cancel the self-timer. • Self-timer shooting is automatically canceled after one shot.
f Button operations 1 f DISP./E button Changing the information display/Displaying the menu guide Press the DISP./E button to change the display in the following order. Shooting mode (Other than n) +2.0 2592×1944 HQ 259 Normal display Playback mode 10 HQ Normal display ’06 06.02 02.16 16 12 12:30 30 100-0004 100 0004 4 4 Simple display 10 HQ 2592×1944 259 +2.0 Detailed display ’06 06.02 02.
2 Menu operations 2 Menu operations MENU button Mode dial Arrow pad (O/N/X/Y), F 2 Press the MENU button to display the top menu. The menus on the top menu are changed by the modes. • If you press the MENU button while the mode dial is set to GUIDE, the shooting guide screen is displayed.
Using the menus Use the arrow pad and F to set menu items. This explains how to use the menus with the [VIDEO OUT] setting as an example. Set the camera to the desired mode (Shooting mode or playback mode). • In this section, press the K button to set to the shooting mode, and set the mode dial to the mode other than GUIDE. • Common menus for each mode are retained even if the mode is changed. Menu operations 2 1 Press the MENU button to display the top menu, and press Y and then press F.
2 Press O/N to select a setting, and press F. • Select the video signal, [NTSC] or [PAL] from [VIDEO OUT] menu and then press F. • The menu item is set and the previous menu is displayed. • Press the MENU button repeatedly, to close the menu. • When the MENU button is pressed before pressing F, a setting you set will not be changed.
Shooting mode menu 1 h i l k L j h SCN n 2 1 CAMERA MENU DIGITAL ZOOM PANORAMA*1 2 IMAGE QUALITY 3 RESET 4 SCN (Scene)*2 IMAGE QUALITY 3 Menu operations 2 RESET CAMERA MENU SETUP SCN SET OK EXIT MENU *1 xD-Picture Card (Optional) is required. *2 Available when SCN selected. g “SETUP menu” (P.29) 4 • The factory default settings are displayed in gray ( ). 1 CAMERA MENU DIGITAL ZOOM .......................................................
PANORAMA ...........................................................Creating a panoramic picture Panorama shooting lets you create a panoramic picture, using the OLYMPUS Master software from the provided CD-ROM. An Olympus xD-Picture Card (referred to as “Card” in this manual) is required for panorama shooting. Connects pictures from bottom to top Y: The next picture is connected at the right edge. X: The next picture is connected at the left edge. O: The next picture is connected at the top.
2 IMAGE QUALITY Changing the image quality Image quality for still picture shooting and their applications Menu operations 2 Image quality/Image size SHQ FE-130/X-720/X-740 2592 × 1944 FE-140/X-725 2816 × 2112 HQ FE-130/X-720/X-740 2592 × 1944 FE-140/X-725 2816 × 2112 Compression Low compression Standard compression SQ1 2048 × 1536 Standard compression SQ2 640 × 480 Standard compression Application • This is useful for printing large images on A4-size (8 × 10 size) paper.
4 SCN (Scene) Shooting pictures by selecting a scene according to the situation M NIGHT + PORTRAIT /N INDOOR M /b CANDLE /R SELF PORTRAIT /c AVALIABLE LIGHT /S SUNSET /c FIREWORKS /j MUSEUM /V BEHIND GLASS /V CUISINE /p DOCUMENTS /i AUCTION /Z BEACH /a SNOW 1 NIGHT + PORTRAIT c BACK MENU SET OK 2 Menu operations N W X • The scene selection screen displays sample images and the shooting mode to best suit the situation.
q Playback mode menu For still pictures 2 4 Menu operations 2 5 SLIDESHOW EDIT PRINT ORDER CALENDAR PLAYBACK MENU SETUP INDEX ERASE EXIT SET OK MENU g “SETUP menu” (P.29) 6 3 4 For movies 1 MOVIE PLAY CALENDAR 5 INDEX EXIT 1 PLAYBACK MENU 0 y*1 2 SLIDESHOW 3 MOVIE PLAY 4 CALENDAR 5 INDEX 6 ERASE SEL.
y....................................................................................................Rotating pictures +90° / 0° / –90° y y y EXIT OK EXIT OK EXIT OK +90° 0° –90° • You can select the picture to rotate by pressing X/Y. 2 SLIDESHOW NORMAL Playing back pictures automatically /FADER /SLIDE • • • • SLIDESHOW NORMAL FADER SLIDE 2 Menu operations Pictures taken with the camera held vertically are displayed horizontally.
3 MOVIE PLAY Playing back movies Select the data with n and press F to playback a movie. Selecting [MOVIE PLAY] from the top menu and pressing F will also playback a movie. ’06 06.02 02.16 16 12 12:30 30 100-0004 100 0004 MOVIE PLAY OK Menu operations 2 4 Operations during movie playback Press F to pause playback. Press F again to replay the movie. HQ 320×24 32 240 Playing time/Total recording time ’06 06.02 02.
4 CALENDAR Playing back pictures in a calendar When a still picture or movie is recorded, it is automatically registered to the calendar by the date of recording. g“Zoom lever Zooming while shooting/close-up playback” (P.11) 5 INDEX Viewing the pictures as an index Pictures are shown on the index display. g“Zoom lever Zooming while shooting/close-up playback” (P.11) 6 ERASE Erasing pictures SEL. IMAGE ...................................................................Erasing selected picture SEL.
7 EDIT Editing still pictures You can edit a picture recorded on the internal memory or on the card and save it as a new picture. Q ...............................................................................Reducing the size of picture 640 × 480 /320 × 240 This changes the image size of a picture and saves it as a new file. Menu operations 2 P ...........................................................................
TITLE ..........................................................................Adding titles to the pictures Adds a selected title to a picture and saves it as a new picture. TITLE SELECT SET OK • Press X/Y to select a picture, and press F. • Press X/Y to select a title, and press F. Press O/N to rotate the picture 90° clockwise or counterclockwise. • Adjust the position and size of the title, and press F. • Press O/N/X/Y to select the color of the title, and press F.
BRIGHTNESS ............................................Changing brightness of the pictures Adjusting the brightness of a picture and saves the picture as a new file. • Adjust the brightness by pressing O/N. BRIGHTNESS BACK Menu operations 2 MENU SET OK SATURATION ...................................... Changing color strength of the pictures Adjusting the color strength of a picture and saves the picture as a new file. • Adjust the color strength by pressing O/N.
SETUP menu Shooting mode SETUP 1 2 3 4 5 6 7 8 IMAGE QUALITY RESET CAMERA MENU SETUP SCN EXIT SET OK MENU SLIDESHOW CALENDAR EDIT PRINT ORDER PLAYBACK SETUP MENU INDEX EXIT *1 xD-Picture Card (Optional) is required. *2 This setting is not available in the playback mode.
4 COLOR NORMAL Setting the color of the menu screens /GREEN / PINK 5 PIXEL MAPPING Menu operations 2 Adjusting the image processing function The pixel mapping function allows the camera to check and adjust the CCD and image processing functions. It is not necessary to operate this function frequently. Approximately once a year is recommended. Wait at least one minute after taking or viewing pictures to allow the pixel mapping function to perform properly.
8 VIDEO OUT Playing back pictures on a TV NTSC / PAL The factory default settings differ according to the region where the camera is sold. Playing back pictures on a TV Turn off the camera and the TV before connecting. Connector cover Multi-connector Connect to the TV’s video input (yellow) terminal. 2 Menu operations To play back camera images on a TV, set the video output according to your TV’s video signal type. • The video signal types for different countries and districts are written below.
3 Printing pictures 3 Printing pictures Printing pictures 3 You can print out the pictures you have taken. If you print the pictures at home, you can either connect the camera directly to the printer or you can connect the camera to a computer and download the pictures to the computer first. If you go to a photo store, it is a good idea to store the print reservation data on the card first.
Direct printing (PictBridge) Using the direct printing function By connecting the camera to a PictBridge-compatible printer, you can print out pictures directly. Select the pictures you want to print and the number of prints on the camera’s monitor. To find out if your printer is compatible with PictBridge, refer to the printer’s instruction manual. What is PictBridge? A standard for connecting digital cameras and printers of different makers and printing out pictures directly.
3 Press the < button. • Printing starts. EASY PRINT START < PC / CUSTOM PRINT OK • When printing is finished, the picture selection screen is displayed. To print another picture, press X/Y to select a picture, and press the < button. • When you have finished, disconnect the USB cable from the camera with the picture selection screen displayed. Printing pictures 3 34 4 Disconnect the USB cable from the camera. 5 Disconnect the USB cable from the printer.
Other print modes and print settings (CUSTOM PRINT) 1 Follow the step 1 and 2 on page 33 to display a scene shown right, and press F. EASY PRINT START < PC / CUSTOM PRINT OK 2 Select [CUSTOM PRINT], and press F. Operation guide 3 USB PC EASY PRINT CUSTOM PRINT EXIT SET OK Follow the operation guide to set each setting. 3 Printing pictures • When the camera turned off is connected to a PC with the attached USB cable, the [USB] screen appears on the monitor of the camera.
Setting the printing paper SIZE PRINTPAPER SIZE STANDARD BACK MENU BORDERLESS STANDARD SET OK Printing pictures 3 Choose from the available paper sizes on your printer. BORDERLESS Select framed or unframed. In [MULTI PRINT] mode, this function is not available. OFF ( ) The picture is printed inside a blank frame. ON ( ) The picture is printed filling the entire page. PICS/SHEET Available in [MULTI PRINT] mode only. The number of prints that can be printed vary depending on the printer.
e_advanced_03_print_7.fm Page 37 Tuesday, December 27, 2005 9:16 AM Setting the number of prints and data to be printed <× PRINT INFO < 1 DATE WITHOUT FILE NAME WITHOUT P BACK MENU SET OK DATE ( ) FILE NAME ( P Sets the number of prints. You can select up to 10 prints. If you select [WITH], pictures are printed with the date. ) If you select [WITH], pictures are printed with the file name. Crops part of a picture and prints it.
6 Disconnect the USB cable from the camera. • The camera turns off. 7 Printing pictures 3 38 Disconnect the USB cable from the printer.
Print settings (DPOF) How to make print reservations Print reservation allows you to save printing data (the number of prints and the date and time information) with the pictures stored on the card. Only the images stored on the card can be reserved to print. Insert a card with recorded pictures into the camera before making print reservations. Pictures with print reservations can be printed using the following procedures.
Single-frame reservation Follow the operation guide to make a print reservation for a selected picture. 1 In the playback mode, press the MENU button to display the top menu. 2 Select [PRINT ORDER] F. [<], and press < PRINT ORDER < U Operation guide 3 Printing pictures 3 BACK Press X/Y to select the frames for print reservations, and then press O/N to set the number of prints. • You cannot make print reservations for pictures with A.
5 Select the date and time print setting, and press F. NO 6 The pictures are printed without the date and time. DATE The selected pictures are printed with the shooting date. TIME The selected pictures are printed with the shooting time. X Select [SET], and press F. NO DATE TIME BACK MENU SET OK < PRINT ORDER 2 ( 4 ) SET CANCEL BACK MENU SET OK Reserves all the pictures stored on the card. The number of prints is set at one print per picture.
Resetting print reservation data You can reset all the print reservation data or just for selected pictures. 1 Select the top menu [PRINT ORDER], and press F. To reset the print reservation data for all the pictures 2 3 Select [<] or [U], and press F. Select [RESET], and press F. PRINT ORDER SETTING PRINT ORDERED RESET KEEP Printing pictures 3 BACK MENU SET OK To reset the print reservation data for a selected picture 2 3 4 Select [<], and press F. Select [KEEP], and press F.
4 Connecting the camera to a computer 4 Connecting the camera to a computer Flow Using the USB cable provided with your camera, you can connect the camera to a computer and download (transfer) the images to your computer using the OLYMPUS Master software, also provided with the camera. Prepare the following items before starting. Install the OLYMPUS Master software gP.44 Connect the camera to the computer gP.48 using the USB cable OLYMPUS Master CD-ROM USB cable Start up the OLYMPUS Master software gP.
Install the OLYMPUS Master software Before installing the OLYMPUS Master software, please confirm that your computer is compatible with the following system requirements. For newer operating systems, please refer to the Olympus web site as shown on the back cover of this manual.
Note • Operation is only guaranteed on a Macintosh equipped with a built-in USB port. • QuickTime 6 or later and Safari 1.0 or later should be installed on your computer. • Be sure to remove the media (drag & drop onto the trash icon) before performing the following operations. Failure to do so could result in unstable computer operation and the need to reboot. • Disconnect the cable connecting the camera to the computer. • Turn off the camera. • Open the camera’s battery compartment/card cover.
4 Follow the on-screen instructions. • When the OLYMPUS Master licensing agreement is displayed, read the agreement and click “Yes” to proceed with the installation. • When the “User Information” dialog box is displayed, enter your “Name” and “OLYMPUS Master Serial Number”; select your region and click “Next”. For the serial number, refer to the sticker on the CD-ROM package. • When the DirectX licensing agreement is displayed, read the agreement and click “Yes”.
Macintosh 1 Insert the CD-ROM into the CD-ROM drive. • The CD-ROM window is displayed. • If the CD-ROM window is not displayed, double-click the CD-ROM icon on the desktop. 2 3 Double-click on the desired language folder. Double-click the “Installer” icon. • The OLYMPUS Master installer starts up. • Follow the on-screen instructions. • When the OLYMPUS Master licensing agreement is displayed, read the agreement and click “Continue” and then “Agree” to proceed with the installation.
Connecting the camera to a computer 1 Make sure the camera is turned off. • The monitor is off. • The lens is retracted. Monitor 2 Connector cover • Refer to your computer’s instruction manual to locate the position of the USB port. 4 Connecting the camera to a computer Connect the multi-connector on the camera to the USB port on the computer using the provided USB cable. • The camera turns on automatically. • The monitor turns on and the selection screen for the USB connection is displayed.
Start up the OLYMPUS Master software Windows 1 Double-click the “OLYMPUS Master” icon on the desktop. • The main menu is displayed. • When OLYMPUS Master is started up for the first time after installation, the “Registration” dialog box is displayed before the main menu. Follow the prompts and fill in the registration form. Macintosh 1 Double-click the “OLYMPUS Master” icon Master” folder. in the “OLYMPUS • The main menu is displayed.
To exit OLYMPUS Master 1 Click “Exit” on the main menu. • OLYMPUS Master is exited. Displaying camera images on a computer Downloading and saving images 1 Click “Transfer Images” menu. on the OLYMPUS Master main • The menu for selecting the source is displayed. 2 . • The window for selecting images is displayed. All the images in the camera are displayed. 4 Connecting the camera to a computer Click “From Camera” 3 Select the image files and click “Transfer Images”.
2 Make the following preparations for disconnecting the USB cable. Windows 98SE 1 Double-click the “My Computer” icon and right-click the “Removable Disk” icon to display the menu. 2 Click “Eject” on the menu. Windows Me/2000/XP Macintosh 1 The trash icon changes to the eject icon when the “Untitled” or “NO_NAME” icon on the desktop is dragged. Drag and drop it on the eject icon. 3 Disconnect the USB cable from the camera.
Viewing still pictures and movies 1 Click “Browse Images” menu. on the OLYMPUS Master main • The “Browse” window is displayed. 2 Double-click the still picture thumbnail that you want to view. Thumbnail • The camera switches to view mode and the picture is enlarged. Connecting the camera to a computer 4 • To return to the main menu, click “Menu” in the “Browse” window. To view a movie 1 Double-click the movie thumbnail that you want to see in the “Browse” window.
Printing pictures Pictures can be printed from the photo, index, postcard and calendar menus. The explanation below uses the photo menu. 1 Click “Print Images at Home” menu. on the OLYMPUS Master main • The print menu is displayed. 2 Click “Photo” . • The “Photo Print” window is displayed. 3 • The printer settings screen is displayed. Make the necessary printer settings. 4 Select a layout and size.
6 Select the number of copies. 7 Click “Print”. • Printing starts. • Click “Menu” in the “Photo Print” window, to return to the main menu. To download and save images to a computer without using OLYMPUS Master Connecting the camera to a computer 4 54 This camera is compatible with USB mass storage. You can connect the camera to the computer using the USB cable provided with the camera to download and save images without using OLYMPUS Master.
5 Getting to know your camera better G585 Getting to know your camera better Shooting tips and information Tips before you start taking pictures The camera does not turn on even when a battery is loaded The batteries are loaded incorrectly • Reload the batteries correctly. The batteries are exhausted • Replace the batteries with new ones, or charge the batteries.
The memory gauge is full • No pictures can be taken when the memory gauge is full. Wait until there is space in the memory gauge. a Before taking any pictures (Off) b Shoot Shoot After taking one picture (Lit) c After taking several pictures (Lit) Shoot Wait d Maximum reached (All lit) The time and date have not been set Using the camera with the default setting • The default setting of the date and time is not correct. Set the correct time and date. g “X Setting the date and time” (P.
Subjects that are difficult to focus on • Under certain types of conditions, it is difficult to focus using auto focus. The green lamp on the monitor lights, allowing you to check if the focus is locked. The green lamp blinks. The subject cannot be brought into focus.
Taking pictures without the flash The flash fires automatically when there is insufficient light. If the subject is too far away, the flash may have no effect. Here is how to take pictures without the flash in this type of situation. Set the camera to h mode • The sensitivity of the CCD increases automatically, you can hold the camera and take pictures in darker places with the flash off. g “h Shooting pictures using image blur reduction” (P.10) Set the flash mode to $ (Flash off).
Additional shooting tips and information Increasing the number of pictures that can be taken There are two ways to record the pictures you take with this camera. Recording pictures to the internal memory • Pictures are recorded to the internal memory, and when the number of storable still pictures reaches 0, you must connect the camera to a computer to download the pictures, and then erase the pictures from the internal memory.
Using a new card • If you use a non-Olympus card or a card used for another application, such as for a computer, the message [CARD ERROR] is displayed. To use this card with this camera, use the [FORMAT] function to format the card. g “MEMORY FORMAT (FORMAT) Formatting the internal memory or card” (P.29) Lamp indicators This camera uses several lamps to indicate the camera status. Lamp The lamp lights for approximately 10 seconds, blinks for approximately 2 seconds, and then the picture is taken.
Functions that cannot be selected from menus • Some items may not be selectable from the menus when using the arrow pad. • Items that cannot be set with the current shooting mode • Items that cannot be set because of the combination of the items that have already been set: [%] and [FLASH MODE], etc. • Some functions cannot be used when there is no card in the camera.
e_advanced_05_shiritai_7.fm Page 62 Friday, December 23, 2005 11:46 AM Playback tips Playing back the pictures stored in the internal memory The card is inserted • When the card is inserted to the camera, the pictures stored in the internal memory cannot be played back. Remove the card first, and play back the pictures. Understanding the settings and other information of pictures taken • Play back a picture, and press the DISP./E button. Press the DISP.
When you get an error message on the camera... Possible cause q There is a problem with the card. This card cannot be used. Insert a new card. Writing to the card is prohibited. The recorded image has been protected (read-only) on a computer. Download the image to a computer and cancel the read-only setting. The internal memory has no available memory and cannot store any new data. Erase unwanted data. Before erasing, insert a card to back up all data or download important pictures to a computer.
Monitor indication CARD SETUP POWER OFF FORMAT SET OK MEMORY SETUP Possible cause Corrective action This card cannot be Format the card or replace. used in this camera. Or, • Select [POWER OFF] and press F. Insert a new card. the card is not formatted. • Select [FORMAT] [YES] and press F. All data on the card is erased. There is an error in the internal memory. Select [MEMORY FORMAT] [YES] and press F. All data in the internal memory is erased. The camera is not connected to the printer correctly.
Functions available in shooting modes and scenes Some functions cannot be set in certain shooting modes. For more details, refer to the table below. Grayed out areas ( ) in the SCN column indicate that to enable the shooting scene in SCN mode, there are restrictions to the functions that can be set. g “Functions with restrictions in shooting scenes” (P.
Functions with restrictions in shooting scenes Scene a Z V N M j P d c R W S X i Function & 9 — 9 — 9 — % 9 — 9 — 9 — Y 9 Flash — 9 Optical zoom 9 IMAGE QUALITY *1 9 DIGITAL ZOOM 9 Getting to know your camera better 5 66 — *1 Only [2048 × 1536] and [640 × 480] are available. *2 Only [640 × 480] are available.
Glossary of terms CCD (Charge-Coupled Device) This converts light passing through the lens into electrical signals. On this camera, light is picked up and converted into RGB signals to build a single image. DCF (Design Rule for Camera File System) A standard for image files by the Japan Electronics and Information Technology Industries Association (JEITA). DPOF (Digital Print Order Format) This is for saving desired print settings on digital cameras.
Pixels A pixel is the smallest unit (dot) used to make up an image. Clear large-sized printed images require millions of pixels. Sleep mode A mode designed to save battery life. The camera automatically enters the sleep mode if you do not operate it for a certain time. To exit the sleep mode, use any button on the camera (shutter button, arrow pad, etc.). TFT (Thin-Film Transistor) Color Monitor A transistor color monitor constructed using thin-film technology.
6 Miscellaneous 6 Miscellaneous Camera care Cleaning the camera Exterior: • Wipe gently with a soft cloth. If the camera is very dirty, soak the cloth in mild soapy water and wring well. Wipe the camera with the damp cloth and then dry it with a dry cloth. If you have used the camera at the beach, use a cloth soaked in clean water and wrung well. Monitor: • Wipe gently with a soft cloth. Lens: • Blow dust off the lens with a commercial blower, then wipe gently with a lens cleaner.
The battery (In addition to the batteries provided with the camera, the following types of battery can be used. Choose the power source best suited to the situation. AA alkaline batteries/ Oxyride batteries The number of pictures that you can take may vary considerably depending on the battery manufacturer and shooting conditions. AA NiMH batteries (rechargeable batteries) Olympus NiMH batteries are rechargeable and economical. For details, refer to the instruction manual for your charger.
Useful use of the accessories The card Pictures can be recorded on the optional xD-Picture Card. The internal memory and card are the camera’s media for recording pictures, similar to film in a film camera. Pictures recorded to the internal memory or card can be easily erased on the camera or processed using a computer. Unlike portable storage media, the internal memory cannot be removed or exchanged. The number of recordable pictures can be increased by using a card with a larger capacity.
Inserting and removing the card 1 2 Turn off the camera. Open the battery compartment/card cover. 2 Battery compartment/ Card cover Inserting the card 3 Orient the card, and insert it into the card slot as shown in the illustration. 1 3 Cover lock Notch • Insert the card straight in. • Insert the card until it clicks into place. Index area Removing the card 3 Miscellaneous 6 Push the card all the way in and release slowly. • The card protrudes slightly and stops. • Grasp the card and remove.
Note • The card access lamp blinks while the camera is reading the images. Reading of images may take some time. Do not open the Battery compartment/ Card cover while the card access lamp is blinking. Doing so may damage the data in the internal memory or the card and render the internal memory or card unusable. Card access lamp AC adapter An AC adapter is useful for time-consuming tasks such as image downloads to a computer or when running a slideshow for a long period of time.
Safety Precautions Caution for Usage Environment Miscellaneous 6 74 • To protect the high-precision technology contained in this product, never leave the camera in the places listed below, no matter if in use or storage: • Places where temperatures and/or humidity are high or go through extreme changes. Direct sunlight, beaches, locked cars, or near other heat sources (stove, radiator, etc.) or humidifiers. • In sandy or dusty environments. • Near flammable items or explosives.
• Using, charging, or storing the batteries outside these ranges could shorten battery life or affect battery performance. Always unload the batteries from the camera before storing the camera for a long period. • Before using NiMH or NiCd batteries, always read the provided instructions. • The number of pictures you can take may vary depending on the shooting conditions or batteries. • Before going on a long trip, and especially before traveling abroad, purchase an ample supply of extra batteries.
Warning Unauthorized photographing or use of copyrighted material may violate applicable copyright laws. Olympus assumes no responsibility for unauthorized photographing, use or other acts that infringe upon the rights of copyright owners. Copyright Notice All rights reserved.
Index S button (Erase) . . . . . . . . . . . . . . 13 OF button (Exposure compensation) . . . . . 12 Y# button (Flash mode) . . . . . . . . 13 X& button (Macro) . . . . . . . . . . . . 12 F button (OK) . . . . . . . . . . . . . . . 12 q button (Playback mode) . . . . . . . 9 < button (Print) . . . . . . . . . . . . 13, 34 NY button (Self-timer) . . . . . . . . . 13 K button (Shooting mode) . . . . . . . 9 Card access lamp . . . . . . . . 50, 60, 73 CCD . . . . . . . . . . . . . . . . . . . . .
Formatting . . . . . . . . . . . . . . . . . . . 29 FRAME . . . . . . . . . . . . . . . . . . . . . . 26 G Green lamp . . . . . . . . . . . . . . . . 8, 60 GUIDE SHOOTING . . . . . . . . . . . . 10 H HQ . . . . . . . . . . . . . . . . . . . . . . . . . 20 I IMAGE QUALITY . . . . . . . . . . . . . . 20 Image size . . . . . . . . . . . . . . . . 20, 67 INDEX . . . . . . . . . . . . . . . . . . . . . . 25 Index display G . . . . . . . . . . . . . . 11 INDOOR N . . . . . . . . . . . . . . . . . .
Remaining recording time . . . . . . . 10 RESET . . . . . . . . . . . . . . . . . . . . . . 20 Resizing Q . . . . . . . . . . . . . . . . . . 26 U S V SATURATION . . . . . . . . . . . . . . . . 28 SCN (Scene) . . . . . . . . . . . . . . . 9, 21 SEL. IMAGE S . . . . . . . . . . . . . . . . 25 Selecting a language W . . . . . . 29 SELF PORTRAIT R . . . . . . . . . . . 21 Self-timer Y . . . . . . . . . . . . . . . . . . 13 Self-timer lamp . . . . . . . . . . . . . 13, 60 SEPIA . . . . . . . . . . . . . . .
http://www.olympus.com/ Shinjuku Monolith, 3-1 Nishi-Shinjuku 2-chome, Shinjuku-ku, Tokyo, Japan Two Corporate Center Drive, P.O. Box 9058, Melville, NY 11747-9058, U.S.A. Tel. 631-844-5000 Technical Support (USA) 24/7 online automated help: http://www.olympusamerica.com/support Phone customer support: Tel. 1-888-553-4448 (Toll-free) Our phone customer support is available from 8 am to 10 pm (Monday to Friday) ET E-Mail: distec@olympus.com Olympus software updates can be obtained at: http://www.olympus.