
User Mannual

55
EN
Other shooting options
2
3D Photography
Take 3D photographs. The results can be viewed on devices that support 3D display.
The camera monitor can not be used to view images in 3D.
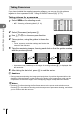
1
Select SCN as the shooting mode.
g “Choosing a Shooting Mode” (P. 12) •
P
A
S
M
A
SCNART
n
SETUP
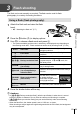
2
Select [3D Photo] and press Q.
3
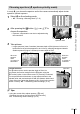
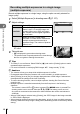
Press the shutter button to take the fi rst shot
and keep the shutter button in this position.
Focus and exposure are locked at the values for the
fi rst shot.
•
Cancel
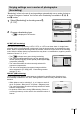
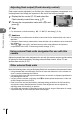
Line up the image.
4
Move the camera horizontally without rotation until the fi rst shot is
superimposed on your subject. The camera will take the second shot
automatically.
If the camera does not take the second shot automatically or if you released the
shutter button before the second shot was taken, press the shutter button all the way
down again.
Do not adjust focus or zoom.
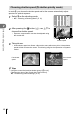
5
The two images are combined automatically.
If the camera displays the message [3D photo was not created.], take the photograph
again. The two shots are saved to separate fi les.
# Cautions
Adjusting zoom after the fi rst shot is taken cancels the fi rst shot.
The camera focuses on the subject in the center focus point only.
Image size is fi xed at 1920 × 1080.
3D and manual focus lenses can not be used.
Depending on the lens and camera settings, the 3D effect may not be visible.
The camera will not go to sleep during 3D photography.
RAW photography is not available.
Frame coverage is not 100%.
$ Notes
Press Q to save the fi rst shot and exit without recording a 3D image.
•
•
•
•
•
•
•
•
•
•
•
•