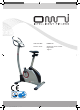
ARTICLE NO.: Article name: OMB2010 Generator Home trainer Ergometer Tagma ! OMB2010 Tagma_Instructions manual 2011_GB.indd 1 23.01.
INTRODUCTION EXPLANATION OF SYMBOLS DEAR CUSTOMER, Congratulations on your purchase of an OMNI home trainer. Home trainers are still the most popular fitness equipment. A new era has begun for OMNI brand products - OMNI Intelligent Fitness is the new brand for innovative fitness equipment. With our dynamic and elegant design, OMNI represents the leading edge in technology, ecological sustainability and quality. In the home trainer field in particular, our focus is on precision action.
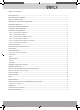
TABLE OF CONTENTS INTRODUCTION...................................................................................................................................... 2 EXPLANATION OF SYMBOLS................................................................................................................. 2 SAFETY INSTRUCTIONS......................................................................................................................... 4 ASSEMBLING THE FITNESS EQUIPMENT................................
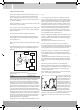
SAFETY INSTRUCTIONS This device complies with the requirements of the standards EN 957-1, EN 957-5, use class H (H = home use). The device is designed for home use. The device was tested taking safety factors according to European standard EN 957 into consideration. Please note that this is a class A exercise device. It thus has an extremely accurate display. This is a speed and/or rpm independent device. When operating the device the resistance is kept constant independently of the speed.
Intended use: The device is intended only for the purpose of exercising as described in this instruction manual. The exercise equipment is designed for use by one person only at any given time. 3. Remove all parts from the transport packaging and remove all protective films, transport straps, and belts. Caution: Avoid protective foils from becoming a deadly trap for children (danger of suffocation!).
ASSEMBLY PARTS LIST Part A A-1 Designation Computer Phillips screw Quantity 1pc 4pc B C C-1 C-2 D D-1 D-3 D-4 D-15 R D-15 L D-26 D-28 H I J J-2 J-11 K-1 K-2 K-3 K-4 K-5 K-6 K-7 K-8 K-9 K-10 M Handle set Handlebar column Computer wire handlebar column Phillips screw Main frame Flat washer Allen screw Main frame computer wire Right pedal Left pedal D/C power cable Bottle holder Front stabilizer Rear stabilizer Seat post Hand knob for vertical saddle adjustment Saddle Handlebar locking clamp Front handl
EXPLODED ASSEMBLY DRAWING SCOPE OF DELIVERY: Installation tools: Allen key, screw driver with flat spanner, multifunctional tool, installation and operation manual. Assembly parts as described in enclosed list of parts. (Some pre-assembled) OMB2010 Tagma_Instructions manual 2011_GB.indd 7 Note: Before you starting assem- bling the equipment, you should allow it to acclimatise at room temperature for one to two hours. 23.01.
TECHNICAL SPECIFICATIONS Article number: OMB2010 Net weight: 29,4 kg Dimensions: 85 x 51 x 147 cm (LxWxH) Max. user weight: 150 kg Standards: EN-957-1, EN-957-5 Flywheel mass system: ca. 14 kg Power supply: Generator and A/C current 110-230V Pulse measurement: Hand-pulse sensors/heart rate receiver (chest belt not included in scope of delivery) www.omni-fitness.eu OMB2010 Tagma_Instructions manual 2011_GB.indd 8 23.01.
OVERVIEW OF EQUIPMENT 147 cm 85 cm OMB2010 Tagma_Instructions manual 2011_GB.indd 9 51 cm 23.01.
Assembly instructions: Some parts of the equipment are heavy and difficult to handle. Make sure that a second person helps you with the assembly. STEP 1 - Assembling the stabilizers Hold the front stabilizer (H) against the main frame (D) and secure in place with 4 Allen screws (K-9). Make sure that the rollers on the stabilizer (30) are pointing downward. STEP 1 rear stabilizer (H) against the main frame (D) and Hold the secure in place with 4 Allen screws (K-9).
STEP 4 - Assembling the handlebar 1. Hold the handlebar (B) against the cut-out on the handlebar column (C). Secure the handlebar (B) with the handlebar clamp (K-1), a spring washer (K-3), a washer (K-4), and an Allen screw (K-5). 2. Route the hand pulse cable (B-4) through the drill hole on the front of the handlebar column (C) and back out at the top. 3. Secure the front cover (K-2) with a spring washer (K-3), a washer (K-4), a spacer sleeve (K-6) and the T-grip hand screw (K-7). 4.
COMPUTER FUNCTIONS AND USE FUNCTIONS Starting or ending exercise programs "Fitness grade" between 1- 6 after completing training. Press the button; then press the balls of your hands against the hand pulse sensors for 60 sec. You will see your fitness grade F1 - Very good - F6 - very poor Starting body fat measurement 2 functions: 1. Before training: Toggle between the presets. 2. During training: Adjust the resistance. Press these keys to set your training presets in ascending order.
USER PROGRAMS target pulse frequency, the pedal resistance level will automatically be raised by one level every 30 seconds and automatically reduced by one load level every 15 seconds once you reach the set value. If you reach the lowest load level, "1", and if your pulse frequency is still above the set value, an audible signal is issued 6 times every 30 seconds and the computer program stops automatically.
WATTS 1. The number 120 flashes on the display in this mode. You can now preset your personal Wattage between 10 and 350 Watts by pressing the Up and Down keys. Press the Mode key to confirm your entry. 2. A TIME message flashes in the lower display. Enter your exercise values. You can press the Mode key to confirm your entries for each function. Preset options for TIME, DISTANCE, approx. CALORIES and PULSE. 3. Press the Start key to start training. 4. Body fat 1.
Finding the right sitting position. Adjusting the saddle height Handlebar inclination 1. Turn the hand screw slightly counter-clockwise. Handschraube 1. Pull out the height adjustment mechanism and keep tight hold of it. 2. Set the required saddle height. 3. Release the height adjustment mechanism. Make sure that it audibly snaps back into place. Determining the optimum saddle height. 1. Move one pedal to the lowest position and sit down on the saddle. 2.
HAND PULSE SENSORS & HEART RATE MONITOR Measuring your pulse There are two ways to measure your pulse: • using a standard pulse rate transmitter, or • with the two hand sensors on the handlebar If you have a pacemaker, note that you must not use the pulse rate transmitter, or consult your doctor for advice. Measuring your pulse with the pulse rate transmitter If you want to monitor your pulse permanently, use a pulse rate transmitter such as a chest belt.
And now: On your marks, set, go! Important note: Before you start with your personal exercise program, observe the safety instructions in the introduction to the user's manual. Always take sufficient time for fitness training, and always allow time for a warm-up and cool-down phase. How often and how long should I exercise? Experts recommend regular exercise to get fit. Random exercise is not the right approach to achieving training success.
OUTPUT CHART This output chart gives you a perfect reference for your exercise program. Regular training will help you raise your personal targets and improve your fitness level. Date Resting pulse Exercise pulse Recovery pulse Load level Time in min. Distance covered Energy consumption Fitness grade www.omni-fitness.eu OMB2010 Tagma_Instructions manual 2011_GB.indd 18 23.01.
OUTPUT CHART Date Resting pulse OMB2010 Tagma_Instructions manual 2011_GB.indd 19 Exercise pulse Recovery pulse Load level Time in min. Distance covered Energy consumption Fitness grade 23.01.
CARE Though the surface of your exercise equipment is resilient to perspiration, it must be cleaned from time to time to ensure hygienic training. To protect the device against excessive soiling during exercising, we recommend the use of a towel. When cleaning the equipment, never use corrosive or aggressive cleaning agents that could damage the surface. Use only a soft damp cloth. Always clean the device after use. STORAGE Keep the equipment in a dry, well ventilated place out of the reach of children.
WARRANTY The warranty period is 24 months (for home use) within the European Union. The warranty period begins on the date of purchase/invoice or delivery. The warranty applies to manufacturing errors or material defects.
OMB2010 Tagma_Instructions manual 2011_GB.
EXPLODED DRAWING OMB2010 Tagma_Instructions manual 2011_GB.indd 23 23.01.
OMNI Service An der Nordhelle 19 D-51645 Gummersbach Tel.: (0049) - (0)1805 - 346412 0.14 Euros/min. from land lines in German/German cellular networks maximum 42 cents/min. Other charges apply when calling from abroad. (Rates: dated Feb./2011) Monday – Friday 9.00 am to 6.00 pm Email: service@omni-fitness.eu All models of Stamm Sport & Freizeit GmbH are subject to ongoing further development.