BEDIENUNGSANLEITUNG USER'S MANUAL MODE D'’EMPLOI DD-2520/DD-2550 USB Direct-Drive Turntable Für weiteren Gebrauch aufbewahren! Keep this manual for future needs! Gardez ce mode d’emploi pour des utilisations ultérieures! Guarde este manual para posteriores usos. © Copyright Nachdruck verboten! Reproduction prohibited! Réproduction interdit! Prohibida toda reproducción.
MULTI-LANGUAGE-INSTRUCTIONS Inhaltsverzeichnis Table of contents/Sommaire EINFÜHRUNG ................................................................................................................................................... 3 SICHERHEITSHINWEISE................................................................................................................................. 4 BESTIMMUNGSGEMÄSSE VERWENDUNG ...............................................................................................
BEDIENUNGSANLEITUNG DD-2520/DD-2550 USB Direct-Drive-Plattenspieler Lesen Sie vor der ersten Inbetriebnahme zur eigenen Sicherheit diese Bedienungsanleitung sorgfältig durch! Alle Personen, die mit der Aufstellung, Inbetriebnahme, Bedienung, Wartung und Instandhaltung dieses Gerätes zu tun haben, müssen - entsprechend qualifiziert sein - diese Bedienungsanleitung genau beachten - die Bedienungsanleitung als Teil des Produkts betrachten - die Bedienungsanleitung während der Lebensdauer des Produkts behalte
• Lieferung inklusive abnehmbarer Acryl-Staubschutzhaube • Einstellbares Anti-Skating • Schockabsorbierende Stellfüße • Ausgang umschaltbar Phono/Line • USB 1.1 Unterstützung • Kompatibel zu Windows® XP und MAC OSX SICHERHEITSHINWEISE ACHTUNG! Seien Sie besonders vorsichtig beim Umgang mit gefährlicher Netzspannung. Bei dieser Spannung können Sie einen lebensgefährlichen elektrischen Schlag erhalten! Dieses Gerät hat das Werk in sicherheitstechnisch einwandfreiem Zustand verlassen.
BESTIMMUNGSGEMÄSSE VERWENDUNG Bei diesem Gerät handelt es sich um einen professionelles Plattenspieler, mit dem sich Standard LPs und Singles abspielen lassen. Dieses Produkt ist für den Anschluss an 115/230 V, 50/60 Hz Wechselspannung zugelassen und wurde ausschließlich zur Verwendung in Innenräumen konzipiert. Vermeiden Sie Erschütterungen und jegliche Gewaltanwendung bei der Installierung oder Inbetriebnahme des Gerätes.
BESCHREIBUNG DER TEILE 1. 2. 3. 4. Puck Plattenteller Stift Spannungswahlschalter (unter dem Plattenteller) 5. Netzschalter mit Strobelampe 6. START/STOP-Taster 7. Headshell 8. Nadellampe mit Lampenschalter 9. USB-Anschluss 10. Tonarm 11. Geschwindigkeitsschalter 12. Pitchanzeige 13. Pitchfader 6/25 14. Tonarmstütze 15. Tonarmlift 16. Anti-Skating-Rad 17. Systemhalter 18. Gegengewicht 19. Scharnier 20. PHONO/LINE-Schalter 00030007.DOC, Version 1.
ANSCHLÜSSE Verbinden Sie die Cinch-Kabel (weiß=linker Kanal, rot=rechter Kanal) mit den PHONO-Eingangsbuchsen Ihres Verstärkers bzw. Mischpultes. Sie können auch einen Line-Eingang verwenden, wenn Sie den PHONO/LINE-Schalter auf Line stellen. Schließen Sie den Plattenspieler über den USB-Anschluss an den Computer an. Schließen Sie den Plattenspieler ans Netz an. EINSTELLUNGEN A) Einstellen des Tonarmgegengewichts: • Entfernen Sie den Nadelschutz. • Stellen Sie den ANTI-SKATE Drehknopf auf "0".
• Wenn Sie das Abspielen der Schallplatte kurz unterbrechen wollen, stellen Sie den Tonarmlift in die "AUF" Position. Wenn Sie die Schallplatte weiter abspielen lassen wollen, stellen Sie den Tonarmlift einfach wieder in die "AB" Position. • Wenn Sie den Tonarmlift nicht benötigen, lassen Sie ihn in der "AB" Position. AUSTAUSCHEN DES TONABNEHMERSYSTEMS Lösen Sie die Befestigungsschrauben an der Headshell und ziehen Sie die Verbindungskabel des Tonabnehmersystems ab.
Bitte beachten Sie: Der USB-Plattenspieler wird unter Windows unter Umständen unter einem anderen Namen angegeben. Dies ist abhängig von Ihrem Computermodell und dem Betriebssystem. In 99% aller Fälle enthält der Name das Word „USB“. Installation der Software (MAC) 1. Legen Sie die mitgelieferte CD ein. 2. Öffnen Sie das CD-Symbol auf Ihrem Desktop. 3. Ziehen Sie das Audacity-Installationsverzeichnis auf Ihre Festplatte. Wir Empfehlen das Verzeichnis in Ihrem „Applications“-Verzeichnis abzulegen. 4.
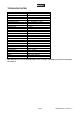
TECHNISCHE DATEN Spannungsversorgung: Gesamtanschlusswert: Typ: Antriebsart: Motor: Drehzahl: Drehzahlübergang: Geschwindigkeitsregelung: Anlaufmoment: Startzeit: Bremszeit: Gleichlaufschwankungen: Rumpeln: Plattenteller: Tonarm: Tonarmlänge: Überhang: Einstellbare Nadelauflagekraft: Anti-Skating-Bereich: Ausgangspegel (Phono): Ausgangspegel (Line): Frequenzgang: Kanaltrennung: Ausgänge: Maße: Gewicht: 115/230 V AC, 50/60 Hz ~ 12 W Manueller Plattenspieler Direktantrieb Bürstenloser 24 V Gleichstrommotor 3
OPERATING INSTRUCTIONS DD-2520/DD-2550 USB Direct-Drive-turntable CAUTION! Keep this device away from rain and moisture! Unplug mains lead before opening the housing! For your own safety, please read this user manual carefully before you initial start-up.
• Adjustable anti-skating • Shock-absorbing feet • Switchable output phono/line • USB 1.1 support • Suitable for Windows® XP and Mac OSX SAFETY INSTRUCTIONS CAUTION! Be careful with your operations. With a dangerous voltage you can suffer a dangerous electric shock when touching the wires! This device has left our premises in absolutely perfect condition.
OPERATING DETERMINATIONS This device is a professional turntable for playing standard LPs or Singles. This product is allowed to be operated with an alternating current of 115/230 V, 50/60 Hz and was designed for indoor use only. Do not shake the device. Avoid brute force when installing or operating the device. When choosing the installation-spot, please make sure that the device is not exposed to extreme heat, moisture or dust. There should not be any cables lying around.
GENERAL DESCRIPTION 1. 2. 3. 4. 45 RPM adaptor Platter Center Voltage selector (underneath the platter) 5. Power switch with strobe-lamp 6. START/STOP-button 7. Headshell 8. Target light with switch 9. USB-port 10. Tonearm 11. Speed-selector 12. Pitch display 13. Pitchfader 14. Armrest 15. Tonarm-lift 16. Anti-Skating-wheel 17. Cartridge holder 18. Counterweight 19. Hinge CONNECTIONS Connect the RCA-cables (white=left channel, red=right channel) with the PHONO IN-sockets of your amplifier or mixer.
ADJUSTING A) Adjusting the counterweight • Remove the stylus cover. • Set the Anti-skating-wheel to the 0 position. • Set the tonearm lift to the down position • Release the tonearm from the armrest and move it to a position between the turntable and the armrest. Make sure that you do not damage the stylus. • Carefully hold the tonearm and adjust the counterweight by turning it clockwise or anti-clockwise respectively. The tonearm should be balanced to a horizontal position.
Connect the Headshell's connection cables with the terminals of the pickup-system and make sure that the occupation of the cables is correct. The different colours mean: Used colour: White (L+) Blue (L-) Red (R+) Green (R-) Channel and poles: Left, plus-pole Left, minus-pole Right, plus-pole Right, minus-pole Tighten the screws on the Headshell. Adjusting the overhang The overhang is the distance between the stylus and the center of the turntable.
Software configuration 1. Click on Microphone in the drop down menu and select Stereo Mix Figure 1: Select Stereo Mix 2. Select the Edit menu and then Preferences Select the USB audio device under the Recording selection as shown. Select Software Playthrough to hear the audio while recording. After completed the above settings, you are ready for recording.
TECHNICAL SPECIFICATIONS Power supply: Power consumption: Type: Drive-method: Motor: Speed: Change-time between speeds: Pitch adjustment: Initial torque: Start time: Stop time: Wow and Flutter: Rumble: Platter: Tonearm: Tonearm-length: Overhang: Adjustable stylus-pressure Anti-Skating-range: Phono output level: Line output level: Frequency range: Channel separation: Output connectors: Dimensions: Weight: 115/230 V AC, 50/60 Hz ~ 12 W Manual turntable Direct-drive Brushless 24 V DC-motor 33 1/3 RPM and 45
MODE D'EMPLOI DD-2520/DD-2550 USB Platine disque Direct-Drive ATTENTION! Protéger de l'humidité. Débrancher avant d’ouvrier le boîtier! Pour votre propre sécurité, veuillez lire ce mode d'emploi avec attention avant la première mise en service.
INSTRUCTIONS DE SECURITE ATTENTION! Soyez prudent, lors de manipulations électriques avec une tension dangereuse vous êtes soumis à des risques d'électrocution! Cet appareil a quitté les ateliers dans un état irréprochable. Pour assurer cet état et un bon fonctionnement sans danger, l'utilisateur doit suivre les instructions de sécurité et les notes d'avertissement contenues dans ce mode d'emploi. Attention: Tout dommage occasionné par la non observation de ce mode d'emploi annule la garantie.
EMPLOI SELON LES PRÉSCRIPTIONS Cet appareil est une platine disque pour jouer des platines standards et singles. Cet appareil doit être connecté avec une tension alternative de 115/230 V, 50/60 Hz et a été conçu pour un usage dans des locaux clos. Evitez les secousses et tout emploi de la force lors de l’installation ou de l'utilisation de l'appareil. Quant au choix de la place d'installation, évitez toutefois les endroits trop chauds, humides ou poussiéreux.
DESCRIPTION 1. 2. 3. 4. Adapteur 45 rmp Plateau Axe central Sélecteur de tension (au-dessus du plateau) 5. Interrupteur ON/OFF avec lampe strobo 6. Commutateur START/STOP 7. Headshell 8. Lumière cible avec interrupteur 9. Connecteur USB 10. Bras de lecture 11. Selecteur de la vitesse 12. Affichage Pitch 13. Pitchfader 14. Porte-bras 15. Levier de commande 16. Régulateur Anti-Skating 17. Porteur du système 18. Contrepoids 19.
AJUSTMENT A) Ajustment du contrepoids • Enlever le capot de protection du diamant. • Mettre la commande anti-derapage à la position 0. • Pousser le levier de commande vers la position "DOWN" (Bas). • Libérez le bras de lecture du porte-bras et positionner le bras de lecture entre Platine disque et porte-bras. Assurez-vous que vous ne détériorez pas le diamant. • L'avancement dans le sens horaire du CONTREPOIDS produira la descente du côté cartouche du BRAS DE LECTURE.
REMPLACER LE SYSTEME Dévissez les vis de fixation du Headshell et retirez les câbles de connexion du système. Retirez le système du Headshell. Veuillez lire le mode d'emploi du nouveau système. Installez la protection du diamant. Connectez les câbles de connection du Headshell avec les points de connection du nouveau systèm et assurez-vous que l'occupation des câbles est correcte.
CARACTERISTIQUES TECHNIQUES Alimentation: Puissance de rendement: Type: Méthode de transmission: Moteur: Vitesse: Transition de vitesse: Vitesse réglable: Couple de démarrage: Pleurage et scintillement: Temps de départ: Temps d'arrêt: Ronflement: Plateau: Bras de lecture: Longeur du bras de lecture: Saillie: Réglage de la pression d'aiguille: Réglage de la commande anti-dérapage: Douilles de connexion: Dimensions: Poids: 115/230 V, 50/60 Hz ~ 12 W Platine disque manuel Transmission directe Moteur cc 24 V s