BEDIENUNGSANLEITUNG USER'S MANUAL Speaker-systems PAS-208 PAS-210 PAS-212 PAS-215 Für weiteren Gebrauch aufbewahren! Keep this manual for future needs! © Copyright Nachdruck verboten! Reproduction prohibited!
Inhaltsverzeichnis Table of contents EINFÜHRUNG................................................................................................................................................... 3 SICHERHEITSHINWEISE................................................................................................................................. 3 Warnzeichen ..................................................................................................................................................
BEDIENUNGSANLEITUNG Lautsprecherboxen ACHTUNG! Gerät vor Feuchtigkeit und Nässe schützen! Niemals das Gerät öffnen! Lesen Sie vor der ersten Inbetriebnahme zur eigenen Sicherheit diese Bedienungsanleitung sorgfältig durch! Alle Personen, die mit der Aufstellung, Inbetriebnahme, Bedienung, Wartung und Instandhaltung dieser Lautsprecherbox zu tun haben, müssen - entsprechend qualifiziert sein - diese Bedienungsanleitung genau beachten - die Bedienungsanleitung als Teil des Produkts betrachten - die Bedienun
LEBENSGEFAHR! Eine herabstürzende Lautsprecherbox kann tödliche Unfälle verursachen. Alle Sicherheitshinweise in dieser Bedienungsanleitung müssen unbedingt eingehalten werden. Bitte beachten Sie, dass Boxen durch Bassschläge und Vibrationen verrutschen können. Außerdem stellen unbeabsichtigte Stöße durch DJs, Musiker oder das Publikum ein erhöhtes Risiko dar. Deshalb muss die Box immer gegen Verrutschen gesichert oder der entsprechende Bereich abgesperrt werden.
BESTIMMUNGSGEMÄßE VERWENDUNG Bei dieser Lautsprecherbox handelt es sich um ein passives System, das sich zur Festinstallation und zum Mobilbetrieb eignet. Die Box ist nur zum Anschluss an einen passenden Verstärker vorgesehen. Die Maximalleistung der Lautsprecherbox darf niemals überschritten werden. Bitte achten Sie während des Betriebes darauf, dass die Lautsprecherbox stets angenehm klingt.
Achten Sie bei der Montage, beim Abbau und bei der Durchführung von Servicearbeiten darauf, dass der Bereich unterhalb des Montageortes abgesperrt ist. Nehmen Sie die Lautsprecherbox erst in Betrieb, nachdem Sie sich mit seinen Funktionen vertraut gemacht haben. Lassen Sie die Lautsprecherbox nicht von Personen bedienen, die sich nicht mit der Anlage auskennen.
Kleine Hörkunde Immer mehr junge Menschen leiden unter einem Hörverlust von 25 Dezibel und mehr, überwiegend hervorgerufen durch laute Musik von tragbaren Kassetten- und CD-Abspielgeräten oder in der Diskothek. Wer Musik über Beschallungsanlagen wiedergibt, sollte wissen, welchen Schallpegeln er sein Gehör und das des Publikums aussetzt. Sie erreichen im zeitlichen Mittel ohne weiteres 75 bis 105 dB(A) in der Disco bzw. 95 bis 115 dB(A) bei einem Rockkonzert.
Zur Erhöhung des Schalldruckes sollen oft zwei Boxenpaare an einen Verstärker angeschlossen werden. Bitte beachten Sie, dass sich die Impedanz halbiert wenn Sie zwei Boxen parallel an einen Kanal (eine Seite) des Verstärkers anschließen. Bitte prüfen Sie, ob der Verstärker für diesen Betriebszustand ausgelegt ist. Beim Anschluss von weiteren Boxenpaaren (z. B. 3 Boxenpaare) an den gleichen Verstärker reduziert sich die Impedanz weiter.
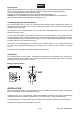
Brückenbetrieb Möglichkeit die Endstufe mono, d.h. über einen Eingangskanal zu betreiben. Beim Brückenbetrieb bleibt der Strom konstant, die Spannung wird verdoppelt. Dadurch verdoppelt sich die Ausgangsimpedanz. Für den Stereobetrieb werden zwei Endstufen benötigt. Schließen Sie das Eingangssignal an die rote Speakerbuchse Mono Bridged an. Achtung! Bevor Sie die Endstufe einschalten beachten Sie bitte die Erläuterungen unter Bedienung. Stellen Sie die Endstufenleistung über den Gain-Regler CH-1 ein.
Zum Transport sind an der Lautsprecherbox zwei Tragegriffe angebracht. Die Box soll an diesen Tragegriffen ruckfrei von zwei möglichst gleich großen Personen getragen werden. Das Tragen der Box durch eine Person soll vermieden werden, da durch das Gewicht der Box und durch die ungünstige Hebelwirkung Rückenschäden und Zerrungen möglich sind. Bitte beachten Sie, dass ab einem Boxengewicht von 25 kg immer zwei Personen zum Transport vorgeschrieben sind.
Beide Kabel sollten gleich lang sein. Beide Kabel sollten geradlinig verlegt werden (keine Schlaufen bilden, Überschüsse S-förmig legen). Kabel immer weit entfernt von Netzzuleitungen verlegen (keinesfalls dicht parallel). Stellen Sie niemals schwere Gegenstände wie Boxen, Flightcases etc. auf Kabel. Wickeln Sie Kabel niemals eng um den Ellenbogen auf, sondern immer glatt und mit einem Innenradius von 20 bis 30 Zentimetern.
Achtung: Über Kopf installierte Lautsprecherboxen können beim Herabstürzen erhebliche Verletzungen verursachen! Wenn Sie Zweifel an der Sicherheit einer möglichen Installationsform haben, installieren Sie die Lautsprecherbox NICHT! Vergewissern Sie sich vor der Montage, dass die Montagefläche mindestens die 10-fache Punktbelastung des Eigengewichtes der Lautsprecherbox aushalten kann.
Bitte beachten Sie: Überprüfen Sie vor dem Eindrehen der Ringösen, ob der Zustand der Gewinde einwandfrei und frei von Verschmutzungen etc. ist. Drehen Sie die Ringösen in die Gewindeöffnungen der Lautsprecherbox. Die Ösen müssen dabei bis zum Anschlag eingedreht und handfest angezogen werden. Verwenden Sie niemals Werkzeug zum Festziehen. Hängen Sie die Schnellverschlussglied der Sicherheitsfangseile in den dafür vorgesehenen Ringösen an der Lautsprecherbox ein.
Stacking Diese Lautsprecherbox darf nur auf eine andere Lautsprecherbox aufgestellt werden, wenn beide Boxen durch passende Spanngurte miteinander verzurrt und gegen Umstürzen gesichert werden. Geeignete Spanngurte: Spanngurt S200 mit Schloss 5m/25mm, Best.-Nr. 60206780 Spanngurt S400 mit Ratsche 5m/25mm, Best.-Nr. 60206785 Geeignete Bühnenelemente: Bühnenelement 100cm x 200cm, indoor, Best.-Nr. 80702810 Bühnenelement 100cm x 200cm, outdoor, Best.-Nr.
Die Aufstellung ist nur auf tragfähigen Flächen zulässig. Gegebenenfalls ist ein geeigneter Unterbau, z.B. durch einen Ausgleichsfuß, zu schaffen. Das System darf niemals bewegt werden bevor das Topteil demontiert ist! Bei der Wahl des Installationsmaterials ist auf optimale Dimensionierung zu achten um optimale Sicherheit zu gewährleisten. Montage auf einem Stativ bzw. Boxenhochständer Die Lautsprecherbox darf nur auf ein Stativ bzw.
Lösen Sie die Feststellschraube der Stellfüße. Ziehen Sie die Stellfüße aus, bis die Querstreben in einem 90° Winkel zu den Stellfüßen stehen. Ziehen Sie die Feststellschraube der Stellfüße fest. ACHTUNG: Auf rutschigen Böden sind die Stellfüße mittels Schrauben oder Nägeln an den vorgesehenen Löchern zu sichern oder Anti-Rutschmatten verwenden. Installation des TV-Zapfens (nur für Stative) Setzen Sie einen passenden TV-Zapfen am oberen Stativende auf und ziehen Sie ihn mit dem seitlichen Hebel fest.
Vorgehensweise: Schritt 1: An der Installationsfläche der Wandhalterung befinden sich die Löcher zur Installation. Schritt 2: Halten Sie die Wandhalterung an die Stelle, wo sie installiert werden soll. Schritt 3: Markieren Sie Ihre Bohrlöcher mit einem Bleistift oder einem geeigneten Werkzeug. Schritt 4: Bohren Sie die Löcher. Schritt 5: Halten Sie die Wandhalterung in der gewünschten Position und schrauben Sie sie fest. Schritt 6: Drehen Sie die Ringösen in die Gewindeöffnungen der Lautsprecherbox.
Horizontale Aufhängung: Bitte beachten Sie: Die horizontale Installation muss immer über drei Ringösen erfolgen. Die Lautsprecherbox muss immer absolut plan (vertikaler Winkel 90°, horizontaler Winkel 0°) installiert werden. Vorgehensweise: Schritt 1: Lösen Sie die Imbusschrauben mit einem passenden Imbusschlüssel. Schritt 2: Drehen Sie die Ringösen in die Gewindeöffnungen der Lautsprecherbox. Die Ösen müssen dabei bis zum Anschlag eingedreht und handfest angezogen werden.
Gekippte Aufhängung: Bitte beachten Sie: Die gekippte Installation muss immer über zwei Ringösen an der Oberseite und eine an der Rückseite erfolgen. Die Lautsprecherbox darf maximal um 115° (vertikaler Winkel) bzw. 25° (horizontaler Winkel) gekippt werden. Clusters/Line Arrays: Verwenden Sie nur geprüfte Flyware namhafter Hersteller. Alle Hinweise in der Bedienungsanleitung der einelnen Komponenten müssen unbedingt eingehalten werden.
BEDIENUNG Nachdem Sie Ihren Verstärker angeschlossen haben, drehen Sie die Lautstärkeregler gegen den Uhrzeigersinn bis zum Anschlag zurück. Schalten Sie erst alle Vorstufen und dann erst die Endstufe ein. Jetzt müssen die "ON" und "PROTECT" Leuchtdioden aufleuchten. Ist dies nicht der Fall, prüfen Sie bitte, ob der Verstärker an eine spannungsführende Netzleitung angeschlossen ist. Nach der Einschaltverzögerung werden die Lautsprecherausgänge aktiviert (PROTECT-LED aus).
USER MANUAL Speaker-systems CAUTION! Keep this device away from rain and moisture! Never open the housing! For your own safety, please read this user manual carefully before you initial start-up.
DANGER TO LIFE! A crashing speaker-system can cause deadly accidents. All safety instructions given in this manual must be observed. Please note that speaker-systems could move due to bass-beats and vibrations. Furthermore, unintended pushes from DJs, musicians or the audience present further risk. This is why the speaker-system must always be secured against moving or the respective area has to be blocked.
OPERATING DETERMINATIONS This speaker-system is a passive system which can be used for permanent installations or for mobile use. This product is only allowed to be connected with an appropriate power amplifier and was designed for indoor use only. The maximum power of the speaker-system must never be exceeded. When operating the speaker-system, please make sure that the loudspeakers always sound well. When distorsions can be heard, either the amplifier or the loudspeaker is overloaded.
The satellite system must always provide enough stability. The subwoofer's base surface must always be sufficiently dimensioned in relation to the top speaker in order to prevent tilting over. Operate the speaker-system only after having familiarized with its functions. Do not permit operation by persons not qualified for operating the speaker-system. Most damages are the result of unprofessional operation! Speaker-systems must never be transported with cranes.
Everybody operating amplification systems should know to what sound pressure levels he exposes his or the audience's hearing. As an average levels between 75 and 105 dB(A) in the discotheque or 95 and 115 dB(A) at a rock concert are reached. Individual peaks can exceed the pain level at 130 dB(A). Such levels are typical for motor chainsaws or jack hammers.
When connecting further speaker-system pairs (e.g. 3 pairs) to the same power amplifier, the impedance lowers even further. You must always make sure that the power amplifier is qualified for the new impedance. If the impedance of the speaker-system is lower than the lowest allowed amplifier impedance, the amplifier and the speaker-systems may be damaged. Furthermore, you must define the operation mode for your system. If the power amplifier is to be used in stereo-mode, the power is lower as in e.g.
Choosing appropriate connection cables The speaker-system must only be connected via a sufficiently dimensioned cable. Too thin cables lead to cable heatup or enormous power loss and loss in sound-quality. For all speaker-systems up to 400 Watts, we recommend a cable diameter of 2.5 mm², for all other speakercables 4 mm². A high damping factor of your amplifier supplies a clear sound reproduction.
possible from the speaker-systems. When using the speaker-system as monitor-system make sure to avoid feedbacks. The speaker-systems of a PA-system are normally located left and right to the stage. Do not install the speaker-systems on the stage, but rather on appropriate tables or platforms in front of the stage. In order to produce a clear sound, the speaker-systems should be installed in a way that they throw the sound over the audience's heads.
Please note: when using this speaker-system in public or industrial areas, a series of safety instructions have to be followed that this manual can only give in part. The operator must therefore inform himself on the current safety instructions and consider them.
For overhead use, always install a safety-rope that can hold at least 12 times the weight of the fixture. You must only use safety-ropes with quick link with screw cap. Appropriate safety-ropes: Safety-rope 40cm x 4mm up to 30kg Safety-rope 90cm x 4mm up to 30kg Safety-rope 140cm x 4mm up to 30kg Safety-rope 40cm x 6mm up to 60kg Safety-rope 90cm x 6mm up to 60kg Safety-rope 140cm x 6mm up to 60kg No. 58010190 No. 58010205 No. 58010305 No. 58010450 No. 58010470 No.
Stacking This speaker-system may only be installed on top of another speaker-system if both systems are lashed up with each other via appropriate clamping belts and protected against flipping over. Appropriate clamping belts: Clamping belt S200 with lock 5m/25mm No. 60206780 Clamping belt S400 with ratchet 5m/25mm No. 60206785 Appropriate stage elements: Stage element 100cm x 200cm, indoor Stage element 100cm x 200cm, outdoor No. 80702810 No.
When choosing the installation material, optimum dimensions have to be chosen in order to secure maximum safety. Installation on a stand or speaker stand The speaker-system may only be installed on a stand or speaker stand if the original speaker-system is equipped with an appropriate flange. Stands or satellite systems must only be installed on a plane area with a maximum inclination angle of 5°.
Installation of the TV-pin (only for stands) Attach an appropriate TV-pin to the top end of the stand and fasten it with the handle at the side. Suitable TV-pin: EUROLITE TV-35 TV-pin for speakers, No. 60000735 Installation of the speaker-system Caution: The loads have to be installed in a balanced way. Caution: The carrying capacity of the stand or speaker stand must never be exceeded! Install the speaker-system via the flange on the speaker stand or via the TV-pin on the stand.
The wall mounting's maximum service life must never be exceeded. Suspended installation DANGER! This speaker-system must only be suspended by experienced and trained persons - Danger to Life due to crashing speaker-systems! Trained persions are e.g. Head Rigger, Lightcrew head etc. If you lack these qualifications, do not attempt the installation yourself, but instead use a professional structural rigger.
Horizontal suspension: Please note: The horizontal installation must always be carried out via three eye-bolts and appropriate chains. The speaker-system must always be installed absolutely planar (vertical angle 90°, horizontal angle 0°). Procedure: Step 1: Unscrew the allen screws with a suitable allen key. Step 2: Install the eye-bolts in the threaded holes of the speaker-system. The eye-bolts must be tightened until stop position, hand-tight and without any tools.
Tilted suspension: Please note: The tilted installation must always be carried out via two eye-bolts on top and one at the rear. The speakersystem can be tilted in a maximum vertical angle of 115° or maximum horizontal angle 25°. Clusters/Line Arrays: Only use certified Flyware of renowned manufacturers. All instructions in the user manuals of the individual components must be adhered to. Only use the components and accessory recommended by the manufacturer.
OPERATION After having connected your amplifier to the mains, turn both gain controls counter-clockwise to Min-position. The last device to be switched on is the amplifier. The "ON" and "PROTECT" LED light up now. If it does not, check if the amplifier is connected to the mains correctly. After the turn-on delay the speakers are activated (PROTECT-LED is off). After having set the volume controls of the pre-amplifier in null-position, turn the gain controls of your amplifier to mid-position.
Operation modes 38/42 PAS_TOP_SERIES.
Operation modes 39/42 PAS_TOP_SERIES.
Operation modes 40/42 PAS_TOP_SERIES.
Operation modes 41/42 PAS_TOP_SERIES.
Operation modes 42/42 PAS_TOP_SERIES.