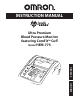
INSTRUCTION MANUAL ENGLISH ESPAÑOL Ultra Premium Blood Pressure Monitor featuring ComFitTM Cuff Model HEM-775
TABLE OF CONTENTS Before Using the Monitor Introduction . . . . . . . . . . . . . . . . . . . . . . . . . . . . . . . . . . . . . . . . . . . . . . . . . .4 Safety Information . . . . . . . . . . . . . . . . . . . . . . . . . . . . . . . . . . . . . . . . . . . . .5 Operating the Device . . . . . . . . . . . . . . . . . . . . . . . . . . . . . . . . . . . . .5 Risk of Electrical Shock . . . . . . . . . . . . . . . . . . . . . . . . . . . . . . . . . .6 Care and Maintenance . . . . . . . . . . . . . . . . .
TABLE OF CONTENTS Taking a Measurement . . . . . . . . . . . . . . . . . . . . . . . . . . . . . . . . . . . . . . . . .26 Using the Guest Mode . . . . . . . . . . . . . . . . . . . . . . . . . . . . . . . . . . .26 Selecting the USER ID . . . . . . . . . . . . . . . . . . . . . . . . . . . . . . . . . .27 Using the USER ID . . . . . . . . . . . . . . . . . . . . . . . . . . . . . . . . . . . . .27 Selecting the TruReadTM Mode . . . . . . . . . . . . . . . . . . . . . . . . . . . . .
Before Using the Monitor INTRODUCTION Thank you for purchasing the Omron® HEM-775 IntelliSense® Automatic Blood Pressure Monitor with ComFitTM Cuff. Fill in for future reference. DATE PURCHASED: __________________ SERIAL NUMBER: ____________________ Staple your purchase receipt here Your new digital blood pressure monitor uses the oscillometric method of blood pressure measurement.
SAFETY INFORMATION To assure the correct use of the product basic safety measures should always be followed including the warnings and cautions listed in this instruction manual. SAFETY SYMBOLS USED IN THIS INSTRUCTION MANUAL WARNING Indicates a potentially hazardous situation which, if not avoided, could result in death or serious injury.
SAFETY INFORMATION OPERATING THE DEVICE (continued) Read the Special Conditions section (page 35) of the instruction manual if your systolic pressure is known to be more than 220 mmHg. Inflating to a higher pressure than necessary may result in bruising where the cuff is applied. Operate the device only as intended. Do not use the device for any other purpose. Dispose of the device, components and optional accessories according to applicable local regulations.
SAFETY INFORMATION CARE AND MAINTENANCE Do not subject the monitor to strong shocks, such as dropping the unit on the floor. Do not submerge the device or any of the components in water. Store the device and the components in a clean, safe location. Changes or modification not approved by Omron Healthcare will void the user warranty. Do not disassemble or attempt to repair the unit or components. Do not store the AC adapter in the cuff compartment. This may damage the cuff.
BEFORE TAKING A MEASUREMENT To ensure a reliable reading follow these recommendations: 1. Avoid eating, drinking alcohol, smoking, exercising, and bathing for 30 minutes before taking a measurement. Rest for at least 15 minutes before taking the measurement. 2. Stress raises blood pressure. Avoid taking measurements during stressful times. 3. Measurements should be taken in a quiet place. 4. Remove tight-fitting clothing from your arm. 5. Sit in a chair with your feet flat on the floor.
Operating Instructions KNOW YOUR UNIT Main Unit: Monitor Cover Cuff Compartment Air Jack USER ID Symbol (A or B) Display USER ID Selection Switch Start/Stop Button Morning/Evening Average ( / ) Buttons SET Button Memory ( ) Button Battery Compartment AC Adapter Jack 9
KNOW YOUR UNIT Components: Housing Air Tube Cord AC Adapter Four “AA” Batteries Air Plug (Connects to Air Jack) Arm Cuff Instruction Manual UNIT DISPLAY Systolic Blood Pressure USER ID Symbol (A or B) Diastolic Blood Pressure Morning Hypertension Symbol Heartbeat Symbol Movement Symbol Irregular Heartbeat Symbol Morning Average Symbol Evening Average Symbol Average Value Symbol TruReadTM Symbol Deflation Symbol Memory Symbol Low Battery Indicator Pulse Display Week Display Date/Time Display 10
DISPLAY SYMBOLS IRREGULAR HEARTBEAT SYMBOL ( ) When the monitor detects an irregular rhythm two or more times during the measurement, the Irregular Heartbeat Symbol ( ) will appear on the display with the measurement values. An irregular heartbeat rhythm is defined as a rhythm that is more than 25% slower or 25% faster from the average rhythm detected while the monitor is measuring the systolic blood pressure and the diastolic blood pressure.
DISPLAY SYMBOLS The American Heart Association1 recommends the following guideline for upper limit of normal for home blood pressure readings: AHA Home Guideline for Upper Limit of Normal BP Systolic Blood Pressure 135 mmHg 85 mmHg Diastolic Blood Pressure This is a general guideline because blood pressure depends on age and morbidity. The AHA recommends a lower home blood pressure goal for certain patients, including diabetic patients, pregnant women, and patients with renal failure1.
DISPLAY SYMBOLS HEARTBEAT SYMBOL ( ) TAKING A MEASUREMENT The Heartbeat Symbol flashes on the display during the measurement. The Heartbeat Symbol flashes at every heartbeat. When the measurement is complete, the Heartbeat Symbol flashes on the display with your blood pressure and pulse rate if the reading is above 135 for the Systolic Blood Pressure value and/or 85 for the Diastolic Blood Pressure value.
BATTERY INSTALLATION 1. Press the ▼ indicator on the battery cover and slide the cover off in the direction of the arrow. 2. Install 4 “AA” size batteries so the + (positive) and - (negative) polarities match the polarities of the battery compartment as indicated. 3. Replace the battery cover.
BATTERY INSTALLATION BATTERY REPLACEMENT Low Battery Indicator When the Low Battery Indicator appears on the display screen turn the monitor off and remove all the batteries. Replace with four new batteries at the same time. Longlife alkaline batteries are recommended. CAUTION If battery fluid should get in your eyes, immediately rinse with plenty of clean water. Contact a physician immediately. NOTES: • Turn the unit off before replacing the batteries.
USING THE AC ADAPTER Use only the authorized Omron AC Adapter, Model Number HEM-ADPT1,with this monitor. We recommend you install the batteries even if the AC Adapter is used. If no batteries are installed, you may need to reset the date and time if the AC Adapter is disconnected. The measurement results will not be deleted. CAUTION Use only Omron authorized parts and accessories. Parts and accessories not approved for use with the device may damage the unit.
USING THE AC ADAPTER TO CONNECT THE AC ADAPTER ① Insert the AC Adapter Plug into the AC Adapter Jack on the back side of the monitor as illustrated. ② Plug the AC Adapter into a 120V AC outlet (60 cycles). Housing 2 1 Cord TO DISCONNECT THE AC ADAPTER ① Hold and pull the Housing to remove the AC Adapter from the electrical outlet. Do not remove by pulling on the cord. ② Remove the AC Adapter plug from the monitor. WARNING Do not plug or unplug the power cord into the electrical outlet with wet hands.
SETTING THE DATE AND TIME Set the monitor to the current date and time before taking a measurement for the first time. If the date and time are not set correctly, the measurement values stored in the memory and the average values may not be correct. The Blood Pressure Monitor automatically stores up to 84 individual measurement values with the dates and times. The monitor also calculates weekly averages for measurements in the morning and in the evening.
SETTING THE DATE AND TIME 2. SETTING THE YEAR The year can be set between 2007 and 2030. When the display reaches 2030, it will return to 2007. Press the Memory button ( ) to advance by increments of one year. Press the SET button to set the current year. The month flashes on the display. NOTE: Press and hold the Memory button ( ) to advance the date and time values faster. 3. SETTING THE MONTH Press the Memory button ( month.
SETTING THE DATE AND TIME 4. SETTING THE DAY Press the Memory button ( of one day. ) to advance by increments Press the SET button to set the current day. The hour flashes on the display. 5. SETTING THE HOUR The time is set using AM or PM. Press the Memory button ( hour. ) to advance by increments of one Press the SET button to set the current hour. The minute flashes on the display. 6. SETTING THE MINUTE Press the Memory button ( minute.
SETTING THE DATE AND TIME RESETTING THE DATE AND TIME To adjust the date or time after it has been setup when you first use the unit. Start with the monitor in the off position. 1. Press and hold the SET button. and the current setting (on or oFF) The TruReadTM symbol will appear on the display for the USER ID selected. To change the on or oFF setting press the Memory button, then press the SET button. The interval time flashes on the display.
APPLYING THE ARM CUFF CAUTION Read all of the information in the instruction manual and any other literature in the box before operating the unit. CAUTION This device is intended for use in measuring blood pressure and pulse rate in the adult population. Do not use this device on infants or persons who cannot express their intentions. APPLYING THE CUFF ON THE LEFT ARM 1. Make sure the air plug is securely inserted in the main unit. 2. Remove tight-fitting clothing from your upper left arm.
APPLYING THE ARM CUFF 3. Sit in a chair with your feet flat on the floor. Place your left arm on a table so the cuff is level with your heart. Thumb Grip 4. Hold the grip on the cuff securely with your right hand, placing your thumb on the thumb grip. Cloth Strip 5. Turn the palm of your left hand upward.
APPLYING THE ARM CUFF 6. Apply the cuff to your left upper arm so the blue strip is on the inside of your arm and aligned with your middle finger. The air tube runs down the inside of your arm. The bottom of the cuff should be approximately 1/2" above your elbow. Blue Strip 1/2 inch (1 - 2 cm) Air Tube 7. Wrap the cuff firmly in place around your arm using the cloth strip.
APPLYING THE ARM CUFF APPLYING THE CUFF ON THE RIGHT ARM When taking a measurement using the right arm use this instruction for Step 6 on page 24. Apply the cuff to your right upper arm so the thumb grip is centered on the inside of your inner arm. The bottom of the cuff should be approximately 1/2'' above your elbow. Thumb Grip NOTE: Be careful not to rest your arm on the air tube. This will restrict the flow of air to the cuff.
TAKING A MEASUREMENT The monitor is designed to take measurements and store the measurement values in the memory for two people using USER ID A and USER ID B. The monitor can also be used to take a single measurement for other persons using the GUEST Mode. The USER ID symbol is not displayed when using the GUEST Mode. Measurements taken using the GUEST Mode are not stored in the memory. CAUTION Operate the device only as intended. Do not use the device for any other purpose. USING THE GUEST MODE 1.
TAKING A MEASUREMENT 3. Inflation stops and the measurement is started. When the measurement is completed, your blood pressure and pulse rate appear on the display. SELECTING THE USER ID Select your USER ID. Always use the same USER ID when taking a measurement. The monitor stores the measurement values in the memory by the USER ID selected. These measurement values are used to calculate the Morning Averages and Evening Averages. Slide the USER ID Selection Switch up or down to select USER A or B.
TAKING A MEASUREMENT SELECTING THE TruReadTM MODE 1. Select your USER ID (A or B). 2. Press and hold the SET button. The TruReadTM symbol on the display. 3. Press the Memory button ( to select on. and the oFF setting appears ) NOTE: Press the Memory button to alternate between on and oFF.
TAKING A MEASUREMENT 4. Press the SET button to confirm the change. The number of seconds between each measurement is displayed. NOTE: The default value between each measurement is 60 seconds. 5. Press the MEMORY button ( between each measurement. ) to change the interval of time The interval can be set to 15 seconds, 30 seconds, 60 seconds or 120 seconds. Continue to press the MEMORY button until the desired interval appears on the display. 6. Press the SET button to confirm the setting.
TAKING A MEASUREMENT 7. If the date and time are correct, press the START/STOP button to turn the monitor off. To change the date and time refer to page 18, SETTING THE DATE AND TIME. CAUTION Do not use a cellular phone near the device. It may result in an operational failure. USING THE SINGLE MODE 1. Select your USER ID (A or B).
TAKING A MEASUREMENT 2. Press the START/STOP button. All symbols appear on the display. The USER ID Symbol you selected flashes on the display. The cuff starts to inflate automatically. As the cuff inflates, the monitor automatically determines your ideal inflation level. This monitor detects the pulse during inflation. Do not move your arm and remain still until the entire measurement process is completed. NOTE: To stop the inflation or measurement, press the START/STOP button.
TAKING A MEASUREMENT 4. When the measurement is complete, the arm cuff completely deflates. Your blood pressure and pulse rate are displayed. 5. Press the START/STOP button to turn the monitor off. NOTE: The monitor will automatically turn off after five minutes.
TAKING A MEASUREMENT USING THE TruReadTM MODE 1. Select your USER ID (A or B). 2. Press the START/STOP button. All symbols appear on the display. The USER ID Symbol you selected flashes on the display. The cuff starts to inflate automatically. NOTE: To stop the inflation or measurement, press the START/STOP button. The monitor will stop inflating, start deflating and will turn off. 3. Inflation stops automatically and the measurement is started.
TAKING A MEASUREMENT The second measurement is complete, waiting to start the next measurement. The consecutive measurements are complete. The average for three measurements appears on the display. 5. Press the SET button to display the blood pressure and pulse rate for the first measurement. Press the SET button again to display the next measurement. 6. Press the START/STOP button to turn the monitor off.
TAKING A MEASUREMENT SPECIAL CONDITIONS CAUTION Inflating to a higher pressure than necessary may result in bruising where the cuff is applied. If your systolic pressure is known to be more than 220 mmHg, press and hold the START/STOP button until the monitor inflates 30 to 40 mmHg higher than your expected systolic pressure. NOTES: • Do not apply more pressure than necessary. • The monitor will not inflate above 299 mmHg. When the measurement is complete, the arm cuff completely deflates.
USING THE MEMORY FUNCTION The monitor is designed to store the blood pressure and the pulse rate in the memory for two people (USER A and USER B) every time a measurement is completed. The monitor automatically stores up to 84 sets of measurement values (blood pressure and pulse rate) for each user (A and B). When 84 sets of measurement values are stored, the oldest record is deleted to save the most recent values.
USING THE MEMORY FUNCTION TO DISPLAY THE MEASUREMENT VALUES 1. Select your USER ID (A or B). 2. Press the Memory button ( The Average Symbol ( reading is shown. ).
USING THE MEMORY FUNCTION 3. Press the Memory button ( ) to display the most recent set of measurement values on the screen. The values are displayed from the most recent to the oldest. NOTE: The date and time are alternately displayed with the measurement values. Alternating display Press the Memory button to display the next set of values. Press and hold the Memory button to display the values faster. TruReadTM Mode The average for the consecutive measurements appears on the display ).
USING THE MEMORY FUNCTION MORNING AND EVENING AVERAGES The monitor calculates and displays a weekly average for measurements taken in the morning ( ) and evening ( ). The monitor stores 8 weeks of Morning Averages and 8 weeks of Evening Averages for each user (A and B). NOTE: The week begins Sunday at 4:00 AM MORNING AVERAGES Morning averages are based on the first average reading using the TruReadTM Mode or the first reading using the Single Mode. Measurement times must be between: 4:00 AM and 9:59 AM.
USING THE MEMORY FUNCTION TO DISPLAY MORNING AND EVENING AVERAGES 1. Select your USER ID (A or B). 2. Press the Morning Average button ( ) or the Evening Average button ( ). The average for the current week “THIS WEEK” appears on the display. 3. Continue to press the Morning Average button ( ) or the Evening Average button ( ) to display the previous weeks. The monitor displays “-1 WEEK” for the previous week to “-7 WEEK” for the oldest set of averages.
USING THE MEMORY FUNCTION DISPLAY COMBINATIONS In addition to the Morning Average and Evening Average Symbols, the monitor may also display the Morning Hypertension Symbol if the morning average for that week is above the AHA guidelines. (See page 12 for details.) Depending on your measurement results, these may be displayed in the following combinations.
USING THE MEMORY FUNCTION The Morning Hypertension Symbol ( ) appears if the weekly average for morning measurements is above 135/85. In this case the Morning Hypertension Symbol ( ) is displayed when the Evening Average is displayed, regardless of the values for the Evening Average. TO DELETE ALL VALUES STORED IN THE MEMORY The values stored in the memory are deleted by USER ID. You cannot partially delete values stored in the memory. All values for the user you select will be deleted. 1.
Care and Maintenance CARE AND MAINTENANCE To keep your digital blood pressure monitor in the best condition and protect the unit from damage, follow the directions listed below: Close the monitor cover when not in use. Do not forcefully bend the arm cuff or air tube. Do not fold tightly. CAUTION Do not store the AC adapter in the cuff compartment. This may damage the cuff. Clean the monitor with a soft dry cloth. Do not use any abrasive or volatile cleaners. Do not attempt to clean the cuff.
CARE AND MAINTENANCE Remove the batteries if the unit will not be used for three months or longer. Always replace all the batteries with new ones at the same time. Use the unit consistent with the instruction provided in this manual. CAUTION Changes or modification not approved by Omron Healthcare will void the user warranty. Do not disassemble or attempt to repair the unit or components. CAUTION Use only Omron authorized parts and accessories.
ERROR INDICATORS AND TROUBLESHOOTING TIPS ERROR INDICATORS SYMBOL CAUSE CORRECTION Cuff under-inflated. Cuff not applied correctly. Single Mode Remove the arm cuff. Read, “Taking a Measurement”. Take another measurement. TruReadTM Mode The monitor will repeat the process up to 5 times. Cuff over-inflated Monitor could not detect pulse wave. Take another measurement and remain still until the measurement is complete. Air plug is not connected. Replace the four batteries.
ERROR INDICATORS AND TROUBLESHOOTING TIPS TROUBLESHOOTING TIPS PROBLEM CAUSES AND SOLUTIONS No power. Replace all four batteries with new ones. No display appears on the unit. Check the battery installation for proper placement of the battery polarities. Measurement values appear too high or too low. Blood pressure varies constantly. Many factors including stress, time of day, and how you wrap the cuff, may affect your blood pressure.
FCC STATEMENT Note: POTENTIAL FOR RADIO/TELEVISION INTERFERENCE (for U.S.A. only) This product has been tested and found to comply with the limits for a Class B digital device, pursuant to part 15 of the FCC rules. These limits are designed to provide reasonable protection against harmful interference in a residential installation.
WARRANTY Your HEM-775 IntelliSense® Automatic Blood Pressure Monitor, excluding the arm cuff, is warranted to be free from defects in materials and workmanship appearing within 5 years from the date of purchase, when used in accordance with the instructions provided with the monitor. The arm cuff is warranted to be free from defects in materials and workmanship appearing within one year from the date of purchase when the monitor is used in accordance with the instructions provided with the monitor.
SPECIFICATIONS Model: Display: Measurement Range: Accuracy/Calibration: HEM-775 LCD Digital Display Pressure: 0 to 299 mmHg, Pulse: 40-180/min.
NOTES 50
NOTES 51
Manufactured by OMRON HEALTHCARE Made in China Distributed by: OMRON HEALTHCARE, INC. 1200 Lakeside Drive Bannockburn, Illinois 60015 www.omronhealthcare.com Copyright © 2006 Omron Healthcare, Inc.