
Instructions / Assembly


2
CAUTION
Installaon of roong materials can be
dangerous. The relave amount of danger
is increased by the height from the ground,
increasing pitches of the roof slope, inclement
weather condions or other factors. We strongly
recommend for anyone installing ONDURA-6V,
or working on a roof in any manner, to take all
precauons possible to ensure your personal
safety at all mes.
Be sure that ladders and other such devices
are safely posioned and properly secured.
OSHA recommends the use of a safety harness
when applying roong. Protecve eyewear is
recommended when applying nails or using
power tools. ONDURA-6V may be slippery when
wet, dusty, frosty or oily, so please avoid working
or walking on the roof if any of these condions
exist. Windy condions can make the worksite
more dangerous, so we recommend that you do
not aempt to install ONDURA-6V during windy
condions.
You will need the following tools and materials:
n Claw Hammer
n Ulity Knife
n Saw (Hand Saw or Circular Saw)
n Measuring Tape or Yardsck
n Chalk line
n String
n Pencil or Marker
n Protecve Eyewear
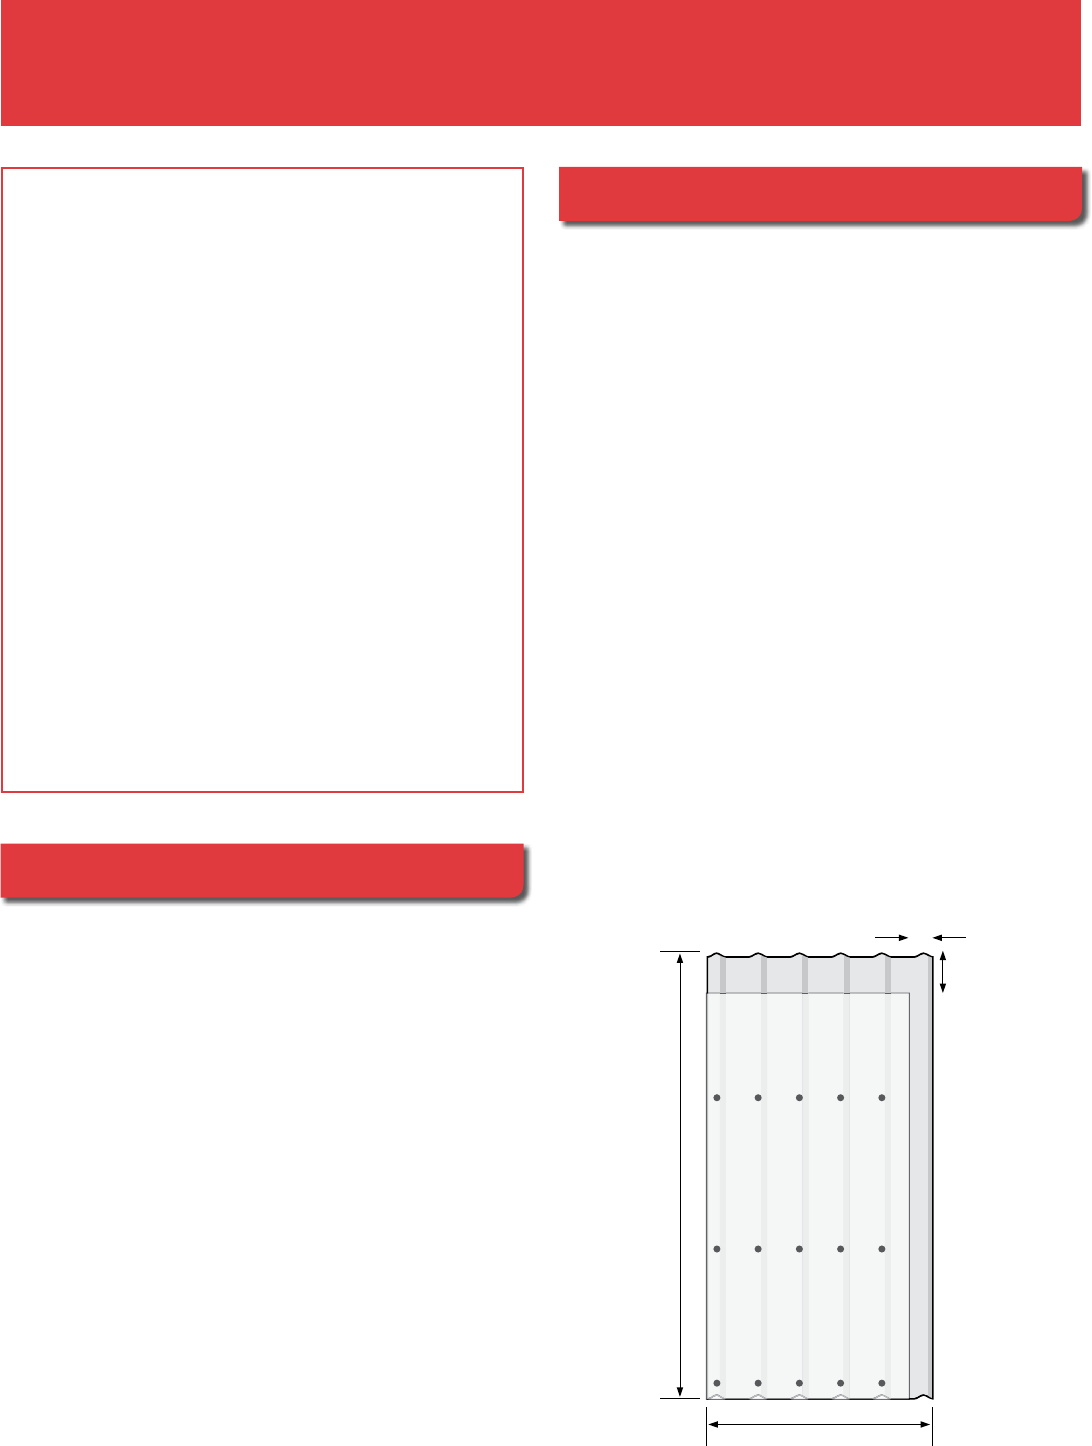
Sheet dimensions: 44 inches wide by 79 inches long
For projects requiring mulple sheets, account for overlaps in
calculang roof coverage (see diagram below).
n Sidelap should be at least one corrugaon
(4 inches for one corrugaon overlap).
n Headlap should be at least 7 inches.
n The eecve sheet coverage is 40 inches wide
by 72 inches long.
n 5 sheets to cover a square
n Fasteners needed per sheet: 15 for 3 rows of
fasteners, with rows spaced approximately
24 inches apart.
n Fasteners for roof ridge: 4 fasteners per foot
of ridge (2 on each side).
n Fasten sheets on every corrugaon
n Fasten ridge caps at every corrugaon.
Ridge cap secons should overlap by at least 7 inches.
Closure strips are 40 inches long, with 2 eave strips and
2 ridge strips per pack. Closure strips should be used at
roof ridge and eaves.
4 inches
7 inches
79 inches
44 inches