
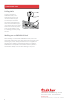
Instructions / Assembly


5
Measure distance along the
sheet corrugaon from eave
edge of sheet to outer wall
of structure. The lower line
of nails should be installed
high enough on the sheet
to be on or inside the wall
support. The typical distance
from the eave edge of a
sheet to the outer wall is
2 to 3 inches. For resistance to wind upli, the maximum
distance from the eave edge of a sheet to the rst row of nails
is 5 inches.
Install nails on the rst sheet along the eave and rake edges.
Tip: For each row of nails, install the rst two nails at
opposite sides of the sheet and aach a string line
between them—across the corrugaons—as a guide
for the posion of the other nails. Mark the posion
of the string on the crown of each corrugaon with a
pencil. Repeat for each row of nails.
Install nails at remaining posions, but do not fasten areas
which will be overlapped by other sheets.
Place next ONDURA-9 sheet into posion on roof.
n The sheets must overlap by at least one corrugaon along
the direcon of the eave.
n The sheets should overlap by at least 7 inches along the
direcon of the rake edge. If installing over purlins, the
overlap must be over a purlin so that the nail can be
secured into the purlin.
Install nails on sheet in the same manner as the rst sheet.
For the last sheet in a row, install nails in the same paern as
previous sheets and in the nal corrugaon along the rake edge.
Place the rst ridge cap at the end of the ridge away from the
prevailing wind, allowing it to project out 3 to 4 inches from the
ridge end.
Insert closure strip above ONDURA-9 sheet and below ridge cap.
The closure strips must be placed where the nails will be located
so that the nails will securely hold the closure strips in place
during the life of the roof.
Install nails through the ridge cap and closure strip at every
crown of the underlying ONDURA-9 sheets. The row of nails
should be 1 inch above the lower edge of the ridge cap. If more
than one ridge cap is needed, overlap the next ridge cap before
fastening through the overlap.
Place next ridge cap with 7 inch overlap. Insert closure strip and
install nails.
Install nal ridge cap with 7 inch overlap and 3 to 4 inch
overhang. Insert closure strip and install nails.
At each end of the ridge, cut the overhang poron of the ridge
cap along the crown with a ulity knife. Fold down resulng
aps for a weather guard. Secure aps to ridge fascia with
roong nails.
Fold down aps and secure to ridge fascia.
Note: Install all sheets on both sides of the roof before installing
the ridge cap.
Measure the ridge to determine the required coverage.
Each ridge cap is 39-1/2 inches long. If more than one ridge cap
is needed, they must be installed with a 7 inch overlap. Allow
for 3 or 4 inches of material at end of ridge to overhang ridge
end. This material will be used to cover the end of the ridge.
7 inch
overlap
39-1/2 inches
5 inch max