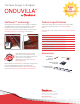
New 3D Shingles! The New Design In Shingles!
elevate Choose ® , elevate and your ... expectations α ≥ Minimum Slope 3:12 or 14 degrees A unique roofing solution and a complete system The wave of innovation is moving full-speed ahead. Much more than a product range, ONDUVILLA® is a truly unique roofing solution and a complete system, offering you beauty, a wide choice of colors and looks, and easy installation. Outstanding design You want more than a reliable solution for AESTHETIC UNIVERSAL ACOUSTIC-FRIENDLY WATERTIGHT your home.
Eco-Responsibility -RESISTANT Our company has achieved a low SIMPLE LIGHTWEIGHT carbon footprint and recycles some 200,000 tons of material each year. ONDUVILLA® materials are composed of recycled fibers and use natural pigments. And because ONDUVILLA® weighs less than conventional roofing materials, transportation uses less fuel and the structure needed to support it is lighter. ONDUVILLA® contributes to meet LEED requirements. ECO-RESPONSIBLE Easy to install ONSIBLE Little training is required.
Installation Guidelines Make the installation against the prevailing wind Wind n Installatio gle 5: Full shin 3 2 22 21 19 Use deck roof made of wood, plywood or OSB and underlayment complying with ASTM D-226 Type 2 20 gle hingle 2 1 3: Half s 13 11 4: Full shin 17 16 14 gle 1: Full shin 5 4 3 1 Protect the rake against the wind using universal ridge/trim piece or similar. 2 15 18 gle 7 2: Full shin 9 8 6 10 Stagger the rows using half shingles.
Eaves 1 Drive nails on top of corrugation between the two overlapping guides Underlayment r the Stagge Closure strip s shingle Universal ridge/ trim Fixing 2 3” At eaves, drive nails on top of the corrugation above the overlapping guides Fixing Leave a space of 3” between the first corrugation and the rake line in order to provide the correct fixing of the universal ridge/trim piece. (Also see page 7). Roof deck (OSB} * = max.
Hip 1 Cut Onduvilla shingles parallel to the hip line. Pieces of closure strip 2a 2b Self-adhesive flashing tape Seal the space between corrugations with fillers cut from the closure strip. Alternative option: Seal the hip with the self-adhesive flashing tape. (Under cold weather conditions, the strip has to be heated before installation.) 3 4 Over lap o f 7” Universal ridge/trim piece Fix the universal ridge/trim piece. Nails must be put on top of each corrugation.
Rake Fixing 1 2 Leave a space of 3” between the first corrugation and the rake line in order to provide the correct fixing of the universal ridge/trim piece. Fix both wings of the universal ridge/trim piece aligned with the nails on the roof.
The New Design In Shingles! New 3D Shingles! SealSmart™ technology Technical specifications Backed by exclusive SealSmart™ technology, the elasticity of ONDUVILLA®’s composite material allows it to shrink firmly around each nail, creating a permanently leakresistant barrier. And the waterproofing is secured thanks to double-embossment technology at the overlaps. Single-layer design made of composite and organic fibers, resin bound and colored with an innovative shading system.