Vertical 90 - Stereoanlage 10026865 10026866
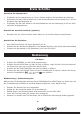
Sehr geehrter Kunde, zunächst möchten wir Ihnen zum Erwerb Ihres Gerätes gratulieren. Bitte lesen Sie die folgenden Anschluss- und Anwendungshinweise sorgfältig durch und befolgen Sie diese um möglichen technischen Schäden vorzubeugen. Sicherheitshinweise und Gewährleistung • • • • • • • • • • • • Diese Bedienungsanleitung dient dazu, Sie mit der Funktionsweise dieses Produktes vertraut zu machen. Bewahren Sie diese Anleitung daher stets gut auf, damit Sie jederzeit darauf zugreifen können.
Technische Daten Artikelnummer 10026865, 10026866 Anschlüsse USB-Port, SD-Slot, AUX-Eingang, Kopfhörer-Ausgang Unterstützte Formate CD, CD-R, CD-RW, MP3 Stromversorgung AC 220-240 V, 50-60 Hz oder DC 5,8V Maße Haupteinheit ca. 28,5 x 20 x 9,5 cm (BxHxT), 1,2kg Maße Lautsprecher ca.
Anschluss für Lautsprecher (R) 1 5 Netzteilanschluss 5,8V 1A Anschluss für Lautsprecher (L) 2 6 Antennenanschluss kopfhöreranschluss 3 7 Haken zur Wandmontage AUX-IN 4 8 Tischfuß (auziehbar) CD-Fach 9 17 Display Power/Standby 10 18 SKIP- / TUNE- STANDBY LED 11 19 SKIP+ / TUNE+ FUNCTION (CD/Tuner/AUX/USB/SD) 12 20 STOP / BAND PROG / PLAY / MODE 13 21 PLAY/PAUSE / ST/MONO VOLUME – 14 22 OPEN/CLOSE VOLUME + 15 23 USB-Anschluss IR Sensor 16 24 SD-Kartenanschluss 4
Fernbedienung: 1. 2. 3. 4. 5. 6. 7. 8. 9. 10. 11. 12. 13. 14. 15. 16. 17. 18. 19. 20. 21. 21. 22. 23. 24. Ein / Aus (FUNKTION) Modus Taste (CD-TUNER-AUX-USB-SD) (REPEAT) wählen zwischen REAPT ONE (Wiederholen des aktuellen Titels) und REPEAT ALL (Wiederholen aller Titel) (SLEEP) Ein / Aus schalten der Abschaltautomatic (OPEN / CLOSE) öffnen / schliessen des CD Faches (BAND) Radio: wechsel zw. UKW / MW (FM ST) wechsle zw. UKW Stereo und Mono (INTRO) spielt jeden Titel 10Sec.
Erste Schritte Anschluss der Lautsprecher • • • Schliessen sie die Lautsprecher an, bevor Sie das Gerät an die Steckdose anschliessen Schliessen Sie das schwarze Kabel ers an die Anschlußbuchse mit der Makierung L auf der Rückseite des Haauptgerätes an. Schliessen Sie das rote Kabel an die Anschlußbuchse mit der Makierung R auf der Rückseite des Hauptgerätes an.
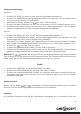
Titelprogrammierung Audio CD: • • • • • Drücken Sie STOP, um sicher zu sein dass die Wiedergabe gestoppt ist. Drücken Sie PROGRAM,um die Titelprogrammierung zu beginnen. Im LCD Display sehen Sie (P01) und es blinken (00),(MEMORY). Während (00) blinkt, drücken Sie , um einen Titel zu wählen. Drücken Sie dann PROGRAM, um den Titel zu speichern. Im LCD Display erscheint (P02). Wiederholen Sie diese Schritte. Sie können bis zu 20 Titel programmieren.
Radiosender speichern • • • • • Drücken Sie PROGRAM/PLAY-MODE am Gerät. Drücken Sie FOLDER + oder FOLDER–, um den Speicherplatz für den aktuellen Sender zu wählen. Drücken Sie Titelsprung Vor/Zurück, um den gewünschten Sender zu wählen. Drücken Sie PROGRAM/PLAY-MODE, um den Sender zu speichern. Um einen gespeicherten Radiosender auszuwählen drücken Sie FOLDER + oder FOLDER –. AUX Anschluss Der AUX Anschluss er möglicht es Ihnen, externe Geräte (z.B. MP3 Player, Kassettenabspieler, etc.
Weitere Funktionen • Equalizer: Drücken Sie die EQ Taste um folgende Einstellungen auszuwählen: Flat – Rock – Classic – Pop- Jazz • BASS: Drücken Sie die BASS Taste, um die Bassanhebung ein- oder aus zu schalten. • ID3: Um die Titelinformation im Display anzuzeigen, drücken Sie die Taste ID3 auf der Fernbedienung. • SLEEP: Diese Funktion erlaubt es das Gerät so zu programmieren das die Musik automatisch nach einer Zeitspanne von bis zu 90 Minuten stoppt.
Dear Customer, Congratulations on purchasing this product. Please read and follow these instructions, in order to avoid damaging the item. We do not cover any damages that may arise from improper use of the item or the disregard of the safety instructions. Important Safety Advice • • • • • • • • Read all instructions before using. To protect against a fire, electric shock or personal injury, do not immerse cord, electric plugs or device in water or other liquids.
Technical Data Item # Connections 10026865, 10026866 USB-Port, SD-Slot, AUX-Eingang, Kopfhörer-Ausgang Supported formats CD, CD-R, CD-RW, MP3 Power supply DC 5,8V (mains adapter) Dimensions main body 28,5 x 20 x 9,5 cm (WxHxD), 1.2kg Dimensions speakers 12 x 20 x 9,5 cm (WxHxD), 0.5kg Speaker cables 1.
Speaker terminal (R) 1 5 DC IN (5.
Fernbedienung: 1. 2. 3. 4. 5. 6. 7. 8. 9. 10. 11. 12. 13. 14. 15. 16. 17. 18. 19. 20. 21. 21. 22. 23. 24.
Getting Started Speaker Connections • • • Always connect the speakers before connceting the power supply. Connect the black wire of to the terminal marked „L“ on the rear of the main united. Connect the red wire to the terminal marked „R“ on the rear of the main united. AUX Connection • Use a 3,5mm male to male line-in cable to connect line out or headphone out jack of an audio device to the AUX Line In Jack.
Progam Play Audio CD: • • • Press STOP to make sure playback is stopped, then press PROGRAM/PLAY-MODE. The LCD screen will display (P01) flashing (00),(MEMORY). While (00) is blinking, press PREVIOS or NEXT to select a track number, press PROGRAM/ PLAY-MODE to store it in memory. The LCD display will display (P02). Repeat the previous steps until you have selected up to 20 tracks. Press PLAY/PAUSE to start Program play. MP3 CD: • • • Press STOP to make sure playback is stopped.
Saving radio stations • • • • • Press PROGRAM/PLAY-MODE on the unit Press FOLDER UP or FOLDER DOWN to select a memory channel for the current radio station. Press PREVIOS or NEXT to select your desired station Press PROGRAM/PLAY MODE button to confirm it To cycle through saved radio stations, press the FOLDER UP or FOLDER DOWN button.. AUX IN • • • • • AUX mode allows you to play any audio device (MP3, cassette player, ect.) through your unit.
Additional Functions • Equalizer: Press EQ button to cycle through the equalizer preset options: Flat – Rock – Classic – Pop- Jazz • BASS: Press BASS to enable or disable the bass enhancement effect. • ID3: Um die Titelinformation im Display anzuzeigen, drücken Sie die Taste ID3 auf der Fernbedienung. • SLEEP: This function allows you to program the unit so that music stops automatically after a certain duration (up to 90 minutes).
Cher client, Toutes nos félicitations pour l‘acquisition de ce nouvel appareil. Veuillez lire attentivement et suivre les instructions de branchement et d‘utilisation suivantes afin d‘éviter d‘éventuels dommages. Consignes de sécurité et garantie • Ce mode d‘emploi a pour objectif de vous familiariser avec les fonctions de ce produit. Conservez bien ce guide d‘utilisation afin de pouvoir vous y référer à tout moment ultérieurement.
Fiche technique Numéro d’article Connectivité 10026865, 10026866 Port USB, lecteur de carte SD, Entrée AUX, Sortie casque Format lus CD, CD-R, CD-RW, MP3 Alimentation AC 220-240 V, 50-60 Hz ou DC 5,8V Dimensions de l’unité principale env. 28,5 x 20 x 9,5 cm (LxHxP), 1,2kg Dimension des enceintes env. 12 x 20 x 9,5 cm (LxHxP), 0,5kg Longueur des câbles d‘enceintes env.
Branchement pour enceinte (R) 1 5 Adaptateur secteur 5,8V 1A Branchement pour enceinte (L) 2 6 Prise d’antenne Prise casque 3 7 Crochet de fixation murale AUX-IN 4 8 Pied de table (amovible) Lecteur CD 9 17 Écran Power/Standby 10 18 SKIP- / TUNE- LED STANDBY 11 19 SKIP+ / TUNE+ FONCTION (CD/Tuner/AUX/USB/SD) 12 20 STOP / BAND PROG / PLAY / MODE 13 21 PLAY/PAUSE / ST/MONO VOLUME – 14 22 OPEN/CLOSE VOLUME + 15 23 Prise USB Capteur IR 16 24 Lecteur de carte SD
4 Télécommande : 1. 2. 3. 4. 5. 6. 7. 8. 9. 10. 11. 12. 13. 14. 15. 16. 17. 18. 19. 20. 21. 21. 22. 23. 24.
Premiers pas Branchement des enceintes • Branchez les enceintes avant de relier l’appareil au secteur • Branchez d’abord le câble noir à sa prise spécifique marquée L au dos de l’appareil principal. • Branchez le câble rouge sur sa prise marquée R au dos de l’appareil principal.
Programmation de titres CD Audio : • Appuyez sur STOP pour vous assurer que la lecture est arrêtée. • Appuyez sur PROGRAM pour commencer la programmation des titres. Sur l’écran LCD vous pouvez lire (P01), et (00) et (MEMORY) clignotent. • Pendant que (00) clignote, appuyez sur pour sélectionner un titre. • Appuyez ensuite sur PROGRAM pour sauvegarder le titre. Sur l’écran LCD vous pouvez lire (P02). • Répétez ces étapes. Vous pouvez programmer jusqu’à 20 titres.
Mémorisation de stations • Appuyez sur PROGRAM/PLAY-MODE sur l‘appareil. • Appuyez sur FOLDER + ou FOLDER– pour sélectionner la position de mémorisation de la station en cours d‘écoute. • Appuyez sur saut de titre avant/arrière pour choisir la station désirée. • Appuyez sur PROGRAM/PLAY-MODE pour mémoriser la station. • Pour sélectionner une station mémorisée, appuyez sur FOLDER + ou FOLDER –.
Autres fonctions • Égaliseur : Appuyez sur la touche EQ pour choisir parmi les réglages suivants : Flat – Rock – Classic – Pop- Jazz • BASS : Appuyez sur la die BASS pour activer ou désactiver l’amplification des basses. • ID3 : Pour afficher à l’écran les informations sur le titre, appuyez sur la touche ID3 sur la télécommande. • SLEEP : Cette fonction permet de programmer l’arrêt automatique de l’appareil après un délai réglable jusqu’à 90 minutes.