DV-SP404.404E_En.book Page 1 Wednesday, June 7, 2006 1:50 PM Contents DVD Player Overview ..............................................2 DV-SP404 DV-SP404E Connections ......................................17 Instruction Manual Getting Started and Setting up ........24 Basic Playback ..................................26 Thank you for purchasing an Onkyo DVD Player. Read this manual carefully before using your new DVD Player.
DV-SP404.404E_En.book Page 2 Wednesday, June 7, 2006 1:50 PM WARNING: TO REDUCE THE RISK OF FIRE OR ELECTRIC SHOCK, DO NOT EXPOSE THIS APPARATUS TO RAIN OR MOISTURE.
DV-SP404.404E_En.book Page 3 Wednesday, June 7, 2006 1:50 PM Important Safety Instructions—Continued A. When the power-supply cord or plug is damaged, B. If liquid has been spilled, or objects have fallen into the appliance, C. If the appliance has been exposed to rain or water, D. If the appliance does not operate normally by following the operating instructions.
DV-SP404.404E_En.book Page 4 Wednesday, June 7, 2006 1:50 PM Precautions—Continued 8. To Obtain a Clear Picture—This unit is a hightech, precision device. If the lens on the optical pickup, or the disc drive mechanism becomes dirty or worn, the picture quality may be affected. To maintain the best picture quality, we recommend regular inspection and maintenance (cleaning or worn part replacement) every 1,000 hours of use depending on the operating environment. Contact your Onkyo dealer for details. 9.
DV-SP404.404E_En.book Page 5 Wednesday, June 7, 2006 1:50 PM Precautions—Continued For U.S. models For British models FCC Information for User Replacement and mounting of an AC plug on the power supply cord of this unit should be performed only by qualified service personnel. CAUTION: The user changes or modifications not expressly approved by the party responsible for compliance could void the user’s authority to operate the equipment.
DV-SP404.404E_En.book Page 6 Wednesday, June 7, 2006 1:50 PM Table of Contents Basic Operation Advanced Operation Overview Playback Techniques Important Safety Instructions.............................. 2 Precautions ........................................................ 3 Introduction......................................................... 7 Supplied Accessories ..................................... 7 Features ......................................................... 7 Disc Notes ..................
DV-SP404.404E_En.
DV-SP404.404E_En.book Page 8 Wednesday, June 7, 2006 1:50 PM Introduction—Continued Disc Notes Supported Discs The DV-SP404/DV-SP404E supports the following discs. Disc DVD-Video Logo Format or file type See page 50 for region information. DVD-Video DVD-R DVD-RW DVD-Video, VR format Discs Made on Personal Computers Discs made on personal computers, including those of a compatible format, may not work properly in the DVSP404/DV-SP404E because of incorrect settings in the disc burning software.
DV-SP404.404E_En.book Page 9 Wednesday, June 7, 2006 1:50 PM Introduction—Continued About WMA WMA is an acronym for Windows Media Audio and refers to an audio compression technology developed by Microsoft Corporation. WMA content can be encoded by using Windows Media® Player version 7, 7.1, Windows Media® Player for Windows® XP, or Windows Media® Player 9 Series.
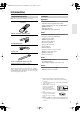
DV-SP404.404E_En.book Page 10 Wednesday, June 7, 2006 1:50 PM Introduction—Continued Handling Discs Storing Discs • Never touch the underside of a disc. Always hold discs by the edge, as shown. • Don’t store discs in places subject to direct sunlight, or near heat sources. • Don’t store discs in places subject to moisture or dust, such as in a bathroom or near a humidifier. • Always store discs in their cases and vertically.
DV-SP404.404E_En.book Page 11 Wednesday, June 7, 2006 1:50 PM Before Using the DV-SP404/DV-SP404E Installing the Batteries 1 Open the battery compartment, as shown. Using the Remote Controller To use the remote controller, point it at the DV-SP404/ DV-SP404E’s remote control sensor, as shown below. Remote control sensor DV-SP404/DV-SP404E 2 3 Insert the two supplied batteries (AA) in accordance with the polarity diagram inside the battery compartment. Close the battery compartment.
DV-SP404.404E_En.book Page 12 Wednesday, June 7, 2006 1:50 PM Front & Rear Panels For detailed information, refer to the pages in brackets. Front Panel 1 2 3 8 A STANDBY/ON button [23, 26] 4 9 J K I (stop) button [27] This button is used to stop playback. J (pause) button [27] This button is used to pause playback. K (PLAY) button [26, 27] This button is used to start playback. L (OPEN/CLOSE) button [26] This button is used to open and close the disc tray.
DV-SP404.404E_En.book Page 13 Wednesday, June 7, 2006 1:50 PM Front & Rear Panels—Continued Display 12 3 4 5 6 7 8 9 1 Pause indicator This indicator appears when playback is paused. 2 Play indicator This indicator is shown during playback. 3 CHP indicator This indicator appears while the number of the current chapter is being displayed. 4 TITLE indicator While stopped, the total number of titles on the current DVD-Video disc is displayed here.
DV-SP404.404E_En.book Page 14 Wednesday, June 7, 2006 1:50 PM Front & Rear Panels—Continued Rear Panel DV-SP404 North American model 1 3 456 9 DV-SP404 Oceanian model 1 2 8 3 456 9 DV-SP404E European model 1 3 456 A HDMI OUT [21] This connector can be used to connect a TV or projector with an HDMI input. This connector outputs digital audio and digital video.
DV-SP404.404E_En.book Page 15 Wednesday, June 7, 2006 1:50 PM Front & Rear Panels—Continued Remote Controller 1 2 ON L STANDBY OPEN/ CLOSE PLAY MODE 1 2 3 4 5 6 7 8 9 0 CLEAR DISPLAY 3 O MENU TOP MENU 4 5 6 7 8 9 J K P Q ENTER RETURN AUDIO M N SETUP ANGLE SUBTITLE ZOOM R S T U V W RC-616DV A STANDBY button [23] This button is used to set the DV-SP404/DVSP404E to Standby. B ON button [23] This button is used to turn on the DV-SP404/DVSP404E.
DV-SP404.404E_En.book Page 16 Wednesday, June 7, 2006 1:50 PM Front & Rear Panels—Continued K Fast Forward /( ) button [27, 30, 31] This button is used for fast forward, slow motion, and frame-by-frame playback. L OPEN/CLOSE button [26] This button is used to open and close the disc tray. M PLAY MODE button [34–37] This button is used to open and close the Play Mode menu.
DV-SP404.404E_En.book Page 17 Wednesday, June 7, 2006 1:50 PM Connecting the DV-SP404/DV-SP404E Before Making Any Connections • Read the manuals supplied with your AV components. • Don’t connect the power cord until you’ve completed all audio and video connections. Optical Digital Output (not North American and European models) The optical digital connector is fitted with protective cap. Before connecting a cable, remove the cap and keep it safely. When you disconnect the cable, put the cap back in.
DV-SP404.404E_En.book Page 18 Wednesday, June 7, 2006 1:50 PM Connecting the DV-SP404/DV-SP404E—Continued Basic Setup The setup described here is a basic setup that allows you to play discs using just the supplied AV cable (RCA/phono). In this setup, stereo audio is played through the speakers in your TV. VIDEO IN TV L R ANALOG INPUT To power outlet Important: • This player is equipped with copy protection technology.
DV-SP404.404E_En.book Page 19 Wednesday, June 7, 2006 1:50 PM Connecting the DV-SP404/DV-SP404E—Continued Switching the video output to interlace using the front panel controls Switch the player to standby then, using the front panel controls, press STANDBY/ON while pressing to switch the player back to Interlace. • If the player is connected using HDMI, disconnect the HDMI cable before resetting the player to interlace output.
DV-SP404.404E_En.book Page 20 Wednesday, June 7, 2006 1:50 PM Connecting the DV-SP404/DV-SP404E—Continued Connecting Your TV • Connect the DVD Player to the TV directly. If you connect the DVD Player to a VCR, TV/VCR combination, or video selector, the playback picture may be distorted as DVD videos are copy protected. Using S-Video (not European model) If your TV (or other equipment) has an S-Video input, you can use this instead of the standard (composite) output for a better quality picture.
DV-SP404.404E_En.book Page 21 Wednesday, June 7, 2006 1:50 PM Connecting the DV-SP404/DV-SP404E—Continued Using HDMI About HDMI If you have a HDMI equipped monitor or display, you can connect it to this player using a commercially available HDMI cable. The HDMI connector outputs uncompressed digital video, as well as almost every kind of digital audio that the player is compatible with, including DVD-Video, Video CD, CD and MP3.
DV-SP404.404E_En.book Page 22 Wednesday, June 7, 2006 1:50 PM Connecting the DV-SP404/DV-SP404E—Continued Connecting to an AV Receiver Although you can reproduce the DVD Player’s sound from the TV speakers with the connections on page 18, connecting with an amplifier provides you high quality dynamic sounds. To reproduce Dolby Digital surround and DTS surround sound, you need to connect to an amplifier with a Dolby Digital and DTS decoder respectively.
DV-SP404.404E_En.book Page 23 Wednesday, June 7, 2006 1:50 PM Connecting the Power/Turning on the DV-SP404/ DV-SP404E Before connecting • Make sure that all the connections on pages 17 – 22 are complete (the connection to a TV is required). 1 North American model: Connect the power cord into the power outlet on the wall. Oceanian and European model; Plug the supplied power cord into the AC INLET and then into the power outlet on the wall.
DV-SP404.404E_En.book Page 24 Wednesday, June 7, 2006 1:50 PM Getting Started Using the on-screen displays Setting up the player for your TV For ease of use, this player makes extensive use of graphical on-screen displays (OSDs). All the screens are navigated in basically the same way, using the cursor ( / / / ) buttons to change the highlighted item and pressing ENTER to select it. ON If you have a widescreen (16:9) TV, you should setup the player so that the picture will be presented correctly.
DV-SP404.404E_En.book Page 25 Wednesday, June 7, 2006 1:50 PM Getting Started—Continued Setting the language of this player’s on-screen displays This sets the language of this system’s on-screen displays. ON STANDBY OPEN/ CLOSE PLAY MODE 1 2 3 DISPLAY 4 5 6 7 8 9 0 CLEAR MENU TOP MENU ENTER SETUP RETURN SETUP AUDIO 1 ANGLE SUBTITLE ZOOM Press SETUP and select “Initial Settings”. SETUP Initial Settings 2 Select “OSD Language” from the “Display” settings.
DV-SP404.404E_En.book Page 26 Wednesday, June 7, 2006 1:50 PM Getting Started—Continued Playing discs 3 Load a disc. Load a disc with the label side facing up, using the disc tray guide to align the disc (if you’re loading a double-sided DVD disc, load it with the side you want to play face down). 4 Press (play) to start playback. If you’re playing a DVD or Video CD, an on-screen menu may appear. See “DVDVideo disc menus” on page 28 and “Video CD PBC menus” on page 28 for more on how to navigate these.
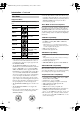
DV-SP404.404E_En.book Page 27 Wednesday, June 7, 2006 1:50 PM Getting Started—Continued Basic playback controls Resume and Last Memory The table below shows the basic controls on the remote for playing discs. The following chapter covers other playback features in more detail.
DV-SP404.404E_En.book Page 28 Wednesday, June 7, 2006 1:50 PM Getting Started—Continued DVD-Video disc menus Video CD PBC menus Many DVD-Video discs feature menus from which you can select what you want to watch. They may also give access to additional features, such as subtitle and audio language selection, or special features such as slideshows. See the disc packaging for details.
DV-SP404.404E_En.book Page 29 Wednesday, June 7, 2006 1:50 PM Getting Started—Continued Hint: • After I load a DVD disc, it ejects automatically after a few seconds! → Most likely, the disc is the wrong region for your player. The region number should be printed on the disc; check it against the region number of the player (which you can find on the rear panel). See also DVD-Video regions on page 50. → If the region number is OK, it may be that the disc is damaged or dirty.
DV-SP404.404E_En.book Page 30 Wednesday, June 7, 2006 1:50 PM Playing discs Notes: • Many of the functions covered in this chapter apply to DVD discs, Video CDs, CDs, DivX Video and MP3/ JPEG discs, although the exact operation of some varies slightly with the kind of disc loaded. • Some DVDs restrict the use of some functions (random or repeat, for example) in some or all parts of the disc. This is not a malfunction. • When playing Video CD, some of the functions are not available during PBC playback.
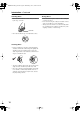
DV-SP404.404E_En.book Page 31 Wednesday, June 7, 2006 1:50 PM Playing discs—Continued Frame advance/frame reverse Viewing a JPEG slideshow You can advance or back up DVD discs frame-by-frame. With Video CD and DivX Video you can only use frame advance. ON STANDBY OPEN/ CLOSE PLAY MODE 1 2 3 After loading a CD/CD-R/RW containing JPEG picture files, press (play) to start a slideshow from the first folder/picture on the disc. The player displays the pictures in each folder in alphabetical order.
DV-SP404.404E_En.book Page 32 Wednesday, June 7, 2006 1:50 PM Playing discs—Continued Browsing video content with the Disc Navigator • Play List: Title – Playlist titles from a VR mode DVD-RW disc. • Original: Time – Thumbnails from the Original content at 10 minute intervals. • Play List: Time – Thumbnails from the Playlist at 10 minute intervals. The screen shows up to six moving thumbnail images displayed one after another.
DV-SP404.404E_En.book Page 33 Wednesday, June 7, 2006 1:50 PM Playing discs—Continued Browsing WMA, MP3, DivX Video and JPEG files with the Disc Navigator Use the Disc Navigator to find a particular file or folder by filename. Note that if there are other types of files on the same disc, these will not be displayed in the Disc Navigator. ON STANDBY OPEN/ CLOSE 3 ENTER To play the highlighted track or DivX Video file, or to display the highlighted JPEG file, press ENTER.
DV-SP404.404E_En.book Page 34 Wednesday, June 7, 2006 1:50 PM Playing discs—Continued Looping a section of a disc The A-B Repeat function allows you to specify two points (A and B) within a track (CD, Video CD) or title (DVD) that form a loop which is played over and over. • You can’t use A-B Repeat with Video CD in PBC mode, or WMA/MP3/DivX Video files. ON Using repeat play There are various repeat play options, depending on the kind of disc loaded.
DV-SP404.404E_En.book Page 35 Wednesday, June 7, 2006 1:50 PM Playing discs—Continued Using random play 1 Use the random play function to play titles or chapters (DVD-Video) or tracks (CD, Video CD) at random. (Note that the same track/title/chapter may play more than once.) You can set the random play option when a disc is playing or stopped. Important: • Random play remains in effect until you select Random Off from the random play menu options.
DV-SP404.404E_En.book Page 36 Wednesday, June 7, 2006 1:50 PM Playing discs—Continued Creating a program list 3 Use the cursor ( / / / ) buttons and ENTER to select a title, chapter or track for the current step in the program list. For a DVD disc, you can add a title or a chapter to the program list. This feature lets you program the play order of titles/ chapters/tracks on a disc.
DV-SP404.404E_En.book Page 37 Wednesday, June 7, 2006 1:50 PM Playing discs—Continued Other functions available from the program menu There are a number of other options in the program menu in addition to Create/Edit.
DV-SP404.404E_En.book Page 38 Wednesday, June 7, 2006 1:50 PM Playing discs—Continued Switching subtitles Switching audio language/channel Some DVD or DivX Video discs have subtitles in one or more languages; the disc box will usually tell you which subtitle languages are available. You can switch subtitle language during playback. ON When playing a DVD or DivX Video disc recorded with dialog in two or more languages, you can switch audio language during playback.
DV-SP404.404E_En.book Page 39 Wednesday, June 7, 2006 1:50 PM Playing discs—Continued Zooming the screen Switching camera angles Using the zoom feature you can magnify a part of the screen by a factor of 2 or 4, while watching a DVD, DivX Video title or Video CD, or playing a JPEG disc. MODE 1 2 3 DISPLAY 4 5 6 7 8 9 0 CLEAR MENU TOP MENU / Some DVD discs feature scenes shot from two or more angles—check the disc box for details.
DV-SP404.404E_En.book Page 40 Wednesday, June 7, 2006 1:50 PM Audio Settings and Video Adjust menus Audio Settings menu Audio DRC The Audio Settings menu offers features for adjusting the way discs sound. ON STANDBY OPEN/ CLOSE PLAY MODE 1 2 3 DISPLAY 4 5 6 7 8 9 0 CLEAR / / / MENU TOP MENU ENTER ENTER SETUP RETURN SETUP AUDIO 1 SETUP ANGLE SUBTITLE ZOOM Press SETUP and select “Audio Settings” from the on-screen display.
DV-SP404.404E_En.book Page 41 Wednesday, June 7, 2006 1:50 PM Audio Settings and Video Adjust menus—Continued Video Adjust menu 2 Make settings using the cursor ( / / / ) buttons, and ENTER. From the Video Adjust screen you can adjust various settings that affect how the picture is presented.
DV-SP404.404E_En.book Page 42 Wednesday, June 7, 2006 1:50 PM Initial Settings menu Using the Initial Settings menu The Initial Settings menu provides audio and video output settings, parental lock settings, and display settings, among others. If an option is grayed out it means that it cannot be changed at the current time. This is usually because a disc is playing. Stop the disc, then change the setting.
DV-SP404.404E_En.book Page 43 Wednesday, June 7, 2006 1:50 PM Initial Settings menu—Continued Digital Audio Out settings Setting Digital Out Option On Digital audio is output from the digital outputs. Off No digital audio output. Dolby Digital Dolby Digital encoded digital audio is output when playing a Dolby Digital DVD disc. Dolby Digital > PCM Dolby Digital audio is converted to PCM audio before being output. DTS DTS encoded digital audio is output when playing a DTS disc.
DV-SP404.404E_En.book Page 44 Wednesday, June 7, 2006 1:50 PM Initial Settings menu—Continued Video Out settings Setting TV Screen (This setting effective for analog and HDMI video output. See also “Screen sizes and disc formats” on page 49.) Component Out AV Connector Out (European model only) HDMI Resolution (Default changes with TV format (PAL/NTSC).) HDMI Color (Default changes depending on device connected.) 44 Option What it means 4:3 (Letter Box) Set if you have a conventional 4:3 TV.
DV-SP404.404E_En.book Page 45 Wednesday, June 7, 2006 1:50 PM Initial Settings menu—Continued Language settings Setting Audio Language*1 Option If there is an English soundtrack on the disc then it will be played. Languages as displayed If there is the language selected on the disc, then it will be played. Other Language Select to choose a language other than the ones displayed (see page 50). English If there is are English subtitles on the disc then they will be displayed.
DV-SP404.404E_En.book Page 46 Wednesday, June 7, 2006 1:50 PM Initial Settings menu—Continued Parental Lock Changing your password • Default level: Off; Default password: none; Default Country/Area code: us (2119) To give you some control over what your children watch on your DVD player, some DVD-Video discs feature a Parental Lock level. If your player is set to a lower level than the disc, the disc won’t play. Some discs also support the Country/Area Code feature.
DV-SP404.404E_En.book Page 47 Wednesday, June 7, 2006 1:50 PM Initial Settings menu—Continued Setting/changing the Country/Area code You can find the Country/Area code list in the adjacent column. 1 Select “Country Code”. 2 Use number buttons to enter your password, then press ENTER.
DV-SP404.404E_En.book Page 48 Wednesday, June 7, 2006 1:50 PM Initial Settings menu—Continued About DivX® VOD content Playing DivX® VOD content In order to play DivX VOD (video on demand) content on this player, you first need to register the player with your DivX VOD content provider. You do this by generating a DivX VOD registration code, which you submit to your provider. Important: • DivX VOD content is protected by a DRM (Digital Rights Management) system.
DV-SP404.404E_En.book Page 49 Wednesday, June 7, 2006 1:50 PM Additional information Screen sizes and disc formats DVD-Video discs come in several different screen aspect ratios, ranging from TV programs, which are generally 4:3, to Cinema- Scope widescreen movies, with an aspect ratio of up to about 7:3. Televisions, too, come in different aspect ratios; “standard” 4:3 and widescreen 16:9. Resetting the player Use this procedure to reset all the player’s settings to the factory default.
DV-SP404.404E_En.book Page 50 Wednesday, June 7, 2006 1:50 PM Additional information—Continued Note: • You have to switch the player into standby (press STANDBY/ON) before each change.
DV-SP404.404E_En.
DV-SP404.404E_En.book Page 52 Wednesday, June 7, 2006 1:50 PM Glossary Analog audio EXIF (Exchangeable Image File) An electrical signal that directly represents sound. Compare this to digital audio which can be an electrical signal, but is an indirect representation of sound. See also “Digital audio”. A file format developed by Fuji Photo Film for digital still cameras.
DV-SP404.404E_En.book Page 53 Wednesday, June 7, 2006 1:50 PM Glossary—Continued Progressive scan video All the lines that make up a video picture are updated in one pass (compared to interlace which takes two passes to update the whole picture). Regions (DVD-Video only) These associate discs and players with particular areas of the world. This unit will only play discs that have compatible region codes. You can find the region code of your unit by looking on the rear panel.
DV-SP404.404E_En.book Page 54 Wednesday, June 7, 2006 1:50 PM Troubleshooting If you have any trouble using your DV-SP404/DV-SP404E, check the following table for possible causes and remedies. If you still can’t resolve the issue yourself, please contact your Onkyo dealer. Symptoms Can’t turn on the DVSP404/DV-SP404E? The disc tray won’t close properly? Causes The power cord is not connected. External interference is affecting the DVSP404/DV-SP404E’s digital circuitry.
DV-SP404.404E_En.book Page 55 Wednesday, June 7, 2006 1:50 PM Troubleshooting—Continued No sound? DVD Player The picture appears stretched or the wrong shape? The 96 kHz PCM Out setting is set to “96 kHz.” Change the 96 kHz PCM Out setting to “96 kHz > 48 kHz,” or use analog connections (page 43). The Digital Out setting is set to “Off.” Change the Digital Out setting to “On” (page 43). The wrong input source is selected on your TV, hi-fi amp, or AV receiver.
DV-SP404.404E_En.book Page 56 Wednesday, June 7, 2006 1:50 PM Troubleshooting—Continued DVD Player Can’t play MP3/WMA/ JPEG discs? Can’t select MP3 files? Can’t play WMA files? Remote Controller Can’t view JPEG files? 56 Buttons on the DVSP404/DV-SP404E work OK but those on the remote controller don’t? The disc is not ISO 9660 Level 1 or 2 format. Correct format should be used when recording is ISO 9660 and closed session (page 8). The disc has not been finalized. Finalize the disc (page 8).
DV-SP404.404E_En.book Page 57 Wednesday, June 7, 2006 1:50 PM Troubleshooting—Continued HDMI troubleshooting Incorrect operation is often mistaken for trouble or malfunction. If you think that there is something wrong with this component, check the points below. Sometimes the trouble may lie in another component. Inspect the other components and electrical appliances being used.
DV-SP404.404E_En.book Page 58 Wednesday, June 7, 2006 1:50 PM Specifications Signal System NTSC/PAL/AUTO Composite Video Output/Impedance 1.0 V (p-p)/75 Ω negative sync, RCA/phono S-Video Output/Impedance (not European model) Y: 1.0 V (p-p)/75 Ω negative sync, 4-pin mini DIN C: 0.286 V (p-p)/75 Ω Component Video Output/Impedance Y: 1.0 V (p-p)/75 Ω PB/PR: 0.7 V (p-p)/75 Ω RCA/phono HDMI Out 19 pin connector AV Connector (European model only) 1.
DV-SP404.404E_En.
DV-SP404.404E_En.book Page 60 Wednesday, June 7, 2006 1:50 PM Sales & Product Planning Div. : 2-1, Nisshin-cho, Neyagawa-shi, OSAKA 572-8540, JAPAN Tel: 072-831-8023 Fax: 072-831-8124 ONKYO U.S.A. CORPORATION 18 Park Way, Upper Saddle River, N.J. 07458, U.S.A. Tel: 201-785-2600 Fax: 201-785-2650 http://www.us.onkyo.com/ ONKYO EUROPE ELECTRONICS GmbH Liegnitzerstrasse 6, 82194 Groebenzell, GERMANY Tel: +49-8142-4401-0 Fax: +49-8142-4401-555 http://www.eu.onkyo.