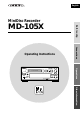
English MiniDisc Recorder Before using MD-105X Connections Operating Instructions AMCS (PUSH TO ENTER) DISC LOADING MECHANISM0 STANDBY/ON STANDBY INPUT MO ST D1 D2 CD DUBBING REC DISPLAY EDIT/NO YES ANALOG MD-105X Operations MINDISC RECODER Other Information
Before using Thank you for purchasing ... Thank you for purchasing the ONKYO MD-105X MD Recorder. Please read this manual thoroughly before making connections and plugging in the unit. Following the instructions in this manual will enable you to obtain the optimum performance and listening enjoyment from your new MD-105X. Please retain this manual for future reference.
Important Safeguards 1. Read Instructions – All the safety and operating instructions should be read before the appliance is operated. 2. Retain Instructions – The safety and operating instructions should be retained for future reference. Heed Warnings – All warnings on the appliance and in the operating instructions should be adhered to. 4. Follow Instructions – All operating and use instructions should be followed. 5.
Precautions 1. Warranty Claim You can find the serial number on the rear panel of this unit. In case of warranty claim, please report this number. 2. Recording Copyright Recording of copyrighted material for other than personal use is illegal without permission of the copyright holder. 3. Power WARNING BEFORE PLUGGING IN THE UNIT FOR THE FIRST TIME, READ THE FOLLOWING SECTION CAREFULLY. The voltage of the available power supply differs according to country or region.
Precautions(continued) For U.S. model FCC INFORMATION FOR USER CAUTION: The user changes or modifications not expressly approved by the party responsible for compliance could void the user’s authority to operate the equipment. Operations Other Information NOTE: This equipment has been tested and found to comply with the limits for a Class B digital device, pursuant to Part 15 of the FCC Rules.
Precautions(continued) For Canadian model For British model CAUTION: THIS DIGITAL APPARATUS DOES NOT Replacement and mounting of an AC plug on the power supply cord of this unit should be performed only by qualified service personnel. EXCEED THE CLASS B LIMITS FOR RADIO NOISE EMISSION FROM DIGITAL APPARATUS SET OUT IN THE RADIO INTERFERENCE REGULATIONS OF THE CANADIAN DEPARTMENT OF COMMUNICATIONS.
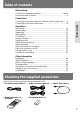
Table of contents Before Using Checking the supplied accessories ............................................... Below Using the remote controller ................................................................ 8 Connections Connecting to the Onkyo Separate Collection series components ....... 9 Connecting to the other components ...............................................
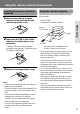
Using the remote controller Inserting the remote controller batteries 1 Remove the battery compartment cover by opening it as shown in the illustration. Using the remote controller Point the remote controller toward the remote control sensor. With the supplied remote controller (RC-409MD) MD-105X Remote control sensor 5m 30° 30° 2 Insert two AA (R6 or UM-3)-size batteries into the battery compartment.
Using the remote controller(continued) Inserting the remote controller batteries 1 Remove the battery compartment cover by pressing the tab and lifting up the cover. Using the remote controller Point the remote controller toward the remote control sensor. With RC-398S (supplied with A-905X amplifier) A-905X 30° 30° 5m 2 Insert two AA (R6 or UM-3)-size batteries into the battery compartment.
Connections Connecting to the Onkyo Separate Collection series components This section introduces you to the other Separate Collection Series system components and their convenient system functions, followed by connecting instructions. The following Separate Collection series components are commercially available: • T-405X ........ Stereo Tuner • A-905X ....... Integrated Stereo Amplifier • K-505X ....... Stereo Cassette Tape Deck • C-705X ....... Compact Disc (CD) Player (Not available in U.S.
Connecting to the other components Before connecting • Do not connect the unit's AC power cord to a wall outlet until you have completed all the other connections. • On each pair of connectors, a red connector (marked R) corresponds to the right channel, and a white connector (marked L) to the left channel. Connect white plugs of audio connection cables to L connectors and connect red pugs of audio connection cables to R connectors.
Connecting to the other components • This unit use heat-sensitive parts. Do not place this unit on the Amplitier or Receiver. Connections ANALOG INPUT (REC) Audio connection cable REMOTE CONTROL OUTPUT (PLAY) US AND FOREIGN PATENTS LICENSED FROM DOLBY LABORATORIES. DIGITAL INPUT OPTICAL L L R R 1 2 MINIDISC RECORDER MODEL NO.
Connecting to the other components (continued) Connecting the (z) controller If you are using other ONKYO components equipped with z connectors, you can control these components using the amplifier's remote cnotroller. Before connecting The amplifier must be connected in the z system hookups for z control operation. Each component has two z connentors. There is no differents between those connectors. The components may be connected in any order.
Operations Normal play RC-409MD r e POWER MINDISC RECODER EJECT EJECT POWER (supplied) RC-398S (supplied with A-905X) AMCS (PUSH TO ENTER) INPUT SELECTOR POWER PLAY MODE CONTINUE RANDOM MEMORY n DISC LOADING MECHANISM0 STANDBY/ON CLOCK CALL SLEEP A 2 3 4 5 G H I J 9 8 7 L M N O 12 13 14 15 ACOUSTIC G.
Normal play (continued) RC-409MD (supplied) AMCS (PUSH TO ENTER) INPUT SELECTOR POWER PLAY MODE CONTINUE RANDOM MEMORY CLOCK CALL SLEEP DISC LOADING MECHANISM0 STANDBY/ON (supplied with A-905X) EJECT POWER MINDISC RECODER RC-398S A B C D E 1 2 3 4 5 F CD DUBBING G 6 REC TAPE J 9 FM AM REPEAT SCROLL 10 L M N O 12 13 14 15 P Q R S T DVD PAUSE/STEP EDIT/NO YES 18 17 U DISPLAY I 8 K 11 16 STANDBY INPUT MO ST D1 D2 H 7 ACOUSTIC G.
Normal play (continued) RC-409MD(supplied) RC-398S qAMCSw EJECT POWER MINDISC RECODER (supplied with A-905X) AMCS (PUSH TO ENTER) INPUT SELECTOR POWER PLAY MODE CONTINUE RANDOM MEMORY CLOCK CALL SLEEP A DISC LOADING MECHANISM0 CD DUBBING REC EDIT/NO YES E 2 3 4 5 G H I J 9 8 7 L M N O 12 13 14 15 P Q R S T 17 18 19 20 V W X Y 22 23 24 . , REPEAT A-B A.SPACE M.SCAN ? ! ( Z 25 >25 / REC ACOUSTIC G.
Normal play (continued) RC-409MD (supplied) EJECT POWER MINDISC RECODER AMCS (PUSH TO ENTER) PLAY MODE CONTINUE RANDOM MEMORY A DISC LOADING MECHANISM0 STANDBY/ON 1 d,f CD DUBBING REC F 6 C 2 D 3 G 4 H I 8 7 9 M N O 13 14 15 Q R S T 16 17 18 19 20 V W X YES Y 22 23 24 . , REPEAT A-B A.SPACE M.
Random play RC-409MD(supplied) n AMCS (PUSH TO ENTER) DISC LOADING MECHANISM0 STANDBY/ON CD DUBBING CONTINUE RANDOM REC with A-905X) EJECT POWER MINDISC RECODER RC-398S (supplied INPUT SELECTOR POWER PLAY MODE CONTINUE RANDOM MEMORY CLOCK CALL SLEEP A B 1 2 F G C D 3 4 H ACOUSTIC G.
Repeat play RC-409MD RC-398S (supplied) EJECT POWER A B C D E 1 2 3 4 5 F G H I J 8 7 INPUT SELECTOR POWER PLAY MODE CONTINUE RANDOM MEMORY 6 (supplied with A-905X) 9 CLOCK CALL SLEEP 10 K L M N O 11 12 13 14 15 ACOUSTIC G. EQUALIZER MODE PRESENCE EFFECT TAPE TUNER PRESET FM AM REPEAT SCROLL DVD PAUSE/STEP REPEAT A-B P Q R S T 16 17 18 19 20 U V W X Y 21 22 23 24 . , REPEAT A-B A.SPACE M.
Repeat play (continued) To stop A-B Repeat • Press the A-B or REPEAT button when a section is in Repeat play. The A-B Repeat mode is now canceled. • Press the e button when a section is in Repeat play. The A-B Repeat mode is canceled and play of the current track stops. Note A-B Repeat cannot be used when the unit is in Repeat (all-track or single-track), Memory, or Random play.
Memory play RC-409MD (supplied) RC-398S qAMCSw n EJECT POWER MINDISC RECODER AMCS (PUSH TO ENTER) CONTINUE DISC LOADING MECHANISM0 STANDBY/ON REC B C D E 1 2 3 4 5 F G H I J 8 7 9 10 K L M N O 11 12 13 14 15 P Q R S T 16 17 18 19 20 U V W X Y 21 22 23 24 . , REPEAT A-B A.SPACE M.
Memory play (continued) Using the Auto Space function (RC-409MD only) Selecting a track using the remote controller (RC-409MD) (RC-398S) 1 F 2 G 3 H 4 I 5 J 6 K 7 L 8 M 9 N 10 O 11 P 12 Q 13 R 14 S 15 T 16 U 17 V 18 W 19 X 20 Y 21 Z 22 23 24 25 . , 1 CD/MD 2 3 4 5 6 7 8 9 -- / - - - 10 / 0 >25 / To select a track numbered 26 or above using RC-409MD Press the [>25] button first.
CD-dubbing (System operation) CD-DUBBING MINDISC RECODER AMCS (PUSH TO ENTER) DISC LOADING MECHANISM0 STANDBY/ON CD DUBBING REC STANDBY INPUT DISPLAY MO ST D1 D2 EDIT/NO YES YES ANALOG MD-105X CD-dubbing (System operation) MINDISC RECODER AMCS (PUSH TO ENTER) DISC LOADING MECHANISM0 STANDBY/ON CD DUBBING REC STANDBY INPUT DISPLAY MO ST D1 D2 EDIT/NO YES ANALOG MD-105X ANALOG IN L 40 20 10 6 2 0 R 1 2 3 4 5 6 7 8 9 10 11 12 13 14 15 15 When the MD recorder is stopped, press
CD-dubbing (System operation) 4 Press the EDIT/NO button to display "CD Dub Mode". 4-1 Press the EDIT/NO button repeatedly until "CD DubMode?" appears. CD-dubbing with track specified When this MD recorder is configured into a system with A-905X and C-705X only one track with CD playing or pausing can be recorded by one-touch operation. EDIT/NO CD DubMode? 1 Play a CD Play your desired track. 4-2 Press the YES button. The current CD dubbing mode is shown.
Analog recording n MINDISC RECODER AMCS (PUSH TO ENTER) qAMCSw DISC LOADING MECHANISM0 STANDBY/ON CD DUBBING REC STANDBY INPUT DISPLAY MO ST D1 D2 EDIT/NO EDIT/NO YES DISPLAY YES ANALOG MD-105X oREC In analog recording, audio connection cables are used for inputting signals from the recording source. 1 Press the STANDBY/ON button. The STANDBY indicator goes out.
Analog recording (continued) 4 Press the o REC button. The MD recorder is now in the recording standby mode. • When your MD-105X is configured with C-705X and K-505X, start playing the CD or tape before pressing the REC button in step 4. 5-2 Turn the AMCS knob to adjust the recording level. Adjust the recording level such that the -6 to -2 dB indicator lights when the input signal is largest.(Also refer to the current recording level readout displayed in dB.) Then, press the YES button.
Analog recording (continued) To disable the automatic track numbering function... Perform the following steps while you are recording or waiting for the recording to start: EDIT/NO DIGITAL IN 1 L 40 20 10 6 2 0 R 1 2 3 4 5 6 7 8 9 10 11 12 13 14 15 15 1. Press the EDIT/NO button. "LevelSync?" appears on the display. 2. Press the YES button. YES DIGITAL IN 1 To stop recording temporarily... Press the s/g button (or the g button on the remote controller).
Digital recording n MINDISC RECODER AMCS (PUSH TO ENTER) qAMCSw DISC LOADING MECHANISM0 STANDBY/ON CD DUBBING REC STANDBY INPUT DISPLAY MO ST D1 D2 EDIT/NO EDIT/NO YES DISPLAY YES ANALOG MD-105X INPUT oREC Digital recording refers to recording where an optical digital cable is used for inputting signals from the recording source. This MD recorder contains a digital input signal sampling frequency rate converter which converts the sampling frequency of digital input signals to 44.
Digital recording (continued) 4 Press the o REC button. The MD recorder is now in the recording standby mode. REC 5-2 Turn the AMCS knob to adjust the recording level. Adjust the recording level such that the -6 to 0 dB indicator lights when the input signal is largest.(Also refer to the current recording level readout displayed in dB.) Then, press the YES button. Before Using TRACK DIGITAL IN 1 L 40 20 10 6 2 0 R 1 2 3 4 5 6 7 8 9 10 11 12 13 14 15 AMCS TO ENTER ) ( PUSH 15 If "D.
Digital recording (continued) 6 Press the n button and then start playing the recording source immediately. The MD recorder stops recording automatically when the remaining space on the MD is not enough to record the next track. n Signal Wait function When "LvlSyncOn" is active and the unit receives no audio signal from the recording source for 10 seconds, the unit enters the "Signal Wait" status in which the unit waits for the audio signals from the source for approx. 20 seconds.
Signal Synchro recording MINDISC RECODER AMCS (PUSH TO ENTER) DISC LOADING MECHANISM0 STANDBY/ON CD DUBBING REC STANDBY INPUT DISPLAY MO ST D1 D2 EDIT/NO YES oREC ANALOG MD-105X Even if your recording source is not Onkyo z-compatible, you can perform synchronized recording. 1 Use the INPUT selector to select MO, ST, D1, or D2, according to the connected device. Recording starts as soon as the unit receives signals from the recording source while "Signal Wait" is displayed.
System operation MINDISC RECODER AMCS (PUSH TO ENTER) DISC LOADING MECHANISM0 STANDBY/ON CD DUBBING REC STANDBY INPUT DISPLAY MO ST D1 D2 EDIT/NO YES ANALOG MD-105X oREC (C-705X) CD-synchro recording When your MD recorder is configured into a system with Onkyo Separate Collection series components (A-905X and C-705X), the operation of the MD recorder can be synchronized with that of the CD player.
System operation (continued) MINDISC RECODER AMCS (PUSH TO ENTER) DISC LOADING MECHANISM0 STANDBY/ON CD DUBBING REC STANDBY INPUT DISPLAY MO ST D1 D2 EDIT/NO YES ANALOG MD-105X oREC Synchro-recording from cassette deck to MD (Cassette Synchro recording) The MD recorder starts recording as soon as the cassette deck starts playing. When playing of the cassette deck completes, the MD recorder stops recording and enters the recording standby mode.
System operation (continued) RC-409MD (supplied) n AMCS (PUSH TO ENTER) DISC LOADING MECHANISM0 CD DUBBING REC C D E 1 2 3 4 5 F G H I J 6 STANDBY/ON B 8 7 9 L M N O 12 13 14 15 P Q R S T 17 18 19 20 U V W X EDIT/NO YES TAPE FM AM REPEAT SCROLL DVD PAUSE/STEP MD 23 24 . , A-B A.SPACE M.SCAN ? ! ( 25 PLAY MODE CLEAR >25 / REC REPEAT RANDOM s REC CD ) CLEAR MEMORY CLEAR ENTER ANALOG MD-105X ACOUSTIC G.
System operation (continued) MINDISC RECODER AMCS (PUSH TO ENTER) DISC LOADING MECHANISM0 STANDBY/ON CD DUBBING REC STANDBY INPUT DISPLAY MO ST D1 D2 EDIT/NO YES ANALOG MD-105X 2 Set the INPUT selector to ST Timer operation 1 Insert an MD.
Other information for recording Checking the contents of recording • If you have not operated the unit since stopping a recording, the track to be played will flash in the music calendar. Press the n button to start playing the flashing track. • To playback from the beginning of the MD, immediately after recording is stopped, press the e button again. Then, press the n button (or the s button on the remote controller) to start playback.
Editing the contents of an MD 3 Press the YES button. Erasing a track The selected track is erased. When the erasing of the track is completed, "Complete" appears in the display. The following operation is possible when the unit is stopped or paused. 1 Turn the AMCS knob until the YES AMCS TO ENTER ) ( PUSH DIGITAL IN 1 L TOC TRACK DIGITAL IN 1 L 40 20 10 6 2 0 1 2 3 4 5 6 7 8 9 10 11 12 13 14 15 15 2 Press the EDIT/NO button several times until "Erase?" appears in the display.
Editing the contents of an MD (continued) qAMCSw MINDISC RECODER AMCS (PUSH TO ENTER) DISC LOADING MECHANISM0 STANDBY/ON CD DUBBING REC STANDBY INPUT DISPLAY MO ST D1 D2 EDIT/NO YES YES ANALOG MD-105X EDIT/NO AMCS TO ENTER ) Dividing a track ( PUSH The following operation is possible during the playback is ongoing or paused. 1 Press the EDIT/NO button several times until "Divide?" appears in the display.
Editing the contents of an MD (continued) 2 Press the EDIT/NO button several EDIT/NO TRACK DIGITAL IN 1 L 40 20 10 6 2 0 R 1 2 3 4 5 6 7 8 9 10 11 12 13 14 15 15 times until "Combine ?" appears in the display. To stop combining tracks Press the EDIT/NO button until “Combine?” disappears, or press the e button. 3 Press the YES button. Connections Note While the TOC indicator is lit or flashing, do not move or unplug the MD recorder.
Editing the contents of an MD (continued) 5 Press the YES button to combine the tracks you have selected. When the combining is completed, "Complete" appears in the display. YES DIGITAL IN 1 L TOC 40 R 20 10 6 2 0 8 9 10 11 12 13 14 15 15 • When tracks are combined, the tracks following those tracks are advanced, each given a new number which is smaller by one track than the previous track number.
Editing the contents of an MD (continued) qAMCSw MINDISC RECODER AMCS (PUSH TO ENTER) DISC LOADING MECHANISM0 STANDBY/ON CD DUBBING REC STANDBY INPUT DISPLAY MO ST D1 D2 EDIT/NO YES YES ANALOG MD-105X Before Using EDIT/NO 4 Turn the AMCS knob until the Moving a track The following operation is possible when the unit is stopped or paused. desired destination track number is displayed. 1 Turn the AMCS knob until the AMCS TO ENTER ) ( PUSH track number you want to move is displayed.
Naming a track or disc RC-409MD qAMCSw EJECT POWER MINDISC RECODER AMCS (PUSH TO ENTER) PLAY MODE CONTINUE RANDOM MEMORY A DISC LOADING MECHANISM0 1 STANDBY/ON F d,f CD DUBBING 6 REC STANDBY INPUT EDIT/NO YES MD-105X D 3 4 H E 5 I J 9 8 7 10 M N O 13 14 15 Q R S T 16 17 18 19 20 U V W X Y 22 23 24 . , REPEAT A-B A.SPACE M.
Naming a track or disc (Continued) 5 Enter a track name or disc name using the AMCS knob. (RC-409MD) PLAY MODE CONTINUE RANDOM MEMORY AMCS TO ENTER ) ( PUSH B C D E 1 F 2 G 3 H 4 I 5 J 6 K 7 L 8 M 9 N 10 O 11 P 12 Q 13 R 14 S 15 T 16 U 17 V 18 W 19 X 20 Y 24 25 . , 21 Z >25 / 22 23 REPEAT A-B ? ! To correct the character entered Move to the character you want to correct using the d and f buttons (the character blinks), and then reenter the character you want.
Naming a track or disc (Continued) Preset titles for easy titling In the Easy Titling mode, you can enter the following titles by simply choosing one. BALLAD BLUES CLASSIC DANCE FUSION JAZZ LIVE POPS REGGAE ROCK SOUL TECHNO VOCAL African American Asian British Euro German Japanese Anthology Best of (One space will be added following "of".) Collection Favorite Happy Heavy Hit Song Omnibus Selection Special Super Space ( ) (To enter a space, choose the symbol .
Canceling the last editing MINDISC RECODER AMCS (PUSH TO ENTER) DISC LOADING MECHANISM0 STANDBY/ON CD DUBBING STANDBY INPUT MO ST D1 D2 REC DISPLAY EDIT/NO YES YES ANALOG MD-105X The UNDO function cancels the last editing you performed with the ALL ERASE, ERASE, DIVIDE, COMBINE, MOVE, or NAME ERASE function. To undo the last editing, press the STOP button and perform the following steps: 2 Undo the last editing. Press the YES button.
Other Information Message list The following table explains the various messages that appear in the display. 46 Message Meaning Blank Disc A new recordable MD or a recordable MD without disc or track names is inserted. Cannot Copy An attempt was made to make a second copy from a digitally dubbed MD (see "Rules for Digital Recording" on page 48).
System limitations The recording system in your MiniDisc recorder is radically different from those used in cassette and DAT decks and is characterized by the limitations described below. Note, however, that these limitations are due to the inherent nature of the MD recording system itself and not to mechanical causes.
Rules for digital recording Guide to the serial copy management system Since your MD unit uses the Serial Copy Management System (SCMS), MDs recorded through the digital input terminal cannot be used to make subsequent copies to other MDs through the digital output terminal. The following diagram shows a system for making copies through the digital or analog terminals. Rule 1 You can record digital source (CD, premastered MD, and DAT equipment with a sampling frequency of 44.
Troubleshooting • Take the disc out and insert it again. If "Disk Error" remains, replace the disc. (See "Precautions for handling the MiniDisc (MD)" on page 51) The unit does not play. • Moisture has formed inside the unit. • Take the MD out and leave the unit in a warm place for several hours until the moisture evaporates (See page 50). • The unit is not on. • Press the STANDBY/ON button to turn the unit on. • The disc is inserted in the wrong direction.
Troubleshooting (Continued) Symptom Cause Remedy The disc name or track name cannot be entered. • The disc is record-protected (“Protected” appears). • Close the record-protect hole (See page 36). • Replace it with a recordable disc. • A premastered (read-only) disc is inserted (“Cannot Rec” appears). System function cannot be used. • The system functions cannot be used. • Check all cable connections. The system functions cannot be used even if remote control (z) cables are connected.
Precautions for handling the MiniDisc (MD) The MD is housed in a cartridge, so you can handle it without worrying about dust and fingerprints. Even so, a dirty or warped cartridge may cause malfunction. Always remember the following precautions so you can enjoy high-quality sound for a long time. Do not touch the disc in the cartridge directly with your fingers. Do not open the shutter by hand. Doing so may damage the disc.
Indexed to parts and controls Front panel STANDBY/ON button [13] Disc slot Ventilation holes Open/Close button (r) [14] Stop button (e) [14] Play/Pause button (n) [14] MINDISC RECODER AMCS (PUSH TO ENTER) DISC LOADING MECHANISM0 STANDBY/ON CD DUBBING AMCS knob (qAMCSw) [16, 21, 26, 29, 43] REC STANDBY INPUT DISPLAY MO ST D1 D2 EDIT/NO FF/FR button (d, f) [17, 43] YES ANALOG MD-105X STANDBY indicator [13] Display REC button (oREC) [26, 29] CD DUBBING DISPLAY button [23, 24] button [15, 42
Indexed to parts and controls (continued) Remote controller RC-409MD (supplied) EJECT POWER EJECT [14] A-B repeat button [19] PLAY MODE CONTINUE RANDOM MEMORY Number buttons [16, 22, 43] REPEAT button [19] A B C D E 1 2 3 4 5 F G H I J 6 7 8 9 10 K L M N O 11 12 13 14 15 P Q R S T 16 17 18 19 20 U V W X Y 21 22 23 24 25 . , REPEAT A-B A.SPACE M.SCAN ? ! ( Z A.SPACE button [22] M.
Indexed to parts and controls (continued) RC-398S (supplied with the A-905X amplifier) MD operation buttons Stop button ( e) [14] Play button (s) [14] Pause button ( g) [14] Rec button (oREC) [26] Down button (q) [16,43] Up button (w) [16,43] Repeat button (REPEAT) [19] Clear button (CLEAR) [21,43] Scroll button (SCROLL) [15] Play Mode button (PLAY MODE) [18,21] INPUT SELECTOR POWER CLOCK CALL SLEEP ACOUSTIC G.
MEMO Before Using Connections Operations Other Information 55
Specifications System MiniDisc digital audio system Number of channels 2 (stereo) Recording system Magnetic field modulation overwrite system Frequency response 10 Hz - 20 kHz (±0.5 dB) Signal read out system Optical non-contact Recording time Stereo : Max. 80 min. (when using MDW-80) Mono : Max. 160 min. (when using MDW-80) Number of revolutions About 400 - 900 rpm (constant linear velocity) Error correction system Advanced Cross Interleave Reed-solomon code Sampling frequency 44.