
Impress Guide
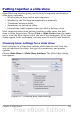

Setting automatic layout options
In Handout view, as in Notes view, Impress creates four areas where
you can put information about the presentation:
• Header area
• Date and Time area
• Footer area
• Slide number area
Note
The information in these areas does not show in Handout view,
but it does appear correctly on the printed handouts.
The way to access and customize these areas is the same as for the
Notes and uses the same dialog box. Refer to “Setting automatic layout
options” on page 206 for information.
Moving thumbnails and adding graphics
You can move (but not resize) the slide thumbnails and add lines,
boxes, and other graphic elements to the handouts. See Chapter 5
(Managing Graphic Objects) for instructions on using the graphics
tools.
Tip
After designing a handout, you may wish to save it in a template
so you can reuse it whenever you want. See “Working with
templates” in Chapter 2 (Slide Masters, Styles, and Templates)
for instructions on saving templates and starting a new
presentation from a template.
Caution
If you click on one of the other handout layouts and then return
to the one you have reformatted, the slide thumbnails return to
their original positions, although any lines or other graphics you
have added remain where you put them. You will need to move
the thumbnails back to where you want them.
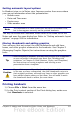
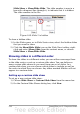
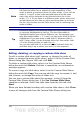
Printing handouts
1) Choose File > Print from the menu bar.
2) In the Print content section of the Print dialog box, make sure
that Handouts is selected.
Chapter 8 Adding and Formatting Slides, Notes, and Handouts 211