
Impress Guide


3) Click and drag to resize the picture.
4) Release the mouse button when satisfied with the new size.
The corner handles resize both the width and the height of the graphic
object simultaneously, while the other four handles only resize one
dimension at a time.
Tip
To retain the original proportions of the graphic, Shift+click one
of the corner handles, then drag. Be sure to release the mouse
button before releasing the Shift key.
For more accurate resizing of the graphic object, use the Position and
Size dialog box described in Chapter 6 (Formatting Graphic Objects).
Caution
Be aware that re-sizing a bit-mapped (raster) image will
adversely affect the resolution, causing some degree of blurring.
It is better to use a specialized graphics manipulation program to
correctly scale the picture to the desired size before inserting it
into your presentation. We recommend you use a tool such as
Gimp (http://www.gimp.org/).
Rotating a picture
As for the position of the image on the page, rotation of a picture can
be done manually or using a dedicated dialog box. The Rotation dialog
box is described in Chapter 6 (Formatting Graphic Objects). To rotate a
picture manually, do as follows:
1) Select the picture if necessary so that the green handles around it
show.
2) Click the Rotate button on the Drawing toolbar. This toolbar
is usually located at the bottom the screen, but it can be
undocked and used as a floating toolbar. If the toolbar is not
showing, select View > Toolbars > Drawing. The Drawing
toolbar is discussed in detail in Chapter 5 (Creating Graphic
Objects).
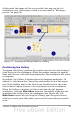
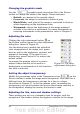
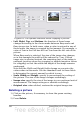
At this stage a black crosshair with a
circle appears in the middle of the
picture: this represents the pivot
point for the rotation. Normally the
center of the picture will be just fine,
but on some occasions you may wish
to rotate around a corner or even
around a point outside the picture; to
Chapter 4 Adding and Formatting Pictures 95
Figure 60: Shape showing
the red rotating handles