
Impress Guide


do that, click on the crosshair and drag it to the desired position
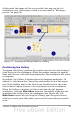
before applying the rotation, as shown in Figure 60.
Note
The icons representing the functions in the toolbars are
different, depending on the operating system used and on
whether OOo has been customized for the Linux distribution in
use or not. When in doubt, hover the mouse over the icons and
wait for the tooltip to appear showing the name of the button.
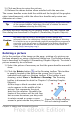
3) Eight red circular handles replace the green square handles, as
shown in Figure 60. Move the mouse over one of the corner
handles and the mouse cursor shape will change. Click the mouse
and move in the direction in which you want to rotate the picture.
4) When satisfied, release the mouse button.
To restrict the rotation angles to multiples of 15 degrees, press the
Shift key while rotating the graphic. This is very handy to rotate
pictures of right angles, for example from portrait to landscape or vice
versa.
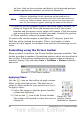
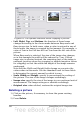
Formatting using the Picture toolbar
When a picture is selected, the Picture toolbar becomes available. This
toolbar provides a number of formatting options which are described in
this section. If the picture toolbar does not appear when an image is
selected, display it by selecting View > Toolbars > Picture from the
menu bar.
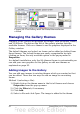
Figure 61: The Picture toolbar
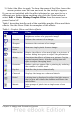
Applying filters
Use the icon on the toolbar to apply various
filters to the selected picture. The best way to
judge if a filter works for your picture is to try it .
To apply a filter:
1) Select the image so that the green handles
around are displayed.
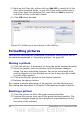
2) Click on the icon in the Picture toolbar.
The toolbar will expand to show the icons in
Figure 62.
96 OpenOffice.org 3.2 Impress Guide
Figure 62: The
graphic filters
available in Impress