
Calc Guide
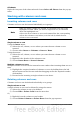
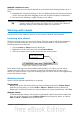
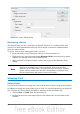

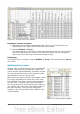
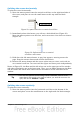


Figure 31: Split bar on horizontal scroll bar
2) Immediately to the right of this button is a thick black line (Figure 31). Move
the mouse pointer over this line and it turns into a line with two arrows.
3) Hold down the left mouse button, and a gray line appears, running up the
page. Drag the mouse to the left and this line follows.
4) Release the mouse button, and the screen is split into two views, each with its
own horizontal scroll bar. You can scroll the left and right parts of the window
independently.
Removing split views
To remove a split view, do any of the following:
• Double-click on each split line.
• Click on and drag the split lines back to their places at the ends of the scroll
bars.
• Choose Window > Split to remove all split lines at the same time.
Using the Navigator
In addition to the cell reference boxes (labeled Column and Row), the Navigator
provides several other ways to move quickly through a spreadsheet and find specific
items.
To open the Navigator, click its icon on the Standard toolbar, or press F5, or
choose View > Navigator on the Menu bar, or double-click on the Sheet Sequence
Number in the Status Bar. You can dock the Navigator to either side of the
main Calc window or leave it floating. (To dock or float the Navigator, hold down the
Control key and double-click in an empty area near the icons at the top.)
The Navigator displays lists of all the objects in a spreadsheet document, grouped
into categories. If an indicator (plus sign or arrow) appears next to a category, at
least one object of this kind exists. To open a category and see the list of items, click
on the indicator.
To hide the list of categories and show only the icons at the top, click the Contents
icon . Click this icon again to show the list.
Table 2 summarizes the functions of the icons at the top of the Navigator.
38 OpenOffice.org 3.3 Calc Guide
Split screen bar