
Getting Started Guide

3) Repeat until you have moved all of the fields you need to where you want
them.
4) Name and save the spreadsheet.
5) Click a row of the table in the Data Source window.
6) Drag the data in the ID field in the selected row onto the ID field in the
spreadsheet. The Save icon should activate.
7) Click the Edit File button to make the spreadsheet read only. Click Save when
asked if you want to save the file.
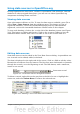
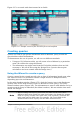
8) The Data Source window goes blank, the fields in the spreadsheet are
populated with data from the row you selected, and the Form Navigation
toolbar appears at the bottom of the spreadsheet.
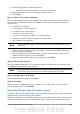
Figure 215: Navigation arrows of a form
9) Click the arrows on the Form Navigation toolbar to view the different records
of the table. (The arrows are circled in red.) The number in the box changes
when you change the record number by clicking an arrow. The data in the
fields changes correspondingly to the data for that particular record number.
Entering data in a form
Records are used to organize the data we enter into a form. They also organize the
data we enter into a subform.
Each type of field allows a different method to enter the data. In many if not all cases,
more than one method can be used.
The first step to entering data in a form is to open it from the main database window
(Figure 175).
1) Click the Forms icon in the Database list.
2) Find the form’s name in the Forms list (Vacations).
3) Double-click the form’s name.
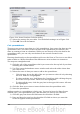
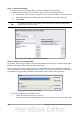
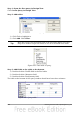
The quickest way to enter a date in the Date field is to click the arrow that opens the
dropdown calendar. Then click the day the you want. Then press the Tab key to go to
the Odometer field.
Figure 216: Calendar dropdown
Chapter 8 Getting Started with Base 235