
Impress Guide

Note
If the image to be copied in the Animator consists of several objects, you
can choose to treat each object as a separate frame. In this case click the
Apply objects individually button . Remember that each object will
be centered in the animation.
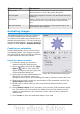
Animated image in one step
For some simple animations it is possible to create all the animation frames in
advance, and place them on the slide. This method works well for a rotating line, a
shape gradually changing color, shapes increasing or decreasing size. In most of
these occasions it is convenient to use the Edit > Duplicate command.
When all the frames are already prepared, use the Apply objects individually
to create one frame for each of the objects.
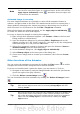
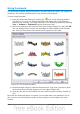
It is easy to obtain for example a rotating line segment:
1) Draw a fairly thick horizontal segment (use Format > Line or the Line and
Filling toolbar to add thickness).
2) Open the Duplicate dialog box by selecting Edit > Duplicate and set the
number of copies to 5, the X and Y axis to 0.1, the angle to 30, the enlargement
width and height to 0, and press the OK button.
3) Select the 6 segments created by Impress and open the Animator (Insert >
Animated image from the main menu bar).
4) On the Animator dialog box, click Apply objects individually.
5) Select Bitmap object in the lower part of the dialog box,
6) Create a new empty slide to contain your animation, then click the Create
button.
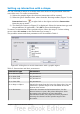
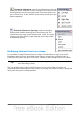
Other functions of the Animator
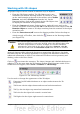
You can review the animation at any time by clicking the Play button as well as
navigate the various frames using the other controls available.
If you are not satisfied with a particular frame, you can remove it. To do so:
1) Navigate to the frame by using the Image Number box with the spin buttons
(just to the right of the play controls).
2) Click the Delete current image button .
You can also delete the whole animation by clicking the Delete all images button
.
Tip
If you want to work on the animation frames a bit more, you can copy
them into the Impress work area by selecting Group object and then
clicking Create.
Tip
Since all the objects are centered in the animation window, to animate an
object off the center of the image, create a blank rectangle of the same
size of the final image and select it along with the object to be animated.
Make sure that Group object is selected before clicking the Apply
object button.
Chapter 5 Managing Graphic Objects 111