
Impress Guide


Formatting shadows
Shadowing can be applied to both lines and areas. To apply a shadow to an area, first
select the object to which shadowing should be applied, then select Format > Area.
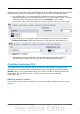
Shadows can also be applied to lines. One way is to click the Shadow icon on the
Line and Filling toolbar (the last tool on the right-hand end). The other way is to
apply a style to the line that uses a shadow (see “Working with graphics styles” on
page 139 for additional information on using styles).
Using the first method, you cannot customize the shadow; it is applied according to
the default settings. The second method offers the opportunity to configure the
shadow properties.
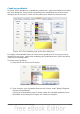
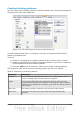
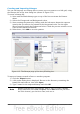
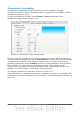
The dialog box to customize a shadow is shown in Figure 114.
Figure 114: Dialog box for customizing the shadowing of graphic objects
When the Use shadow option is selected, the following parameters can be set:
• Position: the selected point in the mini map determines the direction in which
the shadow is cast.
• Distance: determines the distance between the object and the shadow.
• Color: sets the color of the shadow.
• Transparency: determines the amount of transparency for the shadow.
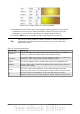
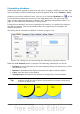
Tip
When the transparency value is set above 0%, the shadow does not
completely hide the objects below. This produces a pleasant visual effect,
as shown in Figure 115.
Figure 115: Shadows with different levels of transparency
Chapter 6 Formatting Graphic Objects 133