
Impress Guide


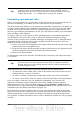


Figure 131: The menu bar and the formatting toolbar in spreadsheet editing mode
If you are familiar with Calc, you will immediately recognize the tools and the menu
items since they are much the same.
Resizing and moving a spreadsheet
When resizing or moving a spreadsheet, ignore the first row and the first column
(easily recognizable by their light gray background) and the horizontal and vertical
scroll bars). They are only used for editing purposes and will not be included in the
visible area of the spreadsheet on the slide.
To resize the area occupied by the spreadsheet:
1) Double-click to enter edit mode, if it is not already active. Notice the black
handles found in the gray border surrounding the spreadsheet (see Figure
130).
2) Move the mouse over one of the handles. The cursor changes shape to give a
visual representation of the effects applied to the area.
3) Click and hold the left mouse button and drag the handle. The corner handles
move the two adjacent sides simultaneously, while the handles at the midpoint
of the sides modify one dimension at a time.
You can move the spreadsheet (change its position within the slide) whether in edit
mode or not. In both cases:
1) Move the mouse over the border until the cursor changes to a four-headed
arrow.
2) Click and hold the left mouse button and drag the spreadsheet to the desired
position.
3) Release the mouse button.
When selected, the spreadsheet object is treated like any other object; therefore
resizing it changes the scale rather than the spreadsheet area. This is not
recommended, because it may distort the fonts and picture shapes.
Navigating the spreadsheet
How a spreadsheet is organized
A spreadsheet consists normally of multiple tables (called sheets) which in turn
contain cells. However, in Impress only one of these tables can be shown at any given
time on a slide.
148 OpenOffice.org 3.3 Impress Guide