
Impress Guide
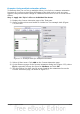
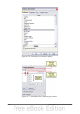
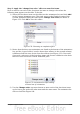
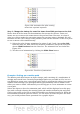
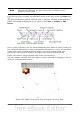
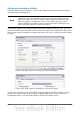
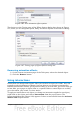
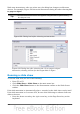

Figure 180: Animation list after moving
items into required sequence
Step 3. Change the timing for some list items from With previous to On click
Notice that all of the items on the animations list (except for the two “Point one”
items) are set to start at the same time as the previous item. However, it is best if
when you click to make the next point appear the previous point is dimmed. We will
therefore set the color change of the previous point and the entrance of the new point
to run on mouse click simultaneously.
1) Select the color change animations for points 2 and 3 and choose On click
from the Start list, then select the entrance animations (except the first) and
choose With Previous from the Start list. The animation list now looks like
Figure 181.
2) Test this set of animations by clicking the Slide Show button.
Figure 181: Final list of animations
Example: Setting up a motion path
The Motion path effect moves an object along a path consisting of a combination of
straight and curved lines. Several pre-packaged paths are provided in OOo, but it is
not difficult to create your own custom path. Start by selecting the object you want to
animate and selecting a pre-packaged motion path animation that is similar to the
effect you want to obtain. Alternatively use the Polygon or Curve animation to create
a new path.
Select the object to show the animation path, which will be displayed as a thin gray
line with a triangle showing the starting point and another indicating the end point.
Click on any point on the line so that blue handles are displayed around it. When the
blue handles around the path are shown, you can move or resize the path the same
way you would perform these operations on a graphic object.
200 OpenOffice.org 3.3 Impress Guide