
Impress Guide
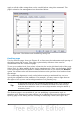
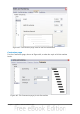
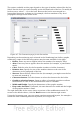
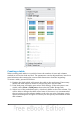
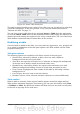

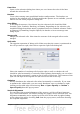

Figure 50: Insert Table dialog box
The table is placed initially at the center of the slide, but you can move it by selecting
it and then dragging it to the new position, or by using the method described in
“Position and size” on page 73.
You can also create a table directly by selecting Insert > Table from the main menu
or with the Insert Table button in the Standard toolbar. When using this method, the
default style and settings are applied to the newly created table. The use of the Insert
Table button is described more in detail later in this section.
Modifying a table
Once the table is added to the slide, you can control its appearance, size, position and
so on using a combination of the task pane options, the Table toolbar and the Table
properties dialog box.
Task pane options
The following options are available in the Show section of the task pane:
• Header Row: selected by default, it adds a first row with a different
background from the rest of the table.
• Total Row: the opposite of Header row; if selected, it changes the background
of the last row to make it stand out from the other rows.
• Banded Rows: selected by default, this option colors alternate rows with
different backgrounds making it easier to ready data presented in rows.
• First Column: highlights the first column of the table by allocating a darker
background to it.
• Last Column: does the same to the last column.
• Banded Columns: when selected, alternate columns are colored differently.
Table toolbar
When a table is selected, 8 blue square handles appear around the edges and the
Table toolbar should be displayed. If necessary, you can open the toolbar using View
> Toolbars > Table. By default the toolbar will float, but you can dock it at any time
to the side or top edge of the work area.
Chapter 3 Adding and Formatting Text 69