
Impress Guide
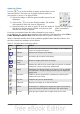


Changing the graphics mode
Use the graphics mode drop-down list in the Picture toolbar to change
the mode of the image. Choose between:
• Default: no changes to the graphic object.
• Grayscale: the image is converted to scales of gray.
• Black/White: each pixel of the image is converted to black or white depending
on the brightness value.
• Watermark: adjusts the brightness of the image making it suitable to be used
as a watermark. For more information on inserting watermarks in the
presentation, refer to Chapter 2 (Slide Masters).
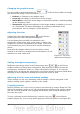
Adjusting the color
Clicking the color adjustment button on the Picture
toolbar opens the color adjustment dialog box.
Use this dialog box to modify the individual color
components of the image (red, green, blue) as well as the
brightness, contrast, and gamma of the image. If the result
is not satisfactory, press Control+Z to restore the default
values.
Increasing the gamma value of a picture makes it more
suitable to be used as a background or watermark as it will
interfere less with a dark text.
Setting the object transparency
Modify the percentage value in the Transparency box on the Picture
toolbar to make the image more transparent. Note that this is different from the
transparency settings for a line or a shape (described in Chapter 5). As with the
gamma value, increasing the transparency of a picture makes the picture blend more
smoothly in the background, making the overlay text easier to read.
Adjusting the line, area and shadow settings
These settings are not very commonly used for images, with the exception of the
shadow setting, which applies a shadow to the image.
Cropping pictures
Impress provides two ways to crop a picture: interactively or using a dialog box. The
interactive method is easier to use, but the dialog box provides more precise control.
You can use both methods: first cropping interactively, then using the dialog box to
fine tune the result.
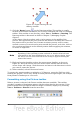
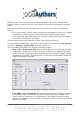
To crop a selected picture interactively, click the Crop icon on the Picture
toolbar (Figure 63). A set of crop marks appears around the picture (see Figure 66).
86 OpenOffice.org 3.3 Impress Guide
Figure 65: The color
adjustment dialog box