subwoofer HCCA 10.2 12.2 15.2 10.4 12.4 15.
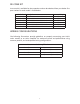
TABLE OF CONTENTS Introduction . . . . . . . . . . . . . . . . . . . . . . . . . . . . . . . . . . . . . . . . . . . . . . . . . . . . . . . . . . . . . . . . . . .3 Practice Safe Sound™ . . . . . . . . . . . . . . . . . . . . . . . . . . . . . . . . . . . . . . . . . . . . . . . . . . . . . . . . . . .3 Installation . . . . . . . . . . . . . . . . . . . . . . . . . . . . . . . . . . . . . . . . . . . . . . . . . . . . . . . . . . . . . . . . . . . .3 Tools of the Trade . . . . . . . . . . . . . . . . . . .
INTRODUCTION Thank you for your purchase of the Orion HCCA SubWoofers. These woofers represent a combination of incredible performance and value. The HCCA series subwoofers feature a massive 4" voice coil and triple stacked magnet assembly to maximize excursion and output. Capable of maintaining their balance at exceptionally high output levels. These high-performance woofers are built with dual 2 or 4 ohm voice coils, to get the most out of your amplifier.
TOOLS OF THE TRADE Listed are the majority of the tools required to perform the installation. Having proper tools will make the installation much easier. It is very difficult when you half way through the installation and discover that you require a specific tool to yourself through a particular part of the installation. Some of these tools necessities. Some make the job much easier.
1. Paper dust cap - moisture and UV 12. Voice coil gap vents. Part of the resistant. enhanced voice coil cooling system (forced convection - aluminum heat sinking -shorting rings to reduce inductive heating). 2. Tall, wide, balanced, NBR Foam (high 13. Cast aluminum rear pole piece heat density expanded polyester foam) sink with fins and vent holes.
RE-CONE KIT A re-cone kit is available for these speakers and can be obtained from your dealer. The part number for each model is listed below. Model HCCA10.2CK HCCA10.4CK HCCA12.2CK HCCA12.4CK HCCA15.2CK HCCA15.
Parallel—One Speaker (dual 2 ohm voice coils) One dual 2 ohm voice coil woofer with voice coils in parallel results in a 1 ohm load to the amplifier. 2 ohm - 2 ohm - + + + - 1. Connect the speaker in parallel by connecting the two positive (+) terminals together and the two negative (-) terminals together. 2. Wire the positive (+) terminals of the woofer to the positive (+) terminal on the amplifier.
Parallel—Two Speakers (dual 4 ohm voice coils) Two dual 4 ohm voice coil woofers with voice coils in parallel and the two woofers in parallel results in a 1 ohm load to the amplifier. + + + 4 ohm - 4 ohm 4 ohm - 4 ohm - + + - 1. Connect the speaker in parallel by connecting the four positive (+) terminals together and the four negative (-) terminals together. 2. Wire the positive (+) terminals of the woofers to the positive (+) terminal on the amplifier.
Parallel—One Speaker (dual 4 ohm voice coils) One dual 4 ohm voice coil woofer with voice coils in parallel results in a 2 ohm load to the amplifier. + + 4 ohm - 4 ohm - + - 1. Connect the speaker in parallel by connecting the two positive (+) terminals together and the two negative (-) terminals together. 2. Wire both positive (+) terminals of the woofer to the positive (+) terminal on the amplifier. Wire both negative (-) terminals of the woofer to the negative (-) terminal on the amplifier.
Series-Parallel—Two Speakers (dual 2 ohm voice coils) Note: Verify and ensure that the woofer wiring is connected as shown with the negative connection from the first woofer coil connected to the positive connection of the second woofer coil. Two dual 2 ohm voice coil woofers with voice coils in series and then parallel the two series woofers results in a 2 ohm load to the amplifier. + + 2 ohm 2 ohm + - 2 ohm - - 2 ohm - + + - 1.
Series-Parallel—Three Speakers (dual 4 ohm voice coils) Note: Verify and ensure that the woofer wiring is connected as shown with the negative connection from the first woofer coil connected to the positive connection of the second woofer coil. Three dual 4 ohm voice coil woofer with voice coils of each woofer wired in series and then parallel the three woofers for a resulting 2.67 ohms.load to the amplifier. + + + 4 ohm 4 ohm - + + 4 ohm - - 4 ohm - 4 ohm - 4 ohm - + + - 1.
Series—One Speaker (dual 2 ohm voice coils) One dual 2 ohm voice coil woofer with voice coils in connected in series results in a 4 ohm load to the amplifier. + 2 ohm - 2 ohm - + + - 1. Connect the woofer in series by connecting the negative (-) of one terminal to the positive (+) terminal of the other coil. 2. Wire the positive (+) terminal of the first coil to the positive (+) terminal on the amplifier.
Series-Parallel—Four Speakers (dual 4 ohm voice coils) Note: Verify and ensure that the woofer wiring is connected as shown with the negative connection from the first woofer coil connected to the positive connection of the second woofer coil. Four dual 4 ohm voice coil woofers should be wired with the voice coils on each woofer in series and then parallel the four woofers for a resulting 2 ohm load to the amplifier.
Series-Parallel—Four Speakers (dual 2 ohm voice coils) Note: Verify and ensure that the woofer wiring is connected as shown with the negative connection from the first woofer coil connected to the positive connection of the second woofer coil. Four dual 2 ohm voice coil woofers should be wired with the voice coils on each woofer in series and then parallel the four woofers for a resulting 1 ohm load to the amplifier.
2 Amplifiers—One Speaker (dual 2 ohm voice coils) One dual 2 ohm voice coil woofer with each voice coil connected to an individual amplifier, resulting in a 2 ohm load to each amplifier. - + + 2 ohm 2 ohm - + + - - 1. Connect one of the speaker’s voice coils to the first amplifier by connecting the positive (+) terminal and the negative (-) terminal from the speaker to the respective positive (+) terminal and the negative (-) terminal from the first amplifier. 2.
2 Amplifiers—One Speaker (dual 4 ohm voice coils) One dual 4 ohm voice coil woofer with each voice coil connected to an individual amplifier, resulting in a 4 ohm load to each amplifier. - + + 4 ohm 4 ohm - + + - - 1. Connect one of the speaker’s voice coils to the first amplifier by connecting the positive (+) terminal and the negative (-) terminal from the speaker to the respective positive (+) terminal and the negative (-) terminal from the first amplifier. 2.
ENCLOSURE DESIGN This section gives the basic description for a sealed enclosure. Orion HCCA woofers are designed for sealed enclosures and vented enclosures. Sealed enclosures are generally considered the most versatile for all music types and are the easiest to build. They will also give high power handling with a wider range of frequencies. The enclosure must be absolutely air tight. Use a high quality wood glue for all seams of the enclosure. The enclosure should also be screwed together.
HCCA 10.2 & 10.4 Sealed Enclosure Recommendations A C —External Dimensions— A = 13 in. B = 13.5 in. C = 14.5 in. —Internal Dimensions— A = 11 in. B = 11.5 in. C = 12.5 in. —Wall Thickness— All Sides = 1.0 in. B c —Box Parts— Box Shape – Square Prism 1 Top, 1 Bottom depth (c) = 14.5 in. width (b) = 13.5 in. thickness = 1.0 in. 1 Front, 1 Back height (a) = 11 in. width (d) = 11.5 in. thickness = 1.0 in. 2 Sides height (a) = 11 in. depth (c) = 14.5 in. thickness = 1.0 in.
HCCA 12.2 & 12.4 Sealed Enclosure Recommendations A C —External Dimensions— A = 16.5 in. B = 16 in. C = 16 in. —Internal Dimensions— A = 14 in. B = 14 in. C = 14 in. —Wall Thickness— All Sides = 1.0 in. B c —Box Parts— Box Shape – Square Prism 1 Top, 1 Bottom depth (c) = 16 in. width (b) = 16 in. thickness = 1.0 in. 1 Front, 1 Back height (a) = 14.5 in. width (d) = 14 in. thickness = 14 in. 2 Sides height (a) = 14.5 in. depth (c) = 16 in. thickness = 1.0 in.
HCCA 15.2 & 15.4 Sealed Enclosure Recommendations A C —External Dimensions— A = 17.5 in. B = 18 in. C = 20 in. —Internal Dimensions— A = 15.5 in. B = 16 in. C = 18 in. —Wall Thickness— All Sides = 1.0 in. B c —Box Parts— Box Shape – Square Prism 1 Top, 1 Bottom depth (c) = 20 in. width (b) = 18 in. thickness = 1.0 in. 1 Front, 1 Back height (a) = 15.5 in width (d) = 19 in. thickness = 1.0 in. 2 Sides height (a) = 15.5 in depth (c) = 20 in. thickness = 1.0 in.
SPECIFICATIONS Directed Part Number 27302 Model Number 10.2 Thiele/Small Parameters Fs (free-air resonance, Hz) 30.78 Vas (equivalent compliance, cu. ft. 0.564 Vas (equivalent compliance, liters) 15.98 Qms (Q, mechanical) 3.63 Qes (Q, electrical) 0.42 Qts (total driver Q) 0.38 Re (DC resistance, ohms) 3.93 Z (nominal impedance, ohms) 2x2 Le (inductance, mh) 1.93 Efficiency (1W @ 1M, dB) 83 Xmax (one way linear excursion, in.) 1.
SPECIFICATIONS (CONT’D) Directed Part Number 27309 Model Number 12.4 Thiele/Small Parameters Fs (free-air resonance, Hz) 23.98 Vas (equivalent compliance, cu. ft. 1.847 Vas (equivalent compliance, liters) 52.33 Qms (Q, mechanical) 2.99 Qes (Q, electrical) 0.42 Qts (total driver Q) 0.37 Re (DC resistance, ohms) 7.76 Z (nominal impedance, ohms) 2x4 Le (inductance, mh) 3.67 Efficiency (1W @ 1M, dB) 85 Xmax (one way linear excursion, in.) 1.
NO WARRANTY THIS PRODUCT IS SOLD "AS-IS" DIRECTED ELECTRONICS (hereinafter "SELLER") MAKES NO WARRANTY of any kind (express, implied or otherwise) in connection with this Product. THIS PRODUCT IS SOLD AS-IS, AND YOU THE PURCHASER ASSUME THE ENTIRE RISK AS TO ITS QUALITY AND PERFORMANCE.